Juicy & Tender Paprika Chicken ~ Gluten-Free

This is one of my all-time favorites for dinner guests, since it’s a tried and true no-fail recipe for Savory Chicken at its BEST! Butter, lemon, cheese and spices combined with a unique way of baking the chicken breasts ensures tender, delicious chicken every time! Your guests will beg for the recipe :).
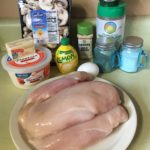
- 4 Boneless, Skinless Chicken Breasts
Marinade
- 1/4 Cup Canola Oil
- 1/4 Cup lemon juice (Fresh or Bottled)
- 1/4 Cup Grated Parmesan Cheese
- 1 teaspoon Salt
- 1 teaspoon Oregano
- 1/2 teaspoon Pepper
Flour Mixture
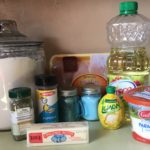
- 1 Cup All-Purpose Gluten-Free Flour (I use Bob’s Red Mill 1-to-1 GF Flour; You can substitute regular Multi-Purpose Flour)
- 4 teaspoons Paprika
- 1/2 teaspoon Salt
- 1/2 teaspoon Pepper
- 2 teaspoons Grated Parmesan Cheese
- 1/2 Cup Butter (For browning the chicken)
- 4-8 Sheets Heavy-Duty Aluminum Foil (If using regular foil, use 2 sheets per breast (insulates and keeps from burning))
- Non-Stick Cooking Spray (I use Pam Coconut Spray)
- Gather the Ingredients
Making the Marinade
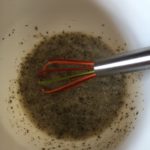
- In a medium-size bowl, combine the oil, lemon juice, the 1/4 cup Grated Parmesan, 1 teaspoon salt, Oregano and 1/2 teaspoon pepper. Mix well.
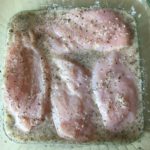
- Pour the marinade over the chicken breasts in a baking dish. Poke the chicken with a fork to allow the marinade to penetrate. Flip the chicken over a couple of times in the marinade to thoroughly coat. Cover and refrigerate for at least 2 hours.
Making the Flour Mixture
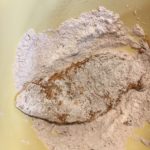
- In a large bowl, combine the flour, paprika, 1 teaspoon salt, 1/2 teaspoon pepper and 2 teaspoons Grated Parmesan Cheese. Mix well.

Browning the Chicken
- When ready to cook, preheat oven to 375 degrees.
- Meanwhile, melt the butter in a large skillet over medium-low heat.
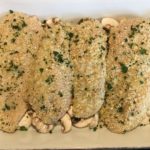
- Roll each chicken breast in the flour mixture, coating well.
- Place each chicken breast in the melted butter and cook over medium-low heat for about 2 1/2-3 minutes per side – enough to lightly brown.

Making the Cooking Packets
- I set up a work station for this step:
a. Tear off 8 sheets of aluminum foil (enough for 2 per breast – double thickness), making them long enough to fold around the chicken breasts (about 18″). Place this stack beside the skillet.
b. Place a baking sheet on the other side of the stack of aluminum foil sheets.
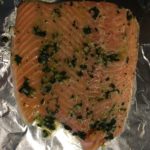
- Spray the foil with non-stick cooking spray, then transfer a chicken breast to the center of the foil. Join the long ends of the foil together and roll down (*but not all the way) to seal. Crimp the short ends up to ensure a tight seal.
*Note: You don’t want to wrap the breasts up really tight, instead you want to leave a little space/pocket above the chicken for steaming

- Repeat with the remaining chicken breasts. Place all four on the baking sheet.

- Bake on the middle rack for 28-35 minutes.

- Scrape any leftovers from the sides of the packets onto the top of each chicken breast…oh so yummy! Enjoy with a nice fresh salad 🙂

Main Dish