Moravian Sugar Cake ~ Gluten Free!!!
Moravian Sugar Cake
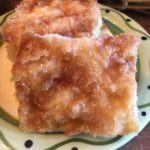
I just updated this recipe and it’s now Gluten-Free 🙂 This is my all-time favorite Christmas treat and I couldn’t go without it just because of my Gluten allergy, so I rolled up my sleeves and headed into my kitchen to come up with a GF version! I hope you all approve 🙂 The crispy Brown Sugar-Cinnamon topping combined with the buttery, tender yeast cake is seriously addictive! Perfect for Christmas morning, New Years Eve, and Holiday Gifts for your special friends and family 🙂
A huge “Thank You” to pastrychefonline.com for sharing the original version of this Wonderful Recipe!!!
For the Dough
- 1/2 Cup Warm Water
- 2 Tablespoons Dried Yeast
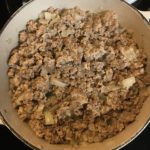
- 1 Cup Mashed Potatoes (Unseasoned – no skin, butter, milk or seasonings)
- 1 1/2 teaspoons Salt
- 1/2 Cup Granulated Sugar
- 11 Tablespoons Salted Butter, Melted ((1 Stick + 3 Tablespoons))
- 1 Cup Whole Milk
- 2 Large Eggs
- 4 Cups All-Purpose Gluten Free Flour (Divided; check to see if your GF flour blend contains Xanthan Gum, if so great, but if not add 2 tsp. Xanthan Gum )
- *2 tsp Xanthan Gum (*Add ONLY if your GF flour blend does NOT contain Xanthan Gum ~ 1/2 tsp xanthan gum per 1 cup GF flour for cakes, muffins, quick breads)
For the Topping
- 8 Tablespoons Salted Butter, Melted
- 1 Cup Granulated Sugar
- 1 Cup Light Brown Sugar (packed)
- 1/2 teaspoon Ground Cinnamon
- 1/4 teaspoon Ground Nutmeg
- 1/8 teaspoon Salt
Making the Dough
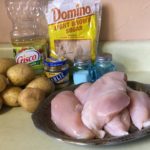
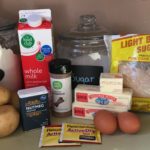
- Gather the ingredients.
- In the bowl of your standing mixer, combine the warm water and yeast. Using the paddle attachment, stir for about 1 minute or until yeast is completely dissolved.
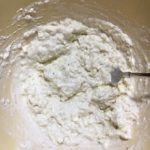
- Next, add the mashed potatoes, salt, sugar, melted butter, milk, eggs and 2 cups of the flour. Mix well on low.
- Change the paddle attachment to the dough hook. Add the remaining 2 cups of flour and mix on medium speed for about 5 minutes, scraping the sides as needed. Dough should be very sticky and stretchy when pulling dough between your fingers. Add a little bit of extra flour if dough doesn’t feel like it has enough body…wetter is better than dry!
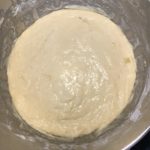
- Smooth the top of the dough with an oiled rubber spatula and cover bowl with a towel. Set in a warm area of your kitchen and let rise for about 1 1/2 – 2 hours. (Dough should double in size).
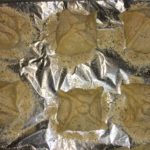
- Spray 2 jelly roll pans with non-stick spray.
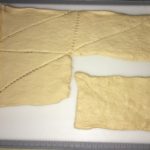
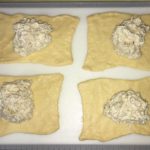
- Divide the dough in half between the 2 jelly roll pans. Spray the dough and your hands with the non-stick spray and begin patting and stretching the dough until it fills each pan – alternate between the pans to allow the dough to relax and stretch on its own.

- Spray the dough with non-stick spray and cover with plastic wrap. Set in a warm area to let rise once again, about 1 hour.

Making the topping
- Place the oven racks in top third and bottom third of your oven. Preheat to 400 degrees.
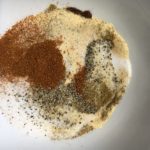
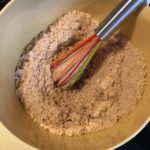
- Meanwhile, in a medium bowl, combine the sugars, cinnamon, nutmeg and salt. Mix very well.
Putting it all Together
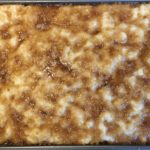
- Once the dough in the pans has risen and become puffy, dimple the dough thoroughly using your greased fingers – do not worry if you puncture all the way through to the pan.
- Next, brush the tops of the dough with 4 Tablespoons of the melted butter per pan. Butter should pool in the dimples that you created.
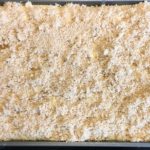
- Sprinkle half of the sugar mixture onto each of the cakes until you can no longer see the dough.
- Place the cakes on the oven racks (one on the top rack and one on the bottom rack). Bake for 7 minutes.
- Switch the cakes on the racks. Bake for another 7 minutes.
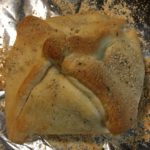
- Let cakes cool in the pans for about 5 minutes.

- Using a large spatula and your hands, transfer to cooling racks – this keeps the bottoms from getting soggy.
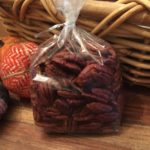
- Serve warm or wrap very well in freeze-proof bags to freeze for up to 2 months.
- Enjoy these yummy cakes throughout the holidays!
- They make the PERFECT Holiday Gifts for friends and family 🙂