Gluten Free Lasagna in Creamy Turkey-Vodka Sauce
Gluten Free Lasagna in Creamy Turkey-Vodka Sauce
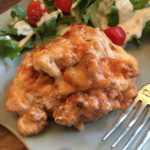
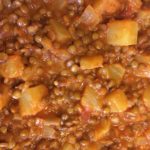
Sweet and Savory is what this Gluten Free Lasagna in Turkey-Vodka Sauce is all about!!! I have been tweaking my Vodka Sauce recipe and I think I finally got it just right 🙂 Adding 93% Lean Ground Turkey makes it thick and hearty! So, I decided to try it in my Gluten Free Lasagna dish and it passed the family’s taste test with flying colors!!! 🙂
The Turkey-Vodka Sauce Ingredients
- 3 lbs Lean Ground Turkey (I used Butterball 93% lean)
- 2 Tbsp olive oil
- 1 Medium Onion, finely chopped (I used a Vidalia)
- 3 tsp minced garlic ((or 2 cloves, minced) I used the already minced Garlic in a jar)
- 1/4 tsp Red Pepper Flakes
- 3 15 oz. Cans Tomato Sauce (45 oz. total)
- 1/3 + 1/4 Cup Vodka (Any unflavored Vodka will do)
- 3 Tbsp Tomato Paste
- 2 Tbsp Balsamic Vinegar
- 2 Tbsp Granulated Sugar
- 1 1/2 tsp Salt
- 1/2 tsp Ground Pepper
- 1/4 Cup Chopped Fresh Basil
- 1 Cup Half & Half
The Lasagna Ingredients
- 8-10 Sheets Gluten Free Oven Ready Lasagna Noodles (I used Barilla brand)
- 30 oz. Ricotta Cheese (I used the Low-Fat version)
- 1 1/2 Cups Shredded Parmesan Cheese
- 2 Cups Shredded Mozzarella Cheese (Or you can use 12 Mozzarella Cheese Slices)
- Salt & Pepper (to taste)
- Non-Stick Cooking Spray
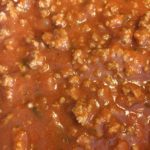
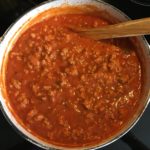
Making the Turkey-Vodka Sauce
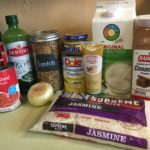
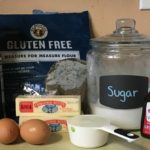
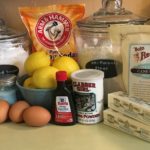
- Gather the ingredients.
- In a Large Lidded Cooking Pot, brown the Ground Turkey until thoroughly cooked. Drain any leftover liquids and set cooked Turkey aside in large bowl.
- In the same large pot, heat the 2T of Olive Oil over medium-low heat. Add the chopped Onion and Garlic. Cook for about 3 minutes, or until onion is translucent.
- Add the Red Pepper Flakes and cook for 1 minute.
- Next, add the Tomato Sauce, Vodka and cooked Turkey. Continue cooking for about 5 minutes.
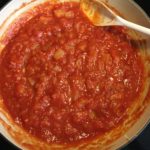
- Throughly mix in the Tomato Paste, Balsamic Vinegar, Sugar, Salt & Pepper. Simmer on Low for 15-20 minutes, partially covered.
- Stir in the Basil and Half & Half and continue cooking for another 5 minutes on low.
Building the Lasagna
- Preheat oven to 425 degrees.
- Spray a 9″ x 13″ or 10″ x 14″ baking dish with non-stick cooking spray. Set aside.
- In a medium or large mixing bowl, stir salt & pepper into the Ricotta Cheese until thoroughly mixed. *I used about 1/2 tsp Salt and 1/8 tsp Pepper.
- To assemble the Lasagna layers, evenly spread a layer of the Turkey-Vodka sauce in the bottom of the prepared baking pan – it takes about 2 cups.

- The next layer is the sheets of Lasagna Noodles – since I used a 10″ x 14″ pan, I used 4 whole sheets placed side-by-side and 1 broken sheet to fill in any large empty gaps/spaces. If you’re using a 9″x13″ pan, 4 sheets should suffice.
- Top the Lasagna Sheets with another layer of Vodka Sauce, making sure that the sheets are completely covered with sauce.
- Sprinkle about 1/3 each of the shredded Mozzarella and Parmesan Cheeses evenly over the sauce layer. *If you’re using Mozzarella slices, sprinkle with Parmesan Cheese first, then place Mozzarella slices on top of the Parmesan.
- Next, add a thick layer of the Ricotta Cheese and spread with a fork. *The Ricotta Cheese is easier to spread on Mozzarella Slices 😉
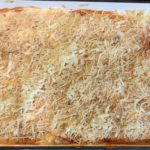
- Repeat steps: Add another layer of Sauce, Lasagna Sheets, Parmesan & Mozzarella, another thick layer of Ricotta Cheese, another layer of Sauce, and sprinkle top with Mozzarella and Parmesan cheeses. *Note: I had a little bit of Ricotta Cheese leftover.
- Spray the underside of a sheet of Aluminum Foil with non-stick cooking spray and cover the Lasagna.
- Bake covered in preheated oven for 40-45 minutes. Uncover and bake for another 15-20 minutes.
- Let rest about 15 minutes before slicing.
- Enjoy!
I used a 10″ x 14″ baking pan and cut the Lasagna into 15 pieces – each serving contains approximately:
388 Calories
17.5 g Total Fat
552 mg Sodium
32.15 g Protein