Spicy Roasted Cauliflower (Gluten Free)

Spicy Roasted Cauliflower (Gluten Free)

I’m not a big fan of cauliflower, not because it tastes bad, but because it really doesn’t have much flavor at all. But, THIS recipe sold me on eating more cauliflower…it’s SO Spicy, Flavorful and Easy to make that I just can’t get enough!!! It’s even great cold the next day! Bon appetit! 🙂

  • 1 Head Cauliflower
  • 3/4 Cup Gluten Free All-Purpose Flour, sifted (I prefer King Arthur brand)
  • 1 tsp Paprika
  • 2 tsp Garlic Powder
  • 1/2 tsp Salt
  • 1/4 tsp Ground Pepper
  • 3/4 Cup Skim Milk (You can substitute with Rice Milk, Oat Milk, Coconut Milk or Soy Milk)

Spicy Sauce:

  • 1/4 Cup Hot Sauce or Buffalo Sauce (For a less-spicy version, use a mild Buffalo Sauce)
  • 2 Tbsps Canola Oil (You can substitute with Olive Oil, Coconut Oil, etc.)
  • 1 Tbsp Honey
  1. Preheat oven to 450 degrees.
  2. Line a baking sheet with parchment paper (or foil sprayed with non-stick cooking spray) and set aside.
  3. Cut up the Cauliflower into bite-size pieces and set aside.
  4. In a large bowl, whisk the GF Flour, Spices and Milk together until thoroughly blended. Add the Cauliflower pieces and stir to completely coat.
  5. Dump the coated Cauliflower pieces onto the prepared baking sheet and spread them out into a single layer.
  6. Bake for 20 minutes, stirring the pieces at the halfway point.
  7. While the Cauliflower is baking, thoroughly combine the Hot Sauce, Oil and Honey.
  8. After the first 20 minutes, brush or spoon the Hot Sauce mixture evenly over the Cauliflower pieces. Continue baking for another 20 minutes.
  9. Serve while hot or warm. The Sauce mixture becomes like a crusty cheese coating…it is SO yummy!

Thank you to Pierce Abernathy @ Tasty for sharing the original recipe…I just made a few minor changes to make it GF, lower in sodium and fat 😉

Appetizers, Dinner, Hors d’Oeuvres, Lunch, Main Dish, Side Dish, Snacks


Lemon Love Notes (Lemon Bars) – Gluten Free

Lemon Love Notes

I have been making these ooey, gooey and crunchy Lemon Bars since I was a child! I have always LOVED Lemon-flavored anything, so this dessert is (and always has been) #1 on my Favorites list!!! These yummy lemon bars are so simple to make and quickly disappear, so you may want to make 2 batches 😉 Enjoy!

Ingredients for the Crust:

  • 16 Tbsp Salted Butter, Softened ((2 sticks))
  • 2 Cup All-Purpose Gluten Free Flour, Sifted (Must be sifted to cut down on graininess (you may substitute regular flour, if you’re not making GF))
  • 1/2 Cup Powdered Sugar

Ingredients for the Lemon Mixture:

  • 4 Large Eggs (slightly beaten)
  • 2 Cup Granulated Sugar
  • 4 Tbsp All-Purpose Gluten Free Flour, Sifted (You may substitute regular flour, if you’re not making GF)
  • 1 tsp Gluten Free Baking Powder
  • 5-6 Tbsp lemon juice (Fresh or bottled)
  • 1 Lemon Zest ((optional))

Topping

  • Powdered Sugar ((optional) as much or as little as desired)

Making the Crust:

  1. Preheat oven to 350 degrees.
  2. Very lightly grease the sides of the 9″ x 13″ baking pan. Set aside.
  3. Using a Stand or Handheld Mixer, fitted with the Paddle attachment, combine the Softened Butter, GF Flour and Powdered Sugar until thoroughly blended.
  4. Press this mixture into the prepared baking pan to evenly cover the bottom.
  5. Bake for 15 minutes or until lightly golden. Remove from oven and let cool a little while you prepare the Lemon topping mixture.

Making the Lemon Topping/Mixture:

  1. Using a Stand or Handheld Mixer, fitted with the Whisk attachment, beat the Eggs until light.
  2. Gradually add the Granulated Sugar to the Eggs and beat until thoroughly blended.
  3. Add the remaining ingredients to the Egg-Sugar mixture and mix thoroughly, until completely smooth.
  4. Pour over the baked Crust.
  5. Bake in the 350 degree oven for 25-30 minutes or until set (no longer jiggling). Note: if the top starts to get too dark, cover pan with foil.
  6. Let cool and then sprinkle with Powdered Sugar. Enjoy!
  7. Enjoy!
Desserts, Snacks
American


Italian Sandwich Bread (Gluten Free)

Italian Sandwich Bread (Gluten Free)

I panicked when I found out that I was allergic to Gluten…that meant NO BREAD!!! 🙁 I tried the frozen GF Breads in the grocery store, but they all tasted wrong! And the texture was well, also wrong!! So, I decided to hit the internet and cookbooks for a good GF Bread Recipe. I had tried SO many different recipes and was just about to give up when I discovered a wonderful GF Bread Flour Blend by Kim (“letthemeatgfcake”). Everyone in my family couldn’t believe that it was Gluten Free…it tasted JUST like “regular” gluten bread 🙂 I bake at least one loaf per day…sometimes 2….yes, it’s THAT great!!! Now, I can have my GF Bread and eat it, too 🙂
A HUGE “Thank You” to Kim @ “letthemeatgfcake.com” for sharing this delicious recipe!

  • 3 Cups + 3 Tbsp (453 g) GF Bread Flour Blend (recipe in the notes*)
  • 2 Tbsp + 1 tsp Granulated Sugar
  • 2 tsp Kosher Salt
  • 2 tsp Quick Rise Yeast (Instant)
  • 2 Cups Milk (You can use Whole, 2%, 1%, Skim, Rice Milk, Cashew Milk, Oat Milk, etc.)
  • 4 Tbsp Unsalted Butter (melted; You can also use a dairy-free butter, such as “Earth Balance”)
  1. Thoroughly coat the bread pan/pans with shortening and then a dusting of GF Flour, being sure to bang the pan to get rid of any extra flour. Set aside.
  2. In a small microwave-proof bowl, melt the butter and set aside.
  3. Using a stand mixer, combine (on Low) the GF Flour Blend, Sugar, Salt and Yeast until completely mixed (about 1 minute).
  4. In another microwave-proof bowl, heat the milk for 45-60 seconds or until just slightly warm.
    Note: I use a 2-Cup Glass measuring cup with a pour spout to make it easier to add to the flour mixture.
  5. Pour the melted butter into the luke-warm milk.
  6. Turn the mixer on to Low and slowly pour the Milk/Butter mixture into the Flour blend until completely combined.
  7. Scrape down the sides of bowl and increase the speed to Medium-High and beat for 5 minutes.
  8. Using a rubber spatula, scrape the bread dough into the prepared bread pan and spread dough out evenly.
  9. Cover the pan with plastic wrap and place in a warm spot to rise for about 1 1/2 – 2 hours or until it has doubled in size.
    Note: I place my breads on top of our cable box since it is nice and warm 🙂
  10. Once the bread dough is ready to bake, place one oven rack in the lowest position and the other rack in the middle position of your oven. Next, place an oven-proof baking pan/dish on the bottom rack (off to one side, so it isn’t directly underneath where the bread will be baking – you don’t want to block heat to the bread above it); add about 1 cup of water to the pan (this is for producing steam for the baking bread).
  11. Preheat oven to 425 degrees.
  12. Remove plastic covering from bread loaf and bake for 35-40 minutes. Bread is done with it starts pulling away from the sides and it makes a hollow thud sound when you thump it lightly.
    Note: if bread starts to get too dark on the top, cover with foil – start checking at about 15 minutes.
  13. Remove from oven and place on a cooling rack while still in the pan for about 10 minutes. Then, remove bread from pan and continue cooling on the wire rack.
  14. Enjoy with butter and honey or fresh strawberry jam or with your favorite sandwich fixings 🙂

Before I start with the recipe for the Gluten Free Bread Flour blend, I need to point out a few things:

1st, kitchen scales would be very helpful since the ingredients in this recipe have to be weighed (in grams).

2nd, weigh each ingredient separately and then add to the storage container or ziploc baggie used to keep the flour fresh.

3rd, I have found that it is much easier to store my flours and flour blends in large plastic containers with tight-fitting tops – easy to scoop from 😉

GF Bread Flour Blend Recipe (makes 5 Cups):

  • Potato Starch – 280 grams
  • Superfine White Rice Flour – 245 grams
  • Tapioca Starch/Flour – 75 grams
  • Whey Protein Isolate (unflavored) – 75 grams
  • Xanthan Gum – 15 grams
Breakfast, Dinner, Lunch, Snacks
American, Italian


Baked Herb-Mayonnaise Chicken

Baked Herb-Mayonnaise Chicken

This recipe is SO quick and easy to make and I bet most of you already have these ingredients in your kitchen! Plus, you can easily swap the herbs with ones that you have on hand, as well as the mayo…you can use regular mayo, lite mayo or substitute sour cream for the mayo (I recently made it with half mayo and half sour cream, because we were running low on mayonnaise, and it was delicious!) The chicken comes out very moist and tender every time 🙂
A BIG “Thank You” to allrecipes for sharing the original recipe for Mayo Chicken…it is divine!!! 🙂

  • 4-6 Boneless, Skinless Chicken Breasts
  • 1 Cup Mayonnaise (I used Hellmann’s Regular Mayonnaise, but you can use Lite or substitute with Sour Cream*)
  • 1 tsp Crushed Garlic
  • 1/2 heaping tsp Dried Basil (or whatever you have on hand)
  • 1/2 heaping tsp Dried Oregano (or whatever you have on hand)
  • 3/4 tsp Salt
  • pinch Pepper
  • 1/2 – 3/4 Cup Parmesan Cheese (grated or shredded)
  1. Preheat oven to 350 degrees.
  2. Spray a 9″ x 13″ baking dish with non-stick cooking spray. Set aside.
  3. In a medium bowl, mix together the Mayonnaise (or Sour Cream), Garlic, Herbs, Salt & Pepper until well-blended.
  4. Place Chicken Breasts in the baking dish, leaving a little space between each breast.
  5. Using a pastry brush or back-side of spoon, spread the Mayonnaise mixture onto both sides of the Chicken Breasts, coating evenly.
  6. Sprinkle desired amount of Parmesan Cheese onto the top of each Chicken Breast.
  7. Bake uncovered for 30-45 minutes, or until inside temperature of chicken registers 160 degrees.
  8. Serve with your favorite side. Enjoy!

*The original recipe called for 1 Cup regular mayonnaise and 1 Tbsp of fresh Rosemary. However, as I noted in the Ingredients section, you can use regular or lite mayonnaise or 1/2 mayo + 1/2 Sour Cream or all sour cream. As far as the herbs are concerned, have fun and try different herbs (dried and/or fresh)…the sky is the limits 😉

Dinner, Main Dish
American


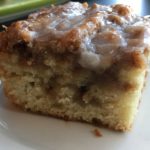
Brown Sugar-Cinnamon Coffee Cake (Gluten Free)

Brown Sugar-Cinnamon Coffee Cake (Gluten Free)

Do you like Coffee Cake? Are you Gluten-intolerant or have Celiac’s and miss eating yummy treats, like Brown Sugar Cinnamon Coffee Cake? Well, now you can have your coffee cake and eat it, too 🙂 This is truly one of the BEST Coffee Cakes I have ever eaten!!! A HUGE “Thank You” to Audrey from “Mama Knows Gluten Free” for sharing this delicious recipe…my entire family thanks you 🙂

The Cake Ingredients:

  • 3 Cups All-Purpose Gluten Free Flour, Sifted (I use King Arthur brand; sifted)
  • 1 1/2 tsp Xanthan Gum (if your GF Flour Blend doesn’t already have it)
  • 1/4 tsp Salt
  • 1 Cup Granulated Sugar
  • 4 tsp Baking Powder (make sure it’s GF)
  • 1 1/2 Cups Whole Milk (you can also use Almond, Rice, Cashew or Coconut Milk for a dairy-free option)
  • 2 Large Eggs
  • 2 tsp Vanilla Extract
  • 1/2 Cup Unsalted Butter, melted (or use Earth Balance brand for a dairy-free version)

The Brown Sugar-Cinnamon Topping

  • 1 Cup Unsalted Butter, softened (or Earth Balance for dairy-free)
  • 1 Cup Light Brown Sugar, packed
  • 2 Tbsp GF All-Purpose Flour
  • 1 Tbsp Ground Cinnamon

The Glaze Ingredients:

  • 2 Cups Powdered Sugar
  • 5 Tbsp Whole Milk (or dairy-free milk of your choice)
  • 1 tsp Vanilla Extract

Making the Cake:

  1. Preheat oven to 350 degrees.
  2. Spray a 9″ x 13″ baking pan (preferably glass) with non-stick cooking spray. Set aside.
  3. Gather the ingredients needed for Cake.
  4. Melt the Butter and set aside.
  5. Using a stand or handheld mixer, fitted with the paddle attachment, mix the GF Flour, Xanthan Gum, Salt, Sugar and Baking Powder on Low until thoroughly blended.
  6. Add the Milk, Eggs and Vanilla to the Flour mixture, blending until thoroughly mixed.
  7. Slowly drizzle the Melted Butter into the Flour-Milk mixture, mixing until fully incorporated.
  8. Pour batter into the prepared baking pan. Set aside while you prepare the Brown Sugar topping.

Making the Brown Sugar-Cinnamon Topping:

  1. Using a Stand or handheld mixer, fitted with the paddle attachment, combine the softened Butter, Brown Sugar, GF Flour and Cinnamon until thoroughly mixed and creamy.
  2. Drop this Brown Sugar mixture by spoonfuls onto the coffee cake batter in the baking pan making sure to cover the surface equally.
  3. Using a sharp knife, thoroughly swirl the Brown Sugar mixture throughout the coffee cake batter.
  4. Bake in preheated oven for about 35-40 minutes, checking after 30 minutes. Cake is done when a toothpick inserted into the middle comes out clean.

Making the Glaze:

  1. In a large bowl, whisk together the Powdered Sugar, Milk and Vanilla until smooth. Drizzle over the warm Coffee Cake and let set for about 10 minutes. Slice into desired-size pieces and Enjoy with a glass of ice-cold milk :)!

Store in an air-tight comtainer. Re-heat slices in microwave for about 10-15 seconds 🙂

Breakfast, Desserts, Snacks, Sweet Breads
American


Gluten Free Chicken Quesadillas

Gluten Free Chicken Quesadillas

I absolutely LOVE these Chicken Quesadillas! The crispy tortilla wraps paired with the spicy chicken, veggies and cheese really give these Quesadillas an authentic Mexican taste! And, they are surprisingly easy to prepare and oh so delicious 🙂

The Quesadilla:

  • 3-4 Large Boneless, Skinless Chicken Breasts (Cut into bite-size pieces)
  • 2-3 Tbsp Olive Oil
  • 2-3 Tbsp Gluten Free Taco Seasoning (I use McCormick Gluten Free Taco Seasoning Mix or make my own)
  • 1 Large Onion, diced
  • 3 Large Bell Peppers, seeded & diced (I use whatever peppers I have on hand)
  • 1-2 Tbsp Fresh Lime Juice (Freshly squeezed over the top of Chicken and Veggies)
  • 1-2 pinches Freshly Ground Pepper
  • 3-4 Cups Shredded Cheese (Monterey Jack & Cheddar combination is wonderful)
  • 12 Gluten Free Tortilla Wraps (I use “Mission” brand)
  • 10-12 Tbsp Salted Butter (I usually use softened butter and spread desired amount on one side of each Tortilla Shell for frying)

Toppings:

  • Sour Cream (I use Lite)
  • Pico de Gallo (This is wonderful either by itself or mixed with Ranch Dressing for dipping)
  • Ranch Dressing (either store-bought or homemade (see recipe below in the Notes)
  • Shredded Cheese (any variety)
  • Fresh Cilantro, chopped (or Parsley)
  1. Gather the ingredients.
  2. In a large skillet, heat about 1-1 1/2 Tbsp Olive Oil over medium heat.
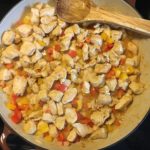
  3. Add the Chicken pieces, Taco Seasoning and Ground Pepper to the skillet, gently stirring/tossing until chicken is well-coated with the seasonings. Cook until chicken is done (about 5-8 minutes). Remove chicken from the skillet with a slotted spoon/spatula, placing it into a bowl to rest. Set aside.
  4. In the same skillet, lower the temperature to medium-low and add another 1 -1 1/2 Tbsp Olive OIl and the diced Onion and Peppers. Cook for about 3 minutes, stirring often.
  5. Once the veggies are done, reduce temperature to low and add the cooked chicken. Stir to mix well. Add the Fresh Lime Juice at this step.
  6. In a separate skillet, melt about 1/2 Tbsp Butter over medium-low heat and place one Tortilla Wrap/Shell in the skillet.
  7. Next, start building the Quesadillas by sprinkling some shredded cheese to cover the shell; then add some of the chicken & veggie mixture; then place more shredded cheese on top of the chicken/veggies; top with a second tortilla shell.
  8. Once the bottom tortilla is starting to get crispy and golden brown, lift the Quesadilla using a large spatula, and drop another 1/2 tbsp of butter into the pan. Now, carefully flip the Quesadilla onto the other side and cook until crispy and golden. Repeat these steps with the remaining tortillas and chicken mixture.
  9. Cut each Quesadilla into quarters and serve with a fresh salad and an assortment of the toppings.
  10. Enjoy!

This recipe can easily be cut in half or doubled, depending on the desired amount.

Fresh Homemade Ranch Recipe: https://smallthymecook.com/recipe/homemade-ranch-dressing-dip/

Dinner, Lunch, Main Dish
Mexican