Stove-Top Paprika Chicken Bites (Gluten Free)

Stove-Top Paprika Chicken Bites (Gluten Free)

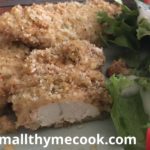
These crispy, yet tender, Paprika Chicken Bites will have your friends and family asking for more! They are delicious served all by themselves or over GF Pasta and my oven roasted veggies! And, the Lemon really comes out when served cold, making this recipe perfect for a picnic lunch. Enjoy 🙂

The Marinade:

  • 1/4 Cup olive oil (or Canola Oil)
  • 1 Large Juice of Lemon (about 1/4 cup)
  • 1/4 Cup Parmesan Cheese, grated or shredded (I use shredded, because that is all we have in our area)
  • 1 tsp Dried Oregano
  • 1 tsp Salt
  • 1 tsp Ground Black Pepper

The Chicken:

  • 3-4 Medium Chicken Breasts (rinsed, patted dry and cut into bite-size pieces)

The Coating:

  • 1 Cup All-Purpose Gluten Free Flour (I use King Arthur brand)
  • 4 tsp Paprika
  • 1/2 tsp Ground Black Pepper
  • 1 Tbsp Parmesan Cheese, grated or shredded
  • 1/2 Cup Salted Butter (I use Land O Lakes)
  1. In a medium bowl, combine all of the Marinade Ingredients until completely blended.
  2. Place the prepared, bite-size pieces of chicken into a large resealable plastic bag.
  3. Pour the Marinade into the bag with the chicken and close bag securely. Smoosh the chicken around in the marinade to evenly coat. Refrigerate for at least 2 hours.
  4. While the chicken is marinating in the refrigerator, combine the GF Flour Blend, Paprika, Pepper and Parmesan Cheese in a Large bowl, mixing well.
  5. Once the chicken has finished marinating, melt the butter in a Large non-stick skillet over medium heat.
  6. Using a slotted spoon, transfer the chicken pieces from the marinade to the GF Flour mixture in the large bowl. Gently toss to evenly coat all of the chicken pieces.
  7. Once the chicken is ready to cook, transfer the pieces to the large skillet containing the melted butter. Do not move the chicken around for 1-2 minutes, allowing the pieces to turn golden and crispy. Gently flip the pieces over to cook all sides…you may have to reduce the temperature once things get going ;). Test a piece after about 5 minutes to see if it’s done (no longer pink inside). I usually cook mine for a total of 8-10 minutes.
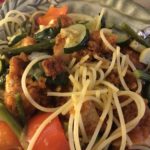
  8. Serve with your favorite sides, over rice or pasta or just by themselves! They are FULL of flavor :). We serve ours over GF Pasta and my oven-roasted veggies…kind of a Chicken Alfredo Bowl!
Dinner, Main Dish


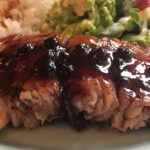
Pan Seared Salmon in a Blueberry-Orange Glaze

Pan Seared Salmon in a Blueberry-Orange Glaze

We received a version of this recipe years ago and I have been trying to replicate it ever since! I think this is as close as I’m going to get 😉 The savory flavor of the Pan-seared Salmon topped with the sweetness of the Blueberry Preserves and Orange juice and just a touch of heat from Cayenne Pepper make this dish unique and very flavorful! A 5-Star winner in our house 🙂

The Salmon:

  • 1 lb Salmon (cut into 4 fillets; skin removed, if desired)
  • 1 Tbsp Olive Oil
  • 1 Tbsp Salted Butter
  • 1-2 pinches Salt
  • 1-2 pinches Ground Black Pepper

The Blueberry-Orange Glaze:

  • 3/4-1 Cup Blueberry Preserves (I use Bonne Maman)
  • 1/4-1/2 Cup Orange Juice (start with 1/4 and add more if needed)
  • 2 tsp Fresh Orange Zest
  • 1-2 pinches Cayenne Pepper (start with 1 and add more, if desired, after the glaze has cooked for a few minutes)

Pan-Searing the Salmon:

  1. Rinse Salmon under cold water and pat dry with paper towels; season with salt and pepper; set aside.
  2. In a large non-stick frying pan, heat the Olive Oil and Butter over Medium heat until there is a sheen on the surface and the butter is completely melted.
  3. Place the Salmon fillets, skin side up, into the frying pan; do not move them around – this allows them to get that nice golden, crispy layer; cook for about 4-5 minutes, depending on the thickness of your fillets.
  4. After the first side is done, carefully flip the fillets over and cook for another 4-5 minutes. Reduce temperature to medium-low/low, if needed.
  5. Once the Salmon is done, carefully transfer the fillets to a warming dish, reserving any oil/butter in the pan; set fillets aside.

Making the Blueberry-Orange Glaze:

  1. Using the same skillet that you used to cook the Salmon, add the Blueberry Preserves, Orange Juice, Orange Zest and Cayenne Pepper, mixing well with a whisk. Cook over medium to medium-high heat until the mixture comes to a low boil. Taste to see of more Cayenne is needed. Reduce temperature and continue cooking for about 3-4 minutes, or until mixture begins to reduce and thicken.
  2. Add the Salmon back into the pan with the blueberry glaze for 1-2 minutes.
  3. Serve the Salmon with the Blueberry Glaze drizzled over the top. Yum!
Dinner, Lunch, Main Dish


Sour Cream Chicken Tenders (Gluten Free)

Sour Cream Chicken Tenders (Gluten Free)

These baked Chicken Tenders turn out tender and juicy inside with a light and crispy outside every time. I bake these quite often for my family and always make a double batch to ensure there are plenty of leftovers for the next day 🙂 This dish is one of our son’s most-requested meals! Enjoy 🙂

The Sour Cream Marinade:

  • 2 Cups Daisy Lite Sour Cream (You may use Regular Sour Cream, if desired)
  • 1/4 Cup Fresh Lemon Juice
  • 4-5 tsp Worcestershire sauce
  • 2 tsp Paprika
  • 1/2 tsp Garlic, minced
  • 1 tsp Salt
  • 2 tsp Ground Black Pepper
  • 2 Packages (9-10 per pack) Chicken Tenders (rinsed and lightly dried with paper towels)

The Crispy Outer Crust:

  • 1 1/2-2 Cups Gluten Free Italian Bread Crumbs
  • 1/2 Cup Salted Butter, melted

Making the Sour Cream Marinade:

  1. In a large bowl, combine the first 7 ingredients and mix well. Set aside.
  2. Place the prepared Chicken Tenders into a large resealable plastic bag.
  3. Pour the Sour Cream marinade into the bag with the Chicken, close the bag securely, and then “smoosh” the chicken around to evenly coat with the marinade. Place flat in the refrigerator overnight (12-24 hours).

Breading the Chicken:

  1. When the chicken is ready to bake, preheat the oven to 350 degrees.
  2. Line a cookie sheet with parchment paper or foil (if using foil, spray with non-stick cooking spray); set aside.
  3. Pour the Bread Crumbs into a shallow bowl or dish and place beside the prepared cookie sheet.
  4. Remove the marinating Chicken from the refrigerator and place next to the dish containing the bread crumbs (I place mine in a large bowl to keep the bag from tipping over).
  5. Once your “station” is set up, remove a few (3-4) Chicken tenders from the bag and dredge them through the bread crumbs to evenly coat them. Then place onto the prepared cookie sheet. Repeat these steps with the remaining chicken.
  6. Once all of the chicken is prepared and lined up on the cookie sheet, drizzle them with the melted butter.
  7. Bake uncovered for approximately 15-18 minutes, depending on your oven, turning them over halfway through.
  8. Serve with your favorite sides and watch them disappear…I serve ours with my Homemade Ranch Dressing/Dip or my Honey Mustard Sauce/Dip 😉
Dinner, Lunch, Main Dish


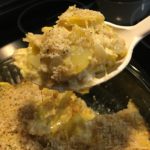
Cheesy Yellow Squash Casserole (Gluten Free)

Cheesy Yellow Squash Casserole (Gluten Free)

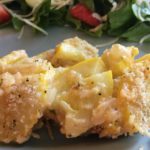
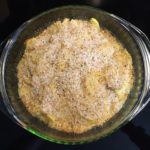
This Yellow Summer Squash Casserole is SO easy and cheesy that it will quickly become one of your family’s favorites! It pairs nicely with a fresh green salad and your favorite protein…a perfect accompaniment for my Maple Glazed Salmon! Enjoy 🙂

  • 2-3 Large Yellow Summer Squash, thinly sliced ((or 5-6 Medium Squash))
  • 1 Tbsp Canola Oil
  • 1 Tbsp Salted Butter (I use Land O Lakes)
  • 1 Large Vidalia Onion, thinly sliced
  • 1/2 Cup Parmesan cheese, shredded
  • 1 Cup Shredded Cheddar Cheese (I used Medium Cheddar, but Mild or Sharp works, too!)
  • 1/2 Cup Lite Sour Cream
  • 1/2 tsp Salt
  • 1/4 tsp Ground Black Pepper
  • 1/2 – 3/4 Cup Gluten Free Italian Bread Crumbs
  1. Preheat oven to 375 degrees.
  2. Grease a 2-quart casserole dish; set aside.
  3. In a large skillet, heat the Oil and Butter over medium heat until the butter is melted.
  4. Saute the thinly sliced Squash and Onion until both are soft. Sprinkle with the Salt and Pepper.
  5. Transfer the Squash and Onion to the prepared casserole dish and add the Parmesan, Cheddar and Sour Cream. Mix gently until well combined.
  6. Sprinkle the Bread Crumbs evenly over the top.
  7. Bake for about 30 minutes or until bubbly and the top is a light golden brown.
  8. Serve with a fresh green salad and your favorite protein….pairs lovely with the Maple Glazed Salmon!
Side Dish


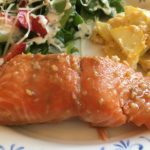
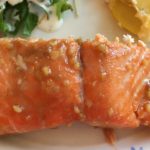
Maple Glazed Salmon (Gluten Free)

Maple Glazed Salmon (Gluten Free)

This recipe is great baked, grilled or pan-seared! The balance of sweetness from the Maple Syrup and the saltiness of the Bragg Liquid Aminos and minced Garlic is perfect! With only 4 ingredients, this recipe is wonderful for those nights when you just don’t feel like cooking a complicated recipe. As I have mentioned before, we eat A LOT of Salmon, so I am always trying new ways to prepare it. I have to admit that I prefer my salmon pan-seared, but usually end up baking it in the oven for ease and less mess 😉 I hope you enjoy this recipe as much as we do!

  • 1 lb. Salmon (Rinsed in cool water & lightly patted dry with paper towels)
  • 1/2 Cup 100% Pure Maple Syrup (not Pancake syrup)
  • 1/4 Cup Bragg Liquid Aminos (You can substitute with Soy Sauce)
  • 1 1/2 tsp Garlic, minced

Instructions for Baking (please see Cook’s Notes for Grilling & Pan-Searing Instructions):

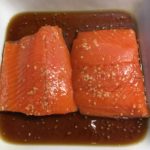
  1. Place the Salmon into a large resealable plastic bag and set aside. *I usually place the plastic bag with the zipper part opened wide in a deep bowl while I rinse the Salmon…then I can plop the Salmon easily into the plastic bag without contaminating the outside of the bag with messy “fish hands” 😉 Set aside.
  2. In a small bowl, combine the Maple Syrup, the Bragg Liquid Aminos (or Soy Sauce) and Garlic. Mix well and pour over the Salmon in the plastic bag.
  3. Make certain that the bag is closed securely, then gently rotate the bag back-and-forth (or flip-flop) to evenly coat the Salmon with the Maple marinade. Place flat into a baking dish and refrigerate for at least 1 hour, flipping over halfway through the marinating time.
  4. Once you are ready to bake the Salmon, preheat the oven to 425 degrees.
  5. Dump the Salmon and the marinade into the baking dish.
  6. Bake for 15-18 minutes or until the Salmon flakes apart easily.
  7. Serve with your favorite sides! Enjoy!!!

Cook’s Notes:

Grilling: If you’re grilling the Salmon, discard the marinade before grilling (I usually make a separate half-batch of the marinade mixture for using as a dip/sauce to serve with the finished Salmon). I cover the grill with heavy-duty foil and spray liberally with non-stick cooking spray before placing the Salmon onto a Medium heated grill. Grill for about 5-7 minutes per side, depending on the thickness of your Salmon. Once the Salmon flakes apart easily, it is done.

Pan-Searing: Over medium to medium-high, heat 1 Tablespoon of Olive Oil and 1 Tablespoon of Salted Butter in a non-stick skillet until the surface shimmers and the butter is sizzling when you “swish” the liquid around in the pan. Place the marinated Salmon (discarding the marinade; Again, I usually make a separate half-batch of the marinade mixture for using as a dip/sauce to serve with the finished Salmon), skin side up, into the heated pan and cook, without moving the fillets, for about 4-5 minutes (you can reduce heat to medium if it’s “spitting”). Gently flip the Salmon fillets over and reduce the heat to medium or medium-low. Continue cooking for another 4-5 minutes. Salmon will still be slightly pink inside, but buttery and crispy outside. Enjoy!

Dinner, Main Dish


Sunshine Lemon Cooler Cookies (Gluten Free)

Sunshine Lemon Cooler Cookies (Gluten Free)

This copycat recipe for Sunshine Lemon Cooler cookies earned 5 Stars with our family! Growing up, these were my favorite cookies!!! I was SO sad when the Sunshine Company stopped making/selling them 🙁 I have tried many copycat recipes over the years, but this one from “Dixie Crystals” is by far the best (a HUGE “Thank You” to dixiecrystals.com). I simply swapped out the regular flour with “Better Batter All Purpose Gluten Free Flour Mix” and voila! the memories came flooding back as these crunchy, lemony morsels of Heaven dissolved in my mouth 🙂 Enjoy!

The Powdered Sugar Coating:

  • 1 Cup Powdered Sugar
  • 1 Envelope Kool-Aid Powdered Lemonade (about 1 1/2 teaspoons)

The Cookie:

  • 2 Cups Better Batter All Purpose Gluten Free Flour Mix (I find that this brand works best)
  • 2 teaspoons Gluten Free Baking Powder
  • 1/4 teaspoon Salt
  • 1/2 Cup Unsalted Butter, Room Temp (I use Land O Lakes)
  • 3/4 Cup Powdered Sugar
  • 1/3 Cup Dixie Crystals Extra Fine Granulated Sugar
  • 1 Large Egg (lightly beaten)
  • 1 teaspoon Vanilla Extract
  • 2 teaspoons Lemon Zest
  • 1 Tablespoon Lemon Juice

Directions for Making the Powdered Sugar Coating:

  1. In a large resealable plastic bag, combine the 1 Cup Powdered Sugar with the Kool-Aid Powdered Lemonade; set aside.

Directions for Making the Cookies:

  1. Preheat oven to 350 degrees.
  2. Line 1-2 cookie sheets with parchment paper; set aside.
  3. In a medium bowl, mix the GF Flour Mix, Baking Powder and Salt; set aside.
  4. Using a Stand Mixer, combine the Butter and Sugars until smooth and creamy.
  5. Next, add the Egg, Vanilla, Lemon Zest and Lemon Juice to the Butter-Sugar mixture, blending well.
  6. Add the Flour Mixture, 1/2 cup at a time, to the dough, mixing on the Low setting until just combined.
  7. Using a small cookie scoop (or spoon and rolling the dough into balls), scoop out the cookie dough onto the prepared cookie sheets, placing them 2″ apart. Using the palm of your hand or the bottom of a glass, slightly flatten each cookie to form disks.
  8. Bake for 12-15 minutes, depending on your oven. I bake mine for 14-15 minutes, because I prefer these cookies to be slightly crunchy, like the original Sunshine recipe.
  9. Let the cookies cool on the sheets for about 5 minutes.
  10. Carefully toss 3-4 cookies at a time in the powdered sugar mixture, coating each cookie well.
  11. Place the powdered cookies on a cooling rack to continue cooling.
  12. Enjoy!
Desserts, Snacks


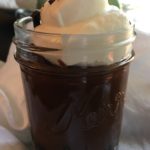
Chocolate Pudding with Cookie Crumbles & Fresh Whipped Cream (Gluten Free)

Chocolate Pudding with Cookie Crumbles & Fresh Whipped Cream (Gluten Free)

Pudding is one of my favorite comfort foods. However, I must confess…I always made it from a box 😉 So, I decided to make it from scratch to see if there was a big difference and YES there is! Homemade chocolate pudding is definitely worth making 🙂 I added the chocolate cookie crumbles in the bottom after finding a wonderful recipe by Ree Drummond (thank you, Ree!) Let me know what you think…box or homemade?

Ingredients for the Cookie Crumble (optional):

  • 22-24 Gluten Free Chocolate Sandwich Cookies (if not GF, use Oreos)
  • 4 Tbsp Salted Butter, Melted (I use Land O Lakes)

Ingredients for the Pudding:

  • 1 1/2 Cups Granulated Sugar
  • 1/4 Cup All-Purpose Gluten Free Corn Starch
  • 1/4 tsp Salt
  • 3 Cups Skim Milk (You can substitute with 1%, 2%, Whole or any non-dairy milk)
  • 4 Large Egg Yolks
  • 6 1/2 ounces Bittersweet Chocolate
  • 2 Tbsp Butter, salted
  • 2 tsp Vanilla Extract

Ingredients for the Whipped Topping:

  • 1 Cup Heavy Whipping Cream (very cold)
  • 2-3 Tbsp Powdered Sugar
  • 1/2 tsp Vanilla Extract

Making the Cookie Crumble:

  1. In a food processor, pulse the melted Butter and Sandwich Cookies until finely crushed. Then spoon desired amount into the bottom of your serving dishes/cups (reserving some for garnish). Note: I spoon about 2 Tbsp into the bottom of each glass.

Making the Pudding:

  1. In a medium saucepan, whisk together the Sugar, Cornstarch and Salt until well-blended.
  2. Add the Milk and Egg Yolks to the Sugar mixture and whisk well.
  3. Heat this mixture over medium heat for about 8-10 minutes, stirring constantly so mixture doesn’t burn or clump. Immediately remove from the heat once it starts to thicken (like pudding ;))
  4. Add the Butter and Vanilla to the pudding mixture, stirring until butter is completely melted and blended.
  5. Pour the mixture into desired serving bowls/cups. Refrigerate for at least 2 hours.

Making the Whipped Cream:

  1. Just before serving the pudding, make the Whipped Cream by combining the Heavy Whipping Cream, Powdered Sugar (1 Tablespoon at a time) and Vanilla Extract using a Stand or Handheld Mixer. Beat on medium-high until stiff peaks form (about 4-5 minutes)
  2. Spoon desired amount on top of each pudding and add a few Cookie Crumbles for garnish. Yum!
Desserts, Snacks
American


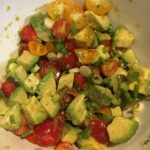
Fresh Avocado Salsa

Fresh Avocado Salsa

This Avocado Salsa is amazing! It’s so fresh, healthy, easy to make and it pairs well with just about any meal…fish, turkey, chicken, pork, beef, potatoes, etc. It is SO yummy on top of Salmon, Turkey Burgers and Baked Potatoes! The possibilities are endless!!! Enjoy 🙂

  • 1 Large Avocado (Peeled, Pitted and cut into bite-size pieces)
  • 1 Green Onion (Chopped; use both green and white parts)
  • 1/2 Cup Tomatoes (Cut into bite-size pieces; I use Red, Orange and Yellow Cherry tomatoes, cut in half or into quarters)
  • 1 Large Lemon (Use Zest and Juice)
  1. In a medium bowl, gently combine all of the ingredients until well mixed. Refrigerate until ready to serve.
  2. Serve on top of your favorite meat or veggie. It is wonderful with Salmon, Turkey Burgers and Baked Potatoes!

Note: This recipe was inspired by a Keto-Friendly recipe that one of my daughters found…Thank you to Amy Ramos for sharing the original recipe for this yummy Salmon and Avocado dish!!! We are forever indebted to you 🙂

Appetizers, Dinner, Hors d’Oeuvres, Lunch, Main Dish, Salads, Side Dish


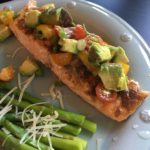
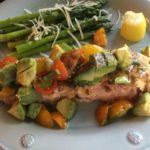
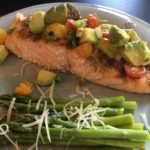
Salmon with Avocado Salsa

Salmon with Avocado Salsa

This Salmon dish is SO fresh and easy to make! Our family eats Salmon 1-2 times per week, so I am always looking for new ways to prepare it…this one is a definite winner! The Avocado Salsa is very versatile and is great paired with fish, chicken, pork, turkey, beef, pasta, baked potatoes, etc. It is wonderful on top of a Turkey Burger! I hope you and your family/friends enjoy it as much as we do 🙂

Avocado Salsa Ingredients:

  • 1 Large Ripe Avocado (Peeled, pitted and cubed)
  • 1 Green Onion (thinly chopped)
  • 1/2 Cup Tomatoes (Diced; I use red, orange and yellow cherry tomatoes)
  • 1 Large Lemon (Zest and Juice)

Salmon Ingredients:

  • 1 Pound Fresh Salmon (Rinsed and patted dry with paper towels)
  • 1 Tbsp Olive Oil
  • 1 tsp Ground Cumin
  • 1/2 tsp Ground Coriander
  • 1/2 tsp Onion Powder
  • 1/4 tsp Sea Salt
  • 1/8 tsp Ground Black Pepper
  • 1/8 tsp Ground Cayenne Pepper

Making the Salsa:

  1. In a small/medium bowl, gently mix the chopped Avocado, Green Onions, Tomatoes, Lemon Zest and Lemon Juice. Refrigerate while preparing the Salmon.

Making the Salmon:

  1. Preheat oven to 425 degrees.
  2. Line a baking sheet with foil, place salmon on the sheet and brush with the Olive Oil, being sure to completely coat the Salmon.
  3. In a small bowl, combine the spices and sprinkle evenly over the Salmon.
  4. Bake for 15-18 minutes.
  5. Serve topped with the fresh Avocado Salsa and your favorite veggies!

Note: This recipe was inspired by a Keto-Friendly recipe that one of my daughters found…Thank you to Amy Ramos for sharing the original recipe for this yummy Salmon and Avocado dish!!! We are forever indebted to you 🙂

Dinner, Lunch, Main Dish


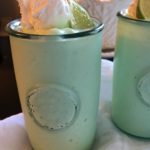
Lime Freeze (Milk Shake)

Lime Freeze (Milk Shake)

One of my fondest memories is of these WONDERFUL frozen treats! I used to walk down to our neighborhood pharmacy, now sadly closed, on hot Summer days and order one of these cool, delicious Lime Freezes 🙂 They are truly one of my all-time favorites and I was bound and determined to reproduce the recipe…I think this is as close as I’m going to get! It’s quick and easy to make and only requires 3 ingredients! Enjoy 🙂

  • 3-4 Large Ice Cream Scoops Lime Sherbet (I think Orange Sherbet would be delicious, too!)
  • 1 Large Ice Cream Scoop Vanilla Ice Cream
  • 3/4 Cup Diet Lemon Lime Soda (Sprite or any other type of Lemon-Lime Soda available; You can also use regular (instead of diet); add a splash at a time if you want a thinner version)
  1. Gather the ingredients.
  2. In a blender or food processor, combine all the ingredients and blend until smooth and creamy.
  3. Serve with a dollop of Cool Whip and a wedge of Lime for garnish 🙂
Desserts, Snacks