Chicken Parmesan ~ Gluten Free

Chicken Parmesan ~ Gluten Free

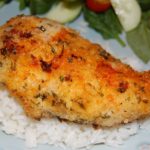
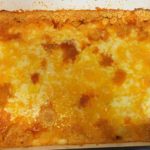
Wow! This is the tastiest and easiest recipe on the planet!!! My husband truly thought I had been in the kitchen for hours, when in fact it only took less than 30 minutes to get this dish ready to pop into the oven! Then, 40-45 minutes baking time for the juiciest, yummiest chicken ever 🙂 I make 5-6 large chicken breasts at a time, so we are certain to have plenty of leftovers…plus, chicken breasts are usually so large these days, that we each eat just half of a chicken breast. This recipe is perfect for a large family 🙂
A definite 5-Stars in our home!!!

  • 6 Medium/Large Boneless, Skinless Chicken Breasts (Rinsed and patted dry with paper towels)
  • 3/4 – 1 Cup Gluten Free Bread Crumbs (I use Plain, so not to interfere with the spices/seasonings)
  • 1/2 – 3/4 Cup Grated Parmesan Cheese
  • 3 Heaping Tbsp Dried Parsley
  • 1/2 tsp Table Salt
  • 1/4 tsp Ground Black Pepper
  • 1/2 tsp Garlic Powder
  • 3/4 Cup Salted Butter, melted
  • 3 Tbsp Lemon Juice (Juice of 2 Lemons)
  • Paprika (for sprinkling on top)
  1. Preheat oven to 350 degrees. Place oven rack in the center position.
  2. In a large bowl, combine the Bread Crumbs, Parmesan Cheese, Parsley, Salt, Pepper and Garlic Powder until well blended. Set aside.
  3. In a microwave-proof bowl, melt the butter.
  4. Next, set up a “work station” with the following in a row or circle:
    1. Chicken Breasts
    2. Melted Butter
    3. Bread Crumb Mixture
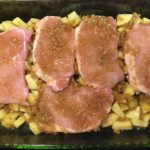
    4. 9″ x 13″ Baking Dish (you may need 2 Baking Dishes, depending on the size of your Chicken Breasts – do NOT crowd your Chicken).
  5. Dip each Chicken Breast into the Melted Butter, coating well. Then, transfer to the Bread Crumb mixture and roll around to coat completely. Place into the Baking Dish and repeat these steps with the remaining Chicken Breasts.
  6. Once all of the Chicken Breasts have been prepared, drizzle any leftover Melted Butter and the Lemon Juice evenly over the tops of the Chicken. Sprinkle with Paprika.
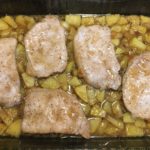
  7. Bake for approximately 40-45 minutes – check the center Chicken Breast by cutting it in half to check for any pinkness.
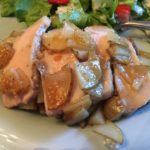
  8. Drizzle juices from pan over the Chicken Breasts before serving. Yum!!!

NOTE: The original recipe for this incredible dish came from a wonderful cookbook that was published by the supporters of the American Cancer Society in 1989, called “VIP Cookbook: A Potpourri of Virginia Cooking.” If you can get your hands on one of these cookbooks, it would be well-worth it!!! 🙂

Dinner, Main Dish


Spaghetti Squash with Tomatoes & Capers

Spaghetti Squash with Tomatoes & Capers

This dish is so Fresh and easy to make with vegetables right out of your garden or kitchen! If I do not have any Spaghetti Squash ready in my garden, I substitute Summer Squash, Zucchini, Acorn Squash, Baking Potato or a mild Fish, such as Flounder. I love this recipe, because it’s so versatile and delicious no matter what you pair with the sauteed Capers and Tomatoes! I hope you enjoy this dish as much as we do 🙂

  • 1 Large Spaghetti Squash
  • 2 tsp Garlic, minced
  • 2 Tbsp olive oil
  • 2 Tbsp Capers
  • 1 1/2 Cups Tomatoes, chopped (with juices)
  • 2 tsp Dried Oregano (or 2 Tbsp Fresh Oregano, chopped)
  • Table Salt (to taste)
  • Ground Black Pepper (to taste)

Baking the Spaghetti Squash:

  1. Preheat Oven to 400 degrees. Place rack in center position.
  2. Cut the Spaghetti Squash in half, lengthwise, scrape out the seeds and loose stringy innards and place facedown in a deep baking dish.
  3. Add enough water to cover the bottom of the dish by about 1/2 inch.
  4. Bake for about 35-40 minutes, or until the squash is soft (depends on the size of the squash).
  5. Remove the squash from the oven and set aside to cool enough to handle.
  6. Reduce oven temperature to 250 degrees.
  7. When the squash is cool enough to handle, hold it over a large, ovenproof bowl/dish and scrape out the flesh from the top to the bottom using the tines of a fork. Cover the dish with foil and place it in the oven to keep hot while you prepare the topping.

Making the Caper & Tomato Topping:

  1. In a large, nonstick skillet, heat the Olive Oil and Garlic over Medium Heat for about 2 minutes.
  2. Next, add the Capers, Tomatoes and Oregano and continue cooking for another 2 minutes.
  3. Remove from heat and add a few pinches of Salt and Pepper to taste.
  4. Spoon desired amount over the prepared Spaghetti Squash and watch it disappear!
Appetizers, Dinner, Hors d’Oeuvres, Main Dish, Salads, Side Dish


Corn & Tomato Salsa

Corn & Tomato Salsa

Are you wondering what to do with the 2,387 tomatoes in your garden?!? 😉 Well, here is a wonderful fresh Salsa that’s quick and easy and oh, so fresh and healthy!!! I serve it over Salmon, Chicken, Baked Potatoes and Fresh Green Leaf Lettuce…the possibilities are endless! Enjoy 🙂

  • 1 – 1 1/2 Cup Fresh Tomatoes (Cut into bite-size pieces; )
  • 1 – 1 1/2 Cup Fresh Corn (Cut off of the cob; can use canned corn, if desired)
  • 1 Large Avocado (Cut into bite-size pieces)
  • 1 Large Lime (Juice and Zest)
  • Table Salt (to taste)
  • Ground Black Pepper (to taste)
  • Chile Powder (to taste)
  • 1 Small Vidalia Onion ((optional) chopped)
  1. Add all of the chopped ingredients to a large mixing bowl and gently toss with the Lime Juice and seasonings to taste. If not serving immediately, wait to cut up the Avocado right before serving so it doesn’t brown. Cover tightly with plastic and refrigerate until ready to serve.
  2. So yummy over Salmon!
Appetizers, Hors d’Oeuvres, Lunch, Salads, Side Dish, Snacks


Buffalo Chicken Dip

Buffalo Chicken Dip

This is our middle daughter’s favorite food…I seriously think she would eat it for Breakfast, Lunch and Dinner EVERY day of her life if others didn’t step in and insist on some variety in her diet 😉
It really IS delicious, though! Our family doesn’t just eat it as an appetizer or hors d’oeuvres, but as a meal with fresh bread/rolls and a big salad 🙂 A definite 5-Stars in this household!

  • 4-6 Large Boneless, Skinless Chicken Breasts (about 3 lbs.; boiled and shredded)
  • 1 1/4 Cup Hot Sauce (I use Sweet Baby Ray’s Buffalo Wing Sauce because it’s Gluten Free and SO yummy!)
  • 2 Cups Ranch Dressing (I make my own using Hidden Valley Ranch Powder, but store-bought in the bottle is just fine ;))
  • 2 Blocks Cream Cheese ((16 oz) I use full fat Philadelphia Cream Cheese)
  • 3 Cups Shredded Cheddar Cheese (You can also use half Cheddar and half Monterey Jack)
  1. Preheat oven to 350 degrees.
  2. In a 9″ x 13″ (or 4 quart) baking dish dish, mix together the Chicken, the Hot Sauce and 1 1/2 Cups Shredded Cheese until thoroughly blended; Spread out evenly in the pan and set aside.
  3. In a medium saucepan, heat the Ranch Dressing and the Cream Cheese over Low heat until the Cream Cheese has completely melted and the mixture is smooth. Pour this mixture evenly over the Chicken mixture in the baking dish.
  4. Top with the remaining Shredded Cheese.
  5. Bake uncovered for approximately 30-35 minutes, or until edges are bubbly and the top is lightly brown.
  6. Serve with your favorite chips, pita chips, bread, etc. Enjoy 🙂
Appetizers, Dinner, Hors d’Oeuvres, Lunch, Main Dish, Side Dish, Snacks
American


Apple Cider Cupcakes with Cream Cheese Frosting ~ Gluten-Free

Apple Cider Cupcakes with Cream Cheese Frosting ~ Gluten-Free

Oh my gosh! These Cupcakes are out of this world!!! I seriously could eat the entire batch 🙂 The Apple Cider adds a wonderful flavor and a bit of caramelized texture – they are delicious even without the frosting! You better double the batch like I did 😉
This recipe earned an instant 5-Star rating in our home!
Note: I adapted this wonderful recipe from forkinthekitchen.com to make it GF – Thank You for sharing!!!

Equipment

  • Muffin Tin
  • Cupcake Liners
  • Stand or handheld Mixer
  • Large Mixing Bowl

The Cupcake Ingredients:

  • 2 1/2 Cups Better Batter All Purpose Gluten Free Flour Mix
  • 1 tsp Baking Soda
  • 1 tsp Baking Powder, GF
  • 1 tsp Table Salt
  • 2 tsp Ground Cinnamon
  • 1 Cup Granulated Sugar (I use Dixie Crystal brand)
  • 1/2 Cup Light Brown Sugar, packed
  • 1 Cup Salted Butter, Softened (I use Land O’ Lakes brand)
  • 2 tsp Vanilla Extract
  • 4 Large Eggs (room temperature)
  • 1 Cup + 4 Tbsp Apple Cider

The Cream Cheese Frosting Ingredients:

  • 8 Oz. Cream Cheese, softened (I used Full Fat Philadelphia brand)
  • 1/4 Cup Salted Butter, Softened
  • 1/2 tsp Vanilla Extract
  • 2 Tbsp Apple Cider
  • 3 1/2 – 4 Cups Powdered Sugar
  • Ground Cinnamon ((optional – to either mix in with the frosting or to sprinkle on the top))

Making the Cupcakes:

  1. Place oven rack in the middle position and preheat oven to 350 degrees.
  2. Line 1-2 muffin tins with cupcake liners; set aside.
  3. In a large mixing bowl, whisk together the GF Flour, Baking Soda, Baking Powder, Salt and Cinnamon until completely blended; Set aside.
  4. Using a Stand or Handheld Mixer, fitted with the paddle attachment, cream the Butter and Sugars until light and fluffy.
  5. Next, with the mixer set on low, add the Vanilla Extract and the Eggs, one at a time; Continue mixing until thoroughly blended.
  6. With the mixer still set on Low, alternate adding the GF Flour mixture (1/2 cup at a time) and the Apple Cider (a couple of Tablespoons at a time) to the Butter-Sugar mixture, blending until just combined after each addition.
  7. Scoop the Cupcake Batter into the lined muffin tin/tins, filling each about 2/3 full.
  8. Bake for approximately 17-20 minutes, or until toothpick inserted into the center comes out clean.
  9. Let cool in the pan for about 5-10 minutes and then transfer to a wire cooling rack to cool completely before frosting.

Making the Frosting:

  1. Using a Stand or Handheld Mixer, fitted with the paddle attachment, cream the softened Cream Cheese and Butter until light and fluffy.
  2. Slowly add the Vanilla Extract and Apple Cider, blending thoroughly.
  3. Next, with the mixer set on low, add the Powdered Sugar, 1/2 cup at a time, beating well between each addition. I usually add between 3 1/2 to 4 cups of Powdered Sugar for the right consistency. Note: If you’re adding Ground Cinnamon into the Frosting, do so now (I usually add several pinches).
  4. Spread or pipe the Frosting onto each cooled cupcake and top with a little Ground Cinnamon, if desired.
  5. Enjoy!
Desserts, Snacks


Oven-Roasted Vegetables

Oven-Roasted Vegetables

This recipe is my Go-To for an easy and healthy dish that my entire family loves! I often serve it over Rice, Quinoa or a Baked Potato (Sweet or White) for a warm and hearty meal. This medley of vegetables is very versatile and pairs well with Seafood, Chicken, Turkey, Pork, Beef…just about anything 😉 I hope you enjoy it as much as we do!
Note: This recipe was adapted from the South Beach Diet and has been thoroughly enjoyed by my family for almost 20 years 🙂

  • 1 Bunch Asparagus (cut into bite-size pieces)
  • 1-2 Medium Yellow Squash (cut into bite-size pieces)
  • 1-2 Medium Zucchini (cut into bite-size pieces)
  • 1-2 Medium Bell Pepper (I usually use a Red and Orange for the milder taste and the beautiful color; cut into bite-size pieces)
  • 1 Large Vidalia Onion (chopped into bite-size pieces)
  • 1-2 tsp Garlic, chopped ((optional))
  • 3-4 Tbsp olive oil
  • Several Pinches Kosher Salt
  • Several Pinches Ground Black Pepper
  1. Preheat oven to 450 degrees.
  2. In a very large bowl, combine all of the cut Vegetables and Olive Oil; Toss until thoroughly mixed and coated with the Oil.
    Note: add the garlic now if adding
  3. Evenly spread the Vegetable mixture onto a large baking sheet and sprinkle with the Kosher Salt and Pepper to taste.
  4. Bake for 30-45 minutes on the center rack until tender, stirring several times during the roasting process to cook evenly.
  5. Serve over Rice, Quinoa, Couscous, Pasta, Baked Potato…or as a Side Dish for your favorite protein. We often pair with Salmon and it’s delicious!!!
Dinner, Lunch, Main Dish, Salads, Side Dish


Brown Sugar & Garlic Pork Chops with Yukon Gold Potatoes

Brown Sugar & Garlic Pork Chops with Yukon Gold Potatoes

Are you looking for a quick & easy dinner recipe? This one-dish sweet and savory Pork recipe is perfect for those nights when you just don’t feel like spending a lot of time in the kitchen 😉 I sometimes use thin Pork Chops, if I’m in a hurry and when I have more time, I use thick Pork Chops and slice them after cooking. I particularly like this recipe, because it only requires 5 ingredients (not including salt & pepper) and it tastes like you’ve been cooking all day 🙂 A 5-Star recipe in our home!
Note: If you do not like Pork, Chicken is a wonderful substitute

Equipment:

  • 9″ x 13″ Baking Dish
  • Large Mixing Bowl

The Ingredients:

  • 3-4 Thin or Thick Pork Chops (Pat dry; Note: see Instructions for comments on thickness of Pork)
  • 1/2 Cup Light Brown Sugar (Increase to 3/4 Cup if you prefer a sweeter taste)
  • 2 Tbsp Minced Garlic (I use the already minced Garlic in a Jar from the produce section)
  • 1/2 + 1/4 tsp Table Salt (1/2 tsp for the Potatoes; 1/4 tsp for the Pork)
  • 1/4 + 1/4 tsp Ground Black Pepper (1/4 tsp for the Potatoes; 1/4 tsp for the Pork)
  • 8-10 small/medium Yukon Gold Potatoes, thinly sliced (I use Yukon Gold for their buttery flavor, but any potatoe will do 😉 Use enough to cover the bottom of your baking dish)
  • 2 + 1 Tbsp Canola Oil (2 Tbsp for the Potatoes; 1 Tbsp for the Pork)
  1. Preheat oven to 375 degrees.
  2. Gather the ingredients.
  3. In a large bowl, combine the thinly sliced Potatoes, 1/2 tsp Salt, 1/4 tsp Pepper and 2 Tablespoons Oil. Toss to coat well and spread into the 9″ x 13″ baking dish.
    Note: If my Pork Chops are on the thinner side, I place the potatoes in the oven while I prepare the Pork Chops, to give the potatoes a little head start 😉
  4. Using the same large bowl that you used for the Potatoes, combine the Brown Sugar, Garlic, 1/4 tsp Salt, 1/4 tsp Pepper and 1 Tbsp Oil. Mix well.
  5. Add the Pork Chops to the Brown Sugar mixture, one at a time, turning them over and kind of “mushing” them around to coat well. Place the Pork Chops on top of the Potatoes in the baking dish. Note: if you have any leftover Brown Sugar mixture drop it amongst the potatoes.
  6. Bake, uncovered, for approximately 30 to 35 minutes, depending on the thickness of your Pork Chops. The Pork is done when the internal temperature measures 145 degrees.
  7. If your Pork Chops are on the thicker side, slice thinly and serve on top of the Potatoes, being certain to drizzle some of the yummy juices over the top before serving.
  8. Serve with your favorite veggie and enjoy 🙂
Dinner, Main Dish


Chocolate Frosted Brownies ~ Gluten Free

Chocolate Frosted Brownies ~ Gluten Free

These GF Chocolate Frosted Brownies are incredibly fudgy, rich and delicious!!! I adapted this recipe from a very popular Brownie recipe from many peoples’ childhoods, called the “Lunch Lady Brownies” – the only changes that I made was to substitute the regular gluten-containing flour with GF All-Purpose Flour and they turned out perfect! My family had NO idea that they were Gluten Free 😉 Yummy!!!
A huge “Thank You” to Holly @ Life In The Lofthouse for sharing the original “Lunch Lady Brownies” recipe 🙂

Equipment:

  • 9″ x 13″ Baking Pan
  • Aluminum Foil
  • Non-Stick Cooking Spray
  • Stand or Handheld Mixer

The Brownie Ingredients:

  • 1 Cup (2 Sticks) Salted Butter (Melted)
  • 1/2 Cup Unsweetened Cocoa Powder
  • 2 Cups All-Purpose Gluten Free Flour (I used Better Batter)
  • 2 Cups Dixie Crystals Extra Fine Granulated Sugar (You may use your desired brand of granulated sugar)
  • 4 Large Eggs (I use Egglands Best, but any brand is fine)
  • 4 teaspoons Vanilla Extract

The Chocolate Frosting Ingredients:

  • 1/4 Cup (1/2 Stick) Salted Butter, softened (I use Land O Lakes brand)
  • 1/4 Cup Milk (I use Whole Milk, but 2% or 1% are fine, too)
  • 1/4 Cup Unsweetened Cocoa Powder
  • 3 Cups Powdered Sugar
  1. Preheat oven to 350 degrees.
  2. Line a 9″ x 13″ baking pan with foil and spray with non-stick cooking spray. Set aside.
  3. Using a Stand Mixer or Handheld mixer, fitted with the Paddle attachment, blend the Melted Butter and Cocoa Powder until smooth.
  4. Next, add the GF Flour and Granulated Sugar, mixing until blended…scraping the sides as needed.
  5. Add the eggs, one at a time, until just blended.
  6. Slowly mix in the Vanilla Extract, blending until just combined. The batter will be thick.
  7. Evenly spread the Brownie batter into the prepared Baking Dish.
  8. Bake for 25 to 30 minutes, or until a toothpick inserted into the center comes out clean.
  9. Remove from oven and allow to cool for 15 minutes while preparing the Chocolate Frosting. Note: You want the Brownies to still be warm when you apply the Frosting.

Making the Chocolate Frosting:

  1. Using a Stand Mixer or Handheld Mixer, fitted with the Paddle attachment, combine the Softened Butter, Milk and Cocoa until smooth and creamy.
  2. Gradually add the Powdered Sugar, 1/2 Cup at a time, starting on Low each time to avoid a HUGE powdery mess 😉
  3. Once all of the Powdered Sugar has been added, beat on Medium to Medium-High speed for about 2 minutes, or until light and creamy.
  4. Spread evenly over the top of the Brownies and let cool completely (I know it’s hard to do!!!) before slicing. Note: I remove the entire Brownie using the foil to lift it…and then I slice them 🙂
  5. Serve by themselves, with a glass of cold milk or your choice of Ice Cream! Enjoy!!!
Desserts, Snacks


Oven Baked Barbecue Spare Ribs

Oven Baked Barbecue Spare Ribs

These Barbecue Ribs are a perfect combination of sweet with a touch of heat and the meat literally falls off the bones! I could eat the entire rack!!! I have always LOVED Barbecue Spare Ribs, but have never attempted to make them myself…until now 😉 This wonderful recipe comes from cafedelites.com ~ Thank You for sharing! Also, a HUGE “Thank You” to “Cooking with Ry” for sharing “How to Easily Remove the Membrane From Your Ribs” on his YouTube Channel 🙂

The Rub:

  • 2 tsp Garlic Powder
  • 2 tsp Paprika
  • 2 tsp Table Salt
  • 1 tsp Onion Powder
  • 1 tsp Ground Black Pepper
  • 1 tsp Cayenne Powder
  • 1/2 tsp Ground Cumin
  • 2 Tbsp olive oil
  • 4 lbs Pork Ribs (Baby Back or St. Louis Cut)

The Barbecue Sauce:

  • 2 Cups Barbecue Sauce (I use Sweet Baby Ray’s Original, but use your favorite)
  • 3 Tbsp minced garlic
  • 2 Tbsp olive oil
  • 1 Tbsp Worcestershire sauce
  • 1 tsp Table Salt
  1. Preheat oven to 350 degrees. Place rack in center position of oven.
  2. Line a baking tray with foil and spray with non-stick cooking spray. Set aside.
  3. Remove the membrane from the underside of the ribs and place on the prepared baking sheet. Note: If you have never done this before, go to “Cooking With Ry” on YouTube and search for “How to Easily Remove The Membrane From Your Ribs” – his instructions are very easy to follow and all you need is a dinner knife and some paper towels 😉

Making the Rub:

  1. In a small jar or bowl, combine all of the seasonings for the rub and mix well.
  2. Sprinkle the Rub over the Ribs; then drizzle with the Olive Oil. Rub the seasonings and Oil thoroughly over both sides of the Ribs.
  3. Cover the entire baking sheet with foil.
  4. Bake for 2 hours.

Making the Barbecue Sauce:

  1. While the Ribs are baking, combine the sauce ingredients in a medium bowl until thoroughly blended. Set aside.

Putting it All Together:

  1. Once the Ribs have finished baking, remove them from the oven and take the foil off of the top.
  2. Increase oven temperature to 460 degrees.
  3. While the oven temperature is rising, thoroughly coat the tops of the Ribs with the Barbecue Sauce, reserving some for serving with the Ribs.
  4. Return the Ribs, uncovered, to the oven and bake for 10 minutes.
  5. To caramelize the edges of the Ribs, change the oven setting to Broil, leaving the rack in the center position, and broil for about 3 minutes.
  6. Remove Ribs from the oven and let rest for 10 minutes before slicing.
  7. I hope you enjoy this as much as we did!
Dinner, Main Dish
American