Moravian Sugar Cake ~ Gluten Free!!!

Moravian Sugar Cake
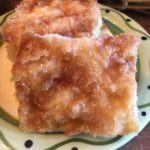
I just updated this recipe and it’s now Gluten-Free 🙂 This is my all-time favorite Christmas treat and I couldn’t go without it just because of my Gluten allergy, so I rolled up my sleeves and headed into my kitchen to come up with a GF version! I hope you all approve 🙂 The crispy Brown Sugar-Cinnamon topping combined with the buttery, tender yeast cake is seriously addictive! Perfect for Christmas morning, New Years Eve, and Holiday Gifts for your special friends and family 🙂
A huge “Thank You” to pastrychefonline.com for sharing the original version of this Wonderful Recipe!!!

For the Dough

  • 1/2 Cup Warm Water
  • 2 Tablespoons Dried Yeast
  • 1 Cup Mashed Potatoes (Unseasoned – no skin, butter, milk or seasonings)
  • 1 1/2 teaspoons Salt
  • 1/2 Cup Granulated Sugar
  • 11 Tablespoons Salted Butter, Melted ((1 Stick + 3 Tablespoons))
  • 1 Cup Whole Milk
  • 2 Large Eggs
  • 4 Cups All-Purpose Gluten Free Flour (Divided; check to see if your GF flour blend contains Xanthan Gum, if so great, but if not add 2 tsp. Xanthan Gum )
  • *2 tsp Xanthan Gum (*Add ONLY if your GF flour blend does NOT contain Xanthan Gum ~ 1/2 tsp xanthan gum per 1 cup GF flour for cakes, muffins, quick breads)

For the Topping

  • 8 Tablespoons Salted Butter, Melted
  • 1 Cup Granulated Sugar
  • 1 Cup Light Brown Sugar (packed)
  • 1/2 teaspoon Ground Cinnamon
  • 1/4 teaspoon Ground Nutmeg
  • 1/8 teaspoon Salt

Making the Dough

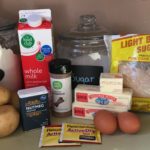
  1. Gather the ingredients.
  2. In the bowl of your standing mixer, combine the warm water and yeast. Using the paddle attachment, stir for about 1 minute or until yeast is completely dissolved.
  3. Next, add the mashed potatoes, salt, sugar, melted butter, milk, eggs and 2 cups of the flour. Mix well on low.
  4. Change the paddle attachment to the dough hook. Add the remaining 2 cups of flour and mix on medium speed for about 5 minutes, scraping the sides as needed. Dough should be very sticky and stretchy when pulling dough between your fingers. Add a little bit of extra flour if dough doesn’t feel like it has enough body…wetter is better than dry!
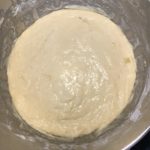
  5. Smooth the top of the dough with an oiled rubber spatula and cover bowl with a towel. Set in a warm area of your kitchen and let rise for about 1 1/2 – 2 hours. (Dough should double in size).
  6. Spray 2 jelly roll pans with non-stick spray.
  7. Divide the dough in half between the 2 jelly roll pans. Spray the dough and your hands with the non-stick spray and begin patting and stretching the dough until it fills each pan – alternate between the pans to allow the dough to relax and stretch on its own.
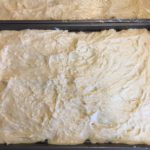
  8. Spray the dough with non-stick spray and cover with plastic wrap. Set in a warm area to let rise once again, about 1 hour.

Making the topping

  1. Place the oven racks in top third and bottom third of your oven. Preheat to 400 degrees.
  2. Meanwhile, in a medium bowl, combine the sugars, cinnamon, nutmeg and salt. Mix very well.
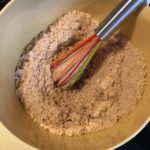
Putting it all Together

  1. Once the dough in the pans has risen and become puffy, dimple the dough thoroughly using your greased fingers – do not worry if you puncture all the way through to the pan.
  2. Next, brush the tops of the dough with 4 Tablespoons of the melted butter per pan. Butter should pool in the dimples that you created.
  3. Sprinkle half of the sugar mixture onto each of the cakes until you can no longer see the dough.
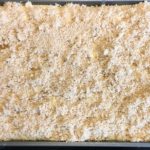
  4. Place the cakes on the oven racks (one on the top rack and one on the bottom rack). Bake for 7 minutes.
  5. Switch the cakes on the racks. Bake for another 7 minutes.
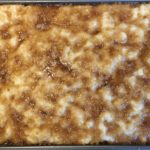
  6. Let cakes cool in the pans for about 5 minutes.
  7. Using a large spatula and your hands, transfer to cooling racks – this keeps the bottoms from getting soggy.
  8. Serve warm or wrap very well in freeze-proof bags to freeze for up to 2 months.
  9. Enjoy these yummy cakes throughout the holidays!
  10. They make the PERFECT Holiday Gifts for friends and family 🙂
Breakfast, Desserts, Snacks, Sweet Breads


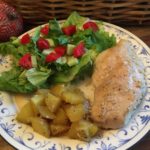
One Dish Brown Sugar Garlic Chicken & Potatoes

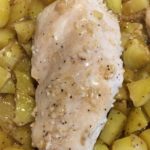
One Dish Brown Sugar Chicken & Potatoes

This sweet and savory recipe is perfect for those nights when you’re in a rush and need a quick and easy-to-prepare dinner with few ingredients! I also use this same recipe for Pork Chops that I found @ dinnerthendessert.com…one of my favorite food websites! 🙂

  • 3-4 Large Boneless, Skinless Chicken Breasts (Rinsed and trimmed)
  • 1/2 Cup Light Brown Sugar (Firmly packed; increase to 3/4 Cup if you prefer sweeter taste)
  • 2 Tablespoons minced garlic (Fresh or in the jar)
  • 1/2 + 1/4 teaspoon Salt (1/2 tsp for the potatoes and 1/4 tsp for the chicken)
  • 1/4 + 1/4 teaspoon Freshly Ground Pepper (1/4 tsp for potatoes & 1/4 tsp for chicken)
  • 8-10 Medium Yukon Potatoes (Cut into bite-size pieces)
  • 2 + 1 Tablespoons Canola Oil (2 T for potatoes & 1 T for chicken)
  1. Preheat oven to 400 degrees.
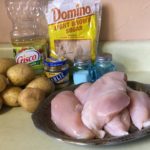
  2. Gather the ingredients.
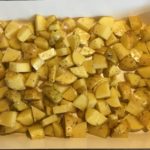
  3. In a large bowl, combine the Potatoes, 1/2 teaspoon Salt, 1/4 teaspoon Pepper and 2 Tablespoons Oil. Toss to coat well. Spread into a 9″ x 13″ deep baking dish.
  4. Using the same large bowl, combine the Brown Sugar, Garlic, 1/4 teaspoon Salt, 1/4 teaspoon Pepper and 1 Tablespoon Oil. Mix well.
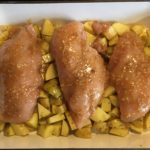
  5. Add the Chicken to the Brown Sugar mix, turning to coat well (I kind of mush the chicken around a little). Place Chicken on top of the potatoes in pan. If you have any leftover Brown Sugar mix, spread it amongst the chicken breasts in the pan.
  6. Bake for 30-35 minutes, turning Chicken over halfway through.
  7. Be sure to drizzle some of the savory juices over the Chicken and Potatoes before serving. Serve with your favorite veggie and enjoy! 🙂
Main Dish, Side Dish
American


Baya’s Spicy Holiday Pecans

Baya’s Spicy Holiday Pecans

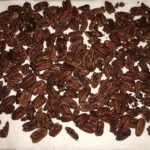
These spicy, crunchy Pecans bring back the fondest memories of the Holidays with my husband’s Grandmother, Baya. She used to make these delicious Pecan treats during Thanksgiving and Christmas for guests to snack on. I make sure to always have a batch or two baking in the oven during the Holidays to fill the house with warm, spicy fragrances. These Pecans also make the perfect Gifts! I hope you, your friends and family enjoy them as much as we do 🙂

  • 4 Cups Pecan Halves
  • 10 Dashes Tabasco/Hot Sauce (Add more if you REALLY like some heat)
  • 1/3 Cup Worcestershire sauce
  • 1 Tablespoon Salted Butter, Melted
  • Salt (Sprinkle as little or as much as you desire)
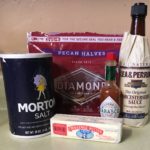
  1. Gather the ingredients.
  2. Preheat oven to 270 degrees.
  3. In a large bowl, combine the Tabasco, Worcestershire Sauce and melted Butter. Mix well.
  4. Next, add the pecans to the Tabasco mix and toss gently with a rubber spatula to thoroughly coat the pecans.
  5. Dump the pecans on a cookie sheet and spread them out evenly. Sprinkle with salt (as much or as little as you desire).
  6. Bake in the center of the oven for 15 minutes.
  7. Remove from oven, stir, salt and return to oven for another 15 minutes or until lightly crispy.
  8. Cool on a paper towel for 10-12 hours (I usually do this in the evening, so I can let them cool/crisp overnight).
  9. If you’re giving these as gifts, pack in a plastic gift bag or tightly sealed container.
  10. Or place them in pretty bowls throughout your house for friends and family to munch 🙂
Snacks


Easy Homemade Beef & Chicken Chili (No Beans; Gluten-Free & Keto Friendly)

Easy Homemade Beef & Chicken Chili (No Beans; Gluten-Free & Keto Friendly)

There is nothing better than a huge pot of Homemade Chili simmering on the stove! I make this Beef & Chicken Chili just about every other weekend throughout the Fall and Winter seasons. It’s so easy to make and the mix of chili spices is delectable! And, it’s Gluten-Free and Keto Friendly! Enjoy 🙂

  • 2 lbs Lean Ground Beef
  • 2 lbs Lean Ground Chicken
  • 1 Large Onion, diced (I use Vidalia)
  • 1 Tablespoon Olive Oil
  • 5 Tablespoons Chili Powder
  • 4 Tablespoons Ground Cumin
  • 2 Tablespoons Garlic Powder
  • 2 teaspoons Salt
  • 1 teaspoon Ground Pepper
  • 1/2 teaspoon Cayenne Pepper (Increase by 1/8 teaspoon at a time of you want a spicier chili)
  • 1 12 oz. Canned Tomato Paste
  • 1 Cup Beef or Chicken Broth (I usually use Beef Broth)
  • 1 Large Fresh Tomato, diced (Or canned (Otional))
  • Shredded Cheddar Cheese (Topping)
  • Sour Cream (Topping)
  • Green Onions (Topping)

The Meats

  1. Gather Ingredients
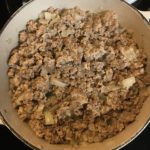
  2. In a large pot, heat the oil over medium to medium-high heat for about 2-3 minutes. Add the chopped onions and cook until translucent, about 5 minutes.
  3. Add the ground meats to the pot and cook until browned (about 8-10 minutes). Lower temperature to medium-low.

The Spices

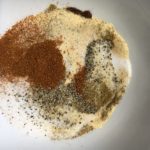
  1. In a medium sized bowl, add all of the spices and blend well.
  2. Next, add the blended spices to the meat mixture. Mix well.

The Broth and Tomato

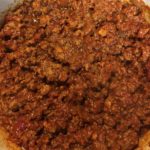
  1. Add the tomato paste, diced tomato and broth to the pot. Mix well.
  2. Cook for 20-30 minutes, stirring occasionally.
  3. Serve with shredded cheddar cheese, sour cream, onions, etc.
Lunch, Main Dish
Mexican


Chicken Pillows

Chicken Pillows

If you like Crescent Rolls, Cream Cheese and Chicken, you will LOVE this recipe! One of our daughters discovered this delicious meal while on a sleepover and it quickly became one of the most requested meals in our household!!! Now, it’s a favorite with our children and their sleepover guests…who needs pizza, when you can have these yummy, easy-to-prepare Chicken Pillows?!? A must-have in every house 🙂 (Thanks for sharing this wonderful recipe, Jennifer!)
  • 4 Cups Chicken (Cooked and cubed or shredded)
  • 8 Oz. Cream Cheese (Softened)
  • 6 Tablespoons Salted Butter (Softened)
  • 2 teaspoons Emeril’s Chicken Rub (Or similar product)
  • 4 Tablespoons Skim Milk
  • 2 teaspoons Minced Dry Onion
  • 2 Packages/Tubes Crescent Rolls
  • 2 Tablespoons Salted Butter (Melted (for the topping))
  • 1/4 Cup Seasoned Bread Crumbs (I use Italian Style (for the topping))
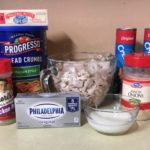
  1. Preheat oven to 350 degrees. Gather the ingredients
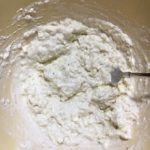
  2. In a large bowl, cream together the softened Cream Cheese and Butter until you reach the consistency of cottage cheese.
  3. Add the cooked and cubed/shredded chicken, Emeril’s Chicken Rub, Milk and Dried Onions to the cream cheese mixture. Mix well and set aside.
  4. Cover a baking sheet with foil that is VERY lightly sprayed with non-stick cooking spray or a Silicone Baking pad. Set aside.
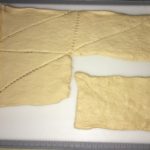
  5. Separate the Crescent Rolls into rectangles and press the diagonal perforations together to seal/close. You should have 8 rectangles (4 per package) when completed.
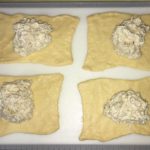
  6. Scoop 1/2 cup of the chicken mixture into the center of each rectangle.
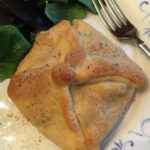
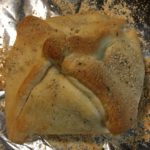
  7. Next, gather up the four corners and twist/press them together lightly at the top of the “pillow” – see photo.
  8. Seal the sides by pressing dough together along the edges.
  9. Repeat with remaining dough and chicken mixture. Place on prepared baking sheet.
  10. Brush each “Pillow” with melted butter and sprinkle with the flavored bread crumbs.
  11. Bake for 20-25 minutes…until golden brown and the bottoms are no longer doughy.
  12. Serve with your favorite veggie and ENJOY!!! 🙂
Sometimes, I prepare this same dish, but in Casserole form by using 2 Crescent Dough Sheets. I simply layer the bottom of a lightly-sprayed deep 9″ x 13″ baking/casserole dish with one Crescent Sheet. Then, spread the chicken/cream cheese mixture evenly over the sheet. Place the 2nd Cresent Dough Sheet on top of this. Brush with the melted butter and sprinkle with the bread crubs. Bake for 20-25 minutes. Yummy 🙂

Main Dish


Gluten Free Chicken in Ginger-Scallion Sauce (Keto Friendly)

Gluten Free Chicken in Ginger-Scallion Sauce (Keto Friendly)

If you’re looking for a tasty, quick and easy-to-make meal, look no further! I use this Ginger-Scallion sauce for Chicken, Fish, Pork, Beef, Rice, Veggies, etc. and it comes out delicious every time. And…it’s Gluten Free and Keto Friendly!!! 🙂

  • 3-4 Breasts Boneless, Skinless Chicken Breasts (Rinsed, trimmed and patted dry with paper towels)
  • 2/3 Cup Apple Cider Vinegar
  • 5 Tablespoons Gluten Free Soy Sauce
  • 4 teaspoons Olive Oil (Or Canola Oil)
  • 4 teaspoons Grated Ginger (I use Ginger Paste)
  • 2 teaspoons Garlic (chopped)
  • 1/2 Cup Green Onions (chopped)
  1. Preheat oven to 400 degrees.
  2. Gather the ingredients.
  3. Place the rinsed, trimmed and dried chicken breasts in a 9″ x 13″ baking dish. Set aside.
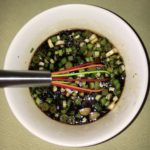
  4. In a small bowl, whisk together all of the ingredients except for the chicken.
  5. Drizzle half of this sauce over the chicken in the baking dish. Reserve the other half for serving with the Chicken.
  6. Bake for approximately 25 minutes, depending on the size of the chicken breasts.
  7. Serve with your favorite side and veggie! Be sure to drizzle the reserved sauce over each Chicken Breast, as well as the side dishes (I usually serve some in a small ramekin with each plate).
    Now, that’s quick and easy 🙂
Main Dish


Salmon with Capers

Salmon with Capers

This is such a healthy and easy dish to make! It’s also Gluten Free and Keto Diet friendly! I especially love this recipe for those busy weeknights, since it’s fast and simple to prepare 🙂

  • 1 lb Salmon
  • 2 teaspoons Olive Oil
  • 2 teaspoons Lemon Juice (Fresh or Bottled)
  • 2 teaspoons Fresh Basil, chopped (Or 1 teaspoon dried Basil)
  • 1 teaspoon Minced Garlic
  • 1/8 teaspoon Salt
  • Freshly Ground Black Pepper (A pinch or Dash)
  • Capers (Top with as many or as few as you desire)
  1. Preheat oven to 425 degrees.
  2. Cover a baking sheet with foil and set aside.
  3. In a small bowl, combine the Olive Oil, Lemon Juice, Basil, Garlic, Salt and Pepper. Whisk until fully blended. Set aside.
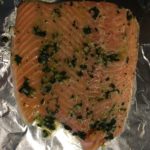
  4. Rinse the salmon in cold water and pat dry with paper towels. Place on the prepared baking sheet.
  5. Brush the Olive Oil mix onto the Salmon to thoroughly coat.
  6. Bake for 15-18 minutes, depending on thickness of the Salmon.
  7. Top with Capers and serve with your choice of side and a freshly steamed veggie for a healthy and quick dinner….pairs well with steamed Asparagus and tiny boiled Red Potatoes 🙂 Enjoy!
Main Dish


Simply Chocolate French Silk Pie

Simply Chocolate French Silk Pie

The cool, creamy (and yes, silky!) chocolate topped with fresh homemade whipped cream definitely takes me back to my childhood! Yes, I was one of THOSE kids who preferred pie over cake for my Birthday…but not just ANY pie! It HAD to be Chocolate French Silk Pie from Miller & Rhoads Tea Room. Even though the Tea Room sadly closed years ago, this wonderful recipe will forever live on in our home and hopefully your home, as well 🙂

Pie Filling

  • 1 1/2 Sticks (or 12 Tablespoons) Salted Butter, Softened
  • 1 Cup + 2 Tablespoons Powdered Sugar
  • 1 1/2 teaspoons Vanilla Extract
  • 4 1/2 Squares Unsweetened Chocolate (Melted)
  • 2 Large Eggs (Keep Cold)
  • 1 9″ Pie Shell (Baked & Cooled)

Whipped Topping

  • 1 Cup Heavy Whipping Cream (Kept Cold)
  • 2 Tablespoons Powdered Sugar (Heaping Tablespoons)
  • 1/2 teaspoon Vanilla Extract
  • 1 Hershey Milk Chocolate Kiss

Making the Chocolate Filling

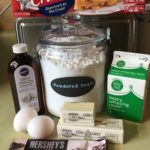
  1. Gather the ingredients
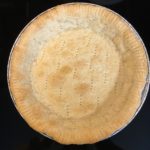
  2. Bake a 9″ pie crust and let cool while preparing the chocolate filling.
  3. Using a Stand or Handheld Mixer, cream the first 3 ingredients together on medium to medium high speed until light and creamy.
  4. Add the melted chocolate and continue beating until well blended.
  5. Add one cold egg and mix for 5 minutes on medium-high. Scrape the sides of the mixing bowl, then add the second cold egg and mix for another 5 minutes. Filling should be light and fluffy.
  6. Pour into the baked and cooled pie shell, spreading evenly. Chill in the refrigerator for at least 2 hours.

Making the Whipped Topping

  1. Using a Stand or Handheld Mixer, whip the cold Heavy Whipping Cream, 2 heaping Tablespoons of Powdered Sugar and 1/2 teaspoon Vanilla Extract on medium-high for about 3-4 minutes (until stiff peaks form).
  2. Spread the whipped cream onto the chocolate filling and add chocolate shavings, if desired (I grated 1 Hershey Kiss for the shavings).
Desserts, Snacks


Lemony-Garlic Chicken Parmesan & Mushrooms (Gluten Free)

Lemony-Garlic Chicken Parmesan & Mushrooms (Gluten Free)

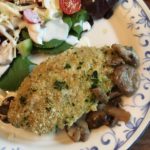
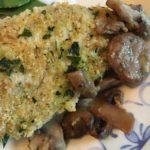
Lemony, Garlic Parmesan Chicken Breasts sit atop buttery and tender Mushrooms in this delicious and easy-to-prepare dish that tastes like you’ve been in the kitchen all day! This makes a perfect meal for those busy weeknights…just serve with a fresh salad or steamed veggie and you’re good-to-go 🙂

  • 4 Boneless, Skinless Chicken Breasts (Rinsed and patted dry)
  • 1 Large Egg
  • 1/2 teaspoon Salt
  • 1/4 teaspoon Pepper
  • 2 teaspoons Garlic Powder (Divided)
  • 1 Cup Gluten Free Bread Crumbs (I use the Italian-flavored kind)
  • 2 teaspoons Parsley, chopped (Divided)
  • 1/2 Cup Parmesan Cheese, Grated
  • 1/2-1 lb. Fresh Mushrooms (I used 1/2 lb. in this recipe, but the more the merrier!)
  • 4 Tablespoons Butter, melted (1/2 stick)
  • 1 Tablespoon Lemon Juice (Fresh or bottled)
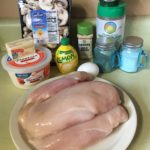
  1. Preheat oven to 375 degrees and gather the ingredients.
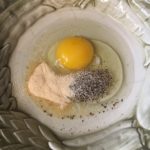
  2. In a wide, shallow bowl whisk the Egg, Salt, Pepper, and 1 teaspoon Garlic Powder. Mix well and set aside.
  3. In another wide, shallow bowl combine the bread crumbs, Parmesan Cheese, 1 teaspoon Garlic Powder and 1 teaspoon Parsley. Mix well and set aside.
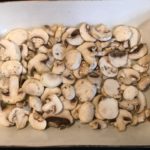
  4. In a small bowl, mix the lemon juice and melted butter. Pour about 2/3 of this into a 9″ x 13″ baking dish and tilt dish to spread the melted butter evenly. Layer enough fresh mushrooms on top of the butter to fill the bottom of the baking dish (you can do a single layer of mushrooms or double layer, if desired).
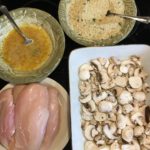
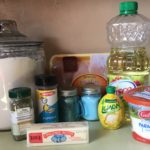
  5. Set up a “work station” that has everything you need close together for breading the chicken (See photo)
  6. First, dip each Chicken Breast into the Egg mixture, turning to coat well.
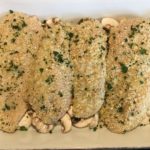
  7. Next, roll each Chicken Breast in the Bread crumb mixture, coating well. Then place on top of the Mushrooms in the baking dish. Drizzle remaining Butter and 1 teaspoon Parsley over the top of each Chicken Breast.
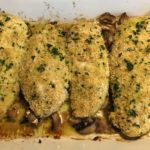
  8. Bake, uncovered for 40-45 minutes.
  9. Enjoy with a fresh salad or favorite steamed veggie!
Main Dish


Paprika Chicken ~ Gluten Free

Juicy & Tender Paprika Chicken ~ Gluten-Free

This is one of my all-time favorites for dinner guests, since it’s a tried and true no-fail recipe for Savory Chicken at its BEST! Butter, lemon, cheese and spices combined with a unique way of baking the chicken breasts ensures tender, delicious chicken every time! Your guests will beg for the recipe :).

  • 4 Boneless, Skinless Chicken Breasts

Marinade

  • 1/4 Cup Canola Oil
  • 1/4 Cup lemon juice (Fresh or Bottled)
  • 1/4 Cup Grated Parmesan Cheese
  • 1 teaspoon Salt
  • 1 teaspoon Oregano
  • 1/2 teaspoon Pepper

Flour Mixture

  • 1 Cup All-Purpose Gluten-Free Flour (I use Bob’s Red Mill 1-to-1 GF Flour; You can substitute regular Multi-Purpose Flour)
  • 4 teaspoons Paprika
  • 1/2 teaspoon Salt
  • 1/2 teaspoon Pepper
  • 2 teaspoons Grated Parmesan Cheese
  • 1/2 Cup Butter (For browning the chicken)
  • 4-8 Sheets Heavy-Duty Aluminum Foil (If using regular foil, use 2 sheets per breast (insulates and keeps from burning))
  • Non-Stick Cooking Spray (I use Pam Coconut Spray)
  1. Gather the Ingredients

Making the Marinade

  1. In a medium-size bowl, combine the oil, lemon juice, the 1/4 cup Grated Parmesan, 1 teaspoon salt, Oregano and 1/2 teaspoon pepper. Mix well.
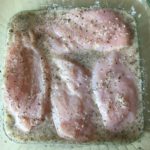
  2. Pour the marinade over the chicken breasts in a baking dish. Poke the chicken with a fork to allow the marinade to penetrate. Flip the chicken over a couple of times in the marinade to thoroughly coat. Cover and refrigerate for at least 2 hours.

Making the Flour Mixture

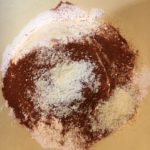
  1. In a large bowl, combine the flour, paprika, 1 teaspoon salt, 1/2 teaspoon pepper and 2 teaspoons Grated Parmesan Cheese. Mix well.

Browning the Chicken

  1. When ready to cook, preheat oven to 375 degrees.
  2. Meanwhile, melt the butter in a large skillet over medium-low heat.
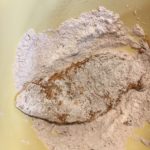
  3. Roll each chicken breast in the flour mixture, coating well.
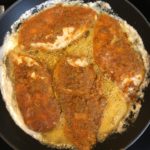
  4. Place each chicken breast in the melted butter and cook over medium-low heat for about 2 1/2-3 minutes per side – enough to lightly brown.

Making the Cooking Packets

  1. I set up a work station for this step:
    a. Tear off 8 sheets of aluminum foil (enough for 2 per breast – double thickness), making them long enough to fold around the chicken breasts (about 18″). Place this stack beside the skillet.
    b. Place a baking sheet on the other side of the stack of aluminum foil sheets.
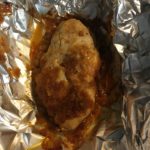
  2. Spray the foil with non-stick cooking spray, then transfer a chicken breast to the center of the foil. Join the long ends of the foil together and roll down (*but not all the way) to seal. Crimp the short ends up to ensure a tight seal.
    *Note: You don’t want to wrap the breasts up really tight, instead you want to leave a little space/pocket above the chicken for steaming
  3. Repeat with the remaining chicken breasts. Place all four on the baking sheet.
  4. Bake on the middle rack for 28-35 minutes.

  5. Scrape any leftovers from the sides of the packets onto the top of each chicken breast…oh so yummy! Enjoy with a nice fresh salad 🙂

Main Dish