Sweet Hickory Smoked Meatballs

Sweet Hickory Smoked Meatballs

These sweet and smoky-flavored meatballs are perfect as an entree or as an appetizer. You can use any ground meat that you desire…However, I usually use Ground Chicken or Turkey for their milder flavors, so not to compete with the sweet and smoky flavors of the sauce. These also freeze well (without the sauce) for a quick and easy meal for those busy nights. Enjoy!

Meatballs

  • 1 lb. Ground Meat (I used Ground Chicken in the photos, but you may use Ground Turkey, Beef or Sausage)
  • 1/2 Cup Gluten Free Bread Crumbs (Plain or Italian-seasoned)
  • 1 Clove Garlic, minced (I use 1/2 teaspoon already minced garlic from a jar)
  • 2 Tablespoons Chopped Fresh Parsley
  • 1/4 Cup Parmesan Cheese, shredded
  • 1 Large Egg
  • 1/2 teaspoon Salt
  • 1/8 teaspoon Pepper

Sauce

  • 2 Cups Catsup
  • 1/2 Cup Brown Sugar
  • 1 Tablespoon Liquid Smoke (I use Natural Hickory-flavored Liquid Smoke)
  • 1/2 teaspoon Garlic Powder
  • 1/2 Cup Chopped Onions

Making the Meatballs

  1. Preheat Oven to 350 degrees. Line a cookie sheet with a baking mat or parchment paper.
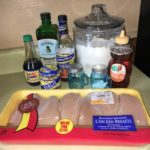
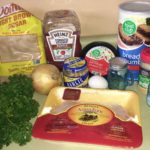
  2. Gather all Ingredients.
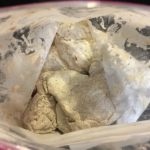
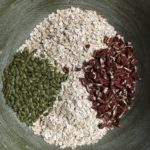
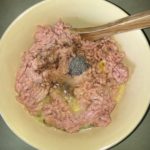
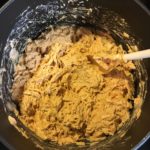
  3. In a large bowl, place the following ingredients: ground meat, bread crumbs, minced garlic, chopped parsley, egg, Parmesan Cheese, salt and pepper.
    {Please Note: I tripled this recipe, thus the reason why the photo shows 3 eggs and larger quantities of ingredients.}
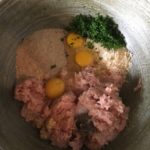
  4. Mix the meat ingredients together.
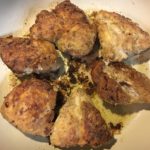
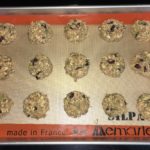
  5. If making these for an entree, use a Medium-sized scoop to form 2″ meatballs (for an appetizer, use a small-sized scoop for 1″ meatballs).
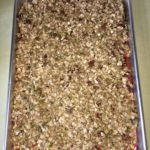
    Place on the prepared cookie sheet, leaving a little room between each meatball to allow for even cooking/crisping.
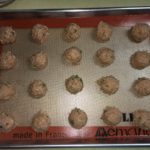
  6. Bake in preheated oven for 20-25 minutes until the meatballs are lightly golden and a little crisp.

Making the Sauce

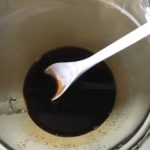
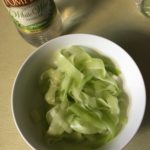
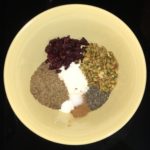
  1. In a medium-sized bowl, combine the Catsup, Brown Sugar, Liquid Smoke (I used Colgin brand, Natural Hickory flavored), Garlic Powder and Chopped Onion.
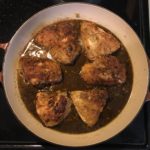
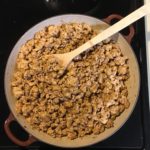
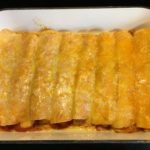
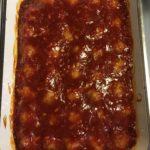
  2. Pour the well-mixed sauce over the lightly-baked, crisp meatballs and spread evenly to coat all of the meatballs.
    {Please Note: I transferred the lightly-baked meatballs to a deep baking dish to allow room for the sauce}
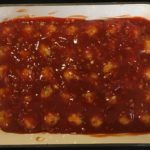
  3. Bake in the 350 degree oven for approximately 45 minutes, or until bubbly.

I triple the recipe to allow enough meatballs for freezing half of the lightly-baked meatballs (without the sauce). Then, when needed I simply whip up a batch of sauce while the meatballs are thawing at room temperature, pour the sauce over the thawed meatballs and finish baking.

Appetizers, Dinner, Hors d’Oeuvres, Lunch
Gluten Free
Dinner, easy, ground beef, ground chicken, ground sausage, ground turkey, hickory smoked, meatballs


Honey Chicken in Wine Sauce

Honey Chicken in Wine Sauce

This wonderful Chicken recipe comes out moist and tender every time! With just a few ingredients, it is easy to prepare and is lightly sweet and salty, making it an instant hit with our entire family! I hope you and yours enjoy it as much as we do.

Marinade

  • 1 Cup Cooking Sherry
  • 4 Tablespoons Reduced Sodium Soy Sauce
  • 1/2 Teaspoon Garlic, minced (I use the already minced garlic in a jar)

Honey Chicken

  • 4 Breasts Chicken (Washed, trimmed and cut into halves)
  • 1/2 Cup Flour (Regular or Gluten-Free)
  • 1/2 Teaspoon Salt
  • 1/2 Teaspoon Pepper
  • 4 Tablespoons Oil (I use Olive Oil)
  • 1/2 Cup Honey

Making the Marinade

  1. Gather ingredients.
  2. Mix the sherry, soy sauce and garlic together and pour into a Large Ziploc baggie.
  3. Add the trimmed and halved chicken breasts to the bag with the marinade, seal and marinate for 1 hour in refrigerator ( you can marinate for longer, if desired/needed).

Flouring the Chicken

  1. In another Large Ziploc baggie, mix the flour, salt and pepper together.
  2. Drain the marinated chicken, reserving the marinade in a medium-sized bowl, and put the chicken into the baggie with the flour mixture. Seal bag and coat the chicken well with the flour.

Cooking the Chicken

  1. In a large skillet, heat the oil over medium to medium-high heat – I usually start with the temperature at medium-high and then lower it a little as the chicken starts browning.
  2. Add the well-floured chicken to the heated oil.
  3. Cook for 10 minutes on one side and then carfully turn over to cook the other side for 10 minutes.
  4. While the chicken is browning, add the honey to the reserved marinade and mix well until honey is dissolved.
  5. Once the chicken is browned on both sides, pour the marinade over the chicken and reduce temperature to low. Cover and simmer for about 15 minutes.

Please Note: This recipe can be started the morning of or the day before it’s needed…just prepare the chicken and the marinade and let it marinate in the refrigerator until ready to cook. I get the flour mixture ready to go, as well.


Homemade Granola

Homemade Granola

This healthy version of Homemade Granola is certain to satisfy that sweet tooth and help curb those cravings for crunchy snacks! I make several batches around the Holidays for special gifts for friends and family…the beautiful colors of the dried fruit and seeds make it a perfect Holiday treat! This recipe is easily adaptable to a Gluten-Free version by simply substituting a few ingredients. Enjoy!

  • 8 Cups Old Fashoined Oats (Use Gluten-Free Oats, if desired)
  • 2 Cups Nuts/Seeds (I usually use chopped Pecans and Pumpkin Seeds (Pepitas))
  • 1 Cup Dried Fruit ((optional) I use Craisins, but any dried fruit will do)
  • 1 Cup Dark Brown Sugar, firmly packed (If you want clumpier Granola increase to 1 1/2 cups )
  • 1/2 Cup Water
  • 1 teaspoon Salt
  • 4 teaspoons Pure Vanilla Extract
  1. Preheat oven to 275 degrees.
  2. Line two cookie sheets with parchment paper or Silpat Baking Mats and set aside.
  3. Gather all of your ingredients.

Make the Brown Sugar Syrup

  1. In a large microwave-safe glass bowl (minimum size of 4 cups, so it does not boil over) mix the Water and Brown Sugar. Microwave for 5 minutes…until sugar is fully dissolved. Remove from microwave, stir and add in the Salt and Vanilla Extract. Stir well to make certain that salt is completely dissolved.

The Dry Ingredients

  1. While the syrup is cooking, combine the oats, nuts and/or seeds in a VERY large bowl.

Combining the Ingredients

  1. Once the syrup is prepared, pour it over the Oat mixture and stir well to evenly coat the dry ingredients.
  2. Spread mixture onto the two prepared cookie sheets and bake for 45-60 minutes…should be lightly golden.
  3. Once out of the oven, add the dried fruit (I do this in the same VERY large mixing bowl that I used before, cleaned and dried first). Let cool completely before putting into storage container/baggies.


Italian Turkey Meatballs

Italian Turkey Meatballs

My teenage son LOVES these tender little Turkey Meatballs so much that I seriously think he would eat them every night of the week! I make these without any tomato sauce due to food allergies…I serve them “naked” with Ranch Dressing or Barbecue sauce on the side and my family gobbles them up! They are so simple to make and freeze really well for those nights when you’re in a rush. Enjoy!

  • 3 lbs Ground Turkey
  • 2 Large Eggs (Whisked well)
  • 2-3 Tablespoons Worcestershire sauce (I usually use 2 Tablespoons, but add more for extra flavor)
  • 1/2 teaspoon Salt
  • 1/4 teaspoon Pepper
  • 1 Cup Bread Crumbs with Italian Spices
  • 1/2 Cup Parmesan cheese, grated ((Optional))
  1. Preheat Oven to 400 degrees.
  2. Cover 2 large baking sheets with foil and lightly spray with non-stick cooking oil.
  3. Gather all of your ingredients.
  4. In a Large Mixing Bowl, place the Ground Turkey, the whisked Eggs, the Worcestershire Sauce and the Salt and Pepper. Blend well.
  5. Add the Italian Bread Crumbs to the Turkey mixture and stir until VERY well blended.
  6. Scoop the mixture onto the prepared baking sheet pans using a Medium-sized scooper – balls should be about 2″ in size. I do not roll them with my hands, but you may do so….I simply scoop and place on the cooking sheets. I leave space between each meatball to ensure even cooking.
  7. Bake at 400 degrees for 18-20 minutes.
  8. Serve with your favorite dip/sauce and a nice fresh salad!


Chicken Bulgogi Bowls

Chicken Bulgogi Bowls

This tasty Korean recipe is easy to make and has quickly become one of my family’s favorites! Even though the classic Bulgogi sauce is meant to be a marinade for beef, I use it with ground chicken or turkey for a lighter fare. The pickled cucumbers and lightly cooked carrots add a wonderful mix of flavors to this already yummy dish. Drizzle a bit of spiciness with a little Sriracha Crema sauce over the top and you’ve satisfied all of your taste buds! Enjoy!

  • 2 cups Rice (I usually use Jasmine Rice)
  • 2.5-3 lbs Ground Chicken
  • 1-2 Cucumbers (I use English Cucumbers )
  • 2 cups Shredded Carrots (I shred my own in a food processor, because we like finer shredded carrots, but store-bought shredded carrots are fine.)
  • 3-4 Scallions (Thinly sliced and separated into white and green parts)
  • 10 teaspoons White Wine Vinegar (Divided in half (I prefer “Pompeian” brand for its light taste))
  • 17.6 oz. Bulgogi Sauce (aka: “Korean BBQ” (I use “Chung Jung One,” since it’s the only brand available in our area))
  • 1 cup Lite Sour Cream (I use “Daisy” brand)
  • 1-3 teaspoons Sriracha (I usually use 2 tsps per cup of sour cream, but if you want it spicier add 1 tsp at a time)
  • 2-3 Tablespoons Butter (Salted or unsalted)
  • 1 teaspoon sugar
  • 1-2 Tablespoon olive oil (or Canola oil)
  • Salt & Freshly Ground Pepper
  1. Cook Rice according to package directions. Add butter, salt and pepper once the rice is finished cooking and stir well.
  2. Heat 1 Tablespoon Olive Oil in a large saute pan or skillet over medium heat. Add the sliced white parts of the scallions and cook for about 1-2 minutes.
  3. Add the ground chicken to the cooked scallions and cook thoroughly. Stir in 5 tsp of the White Wine Vinegar and pour the Bulgogi sauce over the top, mixing well. Reduce heat and simmer, stirring occasionally.
  4. While the chicken is cooking, wash the cucumbers and carrots (if you’re shredding your own carrots) and dry. Remove the ends from both the carrots and the cucumbers. With a vegetable peeler, shave the cucumber lengthwise into thin ribbons (continue peeling until you reach the core where the seeds begin).
  5. In a medium-sized bowl, combine 5 teaspoons of the White Wine Vinegar and 1 teaspoon sugar; mix well. Add the cucumber ribbons to this mixture and place in the refrigerator.
  6. To make the Sriracha Crema, combine the sour cream and 2 teaspoons Sriracha (more if you like it really spicy). Add 1 teaspoon of water at a time until you get the desired consistency for drizzling. Place in refrigerator until ready to eat.
  7. I cook the carrots just before I’m ready to serve, so that they are nice and warm. Drizzle oil in saucepan and heat over medium-high heat. Add the carrots, salt and pepper to taste, and cook for about 2 minutes…you want them still a little crispy and tender.

Assembling the Bowls

  1. Spread about 1/2 cup of rice in the bottom of a bowl. On top of the rice arrange the chicken, carrots and cucumbers (amounts of each topping depend on the person, but I usually serve about 1/4 cup of each topping). Add green scallions and drizzle some of the Sriracha Crema sauce over the top. Enjoy!

You can substitute ground turkey or ground beef for the ground chicken. Also, you can add sesame seeds to the top and to the chicken mixture (I omit due to food allergies).

Main Dish
Korean


Easy Chicken Enchiladas

Easy Chicken Enchiladas

I always thought that making homemade Chicken Enchiladas would be difficult, but it really isn’t if you follow these simple instructions! This Chicken Enchilada recipe is pretty quick and easy and once the chicken is cooked, you can whip together the Enchiladas in a few simple steps and they’re ready to pop into the oven. Enjoy the creamy texture and lightly spicy flavors of this yummy dish!

  • 4 medium-size Chicken Breasts (Baked or Boiled (I boil mine, since they tend to be more tender))
  • 2-3 10 oz. each Enchilada Sauce (cans) (I use Old El Paso, medium (red) and mild (green))
  • 1/2 cup Lite Sour Cream (I use Daisy, but any brand will do)
  • 2 cups Shredded Cheddar Cheese
  • 8 Large Soft Flour Tortilla Shells (You may use smaller sized shells, low-carb or regular)
  • 2 Chopped Green Onions (Optional)
  1. Preheat oven to 350 degrees.
    Shred the cooked chicken and place it in a large sauce pan.
  2. Add 1 of the cans of Enchilada Sauce and mix well over Medium heat.
  3. Add the sour cream and 1 cup of the shredded cheddar and stir until completely melted. Remove from heat.
  4. Set up a “Work Station” like the one in the photo to make life easier. Pour the 2nd can of Enchilada sauce into a deep dish pan (I use a square baking dish). Place a large plate out to serve as a “working surface.” Spray a 9″x13″ baking dish with non-stick cooking spray.
  5. First step, using either your fingers or tongs, dip a tortilla shell into the Enchilada sauce and turn over to coat both sides. Place onto the “working surface” plate.
  6. Next, plop a large spoonful of the chicken mixture towards one end of the tortilla shell and gently spread the mixture out a little with the backside of the spoon.
  7. Roll up and place seam side down in the 9″x13″ baking dish. Repeat until all tortilla shells are gone. Sprinkle the remaining Shredded Cheddar Cheese over the top.
  8. Bake for 18-20 minutes or until nice and bubbly.
  9. Serve with sour cream and chopped green onions.


Oatmeal Power Cookies

Oatmeal Power Cookies

These little cookies are packed with lots of nutrition and are guaranteed to fill your tank. I make a double batch, so I can have plenty available for my family of five who are constantly on-the-go. I pack 2 to a bag and freeze them, so my husband and children can each grab a bag when they’re heading out the door for a healthy snack later in the morning. Perfect with a nice cup of hot tea or coffee…and a great finish after that workout!

Dry Ingredients

  • 1 cup Old Fashioned Oats
  • 1/2 cup Rice Flour (you may use other flours, such as white, wheat, oat, etc.)
  • 1/2 cup Pepitas (pumpkin seeds) (I usually use raw, unsalted* (sunflower seeds or any type nuts are good, too))
  • 1/2 cup Craisins (any dried fruit will do)
  • 1/4 cup Flaxseed, ground
  • 1 Tbsp Chia seeds
  • 1 tsp Cinnamon
  • 1/4 tsp Salt
  • 1/2 tsp Baking Powder

Wet Ingredients

  • 1/2 cup Unsweetened Applesauce
  • 3 Tbsp Honey
  • 3 Tbsp Butter, melted (Or coconut oil)
  • 2-3 Tbsp Oat Milk (Or any milk…Rice, Cow’s Grass, Soy, etc.)
  1. Preheat Oven to 325 degrees. Line a cookie sheet with parchment paper or if a Silpat Mat (I highly recommend these wonderful mats…they REALLY do prevent sticking and you don’t have to keep messing with parchment paper and clean up is a breeze! And, no, I am not getting paid to say this ;))
  2. Gather all of your ingredients.
  3. Combine all of the dry ingredients in a large mixing bowl: Oats, flour, Pepitas (seeds/nuts), Craisins (dried fruit), Chia Seeds, Flaxseed, Cinnamon, Salt and Baking Powder.
  4. Mix well.
  5. Add the wet ingredients one at a time to the dry ingredients, mixing well after adding each one. I usually start with the applesauce, then the honey, butter and lastly the milk. The consistency will be somewhat sticky.
  6. Next, using a medium-sized cookie scoop (holds 1.5 Tbsp), scoop out the dough onto the lined cookie sheet. Gently press the cookies down with the palm of your hand to help flatten them out a little bit – these cookies do not spread out like normal cookies.
  7. Bake for 15-18 minutes. You want these cookies to be somewhat soft.


Caesar Salad with Chicken & Pasta

Caesar Salad with Chicken & Pasta

I whip up a large batch of this yummy Caesar Salad quite often during the Summer months, so my family can graze on it at will. I sometimes make it without the chicken for a lighter version and sometimes I substitute shrimp for a little bit of a change. My family loves the dressing so much that I make an extra jar of it for our regular salads and for dips. Enjoy!

For the Dressing:

  • 3/4 Cup Mayonnaise (I prefer Hellmann’s)
  • 2 teaspoons Dijon mustard
  • 2 teaspoons Worcestershire sauce
  • 2 teaspoons minced garlic
  • 2 Tablespoons lemon juice (fresh or bottled)
  • 1/3 Cup Parmesan cheese, shredded
  • 1/2 teaspoon pepper, freshly ground

Remaining Ingredients:

  • 8 oz. uncooked pasta (I usually use Fusilli or Rotini)
  • 2 bunches Romaine Lettuce (I also use Green or Red Leaf Lettuce when Romaine is not available)
  • 2-4 Cups Chicken Breasts (Or precooked Rotisserie chicken when in a rush)
  • 1 Bag Croutons
  • Parmesan cheese, shredded

Making the Caesar Dressing

  1. In a medium-size bowl, whisk together the first five ingredients until well blended. Then add in the Parmesan cheese and pepper, mix and place in the refrigerator while preparing the rest of the salad.

Making the Pasta, Chicken & Greens

  1. Cook pasta according to the directions on the box for al dente (usually about 7-10 minutes boiling time. Rinse in cold water, drain well and dump in a very large serving bowl (see photo).
  2. While the pasta is cooking, boil the chicken breasts in water (usually takes about 15-20 minutes). Once cooked, remove and shred with two forks into bite-size pieces. This may be done ahead of time, so the chicken can be cooled in the refrigerator. Add to the pasta in the large serving bowl.
  3. Wash, dry and chop lettuce into bite-size pieces and add to the pasta and chicken in the large serving bowl.
  4. Lastly, add the Caesar dressing over the pasta, chicken and lettuce. Toss well to coat evenly.
  5. Sprinkle some shredded Parmesan Cheese and croutons over the top before serving.
    Bon appetit!


Hello world!

Welcome to WordPress. This is your first post. Edit or delete it, then start writing!