White Chicken Enchiladas ~ Gluten Free

White Chicken Enchiladas ~ Gluten Free

Wow! This yummy Chicken Enchiladas dish instantly moved to the top of our “Family Favorites!” It’s a great recipe for making ahead and re-heating for those busy nights and/or last minute plans for dinner guests 🙂 Friends and family will LOVE receiving this as a house-warming gift or for any occasion!
As usual, a HUGE “Thank You” goes to “The Pioneer Woman” for sharing this wonderful recipe. I made some changes to the original recipe to make it allergy-friendly and Gluten Free for my family 😉

The Chicken:

  • 4-5 Boneless, Skinless Chicken Breasts (You could also use a cooked Rotisserie Chicken from your local Grocer to save time)
  • Kosher Salt
  • Ground Black Pepper
  • 2-3 Tbsp Olive Oil

Roasted Bell Peppers:

  • *2 *Red Bell Peppers (or 1-16 oz. already-roasted red Bell Peppers in a jar)
  • *2 *Bell Peppers (any color) (or 1-16 oz. jar of store-bought Roasted Bell Peppers)

The Chicken Mixture (the Filling):

  • 1 Large Onion (or 3-4 Green Onions (white & green parts), thinly sliced)
  • 1 Tbsp Vegetable Oil (I use Canola)
  • *1 Cup Chicken Broth (*You will need a Total of 3 Cups (1 Cup for the Filling + 2 Cups for the Sauce); I use Low-Sodium, so I have more control over the sodium content)
  • *1 Cup Heavy Cream (*You will need a Total of 1 1/2 Cups (1 Cup for the Filling + 1/2 Cup for the Sauce))
  • *1/2 tsp Paprika (*You will need a Total of 1 tsp (1/2 tsp for the Filling + 1/2 tsp for the Sauce))
  • 1/2 of the Roasted Peppers (from above)
  • the Prepared Chicken (from above)

The Sauce:

  • 4 Tbsp Salted Butter
  • 1/4 Cup Gluten-Free All-Purpose Flour (I use Bob’s Red Mill 1-to-1 GF Flour)
  • 2 Cups Low-Sodium Chicken Broth
  • 1/2 Cup Heavy Cream (or Whole Milk)
  • 1/2 tsp Paprika
  • 1 1/2 Cups Shredded Monterey Jack Cheese (*You will need about 3-1/2 Cups + more, if needed)
  • 1 Cup Sour Cream, Lite or Regular (I use Daisy brand Lite)

Other Ingredients:

  • 12-14 8″ Gluten-Free Tortilla Wraps
  • 1 Cup Salsa (I use Store-bought)
  • 1/4 Cup Cilantro ((Optional))

Baking the Chicken:

  1. Preheat oven to 400 degrees. Line a baking sheet with foil; set aside.
  2. Rinse the Chicken Breasts with cold water, pat a little with paper towels, place on the prepared baking sheet, sprinkle both sides with salt & pepper and drizzle with the olive oil.
  3. Bake for about 20 minutes or until the Chicken is almost done (you will be cooking the chicken a bit more later).
  4. Let the Chicken cool a little, then shred using 2 forks; set aside.

Roasting the Bell Peppers:

  1. While the Chicken Breasts are baking, prepare the Bell Peppers for roasting by cutting them into halves down the middle (from stem to bottom) and removing the stems, seeds and any white membrane.
    (Note: if you’re using store-bought Roasted Bell Peppers, skip the “Roasting” step, drain and chop 2-16 Fl. Oz. jars into 1/2″ pieces).
  2. Place the Bell Pepper halves face-down on the prepared baking sheet and roast for about 3-5 minutes or until the skins are blackened.
  3. Remove the Peppers from the oven and place them into a resealable plastic bag; close bag and leave for about 30 minutes.
  4. When cool enough to handle, remove the Peppers from the plastic bag and scrape off the blackened part (discard this black part); chop the Peppers into 1/2″ pieces (or any size desired); set aside.

Making the Filling:

  1. Heat the Vegetable Oil in a large skillet over Medium heat and add the chopped Onions, cooking until translucent (about 2-3 minutes)..
  2. Next, reduce temperature to Medium-Low and add the Shredded Chicken, 1 Cup of the Chicken Broth and 1 Cup of the Heavy Cream, mixing thoroughly.
  3. Add 1/2 teaspoon Paprika and 1/2 of the chopped, Roasted Peppers; stir thoroughly and continue cooking for a few minutes (the liquid will reduce and thicken a little bit); set aside.

Making the Sauce:

  1. Using a separate, large skillet or saucepan, melt the Butter over Medium Heat; add the GF Flour, whisk thoroughly and cook for 1 minute, while whisking.
  2. Add the remaining 2 cups of Chicken Broth, whisking constantly until smooth (about 2 minutes).
  3. Next, reduce heat to Medium-Low and add the remaining 1/2 cup Heavy Cream, 1/2 teaspoon Paprika and 1 1/2 cups Shredded Cheese; mix completely.
  4. Lastly, add the Sour Cream and the other 1/2 of the chopped, Roasted Peppers, mixing thoroughly (add a bit of Chicken Broth if the consistency is too thick); add any Salt and Pepper at this point, if desired.

Putting it Together:

  1. Preheat oven to 350 degrees.
  2. To assemble the Enchiladas, I set up a “work station” as follows: A. 9″x13″ Baking Dish (may need 2) B. large plate with the stack of Tortillas C. Bowl of remaining Shredded Cheese D. The skillet containing the Chicken Filling mixture
  3. First, using a slotted spoon, spread about a 1/2 cup (+or-) portion of the Chicken Filling towards one end of the Tortilla Wraps and sprinkle with 1 Tablespoon of the Shredded Cheese; next, begin rolling the Tortilla wrap starting from the Chicken Filling end; place seam-side down in one of the 9″x13″ baking dishes; Repeat until all of the Tortilla Wraps and Filling are gone.
  4. Pour the Sauce over the tops of all of the Tortilla Wraps (Enchiladas) and spread out evenly to thoroughly coat; Sprinkle the top with any remaining Shredded Cheese (about 1/2 cup per dish).
  5. Bake, uncovered, for about 20 minutes or until bubbling.
  6. Serve with your favorite toppings: Sour Cream, Salsa, Cilantro, etc. Yum!
Dinner, Lunch, Main Dish


Mini Chicken “Meatloaf” Cups (Gluten-Free)

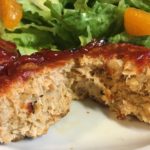
This recipe has quickly become a family favorite in our home! It can be made with any ground meat of your choice, or a combination of ground meats. I love the simplicity and versatility of this recipe and the fact that it only requires a few ingredients. You can also sneak in some finely chopped vegetables of your choice for those picky eaters. Also makes a wonderful afternoon snack! I hope you and your family enjoy it as much as we do 🙂

A huge “Thank You” to “The Pioneer Woman” (aka: “Ree Drummond”) for sharing the original version of this recipe. I have made some changes in order to make this dish GF and allergy-friendly for our family.

Mini Chicken “Meatloaf” Cups (Gluten-Free)

  • 1 1/2 Cups Gluten-Free Whole Oats (I use Bob’s Red Mill GF Whole Oats)
  • 1 Cup Whole Milk (or Unflavored Oat Milk for a dairy-free version)
  • 2 1/2 lbs Ground Chicken (or ground Turkey, Pork, Beef or combination of ground meats of your choice)
  • 2 tsp Dried Minced Parsley (or 3 Tablespoons Freshly Minced Parsley)
  • 1/2 tsp Seasoned Salt (such as “Season All” or “Lawry’s”)
  • 1/2 tsp Ground Black Pepper ( )
  • 1/2 tsp Red Pepper Flakes (optional, if you would like a bit of heat)
  • 1/4 + 3/4 Cup Ketchup (more, if needed)
  • Shredded Parmesan Cheese (optional)
  1. Preheat oven to 350 degrees.
  2. Generously spray 18-20 standard muffin cups (2 – 12-cup muffin pans) with cooking spray; set aside.
  3. In a small bowl, mix the Whole Oats and Milk together; set aside for about 5 minutes.
  4. In a large bowl, thoroughly mix the ground Meat, the Oat mixture, Parsley, Seasoned Salt, Pepper and 1/4 Cup Ketchup.
  5. Scoop a 1/4-cup portion of the Meat mixture into the prepared muffin cups and evenly flatten/smooth the tops.
  6. Next, squirt about 1/2 teaspoon of Ketchup onto the tops of each “meatloaf” and smooth the Ketchup evenly to thoroughly coat the tops.
  7. Bake for 25 minutes, then carefully remove the muffin pans from the oven and squirt another 1/2 teaspoon onto the tops of the “meatloaves,” spreading evenly with the back of the spoon to thoroughly coat each “meatloaf.”
  8. Bake for an additional 30 minutes or until edges start to crisp and/or sizzle.
  9. Remove from the oven and add any additional Ketchup to the tops; you may also lightly sprinkle the tops with shredded Parmesan Cheese, if desired; let sit in the pan for about 5 minutes before serving.
  10. Excellent served with a fresh Salad and fruit! Yummy 🙂
Appetizers, Dinner, Hors d’Oeuvres, Lunch, Main Dish, Snacks
American


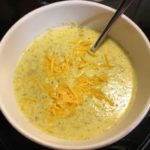
Easy Creamy Broccoli & Cheddar Soup ~ Gluten Free

This quick & easy recipe reminds me of my favorite Broccoli-Cheddar Soup from Panera Bread, but without the Gluten 🙂 It’s so fresh and flavorful that I can’t stop at just one bowl! I owe a HUGE “Thank You” to Holly Nilsson @ spendwithpennies.com for sharing the original version of this yummy soup!! I made a few adjustments in order to make it Gluten-Free and allergy-friendly for my family.

Easy Creamy Broccoli & Cheddar Soup ~ Gluten Free

  • 1 Tbsp Butter (unsalted)
  • 1 Small Onion (Chopped)
  • 1/2 Cup Carrots (Diced)
  • 1/2 teaspoon Garlic (minced)
  • 1 Large Head Broccoli (Chopped (about 3 Cups))
  • 2 Cups Chicken Broth (Low Sodium or Regular)
  • 1/2 teaspoon Dried Thyme
  • Salt & Pepper (to taste)
  • 2 Tbsp All-Purpose Gluten Free Flour (I use Bob’s Red Mill 1-to-1 GF Flour)
  • 3/4 Cup Whole Milk
  • 3/4 Cup Skim Milk
  • 1 Cup Sharp Cheddar Cheese (Shredded)
  1. In a large saucepan, melt the Butter over medium-low heat. Once Butter is melted, add the Onions, Carrots and Garlic; cook until the Onions are translucent and soft (about 3-5 minutes).
  2. Add the Broccoli, Chicken Broth and Seasonings to the Onion mixture and cook over low heat until the Broccoli has softened ~ about 15 minutes.
  3. Next, using either an Immersion Blender, Regular Blender or Food Processor, thoroughly blend the cooked Vegetable/Broth mixture; set aside in the large saucepan over Low heat.
  4. Meanwhile, in a small/medium bowl, combine the GF Flour blend and Milks using a whisk to thoroughly blend; Add this mixture to the Vegetable/Broth mixture in the large saucepan.
  5. Increase the temperature to Medium/Medium-Low and bring to a boil, while whisking continuously; once the mixture has thickened (about 5 minutes), remove from heat and add the Shredded Cheddar.
  6. Serve with your favorite GF Bread and Enjoy!
Appetizers, Dinner, Hors d’Oeuvres, Lunch, Main Dish, Snacks, Soup
American


Quick & Easy Copycat Chick-fil-A Sauce

Quick & Easy Copycat Chick-fil-A Sauce

Just in time for the Fourth of July! This quick and easy Copycat Chick-fil-A Sauce will not disappoint! Use this dip/sauce for everything from fries and chips to veggies to spreads for sandwiches, wraps, burgers….the sky is the limit 😉

  • 1 Cup Mayonnaise (I use Hellmann’s)
  • 4 tsp Yellow Mustard
  • 4 Tbsp Barbecue Sauce (I use Sweet Baby Ray’s, but you can use whatever bbq sauce you have on hand)
  • 4 Tbsp Honey
  1. In a small bowl, combine all ingredients using a whisk or rubber spatula until completely combined.
Appetizers, Dinner, Hors d’Oeuvres, Lunch, Snacks
American


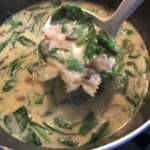
Creamy Spinach-Mushroom & Pasta Soup ~ Gluten Free!

Creamy Spinach-Mushroom & Pasta Soup ~ Gluten Free!

This is one of the BEST soups I have ever tasted! It’s also SO easy to make, sending this recipe right to the top of my Favorites list 😉 Full of freshness and comfort!
Thank You, as always, to The Pioneer Woman for sharing the original version of this delicious soup ~ I have tinkered with the ingredients a bit in order to make it GF and allergy-friendly for my family 🙂

  • 1/4 Cup Olive Oil (I use the milder version, so it doesn’t compete with the other flavors)
  • 1 1/2 Cups Mushrooms (Chopped)
  • 1 tsp Dried Thyme ((or 1 Tbsp Fresh))
  • 1 tsp Kosher Salt
  • 2 tsp Italian Seasoning ((*I make my own blend by combining 1 1/2 tsp dried Oregano, 1 tsp dried marjoram and 1/2 tsp dried Basil ~ this makes 3 tsp, so you will have 1 extra tsp to use later))
  • 1 1/2 tsp Minced Garlic (I use the already-minced Garlic in a jar)
  • 1/4 Cup Gluten-Free All Purpose Flour
  • 6 Cups Vegetable Broth (I use the Low Sodium Version)
  • 1 Cup Heavy Cream (For a little bit lighter version, I substitute 1/2 Cup of the Heavy Cream with 1/2 Cup Whole Milk)
  • 2 Cups Gluten-Free Pasta, dry (We like the Bow-Tie Pasta or the Little Shells for this recipe)
  • 4 Heaping Cups Baby Spinach
  • Ricotta Cheese, for serving ((optional))
  1. Heat the Olive Oil in a large pot (Dutch Oven) over medium heat.
  2. Add the Mushrooms, Thyme and Salt; cook until the mushrooms are browned and soft (about 5-7 minutes).
  3. Add the 2 tsp of Italian Seasoning and the Garlic; continue cooking for about 1-2 minutes.
  4. Next, sprinkle the GF Flour over the Mushroom mixture and stir until evenly coated.
  5. Stir in the Vegetable Broth and bring to a low boil; reduce temperature to Low and cook until the mixture thickens (about 8-10 minutes).
  6. Slowly pour in the Heavy Cream, mixing thoroughly.
  7. Add your choice of GF Pasta to the pot and continue cooking until the pasta is al dente (about 5-8 minutes, depending on the type of pasta).
  8. Lastly, add the Spinach and cook until it wilts ~ about 1 minute.
  9. Serve with a dollop of Ricotta Cheese, if desired.
    Enjoy 🙂
Appetizers, Dinner, Lunch, Main Dish, Side Dish, Soup, Stew


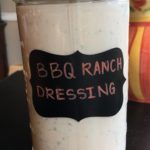
Barbecue-Ranch Dip/Salad Dressing

Barbecue-Ranch Dip/Salad Dressing

This Dressing/Dip is definitely one of my family’s favorites! I make sure to keep a fresh batch made at all times…my husband loves it as a dip for veggies and tortilla chips 🙂 And, my children love it as a salad dressing, baked potato topper and a dip for French Fries and Chicken Bites! It’s so easy to make and can be easily personalized to suit your family’s tastes by adding different herbs and spices 😉
Of course, a BIG “Thank You” to Ree Drummond (aka: “The Pioneer Woman”) for sharing the original version of this recipe!!! It’s a 5-Star recipe in our house!

  • 1 Cup Mayonnaise (I use Hellmann’s)
  • 1/2 Cup Sour Cream (I use Daisy Lite, but full-fat is fine, too)
  • 1/4 Cup Barbecue Sauce (I use Sweet Baby Ray’s, but you can use whatever bbq sauce you have on hand)
  • 3 Tbsp Dried Parsley Flakes
  • 1/2 tsp Garlic, minced (I use the already-minced garlic in a jar (usually found in the produce section))
  • 1/4-1/2 Cup Buttermilk (*usually only needed if you’re making a Salad Dressing; I make my own by adding 1 Cup Milk to 1 Tbsp Lemon Juice or White Vinegar; gently stir and let sit for 5 minutes)
  • 1/4-1/2 tsp Kosher Salt (optional)
  1. Gather the ingredients.
  2. Note: If using Buttermilk (usually only needed for the Salad Dressing version of this recipe; if you’re making this recipe as a dip, the Buttermilk is usually not needed) and you’re making your own, do so now by pouring 1 Tablespoon of White Vinegar or Lemon Juice into a 1-Cup measuring cup; then add milk (I use Whole Milk, but any fat % Milk is fine) to the Vinegar/Lemon Juice to almost fill the 1-cup measuring cup; gently stir and let sit for 5 minutes while preparing the remaining ingredients.
  3. While the Buttermilk is forming, place all of the remaining ingredients into a large bowl and whisk until thoroughly combined.
  4. To dilute/thin the dressing, add some Buttermilk, a little bit at a time, until you reach the desired consistency.
  5. Pour into a jar/vessel, cover with lid or plastic wrap and refrigerate until ready to use.
  6. Enjoy!
Appetizers, Hors d’Oeuvres, Salads, Side Dish, Snacks


Spicy Cheddar Cheese Crackers ~ Gluten Free (Just Like “Cheese Straws”)

Spicy Cheddar Cheese Crackers ~ Gluten Free (Just Like “Cheese Straws”)

Do you remember those wonderful “Cheese Straws” that were always around in abundance during the Holidays? Well, these little “Spicy Cheddar Cheese Crackers” will take you right back to your childhood! And, if you’re Gluten-Free, fear not, these are not only Gluten-Free, but are so easy to make and only require 7 ingredients (if you include water) 😉 I chose to cut my dough into leaf shapes for the Autumn season, but any shape will do (Christmas Trees, Snowmen, Wreaths, Holly Leaves, etc.) These make the perfect little Holiday Gifts 🙂
Enjoy!!!
Note: The original non-GF recipe can be found in just about every cookbook out there, but I want to give credit to Ree Drummond (aka: “The Pioneer Woman”) for her non-gf version of this recipe that I adapted to “fit” our family (please see the “Copycat Cheez-It” version for the GF and non-spicy recipe for these same crackers) 😉

  • 2 Cups Sharp Cheddar Cheese
  • 1 Cup GF All-Purpose Flour (I use “Caputo” brand – it makes an incredible dough to work with)
  • 4 Tbsp Salted Butter (cold and cut into small pieces)
  • 1/2 tsp Kosher Salt
  • 1/2 tsp Seasoned Salt (I use “Season All”)
  • 1/8-1/4 tsp Cayenned Pepper (I use 1/4 tsp for a little more “kick”)
  • 3 Tbsp Ice Water
  1. Place all of the ingredients, except for the Water, into a Food Processor and pulse until the mixture looks like “sand.”
  2. With the Food Processor running, slowly add the Ice-Cold Water, one Tbsp at a time, through the shoot until the dough forms a large ball.
  3. Wrap the Cheese dough ball in plastic and refrigerate for 1 hour.
  4. When ready to bake, preheat oven to 350 degrees.
  5. Line 1-2 baking sheets with Parchment Paper or Silicone Baking Mats; set aside.
  6. Roll the dough out to 1/4″ thickness on a lightly floured surface, cut into desired shapes and place on the prepared baking sheets.
  7. Bake for 15-18 minutes or until golden brown.
    *See notes for “crisping” up crackers if they turn soft.
  8. Allow the crackers to cool completely on a wire rack to develop the flavors and desired crispness.
  9. Enjoy 🙂

*Note: if your crackers get a little soft, simply toss them onto a baking sheet and re-heat in a 275 degree oven for about 8-10 minutes. Let cool and gobble them up!

Appetizers, Hors d’Oeuvres, Snacks


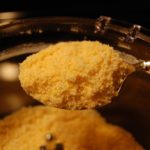
Copycat Cheez-It Cheddar Cheese Crackers ~ Gluten Free

Copycat Cheez-It Cheddar Cheese Crackers ~ Gluten Free

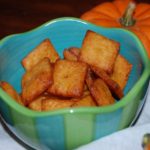
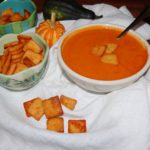
These are the yummiest Gluten-Free Cheese Crackers I have EVER tasted!!! They taste just like Cheez-It crackers! Plus, they are SO easy to make and only 6 ingredients are needed 🙂 I love them with my Roasted Red Pepper and Tomato soup…or just by themselves! A big bag of these yummy crackers would make a perfect treat for anyone.
*This recipe was adapted from a Ree Drummond (aka: “The Pioneer Woman”) recipe (“Homemade Cheddar Crackers”)…of course! Thank you SO much for sharing!

  • 2 Cups Sharp Cheddar Cheese (Shredded)
  • 1 Cup Gluten Free All-Purpose Flour Blend (I use Caputo brand – it’s a little more expensive, but well worth it – it performs like “regular” flour and is not gritty)
  • 4 Tbsp Salted Butter (Kept cold & cut into small pieces)
  • 1/2 tsp Kosher Salt
  • 1/2 tsp Seasoned Salt (I use Season-All)
  • 3 Tbsp Ice Water
  1. Place all of the ingredients, except for the Ice Water, into a Food Processor and pulse until the mixture looks like sand.
  2. With the Food Processor running, slowly add the Ice Water, one Tablespoon at a time, through the shoot until the dough forms a ball.
  3. Wrap the Cheese-dough ball in plastic and refrigerate for 1 hour.
  4. When ready to bake, preheat oven to 350 degrees.
  5. Line 1-2 baking sheets with silicone baking mats or parchment paper; set aside.
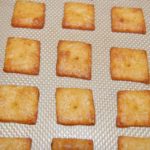
  6. Roll out the dough to 1/4″ thickness and cut into desired-size squares using a pizza cutter ~ I use a straight-edge ruler and usually cut my dough into 1″ x 1″ squares.
  7. Place the squares onto the lined baking sheets.
  8. Using the smaller end of a chop stick or wooden skewer, poke a small hole into the center of each square.
    Note: If desired, you can sprinkle the crackers with a little kosher salt at this stage, but they really do not need it 😉
  9. Bake the crackers for 15-18 minutes or until golden brown; I bake mine for the maximum amount of time since I prefer mine on the more crispy side.
  10. Allow to cool completely to fully develop the flavors and desired crispiness.
  11. Enjoy with your favorite soup, salad or all on their own 🙂
  12. Note: if your crackers get soft, simply toss them onto a baking sheet and re-heat in a 275 degree oven for about 8-10 minutes.
Appetizers, Hors d’Oeuvres, Lunch, Snacks, Soup


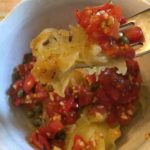
Spaghetti Squash with Tomatoes & Capers

Spaghetti Squash with Tomatoes & Capers

This dish is so Fresh and easy to make with vegetables right out of your garden or kitchen! If I do not have any Spaghetti Squash ready in my garden, I substitute Summer Squash, Zucchini, Acorn Squash, Baking Potato or a mild Fish, such as Flounder. I love this recipe, because it’s so versatile and delicious no matter what you pair with the sauteed Capers and Tomatoes! I hope you enjoy this dish as much as we do 🙂

  • 1 Large Spaghetti Squash
  • 2 tsp Garlic, minced
  • 2 Tbsp olive oil
  • 2 Tbsp Capers
  • 1 1/2 Cups Tomatoes, chopped (with juices)
  • 2 tsp Dried Oregano (or 2 Tbsp Fresh Oregano, chopped)
  • Table Salt (to taste)
  • Ground Black Pepper (to taste)

Baking the Spaghetti Squash:

  1. Preheat Oven to 400 degrees. Place rack in center position.
  2. Cut the Spaghetti Squash in half, lengthwise, scrape out the seeds and loose stringy innards and place facedown in a deep baking dish.
  3. Add enough water to cover the bottom of the dish by about 1/2 inch.
  4. Bake for about 35-40 minutes, or until the squash is soft (depends on the size of the squash).
  5. Remove the squash from the oven and set aside to cool enough to handle.
  6. Reduce oven temperature to 250 degrees.
  7. When the squash is cool enough to handle, hold it over a large, ovenproof bowl/dish and scrape out the flesh from the top to the bottom using the tines of a fork. Cover the dish with foil and place it in the oven to keep hot while you prepare the topping.

Making the Caper & Tomato Topping:

  1. In a large, nonstick skillet, heat the Olive Oil and Garlic over Medium Heat for about 2 minutes.
  2. Next, add the Capers, Tomatoes and Oregano and continue cooking for another 2 minutes.
  3. Remove from heat and add a few pinches of Salt and Pepper to taste.
  4. Spoon desired amount over the prepared Spaghetti Squash and watch it disappear!
Appetizers, Dinner, Hors d’Oeuvres, Main Dish, Salads, Side Dish


Corn & Tomato Salsa

Corn & Tomato Salsa

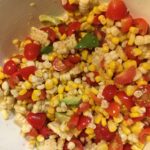
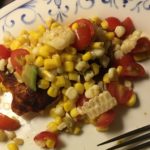
Are you wondering what to do with the 2,387 tomatoes in your garden?!? 😉 Well, here is a wonderful fresh Salsa that’s quick and easy and oh, so fresh and healthy!!! I serve it over Salmon, Chicken, Baked Potatoes and Fresh Green Leaf Lettuce…the possibilities are endless! Enjoy 🙂

  • 1 – 1 1/2 Cup Fresh Tomatoes (Cut into bite-size pieces; )
  • 1 – 1 1/2 Cup Fresh Corn (Cut off of the cob; can use canned corn, if desired)
  • 1 Large Avocado (Cut into bite-size pieces)
  • 1 Large Lime (Juice and Zest)
  • Table Salt (to taste)
  • Ground Black Pepper (to taste)
  • Chile Powder (to taste)
  • 1 Small Vidalia Onion ((optional) chopped)
  1. Add all of the chopped ingredients to a large mixing bowl and gently toss with the Lime Juice and seasonings to taste. If not serving immediately, wait to cut up the Avocado right before serving so it doesn’t brown. Cover tightly with plastic and refrigerate until ready to serve.
  2. So yummy over Salmon!
Appetizers, Hors d’Oeuvres, Lunch, Salads, Side Dish, Snacks