Buffalo Chicken Dip

Buffalo Chicken Dip
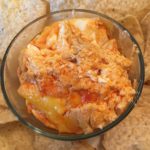
This is our middle daughter’s favorite food…I seriously think she would eat it for Breakfast, Lunch and Dinner EVERY day of her life if others didn’t step in and insist on some variety in her diet 😉
It really IS delicious, though! Our family doesn’t just eat it as an appetizer or hors d’oeuvres, but as a meal with fresh bread/rolls and a big salad 🙂 A definite 5-Stars in this household!

  • 4-6 Large Boneless, Skinless Chicken Breasts (about 3 lbs.; boiled and shredded)
  • 1 1/4 Cup Hot Sauce (I use Sweet Baby Ray’s Buffalo Wing Sauce because it’s Gluten Free and SO yummy!)
  • 2 Cups Ranch Dressing (I make my own using Hidden Valley Ranch Powder, but store-bought in the bottle is just fine ;))
  • 2 Blocks Cream Cheese ((16 oz) I use full fat Philadelphia Cream Cheese)
  • 3 Cups Shredded Cheddar Cheese (You can also use half Cheddar and half Monterey Jack)
  1. Preheat oven to 350 degrees.
  2. In a 9″ x 13″ (or 4 quart) baking dish dish, mix together the Chicken, the Hot Sauce and 1 1/2 Cups Shredded Cheese until thoroughly blended; Spread out evenly in the pan and set aside.
  3. In a medium saucepan, heat the Ranch Dressing and the Cream Cheese over Low heat until the Cream Cheese has completely melted and the mixture is smooth. Pour this mixture evenly over the Chicken mixture in the baking dish.
  4. Top with the remaining Shredded Cheese.
  5. Bake uncovered for approximately 30-35 minutes, or until edges are bubbly and the top is lightly brown.
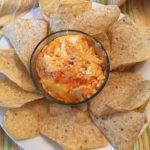
  6. Serve with your favorite chips, pita chips, bread, etc. Enjoy 🙂
Appetizers, Dinner, Hors d’Oeuvres, Lunch, Main Dish, Side Dish, Snacks
American


Paprika Cauliflower Bites ~ Gluten-Free

Paprika Cauliflower Bites ~ Gluten-Free

Did you know that there are three (3) different types of Paprika? There is “Sweet Paprika,” usually labeled as “Paprika” and offers a somewhat sweet pepper flavor without much heat. The second type is “Hot Paprika,” because it is exactly that…HOT! The last type is “Smoked Paprika” and comes from peppers that have been smoked and dried over a fire. “Smoked Paprika” comes in a variety of spiciness (mild, medium, medium-hot and hot), depending on the variety of peppers used.
Paprika is definitely one of my favorite spices, so I am always trying out new ways to use it in my recipes. I hope you enjoy these Paprika Cauliflower Bites 🙂

The Marinade:

  • 1/4 Cup Light Olive Oil (or Canola Oil)
  • 1/4 Cup lemon juice (Juice of 1 Large Lemon)
  • 1/4 Cup Parmesan Cheese, grated or shredded (I use grated when it’s available)
  • 1 tsp Dried Oregano
  • 1 tsp Salt (table)
  • 1 tsp Ground Black Pepper

The Cauliflower:

  • 1 Head Cauliflower (broken/cut into bite-size pieces)

The Coating:

  • 1 Cup All-Purpose Gluten Free Flour (I use King Arthur or Better Batter)
  • 4 tsp Paprika (I use “Sweet Paprika” (label usually states just “Paprika”)
  • 1/2 tsp Ground Black Pepper
  • 1 Tbsp Parmesan Cheese, shredded or grated (I use Shredded for this part for a cheesier finish)
  • 1/2 Cup Butter, salted
  1. In a medium-size bowl, combine all of the Marinade ingredients mixing well; set aside.
  2. Place the bite-size Cauliflower pieces into a large resealable plastic bag.
  3. Pour the Marinade into the bag with the Cauliflower and close bag securely. Smoosh the Cauliflower around in the marinade to evenly coat. Refrigerate for at least 2 hours.
  4. Meanwhile, combine the GF Flour, Paprika, Pepper and Parmesan Cheese in a large bowl, mixing well.
  5. Once the Cauliflower has finished marinating, melt the butter in a large non-stick skillet over medium heat.
  6. Using a slotted spoon, transfer the Cauliflower pieces from the marinade to the GF Flour mixture in the large bowl. Gently toss to evenly coat all of the Cauliflower pieces with the GF Flour mixture.
  7. Once the Cauliflower pieces are ready to cook, transfer the pieces to the large skillet containing the melted butter. Do not move the Cauliflower around for about 1-2 minutes, allowing the pieces to turn golden brown and lightly crispy. Gently flip the Cauliflower pieces over to cook all sides…you may have to reduce the temperature to prevent burning. Test a piece after about 5 minutes to see if it’s done (softened) – I usually cook mine for about 8-10 minutes.
  8. Serve with a fresh salad and your choice of protein….yummy! 🙂
Appetizers, Dinner, Hors d’Oeuvres, Side Dish


Fresh Avocado Salsa

Fresh Avocado Salsa

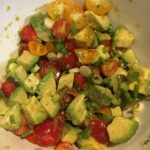
This Avocado Salsa is amazing! It’s so fresh, healthy, easy to make and it pairs well with just about any meal…fish, turkey, chicken, pork, beef, potatoes, etc. It is SO yummy on top of Salmon, Turkey Burgers and Baked Potatoes! The possibilities are endless!!! Enjoy 🙂

  • 1 Large Avocado (Peeled, Pitted and cut into bite-size pieces)
  • 1 Green Onion (Chopped; use both green and white parts)
  • 1/2 Cup Tomatoes (Cut into bite-size pieces; I use Red, Orange and Yellow Cherry tomatoes, cut in half or into quarters)
  • 1 Large Lemon (Use Zest and Juice)
  1. In a medium bowl, gently combine all of the ingredients until well mixed. Refrigerate until ready to serve.
  2. Serve on top of your favorite meat or veggie. It is wonderful with Salmon, Turkey Burgers and Baked Potatoes!

Note: This recipe was inspired by a Keto-Friendly recipe that one of my daughters found…Thank you to Amy Ramos for sharing the original recipe for this yummy Salmon and Avocado dish!!! We are forever indebted to you 🙂

Appetizers, Dinner, Hors d’Oeuvres, Lunch, Main Dish, Salads, Side Dish


Baked Turkey-Ranch Meatballs with Spicy Avocado Sauce (Gluten Free)

Baked Turkey-Ranch Meatballs with Spicy Avocado Sauce (Gluten Free)

Oh my goodness! These savory and slightly sweet meatballs paired with the spicy Avocado dipping sauce is out of this world!!! I always make a triple batch when I’m making any type of meatball, so I can freeze some for another busy night. However, after making a triple batch of these yummy meatballs, I didn’t have enough to freeze…my family LOVED them and not only went back for seconds, but thirds 🙂 I served this with a fresh salad, topped with cucumbers, strawberries and a store-bought Honey Poppy Seed dressing…delicious! I hope you enjoy 🙂

The Meatballs:

  • 3 lbs Ground Turkey
  • 2 Large Eggs
  • 1 Cup Gluten Free Seasoned Bread Crumbs
  • 1/8 Cup + 1 Tablespoon Worcestershire sauce
  • 2 Tablespoons (heaping) Ranch Dressing Powder Mix (I use Hidden Valley Ranch)
  • 1/4 Cup Light Brown Sugar (I do not pack this)
  • 2-3 Pinches Ground Black Pepper

The Spicy Avocado Sauce:

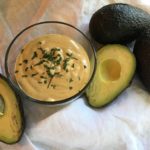
  • 1 Large Ripe Avocado (seed removed and sliced into smaller pieces)
  • 2/3 Cup Mayonnaise (I use Hellmann’s Mayonnaise)
  • 2/3 Cup Buttermilk or Buttermilk Substitute (Since Buttermilk is difficult to find right now, you can make your own: pour 1 Tablespoon White Vinegar (or Lemon Juice) in a 1 Cup measuring cup, then add milk of your choice to fill remaining cup (I used Plain Rice Milk))
  • 3-4 tsp Onion Powder
  • 3 tsp Garlic Powder
  • 1 tsp Kosher Salt
  • 1 tsp Paprika
  • 1/2 tsp Cayenne Pepper
  • 1/2 tsp Ground Black Pepper
  • Dried Parsley (for sprinkling on top)

Making the Meatballs:

  1. Gather the meatball ingredients.
  2. Preheat oven to 375 degrees.
  3. Line 2-3 baking sheets with parchment paper. Set aside.
  4. In a large mixing bowl, combine all of the Turkey Meatball ingredients and mix very well, either with a fork or your hands.
  5. Using a 2″ cookie scooper (or spoon), scoop turkey mixture onto the prepared baking sheets (16 meatballs per sheet). You may either form the meatballs using your hands or just drop meatballs directly onto sheet using the cookie scooper.
  6. Bake for 16-18 minutes, or until inside temperature measures 165 degrees (I usually cut the center-most meatball in half to check for any pinkness).

Making the Spicy Avocado Dipping Sauce:

  1. Gather the Avocado ingredients.
  2. While the meatballs are cooking, blend the Avocado ingredients (except for the Parsley) in a blender or food processor until smooth and creamy.
  3. Pour into serving bowl and top with dried Parsley. Refrigerate until ready to serve.
  4. Once the meatballs are cooked, drizzle some Spicy Avocado Sauce over the tops and serve with your favorite veggie! Yum!!!

*Thank you to californiaavocado.com for sharing the Spicy Avocado Ranch Dressing recipe…I made a few minor adjustments 😉

Appetizers, Dinner, Hors d’Oeuvres, Lunch, Main Dish
American


Garlic-Parmesan Asparagus

Garlic-Parmesan Asparagus

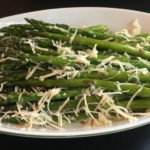
We are BIG fans of Asparagus, so I am always trying new ways to prepare this wonderful vegetable! This recipe is SO quick, easy and delicious that you will be wishing you had made more 😉 Enjoy!

  • 1 Bunch Asparagus (If you love Asparagus as much as we do, you may want to make 2 bunches)
  • 1-2 Tbsp Olive Oil
  • Kosher Salt (as much or as little as you desire)
  • Ground Pepper (as much or as little as you desire)
  • 2 tsp Garlic, chopped (I use the already prepared chopped Garlic in the jar)
  • 2-4 Tbsp Grated or shredded Parmesan (I use both – Grated for mixing with the Garlic and Shredded for topping before serving)
  1. Preheat oven to 400 degrees.
  2. Gather the ingredients.
  3. Line a baking sheet with foil and spray with non-stick cooking spray. Set aside.
  4. Rinse Asparagus in cold water and pat dry with paper towels.
  5. Spread the Asparagus onto the prepared baking sheet in a single layer. Drizzle or brush (I brush to coat more evenly) the Olive Oil over the Asparagus. Sprinkle with Kosher Salt and Pepper, coating evenly.
  6. Bake the Asparagus for about 8-10 minutes on the middle rack.
  7. While the Asparagus is baking, mix the Garlic and Grated Parmesan together in a small bowl.
  8. Sprinkle the Garlic-Parmesan mixture evenly over the Asparagus. Bake for another 5-7 minutes, or until Parmesan Cheese is melted.
  9. Sprinkle more Shredded or Grated Parmesan over the Asparagus and serve with your favorite dish! Yummy 🙂
Appetizers, Dinner, Hors d’Oeuvres, Lunch, Main Dish, Side Dish


Spicy Roasted Cauliflower (Gluten Free)

Spicy Roasted Cauliflower (Gluten Free)

I’m not a big fan of cauliflower, not because it tastes bad, but because it really doesn’t have much flavor at all. But, THIS recipe sold me on eating more cauliflower…it’s SO Spicy, Flavorful and Easy to make that I just can’t get enough!!! It’s even great cold the next day! Bon appetit! 🙂

  • 1 Head Cauliflower
  • 3/4 Cup Gluten Free All-Purpose Flour, sifted (I prefer King Arthur brand)
  • 1 tsp Paprika
  • 2 tsp Garlic Powder
  • 1/2 tsp Salt
  • 1/4 tsp Ground Pepper
  • 3/4 Cup Skim Milk (You can substitute with Rice Milk, Oat Milk, Coconut Milk or Soy Milk)

Spicy Sauce:

  • 1/4 Cup Hot Sauce or Buffalo Sauce (For a less-spicy version, use a mild Buffalo Sauce)
  • 2 Tbsps Canola Oil (You can substitute with Olive Oil, Coconut Oil, etc.)
  • 1 Tbsp Honey
  1. Preheat oven to 450 degrees.
  2. Line a baking sheet with parchment paper (or foil sprayed with non-stick cooking spray) and set aside.
  3. Cut up the Cauliflower into bite-size pieces and set aside.
  4. In a large bowl, whisk the GF Flour, Spices and Milk together until thoroughly blended. Add the Cauliflower pieces and stir to completely coat.
  5. Dump the coated Cauliflower pieces onto the prepared baking sheet and spread them out into a single layer.
  6. Bake for 20 minutes, stirring the pieces at the halfway point.
  7. While the Cauliflower is baking, thoroughly combine the Hot Sauce, Oil and Honey.
  8. After the first 20 minutes, brush or spoon the Hot Sauce mixture evenly over the Cauliflower pieces. Continue baking for another 20 minutes.
  9. Serve while hot or warm. The Sauce mixture becomes like a crusty cheese coating…it is SO yummy!

Thank you to Pierce Abernathy @ Tasty for sharing the original recipe…I just made a few minor changes to make it GF, lower in sodium and fat 😉

Appetizers, Dinner, Hors d’Oeuvres, Lunch, Main Dish, Side Dish, Snacks


Easy Sausage Pinwheels (Only 3 Ingredients!)

Easy Sausage Pinwheels (Only 3 Ingredients!)

These are one of those yummy foods that take me right back to my childhood! My older sister was always in charge of making these for our annual Christmas parties and I remember eating dozens of them before they even left the kitchen :). They are SO easy to make and oh so yummy!

  • 2 Cans Crescent Dough Sheet (If you can’t find the sheets, just use the regular crescent dough and press the seams together)
  • 1 Pound Pork Sausage (You may use Regular or Spicy)
  • 2 Cups Shredded Cheddar Cheese (I use Sharp)
  1. Gather the ingredients.
  2. In a large bowl, combine the sausage and cheese using two forks. Mix well and set aside.
  3. On a large sheet of foil, unroll one of the Crescent Dough Sheets.
  4. Spread half of the sausage mixture onto the dough sheet using a fork.
  5. Roll up the dough and sausage mixture along the longer edge of the dough sheet.
  6. Repeat these steps with the second Dough Sheet and remaining sausage mixture.
  7. Wrap the foil around each dough roll and freeze for about 2-3 hours.
  8. When ready to bake, preheat oven to 375 degrees.
  9. Lightly spray a cookie sheet or line it with a silicone baking pad. Set aside.
  10. Slice the dough rolls into about 1/4″ – 3/8″ wide slices and place on the prepared cookie sheet.
  11. Bake for about 15 minutes or until lightly golden color.
  12. Serve warm 🙂
Appetizers, Hors d’Oeuvres, Snacks


Quick & Easy Barbecue Chicken Biscuits ~ Kids Love Them!

Easy Barbecue Chicken Biscuits

Kids adore these Barbecue Chicken Biscuits shaped into little Cups! They're slightly sweet and will remind you of those "Manwich Sloppy Joes." Kids love them because they can pick one up and eat it in just a few bites. Parents love them because these yummy little morsels are tasty, filling and not "sloppy!" Perfect for ANY night of the week :).

  • 1 lb Ground Chicken (Or Turkey or Beef)
  • 1 Cup Ketchup
  • 1 Can Tomato Soup
  • 1 Small Onion (Diced)
  • 1 1/2 tsp White Vinegar
  • 2 Tablespoons Light Brown Sugar
  • 1 10-Count Can Refrigerator Biscuits
  • 1 Cup Shredded Cheddar Cheese

Making the Chicken Barbecue Filling

  1. Gather the ingredients.
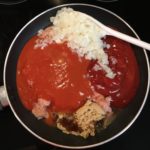
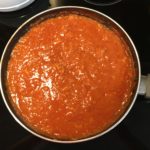
  2. In a large non-stick skillet, dump the chicken, ketchup, tomato soup, onion, vinegar and sugar.
  3. Mix well and simmer for 30 minutes.

Making the “Cups”

  1. Preheat oven to 400 degrees.
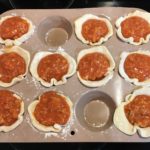
  2. While the Barbecue Filling is simmering, roll out the biscuits on a floured surface, then press each into a muffin tin.

Assembling the Barbecue Chicken Cups

  1. Fill each cup with the Barbecue Filling (you will have some leftover filling).
  2. Top with the shredded cheese.
  3. Bake for 8-11 minutes or until the edges of the biscuits are a light golden brown.
  4. Let rest for a couple of minutes before removing them from the muffin tin.
  5. Serve with a fresh green salad and Enjoy!