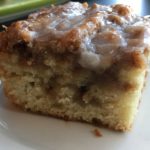
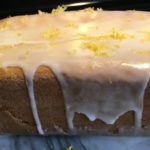
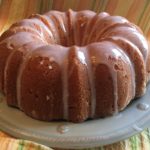
Pumpkin Spice Bundt Cake (Gluten Free)
Pumpkin Spice Bundt Cake (Gluten Free)
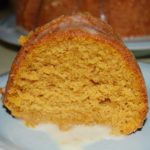
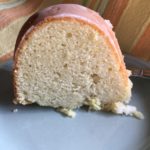
Wow! This cake takes it all!!! It is so moist and full of flavor…and, it's Gluten-Free 🙂 If you haven't tried "Gluten Free Heaven" Flour Mixes, then you don't know what you're missing! They have mastered the secret to GF baking – you will never know it's GF. A big shout out to Dixie Crystals for the original version of this recipe…I made a few changes in order to make it GF and allergy-friendly for my family. Thank you to Dixie Crystals and GF Heaven 🙂
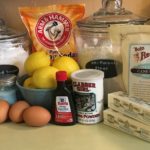
Cake:
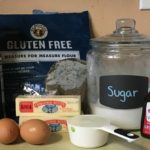
- 1 3/4 Cups *Gluten Free Heaven" Cake & Pastry Flour (*I have not made this cake with any other GF flours; please note that all GF Flours are not created the same and results will vary if you use a different GF Flour)
- 3/4 + 1/8 teaspoon *Xanthan Gum (*This must be added for “GF Heaven Flours” since they do not contain it; leave out if your GF Flour already contains it)
- 1 teaspoon GF Baking Powder
- 1/2 teaspoon GF Baking Soda
- 2 teaspoons Ground Cinnamon
- 1/2 teaspoon Ground Ginger
- 1/8 teaspoon Ground Cloves
- 1 teaspoon Salt
- 1 Cup + 2 Tbsp Unsalted Butter (Very soft, but not melted)
- 1 Cup Extra Fine Granulated Sugar (I always use Dixie Crystals)
- 3 Large Eggs (room temperature)
- 2/3 Cup Canned Pumpkin (I used Libby’s)
- 1/3 Cup Orange Juice (I used “no pulp” kind)
Glaze:
- 2/3 Cups Confectioner’s Sugar ((Powdered); plus more if you want a thicker consistency)
- 2 Tbsp Orange Juice
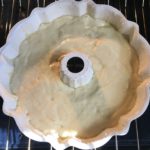
- Set oven rack in the middle position; Preheat oven to 350 degrees.
- Butter and flour Bundt pan (you can also use a 9 x 5 – inch loaf pan); set aside.
- In a medium-sized bowl, whisk together the GF Flour, Xanthan Gum, Baking Soda & Powder and Spices; set aside.
- Using a Stand or Handheld Mixer, fitted with the paddle attachment, beat the Butter until light & fluffy; add the Granulated Sugar and blend until thoroughly mixed and fluffy.
- Add the Eggs, one at a time, blending well after adding each Egg; scrape sides of bowl often; whip until the mixture is very light & fluffy.
- Next, add the Canned Pumpkin and mix until blended.
- Add the Dry Ingredient mixture and Orange Juice in 3-4 segments, mixing and scraping bowl and paddle well between each addition.
-
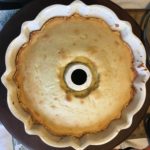
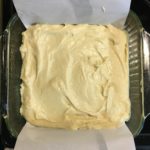
Scrape the batter into the prepared Bundt Pan; place in the preheated oven on the middle rack and bake for 45 minutes (check the cake around the 30-35 minute mark to make sure it isn't browning too much – if it is, cover loosely with a piece of aluminum foil); test doneness after 45 minutes with a toothpick and pressing lightly on the top to see if it springs back; bake an additional 15-30 minutes, depending on your oven (my cake was ready after 45 minutes).
- Once cake is done, remove from oven and let cool in the pan for approximately 10-15 minutes before turning out onto a cooling rack.
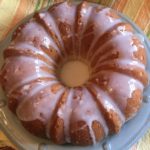
- While the cake is cooling, thoroughly whisk the Powdered Sugar and Orange Juice together in a small bowl until desired consistency is reached; spoon the Glaze over slightly warm or completely cooled cake.
- Serve with or without Vanilla Ice Cream and Enjoy! 🙂

*Use the “Spoon & Sweep” method for measuring the GF Flour: use a spoon to fill the measuring cup with the desired amount of flour, then scrape across the top with the back side of a knife to level off.