Gluten Free Lemon Pound Cake

Gluten Free Lemon Pound Cake

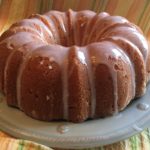
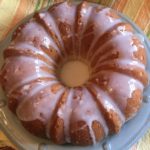
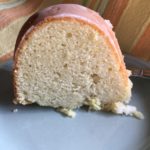
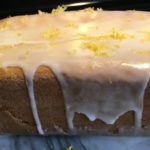
This Lemon Pound Cake turns out moist, tasty and delicious every time! Made with Fresh Lemon Juice and Lemon Zest puts this GF Lemon Pound Cake over the top! I have learned to make TWO cakes, since my family tends to inhale the first one within a few hours 😉
A big “Thank You” to America’s Test Kitchen for creating this recipe 🙂

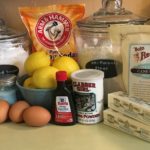
Cake Ingredients:

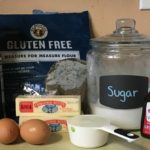
  • 1 1/4 Cups King Arthur Gluten Free Multi-Purpose Flour (Sifted)
  • 1 tsp Baking Powder
  • 1/2 tsp Salt
  • 1/4 tsp Xanthan Gum
  • 1 1/4 Cup Granulated Sugar
  • 2 Tbsp Lemon Zest (about 2 lemons)
  • 1 Tbsp Lemon Juice (from the Lemons used for Zest)
  • 4 Large Eggs
  • 1/2 Cup Cream Cheese (softened)
  • 1 1/2 tsp Vanilla Extract
  • 1/2 Cup Unsalted Butter (Melted)

Glaze Ingredients:

  • 1/2 Cup Powdered Sugar
  • 2 tsp Lemon Juice

The Cake Instructions:

  1. Preheat oven to 350 degrees.
  2. Grease and flour an 8 1/2″ x 4 1/2″ loaf pan. Set aside.
  3. In a large mixing bowl, whisk the Flour, Baking Powder, Salt and Xanthan Gum until blended. Set aside.
  4. In a food processor, combine the Granulated Sugar and Lemon Zest until thoroughly mixed (about 7 pulses).
  5. Next, add the Lemon Juice, Eggs, Softened Cream Cheese and Vanilla Extract to the Sugar mixture. Process until completely blended (about 20-30 seconds)
  6. With the Food Processor running on Low, slowly drizzle the melted Butter into the Cream Cheese mixture. Continue processing until mixed completely (about 30-40 seconds).
  7. Add this Cream Cheese mixture to the Flour mixture in the large bowl. Whisk until thoroughly blended and smooth.
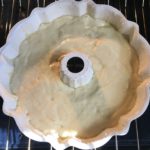
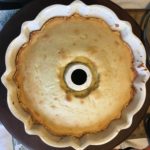
  8. Pour the batter into the prepared loaf pan. Bake for 15 minutes at 350 degrees. Decrease the temperature to 325 degrees and bake for an additional 35-40 minutes, or until cake is a light golden brown and toothpick inserted into the center comes out clean.
  9. Let cool in the pan on a wire rack for about 10 minutes. Remove cake from pan and continue cooling on the wire rack until completely cooled (about 1 1/2 hours).

The Glaze Instructions:

  1. In a small bowl, whisk together the Powdered Sugar and Lemon Juice until smooth, adding more sugar if not thick enough.

Putting it all Together:

  1. Once the cake is completely cooled, drizzle the Glaze over the top of the cake, letting it run down the sides. Sprinkle fresh Lemon Zest on top and let Glaze set for about 15 minutes before serving. Enjoy 🙂
Store cake at room temperature in a large plastic baggie, sealed tightly.
Breakfast, Desserts, Snacks, Sweet Breads


Gluten Free Chocolate Brownie-Cream Sandwiches

Gluten Free Chocolate Brownie & Cream Sandwiches

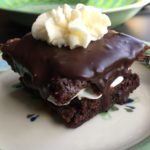
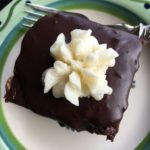
These little treats are sinfully rich, moist and delicious 🙂 They are certain to please any Gluten-Free Chocoholic! I converted this recipe from The Pioneer Woman’s (aka: Ree Drummond) “Chocolate Devils,” which were intended to be a cake-like consistency, but to our delight the Gluten-Free version turned out to be a moist, brownie-like consistency. A 5-Star hit in our household 🙂

Brownie Ingredients:

  • 2 Cups Gluten Free All-Purpose Flour, sifted (must be sifted to reduce grittiness)
  • 2 Cups Granulated Sugar
  • 1/4 tsp Salt
  • 1 Cup Butter, salted (2 sticks)
  • 4 Tbsp Cocoa (heaping Tbsps)
  • 1 Cup Boiling Water
  • 1/2 Cup Buttermilk
  • 1 tsp Baking Soda
  • 1 tsp Vanilla Extract
  • 2 Large Eggs

The Cream-Filling Ingredients:

  • 5 Tbsps All-Purpose Gluten Free Flour, Sifted (again, must be sifted to reduce grittiness)
  • 1 Cup Whole Milk
  • 1 tsp Vanilla Extract
  • 1 Cup Salted Butter, Softened ((2 sticks))
  • 1 Cup Granulated Sugar

The Ganache Ingredients:

  • 3 Cups Heavy Cream
  • 2 tsp Vanilla Extract
  • 4 Cups Semi-Sweet Chocolate Chips

Making the Gluten-Free Brownies

  1. Preheat Oven to 350 degrees.
  2. Gather the ingredients.
  3. Spray a cookie sheet with non-stick cooking spray. Line the cookie sheet with parchment paper and spray the paper as well. Set aside.
  4. In a stand mixer, combine the Flour, Sugar and Salt on low. Set aside while moving to the next step.
  5. In a small or medium saucepan, melt the butter. Add the Cocoa Powder and mix until completely combined. Add 1 Cup boiling water to the saucepan, mixing well and bring to a boil. Let boil for about 30 seconds. Add this mixture to the Flour mixture and blend on low until combined. Let cool slightly.
  6. In a medium-sized bowl, whisk the Buttermilk, Baking Soda, Vanilla and Eggs until thoroughly combined. Pour this into the Flour-Butter mixture and blend on low until completely combined.
  7. Scrape the Brownie mixture into the prepared cookie sheet, spreading evenly over the parchment paper.
  8. Bake for 20-25 minutes, or until toothpick inserted into the center comes out clean. Cool completely! This is very important – if brownies are not cooled all the way, the cream filling will just melt and turn to goop 🙁 If I have the time, I let mine cool overnight.
  9. Once completely cooled, cut the brownies into 2″ squares and place on a wire rack on another cookie sheet (you can use a square cookie cutter if you have one). Set in a cool spot while you prepare the cream filling.

Making the Cream Filling:

  1. In a small saucepan, whisk the GF Flour and Milk together and heat over medium-low heat, stirring constantly, until very thick (like pancake batter). Remove and cool completely. Add the Vanilla and blend thoroughly.
  2. Meanwhile, in a stand mixer fitted with the paddle attachment, cream the softened Butter and Sugar until VERY light, smooth and fluffy.
  3. Next, add the completely cooled Flour-Milk-Vanilla mixture to the Butter-Sugar mixture and beat on medium to medium-high for about 5-7 minutes – you want it to look like whipped cream.
  4. Using a pastry bag or plastic freezer (these are thicker and sturdier than regular ones) baggie fitted with a large star tip, fill the bag with the Cream Filling and pipe onto one of the cooled brownies. Place another brownie on top and press down gently. Repeat with the remaining brownies, reserving a small amount of the cream for the tops of the brownies. Set aside while you prepare the Ganache.

Making the Ganache:

  1. In a large saucepan, heat the Heavy Cream over medium-low until VERY hot. Add the Vanilla and Chocolate Morsels and stir until all of the chocolate is melted and blended completely.
  2. Remove Ganache from the heat and ladle over each Brownie Sandwich. Chill in the refrigerator for at least 1 hour.
  3. When ready to serve, top each Brownie Sandwich with some of the Cream and perhaps a cherry or raspberry 🙂
  4. Enjoy!

I know that there are a lot of steps involved, but believe me it’s well worth it!!!

Desserts, Snacks


Gluten Free Chocolate Hydrangea Cupcakes

Gluten Free Chocolate Hydrangea Cupcakes

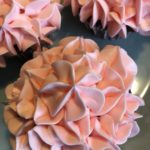
Even though I love Blue Hydrangeas, I just couldn’t bring myself to decorate these yummy cupcakes with Blue Icing….so, Pink Hydrangeas it is! The wonderful Chocolate of the cupcakes compliments the creamy Butter-Cream Icing perfectly….an instant hit in our household!!! Enjoy 🙂
A HUGE ‘Thank You” to America’s Test Kitchen for sharing this incredible Gluten Free Chocolate Cupcake recipe!

Cupcake Ingredients:

  • 1/2 Cup Canola Oil
  • 3 oz. Bittersweet Chocolate (chopped)
  • 1/3 Cup Unsweetened Cocoa Powder
  • 1/2 Cup + 2 Tbsp King Arthur Gluten Free Multi-Purpose Flour (sifted)
  • 3/4 tsp Gluten Free Baking Powder
  • 1/2 tsp Baking Soda
  • 1/2 tsp Xanthan Gum
  • 1/2 tsp Salt
  • 3 Large Eggs
  • 1 tsp Vanilla Extract
  • 3/4 Cup Granulated Sugar
  • 1/3 Cup Whole Milk

Buttercream Icing Ingredients:

  • 12 Tbsp Unsalted Butter (Softened)
  • 1 1/2 Tbsp Heavy Cream
  • 1 1/4 tsp Vanilla Extract
  • 1/8 tsp Salt
  • 1 1/2 Cups Powdered Sugar
  • Red Food Coloring Gel (as much or as little as you desire)

Making the Cupcakes:

  1. Preheat oven to 350 degrees.
  2. Line a 12-cup muffin tin with paper cupcake liners. Set aside.
  3. Gather the ingredients.
  4. In a microwave-safe bowl, microwave the Oil, Chocolate and Cocoa until chocolate is fully melted (about 2 minutes). Be sure to stir the mixture often to thoroughly mix ingredients and to prevent clumping. Remove from microwave and set aside to cool slightly.
  5. In a small bowl, whisk together the sifted GF Flour, Baking Powder, Baking Soda, Xanthan Gum and Salt. Set aside.
  6. In a large bowl, whisk together the Eggs, Vanilla Extract and Sugar until thoroughly blended.
  7. Next, whisk the Chocolate mixture and Milk into the Egg Mixture until thoroughly combined.
  8. Add the Flour Mixture to the Chocolate/Egg mixture, whisking until smooth and creamy.
  9. Using a 2″ cookie scoop or large spoon, scoop the batter into the prepared cupcake tin.
  10. Bake for 15-18 minutes, rotating the tin halfway through the baking time (my oven tends to run a little on the hot side, so 15 minutes is perfect for me), or until toothpick inserted into the middle of the cupcake comes out clean.
  11. Let cool in the cupcake tin for 10-15 minutes before transferring the cupcakes to a wire rack to cool completely.

Making the Buttercream Icing:

  1. In a Stand Mixer fitted with the whisk attachment, whisk the Butter, Heavy Cream, Vanilla Extract and Salt together on medium-high until smooth and creamy.
  2. Reduce speed to Low and slowly add the Powdered Sugar, 1/2 cup at a time, until well-blended.
  3. Increase speed to medium-high and whip until fluffy (about 5 minutes).
    If adding food coloring, do so halfway through this step and while mixer is turned OFF (I learned this the hard way ;))
  4. Once the cupcakes are completely cooled, you can begin icing them with the prepared icing/frosting using either a knife or pastry bag fitted with desired tip. Add sprinkles, too!
  5. Enjoy 🙂
Desserts, Snacks


Gluten Free Lemon Cookies with Lemon-Cream Cheese Frosting

Gluten Free Lemon Cookies with Lemon-Cream Cheese Frosting

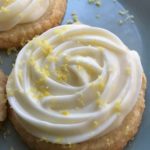
Crispy Lemon-Butter Cookies accented with Fresh Lemon Zest and topped with a Creamy Lemon Frosting infused with more Fresh Lemon Zest make these cookies sinfully delicious! I have to make a double batch every time I make these, because my family gobbles them up so quickly 🙂 If you like Lemony desserts, you’ll LOVE these cookies!

The Lemon Cookies

  • 1 Cup Unsalted Butter, softened ((2 Sticks))
  • 1 Cup Powdered Sugar
  • 1/2 tsp Salt
  • 1/2 tsp Pure Vanilla Extract
  • 1 Tbsp Lemon Zest
  • 1 Tbsp Fresh Lemon Juice
  • 2 Cups Gluten Free All-Purpose Flour (Sifted)

The Creamy Lemon Frosting

  • 1/2 Cup Cream Cheese, softened
  • 1 1/2 Cups Powdered Sugar
  • 1 Tbsp Lemon Zest
  • 1 Tbsp Fresh Lemon Juice
  • 1/8 tsp Butter, Unsalted
  1. Gather the ingredients needed for the Lemon Cookie dough.
  2. Using a Stand Mixer fitted with the Paddle attachment, cream together the Butter, Powdered Sugar and Salt until light and fluffy.
  3. Add the Vanilla Extract, Lemon Zest and Lemon Juice to the Butter mixture, mixing until combined.
  4. Next, gradually add the GF Flour, 1/2 cup at a time, to the mixing bowl, blending thoroughly between each addition and scraping down the sides of the bowl as needed.
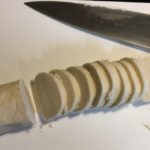
  5. Once the cookie dough has been thoroughly blended, turn the dough out onto a large cutting board and roll into a log about 9″-10″ in length. Wrap this log tightly in plastic wrap and place in freezer for at least 2 hours.
  6. When dough is chilled enough for slicing, preheat oven to 350 degrees and remove chilled dough from the freezer.
  7. Line a cookie sheet with a nonstick baking mat or Parchment paper. Set aside.
  8. Using a sharp knife, slice the dough log into 1/4″ thick sections and place each disc about 2″ apart onto the prepared cookie sheet.
  9. Bake for 12-15 minutes, or until edges turn a light golden-brown.
  10. Let cookies cool on pan for 1-2 minutes until removing to a wire cooling rack. Cool completely before applying the frosting.

Making the Creamy Lemon Frosting

  1. Using a Stand Mixer fitted with the Paddle attachment, cream together the softened Cream Cheese and Powdered Sugar until well-blended.
  2. Add the Lemon Zest, Lemon Juice and Salt to the Cream Cheese mixture. Continue beating until completely mixed.
  3. Transfer the Frosting to a piping bag, fitted with a large star tip. Please Note: this is optional, as you can apply the frosting either using a butter knife or a piping bag (or plastic storage bag) with the end snipped off.
  4. When the cookies are completely cooled, spread or pipe the desired amount of frosting onto each cookie. Enjoy 🙂

Note: I usually make the frosting while the cookies are baking, so I can place it into the refrigerator to set. If you find that the frosting gets too soft while piping, place it into the refrigerator for 10-15 minutes to harden a little.

Desserts, Snacks


Gluten Free Monster Cookies

Gluten Free Monster Cookies

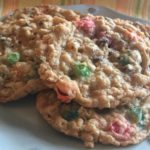
Inspired by Ree Drummond’s “Monster Cookies” recipe! To make these incredibly delicious cookies Gluten Free and Allergy-Friendly for my family, I just swapped out a few of the ingredients, decreased the oven temperature and baking time and voila! These are the BEST Gluten Free cookies that I have converted from a “regular” recipe 🙂 They are just the right blend of sweet, savory, chewy AND crunchy!
A HUMONGOUS “Thank You” to Ree Drummond (aka: The Pioneer Woman) for sharing her “Monster Cookies” recipe!!!

  • 2 Sticks Salted Butter, Softened ((16 Tbsps) I used “Land O Lakes”)
  • 1/2 Cup Granulated Sugar
  • 1 1/2 Cups Light Brown Sugar (Firmly packed)
  • 2 Large Eggs
  • 1 Tbsp Vanilla Extract
  • 1 1/2 Cups All-Purpose Gluten Free Flour, Sifted (I used “King Arthur” Brand)
  • 1 1/2 tsp Salt
  • 1 tsp Gluten Free Baking Powder (I use “Clabber Girl” brand)
  • 1/2 tsp Baking Soda
  • 1 1/2 Cups Oats (I used “Quaker” Old Fashioned Oats)
  • 1 Cup Chocolate Coated Candies (I used “M&M’s”)
  • 3/4 Cup Mini Chocolate Morsels (I used “Enjoy Life” semi-sweet mini chips)
  • 2 1/4 Cups Rice Cereal (I used “Rice Krispies” cereal)
  • 1/2 Cup Chopped Pecans ((Optional) I did not include these due to allergies)
  1. Preheat oven to 350 degrees.
  2. Line cookie sheet with a Silpat Baking Pad or parchment paper. Set aside.
  3. Using a Stand Mixer fitted with the Paddle attachment, cream together the Butter and Sugars until light and fluffy (about 2 minutes).
  4. Add the eggs, one at a time, mixing well. Add the vanilla and continue mixing until all is blended, scraping down sides of bowl as needed.
  5. In a separate bowl, combine the Sifted GF Flour, Salt, Baking Powder and Baking Soda.
    Note: please be sure to sift the flour since it helps prevent grittiness.
  6. Add the Flour mixture to the Butter mixture. Mix until well-combined.
  7. Next, add the Oats and Chocolate Chips and mix until incorporated. Note: add the chopped nuts now if you’re including them.
  8. Lastly, add the M&M Candies and Rice Cereal and mix well using a large, sturdy spoon.
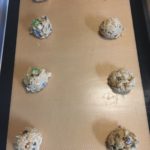
  9. Using a 2 Tbsp cookie scoop, drop dough balls at least 2″ apart onto the prepared cookie sheet. I only placed 8 cookie dough balls on each baking sheet.
  10. Bake in preheated oven for 10-14 minutes, rotating pan halfway through. Cookies are done when they turn a light golden brown.
  11. Let cookies cool for a couple of minutes on baking sheet, before transferring to a wire cooling rack.
  12. These cookies store well in an airtight container for 3-5 days, if they last that long! They also ship well…I send these cookies to one of my daughters, who states that they arrive looking like they were just baked 🙂

Desserts, Snacks


Gluten Free White Pearl Cupcakes

Gluten Free White Pearl Cupcakes

I think these cupcakes would be perfect for a Bridal Shower, Wedding, Anniversary, Birthday or any special occasion 🙂 Plus, they’re SO easy to make and absolutely delicious! Enjoy!

The Cupcake Batter

  • 1 Stick Salted Butter, softened ((8 Tbsp))
  • 1 Cup Granulated Sugar
  • 1 1/2 tsp Vanilla Extract
  • 3 Large Egg Whites
  • 1/2 Cup Whole Milk
  • 1 1/2 Cups Gluten Free All-Purpose Flour (I use King Arthur brand)
  • 2 tsp Baking Powder
  • 1/2 tsp Salt

The Buttercream Frosting

  • 2 Sticks Salted Butter, softened ((16 Tbsp))
  • 4 Cups Powdered Sugar
  • 2 tsp Vanilla Extract
  • 1/8 tsp Salt
  • 1/3 Cup Heavy Cream

Making the Cupcake Batter

  1. Gather the ingredients.
  2. Preheat Oven to 350 degrees.
    Line cupcake tin with cupcake liners and set aside.
  3. In a medium-sized bowl, sift together the GF Flour, Baking Powder and Salt. Set aside.
  4. Using a stand mixer fitted with the paddle attachment, cream the Softened Butter with the Granulated Sugar and Vanilla Extract until light and fluffy.
  5. Add the Egg Whites to the Butter mixture, mixing until well-blended.
  6. Slowly begin adding the Flour Mixture to the Butter mixture, alternating with the Milk, until all of the ingredients are mixed together and batter is smooth.
  7. Pour batter into the prepared cupcake tin, filling each cupcake liner 2/3 full (you may have enough batter for a couple of extra cupcakes).
  8. Bake for 15-18 minutes (my oven runs a little bit hot, so my cupcakes are ready in 15 minutes), or until toothpick comes out clean.
  9. Cool in pan for about 10 minutes before transferring the cupcakes to a wire rack to cool completely.

Making the Frosting

  1. Using a stand mixer fitted with the whisk attachment, whisk the butter until smooth and creamy.
  2. Slowly add the powdered sugar to the creamed butter until completely mixed. Increase speed to medium-high and whisk until fluffy.
  3. Next, add the Vanilla Extract and Heavy Cream, whisking on medium-high until light and fluffy (you may add extra Heavy Cream, if needed).
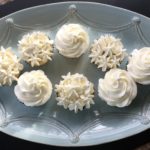
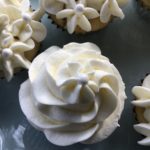
  4. Pipe the frosting onto the cupcakes, using whichever tip you desire (I used a Star tip)…or simply spread onto the cupcakes with a butter knife for a smooth effect. Top with Pearl candies or any other sprinkle, etc.
  5. Enjoy!

I want to thank “The Toasty Kitchen” for sharing her recipe for Easy White Cupcakes, which I adapted to a Gluten-Free Version 🙂

Desserts, Snacks


Gluten Free Lemon Bundt Cake

Gluten Free Lemon Bundt Cake

Fresh Lemon Zest and fresh Lemon Juice make this Gluten Free cake moist and delectable! My son requested this cake for his 21st Birthday and was shocked when I informed him that it was Gluten Free. I truly believe that sifting the flour is the key to making Gluten Free baked goods taste like baked goods that contain gluten. 🙂
Thank You to America’s Test Kitchen for sharing this wonderful recipe!!! #America’sTestKitchen

The Cake Release

  • 2 Tbsp Unsalted Butter, Melted
  • 1 Tbsp Gluten Free All-Purpose Flour (I use King Arthur brand)

The Cake

  • 2 3/4 Cup All-Purpose Gluten Free Flour, Sifted (King Arthur Brand)
  • 1 tsp Salt
  • 1 tsp Baking Powder
  • 1/2 tsp Baking Soda
  • 1/4 tsp Xanthan Gum
  • 3/4 Cup Whole Milk
  • 3 Tbsp Lemon Zest (3 Lemons)
  • 1/3 Cup Fresh Lemon Juice
  • 2 tsp Vanilla Extract
  • 12 Tbsp Unsalted Butter, softened (1 1/2 Sticks)
  • 1 1/2 Cup Granulated Sugar
  • 4 Large Eggs

The Glaze

  • 1 Cup Powdered Sugar
  • 4-6 tsp Fresh Lemon Juice (approximately 2 Lemons)
  1. Gather the ingredients.
  2. Preheat Oven to 350 degrees.

Prepping the Bundt Pan

  1. Mix the 2 Tbsp melted Butter with 1 Tbsp GF Flour, making a smooth paste. Using a small pastry brush, spread the paste into the Bundt pan, covering the entire inside of pan. Set aside.

Making the Cake Batter

  1. In a medium-sized bowl, sift together the GF Flour, Salt, Baking Powder, Baking Soda and Xanthan Gum. Set aside.
  2. In a separate small bowl, whisk together the Milk, Lemon Zest, Lemon Juice and Vanilla Extract until well-blended. Set aside.
  3. Using a Stand Mixer, fitted with the paddle attachment, beat the softened Butter and Granulated Sugar on Medium-High until light and fluffy.
  4. Add the Eggs, one at a time, to the Butter mixture, blending until well-combined.
  5. Reduce the speed to Low and begin alternately adding the Flour Mixture and Milk Mixture to the Butter Mixture. Continue mixing until all ingredients are combined, scraping the sides as needed.
  6. Scrape the batter into the prepared Bundt pan and smooth the top.
  7. Bake in preheated oven for 40-50 minutes, turning the pan halfway through baking. Cake is ready when it is a light golden brown and wooden skewer comes out clean.
  8. Cool cake in pan for about 10-15 minutes before running a knife around the edges to loosen. Turn out onto a wire rack to completely cool before applying the glaze.

Making the Glaze

  1. Whisk the Powdered Sugar with 4 tsp Lemon Juice until smooth. Add the remaining 2 tsp Lemon Juice, one at a time, until glaze is pourable. Drizzle the glaze evenly over the top of the Bundt cake, letting the glaze drip down the sides.
  2. Slice and Enjoy!
Desserts, Snacks


Easy Gluten Free Cinnamon-Sugar Coffee Cake

Easy Gluten Free Cinnamon-Sugar Coffee Cake

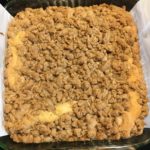
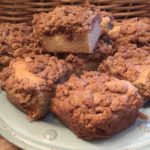
This Gluten Free Coffee Cake is SO moist, tasty and easy to make! It’s the perfect afternoon snack, dessert or breakfast for those weekend sleepovers. An instant hit with our family and friends! 🙂
*Thank You to America’s Test Kitchen for sharing this wonderful recipe!!

The Crumb Topping

  • 1/2 Cup Unsalted Butter, Melted (1 Stick or 8 Tbsp)
  • 1/3 Cup Granulated Sugar
  • 1/3 Cup Dark Brown Sugar (Packed)
  • 1 Large Egg Yolk
  • 1/8 tsp Salt
  • 3/4 tsp Cinnamon
  • 3/4 Cup + 1/3 Cup All-Purpose Gluten Free Flour, Sifted (I use Better Batter GF Multi-Purpose Flour)

The Cake

  • 3/4 Cup + 1/3 Cup All-Purpose GF Flour, Sifted (I use Better Batter GF Multi-Purpose Flour)
  • 1/2 Cup Granulated Sugar
  • 1/4 tsp Salt
  • 1/4 tsp Xanthan Gum (use ONLY if your GF Flour Blend doesn’t contain any; Better Batter contains Xanthan Gum, so I do not add it )
  • 1/2 tsp Baking Soda
  • 6 Tbsp Butter, Unsalted (Softened & Cut Into 6 Pieces)
  • 1/2 Cup Sour Cream
  • 2 Large Eggs
  • 1 Large Egg Yolk
  • 1 tsp Vanilla Extract
  1. Gather the ingredients.
  2. Spray an 8″ x 8″ baking pan with non-stick cooking spray. Next, fold a 16″ length of Parchment Paper to a width of 7″ and fit it into the baking pan, so that the excess hangs over the edges for easy removal of the cake. Set aside.

Making the topping:

  1. In a small sauce pan, melt the butter over low heat. Once completely melted, remove from heat and let cool slightly.
  2. Using a whisk, mix in the sugars, salt, cinnamon and egg yolk to the melted butter, thoroughly mixing.
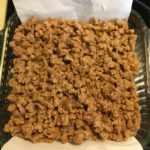
  3. Add the GF Flour to the butter mixture, blending well. The mixture will look like ground meat. Set aside.

Making the Cake:

  1. Place one of your oven racks in the upper-middle position of the oven and preheat oven to 325 degrees.
  2. In a stand mixer, using the paddle attachment, mix the GF Flour, Granulated Sugar, Salt, Xanthan Gum (if needed) and Baking Soda on low until completely blended.
  3. Next, add the Butter to the flour mixture, one piece at a time, mixing on low until butter pieces are no longer visible – mixture will resemble coarse sand.
  4. Add the Sour Cream, Eggs, Yolk and Vanilla to the Flour mixture and mix on medium-high until batter is light and fluffy.
Putting it Together:

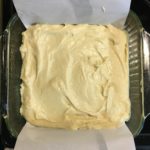
  1. Scrape the batter into the prepared baking pan and smooth the top.
  2. Using your hands, break the Topping Mixture into large pea-sized pieces and sprinkle over the top of the batter to completely cover.
  3. Bake for 35-45 minutes, rotating the pan halfway through baking. It’s done when the middle is no longer jiggly and a wooden toothpick inserted into the middle comes out clean.
  4. Let cool in the pan for 30 minutes before removing, using the excess Parchment Paper to lift and pull the cake out.
  5. Place on a platter or cutting board to cut and serve. Enjoy!

**This cake stores well in an air-tight container for about 3 days.

***A HUGE “Thank You” to America’s Test Kitchen for sharing this wonderful recipe!!! 🙂

Breakfast, Desserts, Snacks


Easy 3-Ingredient Candied Cashews

Easy 3-Ingredient Candied Cashews

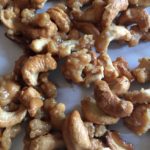
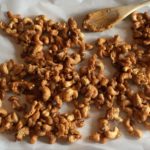
This is the easiest and yummiest recipe for Candied Cashews!!! Only 3 ingredients, about 15 minutes and these delicious morsels are ready to enjoy…..well, you have to wait a few minutes for them to cool before you pounce on them! These are perfect for snacking, giving as gifts or topping your favorite ice cream 🙂
A BIG “Thank You” to www.saltandlavender.com for sharing this wonderful treat!!!

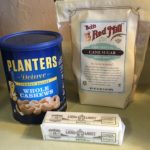
  • 2 Tbsp Salted Butter
  • 1 Cup Granulated Sugar
  • 2 Cups Cashews (I used Lightly Salted)
  1. Gather the ingredients.
  2. In a medium to large nonstick skillet, melt the butter over medium-low heat.
  3. Once the butter is melted, add the sugar and cashews.
  4. Cook over low to medium-low heat until sugar has completely melted, stirring often to completely coat the cashews and to prevent mixture from burning.
  5. Turn out onto a sheet of parchment paper to let cool.
  6. Enjoy as a snack, as a topping on ice cream or mixed in with your favorite yogurt…or give as a special gift!
Desserts, Snacks


Homemade Vanilla Marshmallows

Homemade Vanilla Marshmallows

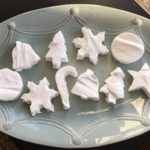
There’s nothing better than a Hot Cup of Cocoa with Homemade Marshmallows, a good Book and a Crackling Fire on a cold Winter’s night! This recipe can be easily tweaked by adding different flavored Gelatins or Extracts, adding hot cocoa powder to the powdered sugar to make chocolate marshmallows and cutting the marshmallows into fun designs using cookie cutters! Let your imagination soar 🙂 Thank you to dinnerthendessert.com for this awesome recipe!

  • 3 1/4 oz. packets Unflavored Gelatin (3/4 oz. Total)
  • 1/2 + 1/2 Cup Water (1 Cup Total)
  • 1 1/2 Cups Granulated Sugar
  • 1 Cup Light Corn Syrup
  • 1/8 tsp Salt
  • 1 Tablespoon Vanilla Extract (Can substitute different extract flavors)
  • 1/2 Cup Confectioner’s Sugar (Divided)
  • 1 Candy Thermometer (I know this isn’t an ingredient, but please make sure you have one of these before beginning)
  1. Gather the ingredients.
  2. Sprinkle 1/4 Cup of the Confectioner’s Sugar into a 9″ x 13″ baking dish. Set aside.
  3. Add the 3 Packets of Gelatin and 1/2 cup Water to the bowl of your Standing Mixer.
  4. Meanwhile, in a medium heavy saucepan, fitted with the Candy Thermometer, combine the Sugar, Corn Syrup, Salt and 1/2 Cup Water. Heat over Medium Heat, whisking until all of the Sugar is dissolved. Continue cooking until temperature reaches 240 degrees F. (Note: you do not need to whisk the entire time…let the mixture boil on its own after the sugar has dissolved, but do not leave unattended).
  5. Once the Sugar mixture has reached 240 degrees, turn off heat and leave the pot on the stove while you turn your Standing Mixer on to the Low setting.
  6. Slowly and carefully add the Sugar mixture to the Gelatin mixture in the Standing Mixer and blend for about 2 minutes, until thoroughly mixed.
  7. Next, increase the speed to High and mix for approximately 10 minutes, or until mixture has reached the consistency of Marshmallow Fluff.
  8. Add the Vanilla (or whatever flavor you desire) Extract and mix for another minute to thoroughly blend.
  9. Pour the Marshmallow mixture into the prepared 9″ x 13″ Baking Dish, spreading with a spatula to smooth out the surface.
  10. With the remaining 1/4 Cup Confectioner’s Sugar, sprinkle evenly over the top of the Marshmallow mixture. Place somewhere to let rest and firm up for 24 hours.
  11. Once the Marshmallow has firmed up, remove from the baking dish and place on a cutting surface.
  12. Using a sharp knife, cut into squares or use cookie cutters to make different-themed shapes (dip knife and/or cookie cutters into Confectioner’s Sugar to help prevent sticking).
  13. Enjoy with a Hot Cup of Cocoa, a good book and a roaring fire!
Desserts, Snacks