Easy 3-Ingredient Candied Cashews

Easy 3-Ingredient Candied Cashews

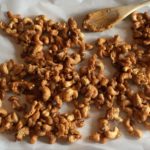
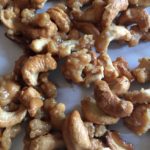
This is the easiest and yummiest recipe for Candied Cashews!!! Only 3 ingredients, about 15 minutes and these delicious morsels are ready to enjoy…..well, you have to wait a few minutes for them to cool before you pounce on them! These are perfect for snacking, giving as gifts or topping your favorite ice cream 🙂
A BIG “Thank You” to www.saltandlavender.com for sharing this wonderful treat!!!

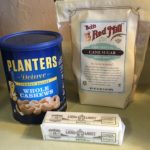
  • 2 Tbsp Salted Butter
  • 1 Cup Granulated Sugar
  • 2 Cups Cashews (I used Lightly Salted)
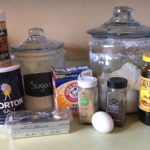
  1. Gather the ingredients.
  2. In a medium to large nonstick skillet, melt the butter over medium-low heat.
  3. Once the butter is melted, add the sugar and cashews.
  4. Cook over low to medium-low heat until sugar has completely melted, stirring often to completely coat the cashews and to prevent mixture from burning.
  5. Turn out onto a sheet of parchment paper to let cool.
  6. Enjoy as a snack, as a topping on ice cream or mixed in with your favorite yogurt…or give as a special gift!
Desserts, Snacks


Homemade Vanilla Marshmallows

Homemade Vanilla Marshmallows

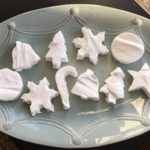
There’s nothing better than a Hot Cup of Cocoa with Homemade Marshmallows, a good Book and a Crackling Fire on a cold Winter’s night! This recipe can be easily tweaked by adding different flavored Gelatins or Extracts, adding hot cocoa powder to the powdered sugar to make chocolate marshmallows and cutting the marshmallows into fun designs using cookie cutters! Let your imagination soar 🙂 Thank you to dinnerthendessert.com for this awesome recipe!

  • 3 1/4 oz. packets Unflavored Gelatin (3/4 oz. Total)
  • 1/2 + 1/2 Cup Water (1 Cup Total)
  • 1 1/2 Cups Granulated Sugar
  • 1 Cup Light Corn Syrup
  • 1/8 tsp Salt
  • 1 Tablespoon Vanilla Extract (Can substitute different extract flavors)
  • 1/2 Cup Confectioner’s Sugar (Divided)
  • 1 Candy Thermometer (I know this isn’t an ingredient, but please make sure you have one of these before beginning)
  1. Gather the ingredients.
  2. Sprinkle 1/4 Cup of the Confectioner’s Sugar into a 9″ x 13″ baking dish. Set aside.
  3. Add the 3 Packets of Gelatin and 1/2 cup Water to the bowl of your Standing Mixer.
  4. Meanwhile, in a medium heavy saucepan, fitted with the Candy Thermometer, combine the Sugar, Corn Syrup, Salt and 1/2 Cup Water. Heat over Medium Heat, whisking until all of the Sugar is dissolved. Continue cooking until temperature reaches 240 degrees F. (Note: you do not need to whisk the entire time…let the mixture boil on its own after the sugar has dissolved, but do not leave unattended).
  5. Once the Sugar mixture has reached 240 degrees, turn off heat and leave the pot on the stove while you turn your Standing Mixer on to the Low setting.
  6. Slowly and carefully add the Sugar mixture to the Gelatin mixture in the Standing Mixer and blend for about 2 minutes, until thoroughly mixed.
  7. Next, increase the speed to High and mix for approximately 10 minutes, or until mixture has reached the consistency of Marshmallow Fluff.
  8. Add the Vanilla (or whatever flavor you desire) Extract and mix for another minute to thoroughly blend.
  9. Pour the Marshmallow mixture into the prepared 9″ x 13″ Baking Dish, spreading with a spatula to smooth out the surface.
  10. With the remaining 1/4 Cup Confectioner’s Sugar, sprinkle evenly over the top of the Marshmallow mixture. Place somewhere to let rest and firm up for 24 hours.
  11. Once the Marshmallow has firmed up, remove from the baking dish and place on a cutting surface.
  12. Using a sharp knife, cut into squares or use cookie cutters to make different-themed shapes (dip knife and/or cookie cutters into Confectioner’s Sugar to help prevent sticking).
  13. Enjoy with a Hot Cup of Cocoa, a good book and a roaring fire!
Desserts, Snacks


Hot Chocolate Brownie Bites (Gluten Free)

Hot Chocolate Brownie Bites (Gluten Free)

These little Hot Chocolate Brownie Bites are the BEST Gluten Free cookies that I have ever tasted!!! I thought I would never say this, but I actually prefer these without icing! They are, of course, delicious and quite sinful with or without the icing 🙂

Ingredients for the Cookie

  • 1/2 Cup Butter, Unsalted (1 Stick)
  • 1 1/2 Cups Semi-Sweet Chocolate Chips (I used “Enjoy Life” Mini Semi-Sweet Chocolate Chips (allergy friendly), but Nestle is just fine!)
  • 1 1/2 Cups Gluten Free All-Purpose Flour (I used “King Arthur” Cup-for-Cup GF All-Purpose Flour)
  • 1/4 Cup Unsweetened Cocoa Powder (I used Hershey’s Cocoa (100% Cacao))
  • 1 1/2 tsp Baking Powder
  • 1/4 tsp Salt
  • 1 1/4 Cup Light Brown Sugar
  • 3 Large Eggs
  • 1 1/2 tsp Vanilla Extract

Ingredients for the Icing

  • 4 Tablespoons Unsalted Butter, Melted
  • 2 Cups Confectioner’s Sugar
  • 1/4 Cup Unsweetened Cocoa Powder (Hershey’s Cocoa)
  • 1/4 Cup Hot Water (Hot Water from the tap…not boiling)
  • 1/2 tsp Vanila Extract
  • Decorative Sprinkles

Making the Cookies

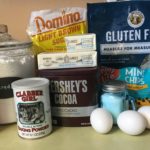
  1. Gather the ingredients.
  2. In a small heavy pot, melt the 1/2 Cup Unsalted Butter on Low. Once the butter is melted, add the 1 1/2 Cups Semi-Sweet Chocolate Morsels and continue heating over low until the chocolate is melted. Mixture should be smooth and creamy. Remove from heat.
  3. Meanwhile, in a medium-sized bowl, combine the dry ingredients (Flour, Cocoa Powder, Baking Powder and Salt). Mix well and set aside.
  4. Either using a Standing or Handheld Mixer, beat the Eggs, Brown Sugar and Vanilla Extract on low until blended.
  5. Add the cooled Chocolate mixture to the Egg mixture and mix on Low until blended.
  6. Next, add the Flour mixture 1/2 Cup at a time to the Wet Mixture and beat on Low until well blended. The dough will be thick, like Brownies. Cover the bowl with foil or plastic wrap and refrigerate for 3-4 hours.
  7. Once the dough has “hardened” to the consistency of modeling clay, remove the dough from the refrigerator.
  8. Preheat oven to 325 degrees.
  9. Line 1-2 cookie sheets with Parchment Paper or Silicone Baking Mats and set aside.
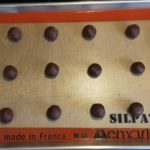
  10. Using a Small Cookie Scoop, scoop out dough and roll into balls. Place them 2″ apart on the prepared cookie sheets.
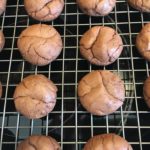
  11. Bake for 10-12 minutes or until they start to form cracks on their tops.
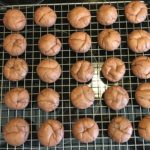
  12. Let cookies sit on cookie sheet for a few minutes before transferring them to a wire rack to cool completely.

Making the Icing

  1. While the cookies are cooling, combine the 4 Tablespoons melted Butter, 1/4 Cup Cocoa Powder, 1/4 Cup Hot Water, Vanilla Extract and 2 Cups Confectioner’s Sugar. Mix on Low until well blended. If mixture is too thick, add a little bit of water (1 Tablespoon at a time) until icing is a little runny.
  2. Next, keeping the cooled cookies on the cooling rack, place rack on a cookie sheet or paper towels to catch the run-off icing.
  3. Spoon desired amount of icing onto 2-3 cookies at a time and then add sprinkles….icing sets up quickly, so only apply icing to a few cookies at a time.
  4. Continue applying the icing and decorative sprinkles to the rest of the cookies until done.
    Enjoy!

Note: Instead of adding Icing to these cookies, try rolling them in Confectioner’s Sugar before baking or leave plain 🙂

Desserts, Snacks


Moravian Sugar Cake ~ Gluten Free!!!

Moravian Sugar Cake

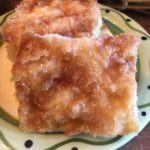
I just updated this recipe and it’s now Gluten-Free 🙂 This is my all-time favorite Christmas treat and I couldn’t go without it just because of my Gluten allergy, so I rolled up my sleeves and headed into my kitchen to come up with a GF version! I hope you all approve 🙂 The crispy Brown Sugar-Cinnamon topping combined with the buttery, tender yeast cake is seriously addictive! Perfect for Christmas morning, New Years Eve, and Holiday Gifts for your special friends and family 🙂
A huge “Thank You” to pastrychefonline.com for sharing the original version of this Wonderful Recipe!!!

For the Dough

  • 1/2 Cup Warm Water
  • 2 Tablespoons Dried Yeast
  • 1 Cup Mashed Potatoes (Unseasoned – no skin, butter, milk or seasonings)
  • 1 1/2 teaspoons Salt
  • 1/2 Cup Granulated Sugar
  • 11 Tablespoons Salted Butter, Melted ((1 Stick + 3 Tablespoons))
  • 1 Cup Whole Milk
  • 2 Large Eggs
  • 4 Cups All-Purpose Gluten Free Flour (Divided; check to see if your GF flour blend contains Xanthan Gum, if so great, but if not add 2 tsp. Xanthan Gum )
  • *2 tsp Xanthan Gum (*Add ONLY if your GF flour blend does NOT contain Xanthan Gum ~ 1/2 tsp xanthan gum per 1 cup GF flour for cakes, muffins, quick breads)

For the Topping

  • 8 Tablespoons Salted Butter, Melted
  • 1 Cup Granulated Sugar
  • 1 Cup Light Brown Sugar (packed)
  • 1/2 teaspoon Ground Cinnamon
  • 1/4 teaspoon Ground Nutmeg
  • 1/8 teaspoon Salt

Making the Dough

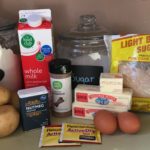
  1. Gather the ingredients.
  2. In the bowl of your standing mixer, combine the warm water and yeast. Using the paddle attachment, stir for about 1 minute or until yeast is completely dissolved.
  3. Next, add the mashed potatoes, salt, sugar, melted butter, milk, eggs and 2 cups of the flour. Mix well on low.
  4. Change the paddle attachment to the dough hook. Add the remaining 2 cups of flour and mix on medium speed for about 5 minutes, scraping the sides as needed. Dough should be very sticky and stretchy when pulling dough between your fingers. Add a little bit of extra flour if dough doesn’t feel like it has enough body…wetter is better than dry!
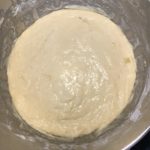
  5. Smooth the top of the dough with an oiled rubber spatula and cover bowl with a towel. Set in a warm area of your kitchen and let rise for about 1 1/2 – 2 hours. (Dough should double in size).
  6. Spray 2 jelly roll pans with non-stick spray.
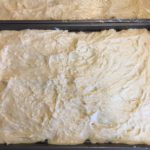
  7. Divide the dough in half between the 2 jelly roll pans. Spray the dough and your hands with the non-stick spray and begin patting and stretching the dough until it fills each pan – alternate between the pans to allow the dough to relax and stretch on its own.
  8. Spray the dough with non-stick spray and cover with plastic wrap. Set in a warm area to let rise once again, about 1 hour.

Making the topping

  1. Place the oven racks in top third and bottom third of your oven. Preheat to 400 degrees.
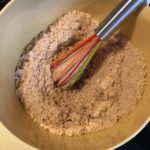
  2. Meanwhile, in a medium bowl, combine the sugars, cinnamon, nutmeg and salt. Mix very well.

Putting it all Together

  1. Once the dough in the pans has risen and become puffy, dimple the dough thoroughly using your greased fingers – do not worry if you puncture all the way through to the pan.
  2. Next, brush the tops of the dough with 4 Tablespoons of the melted butter per pan. Butter should pool in the dimples that you created.
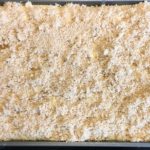
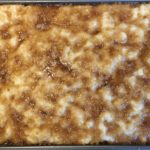
  3. Sprinkle half of the sugar mixture onto each of the cakes until you can no longer see the dough.
  4. Place the cakes on the oven racks (one on the top rack and one on the bottom rack). Bake for 7 minutes.
  5. Switch the cakes on the racks. Bake for another 7 minutes.
  6. Let cakes cool in the pans for about 5 minutes.
  7. Using a large spatula and your hands, transfer to cooling racks – this keeps the bottoms from getting soggy.
  8. Serve warm or wrap very well in freeze-proof bags to freeze for up to 2 months.
  9. Enjoy these yummy cakes throughout the holidays!
  10. They make the PERFECT Holiday Gifts for friends and family 🙂
Breakfast, Desserts, Snacks, Sweet Breads


Baya’s Spicy Holiday Pecans

Baya’s Spicy Holiday Pecans

These spicy, crunchy Pecans bring back the fondest memories of the Holidays with my husband’s Grandmother, Baya. She used to make these delicious Pecan treats during Thanksgiving and Christmas for guests to snack on. I make sure to always have a batch or two baking in the oven during the Holidays to fill the house with warm, spicy fragrances. These Pecans also make the perfect Gifts! I hope you, your friends and family enjoy them as much as we do 🙂

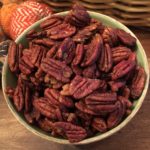
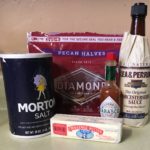
  • 4 Cups Pecan Halves
  • 10 Dashes Tabasco/Hot Sauce (Add more if you REALLY like some heat)
  • 1/3 Cup Worcestershire sauce
  • 1 Tablespoon Salted Butter, Melted
  • Salt (Sprinkle as little or as much as you desire)
  1. Gather the ingredients.
  2. Preheat oven to 270 degrees.
  3. In a large bowl, combine the Tabasco, Worcestershire Sauce and melted Butter. Mix well.
  4. Next, add the pecans to the Tabasco mix and toss gently with a rubber spatula to thoroughly coat the pecans.
  5. Dump the pecans on a cookie sheet and spread them out evenly. Sprinkle with salt (as much or as little as you desire).
  6. Bake in the center of the oven for 15 minutes.
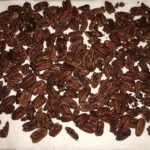
  7. Remove from oven, stir, salt and return to oven for another 15 minutes or until lightly crispy.
  8. Cool on a paper towel for 10-12 hours (I usually do this in the evening, so I can let them cool/crisp overnight).
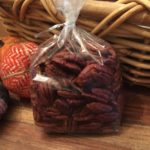
  9. If you’re giving these as gifts, pack in a plastic gift bag or tightly sealed container.
  10. Or place them in pretty bowls throughout your house for friends and family to munch 🙂
Snacks


Ginger Molasses Cookies ~ Gluten Free

Ginger Molasses Cookies ~ Gluten Free

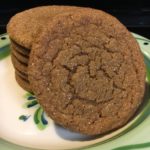
Get ready for the BEST Gluten-Free Ginger Molasses Cookies on the planet! I make batches of these soft, chewy and delicious Cookies for Christmas gifts…our family, friends and neighbors LOVE them! They make great Holiday gifts, so get out your aprons and cookie sheets and start baking! The dough freezes really well, so you can make several batches ahead of time. Enjoy!
*As a special treat for the Holidays, make my Ginger Cookie Ice Cream Sandwiches by just adding a scoop of Vanilla Bean Ice Cream between two of my GF Ginger Molasses Cookies!!! Yummy! 🙂

  • 2 Cups All-Purpose Gluten Free Flour (I use “GF Jules” all-purpose gf flour for this recipe – this GF Flour Blend already has Xanthan Gum in it, so I do NOT add Xanthan Gum)
  • *1 tsp Xanthan Gum (add this ONLY if your GF Flour blend does not already contain it)
  • 2 teaspoons Baking Soda
  • 1 teaspoon Ground Cinnamon
  • 1/2 teaspoon Ground Cloves
  • 1/2 teaspoon Ground Ginger
  • 1/2 teaspoon Salt
  • 3/4 Cup Shortening, melted (cooled for 10-15 minutes)
  • 1/4 Cup Molasses
  • 1 Cup Granulated Sugar
  • 1 Large Egg, lightly beaten
  • *1/2 – 1 Gallon Vanilla Bean Ice Cream (If you’re making my Holiday Ginger Cookie Ice Cream Sandwiches, see Notes*)
  1. Gather all your ingredients.

The Flour Mixture

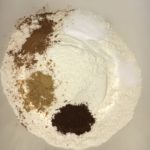
  1. In a large bowl, combine the Flour, *Xanthan Gum (only if needed), Baking Soda and spices. Mix well and set aside.
The Shortening Mixture

  1. In a small saucepan, melt the shortening, remove from heat and cool for about 10-15 minutes (this is so you don’t cook the eggs when you add it).
  2. While the shortening is cooling, combine the Molasses, Sugar and egg using a Stand or Handheld Mixer. Add the cooled shortening and mix well.
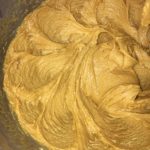
Combining the Wet and Dry Ingredients

  1. Slowly add the Flour Mixture to the wet mixture, 1/2 cup at a time, blending well after each addition.
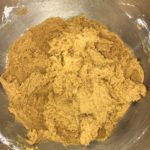
  2. Cover the bowl with plastic wrap and refrigerate for at least 1-2 hours – I find that chilling the dough overnight gets the best results.
  3. When ready to bake the cookies, preheat the oven to 350 degrees.
  4. While the oven is preheating shape the dough into small 1″ balls (you can use a small cookie scoop to get more uniform cookies) and roll in a bowl of granulated sugar, coating well.
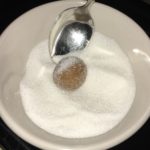
  5. Space cookie balls at least 2″ apart on an ungreased cookie sheet lined with a baking mat or parchment paper.
  6. Bake for 8-10 minutes, or until they are covered in “cracks.”
  7. Let cool for about 2 minutes on the cookie sheet before transferring to a wire rack to cool completely…try one (or two) while they’re still warm!
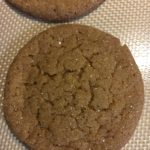
  8. Once they are completely cooled, you can package them in cellophane gift bags
  9. Enjoy!

This dough freezes really well, so you can make several batches ahead of time for Christmas gifts, parties, etc.

*Note: For my “Holiday Ginger Cookie Ice Cream Sandwiches ~ Gluten Free” just add a scoop of Vanilla Bean Ice Cream between two of my GF Ginger Molasses Cookies, wrap in plastic wrap and freeze until ready to eat! 🙂
Desserts, Snacks