Brown Sugar & Cinnamon Breakfast Rolls ~ Gluten Free – Yum!

Brown Sugar & Cinnamon Breakfast Rolls ~ Gluten Free – Yum!

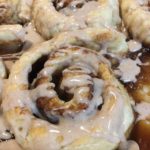
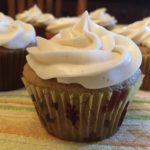
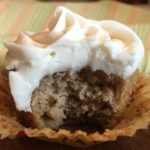
These taste just like the ones I remember from my childhood AND they’re gluten-free! My oldest daughter states that they remind her of a better version of the ones from the can 😉 These GF Cinnamon Rolls truly are yummy and are surprisingly easy to make! Now, our family can have our annual Cinnamon Rolls on Christmas morning (and weekend mornings!)!!! A BIG “Thank You” to Nicole @ glutenfreeonashoestring for sharing this wonderful recipe 🙂

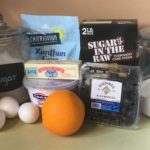
Ingredients for the Rolls:

  • 3 1/4 Cups Gluten Free All-Purpose Flour (I use Better Batter brand and it works beautifully)
  • 1 1/2 tsp Xanthan Gum (use ONLY if your GF Flour blend doesn’t already contain it – (Better Batter brand already contains Xanthan Gum, so I skip this ingredeint))
  • 1/2 Cup Nonfat Dry Milk (you can also use cultured buttermilk blend powder)
  • 2 tsp Rapid Rise or Instant Yeast
  • 1/4 tsp Cream of Tartar
  • 1/4 tsp Baking Soda
  • 2 Tbsp Light Brown Sugar (packed)
  • 1 tsp Kosher Salt
  • 1 tsp Apple Cider Vinegar
  • 2 Tbsp Unsalted Butter (softened to room temperature)
  • 1 Large Egg, lightly beaten (at room temperature)
  • 1 1/2 Cups Warm Water (approximately 95 degrees )

Ingredients for the Filling:

  • 6 Tbsp Unsalted Butter (softened to room temperature; divided)
  • 1 1/2 Cup Light Brown Sugar (packed & divided)
  • 2 tsp Ground Cinnamon (divided)

Ingredients for the Glaze:

  • 1 Cup Powdered Sugar
  • 1 Tbsp Milk (I use Whole Milk, but any kind is fine)
  • 1/2 tsp Ground Cinnamon
  1. Grease a 9″ x 13″ baking dish; set aside

Making the Dough:

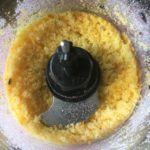
  1. Using a Stand or Handheld Mixer, fitted with the Paddle attachment, combine the GF Flour, Xanthan Gum (only if needed), Nonfat Dry Milk, Yeast, Cream of Tartar, Baking Soda, Brown Sugar and Salt; mix until completely blended.
  2. Next, slowly add the Vinegar, Butter and Egg; mix until thoroughly blended.
  3. Lastly, with the Mixer set on Low, add the Warm Water gradually in a slow, steady stream…let it trickle down the inside of the bowl until all of the Water has been added.
  4. Scrape down the sides of the bowl, then turn the Mixer up to Med-High and let mix for 3 minutes; dough should be moist and starting to pull away from the sides of the bowl.
  5. Gently scrape the dough out onto a lightly floured working surface; lightly flour the top with more flour and gently knead until smooth.
  6. Divide the dough in half and place half under a towel or plastic wrap to keep it from drying out.
  7. Lightly flour the working half of the dough and roll into a rectangle, about 9″ x 12″ and 1/2″ thick, with a rolling pin (add flour as needed to prevent sticking).
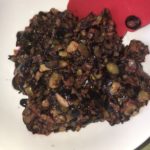
Adding the Filling:

  1. Using an offset spatula or a butter knife, spread 1/2 of the softened butter onto the dough, leaving a 1″ border around the edges.
  2. Next, sprinkle 1/2 of the Brown Sugar on top of the butter and gently pat it down with your fingers; sprinkle 1/2 of the Cinnamon onto the Brown Sugar.
  3. Starting on one of the short sides of the dough, roll tightly into a coil/tube and gently pinch the end of the roll with the body of the roll to seal together.
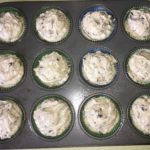
  4. Using a very sharp knife, slice the dough roll into 2″ wide sections (I know this seems quite large, but you’re going to press them down) and place them into the prepared Baking Dish, about 1″ apart; gently press each roll down by about 1/3.
  5. Repeat these steps with the remaining half of the dough and filling.
  6. Cover the Baking Dish with lightly oiled plastic wrap (I use non-stick cooking spray) and place in a warm, draft-free place to rise for about 1 hour; the dough should double in size.

Baking the Rolls:

  1. Once the dough has almost finished rising, preheat the oven to 350 degrees.
  2. Remove the plastic wrap and bake on the center rack for about 23-27 minutes, or until the rolls are golden brown and cooked in the middle.
  3. Let cool to room temperature before adding the glaze.

Making the Glaze:

  1. While the rolls are cooling, combine the Powdered Sugar, Milk and Cinnamon in a small bowl, mixing until smooth; add additional Milk, a little at a time, if needed to reach desired consistency (the glaze should be thick, but able to be drizzled)
  2. Enjoy!!!
Breakfast, Desserts, Snacks


Apple Cider Cupcakes with Cream Cheese Frosting ~ Gluten-Free

Apple Cider Cupcakes with Cream Cheese Frosting ~ Gluten-Free

Oh my gosh! These Cupcakes are out of this world!!! I seriously could eat the entire batch 🙂 The Apple Cider adds a wonderful flavor and a bit of caramelized texture – they are delicious even without the frosting! You better double the batch like I did 😉
This recipe earned an instant 5-Star rating in our home!
Note: I adapted this wonderful recipe from forkinthekitchen.com to make it GF – Thank You for sharing!!!

Equipment

  • Muffin Tin
  • Cupcake Liners
  • Stand or handheld Mixer
  • Large Mixing Bowl

The Cupcake Ingredients:

  • 2 1/2 Cups Better Batter All Purpose Gluten Free Flour Mix
  • 1 tsp Baking Soda
  • 1 tsp Baking Powder, GF
  • 1 tsp Table Salt
  • 2 tsp Ground Cinnamon
  • 1 Cup Granulated Sugar (I use Dixie Crystal brand)
  • 1/2 Cup Light Brown Sugar, packed
  • 1 Cup Salted Butter, Softened (I use Land O’ Lakes brand)
  • 2 tsp Vanilla Extract
  • 4 Large Eggs (room temperature)
  • 1 Cup + 4 Tbsp Apple Cider

The Cream Cheese Frosting Ingredients:

  • 8 Oz. Cream Cheese, softened (I used Full Fat Philadelphia brand)
  • 1/4 Cup Salted Butter, Softened
  • 1/2 tsp Vanilla Extract
  • 2 Tbsp Apple Cider
  • 3 1/2 – 4 Cups Powdered Sugar
  • Ground Cinnamon ((optional – to either mix in with the frosting or to sprinkle on the top))

Making the Cupcakes:

  1. Place oven rack in the middle position and preheat oven to 350 degrees.
  2. Line 1-2 muffin tins with cupcake liners; set aside.
  3. In a large mixing bowl, whisk together the GF Flour, Baking Soda, Baking Powder, Salt and Cinnamon until completely blended; Set aside.
  4. Using a Stand or Handheld Mixer, fitted with the paddle attachment, cream the Butter and Sugars until light and fluffy.
  5. Next, with the mixer set on low, add the Vanilla Extract and the Eggs, one at a time; Continue mixing until thoroughly blended.
  6. With the mixer still set on Low, alternate adding the GF Flour mixture (1/2 cup at a time) and the Apple Cider (a couple of Tablespoons at a time) to the Butter-Sugar mixture, blending until just combined after each addition.
  7. Scoop the Cupcake Batter into the lined muffin tin/tins, filling each about 2/3 full.
  8. Bake for approximately 17-20 minutes, or until toothpick inserted into the center comes out clean.
  9. Let cool in the pan for about 5-10 minutes and then transfer to a wire cooling rack to cool completely before frosting.

Making the Frosting:

  1. Using a Stand or Handheld Mixer, fitted with the paddle attachment, cream the softened Cream Cheese and Butter until light and fluffy.
  2. Slowly add the Vanilla Extract and Apple Cider, blending thoroughly.
  3. Next, with the mixer set on low, add the Powdered Sugar, 1/2 cup at a time, beating well between each addition. I usually add between 3 1/2 to 4 cups of Powdered Sugar for the right consistency. Note: If you’re adding Ground Cinnamon into the Frosting, do so now (I usually add several pinches).
  4. Spread or pipe the Frosting onto each cooled cupcake and top with a little Ground Cinnamon, if desired.
  5. Enjoy!
Desserts, Snacks


Gluten Free Blueberry-Orange Muffins

Gluten Free Blueberry-Orange Muffins

The combination of Orange Zest and fresh Blueberries in these Gluten Free muffins is absolutely wonderful! And, I love the fact that they aren’t too sweet, making them perfect for Breakfast, mid-morning and afternoon snacks. Enjoy!
Note: I tweaked this recipe from America’s Test Kitchen’s “The How Can It Be Gluten Free Cookbook”

  • 8 Tablespoons Butter, Unsalted (1 Stick; Melted & cooled)
  • 2 Cups Blueberries (Fresh )
  • 3/4 Cup Granulated Sugar (Can use 1 Cup, if you want these to be a little bit sweeter)
  • 2-3 teaspoons Orange Zest (Zest of 1 large orange)
  • 1 3/4 + 2/3 Cups Gluten Free All-Purpose Flour (I made the ATK’s Gluten Free Flour Blend (recipe included below), but I also make these with Pamela’s Gluten Free All-Purpose Flour Blend, if I don’t have my own mix readily available)
  • 1 Tablespoon Gluten Free Baking Powder
  • 1/2 teaspoon Salt
  • 1/4 teaspoon Xanthan Gum
  • 1/2 Cup Plain Yogurt (I used 0% Fat Yogurt)
  • 3 Large Eggs
  • 2 Tablespoons Turbinado Sugar (i.e. Raw Sugar)
  1. Gather the ingredients.
  2. Melt the butter and let cool a bit while you begin preparing the muffin batter.
  3. In a food processor, pulse the Blueberries a few times (3-4) to coarsely chop them. Scrape them into a separate bowl and set aside.
    Note: I would normally leave them whole, but certain members of my family prefer them when chopped :).
  4. In the same food processor, combine the granulated sugar and orange zest. Pulse for about 10 seconds until the consistency is sand-like.
  5. In a large bowl, combine the GF Flour mix, baking powder, salt and xanthan gum. Mix well with a whisk. Then add to the sugar mixture in the food processor, pulsing until well blended.
  6. In the same large bowl that you used to whisk together the flour mixture, combine the eggs, yogurt and melted butter. Whisk until well blended, then add to the food processor and blend until there are no lumps.
  7. Transfer the batter to the large bowl and gently fold in the chopped (or whole) blueberries. Cover the bowl with plastic wrap and let rest for 30 minutes.
    (Note: this resting period is important in order to let the grains soften or mature, so that the resulting muffins will not be grainy or sandy in texture)
  8. Meanwhile, preheat oven to 400 degrees.
    Line a muffin tin with muffin cups and spray with a non-stick cooking spray.
  9. After the batter has rested for 30 minutes, scoop into the lined muffin tray using a medium or large scoop. This batter does not rise much, so don’t worry about filling the cups to the top.
  10. Sprinkle the tops with the Turbinado sugar.
  11. Bake for about 18-20 minutes, or until lightly golden and toothpick comes out clean. Cool muffins in the pan for about 10 minutes, before transferring them to a wire rack to cool for an additional 10 minutes.
  12. Enjoy these muffins that are chock full of blueberries while warm :).
  13. Any leftovers can be completely cooled and stored in an airtight container for about 2 days or frozen for 2-3 weeks. Before serving, let thaw and microwave for about 20 seconds.

The ATK Gluten Free Flour Blend

Ingredients:

  • 4 1/2 Cups + 1/3 Cup White Rice Flour
  • 1 2/3 Cups Brown Rice Flour
  • 1 1/3 Cups Potato Starch (NOT Potato Flour)
  • 3/4 Tapioca Starch
  • 3 Tablespoons Nonfat Milk Powder (if milk allergies are an issue, substitute with Gluten Free, Lactose Free, Non-Dairy Coffee Creamer Powder, like Nestle Original Coffee-Mate).

In a large bowl, combine all of the ingredients with a whisk and transfer to an airtight container. Refrigerate for up to 3 months. Before using, bring to room temperature.