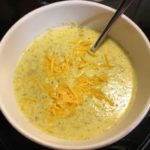
Easy Creamy Broccoli & Cheddar Soup ~ Gluten Free

This quick & easy recipe reminds me of my favorite Broccoli-Cheddar Soup from Panera Bread, but without the Gluten 🙂 It’s so fresh and flavorful that I can’t stop at just one bowl! I owe a HUGE “Thank You” to Holly Nilsson @ spendwithpennies.com for sharing the original version of this yummy soup!! I made a few adjustments in order to make it Gluten-Free and allergy-friendly for my family.

Easy Creamy Broccoli & Cheddar Soup ~ Gluten Free
  • 1 Tbsp Butter (unsalted)
  • 1 Small Onion (Chopped)
  • 1/2 Cup Carrots (Diced)
  • 1/2 teaspoon Garlic (minced)
  • 1 Large Head Broccoli (Chopped (about 3 Cups))
  • 2 Cups Chicken Broth (Low Sodium or Regular)
  • 1/2 teaspoon Dried Thyme
  • Salt & Pepper (to taste)
  • 2 Tbsp All-Purpose Gluten Free Flour (I use Bob’s Red Mill 1-to-1 GF Flour)
  • 3/4 Cup Whole Milk
  • 3/4 Cup Skim Milk
  • 1 Cup Sharp Cheddar Cheese (Shredded)
  1. In a large saucepan, melt the Butter over medium-low heat. Once Butter is melted, add the Onions, Carrots and Garlic; cook until the Onions are translucent and soft (about 3-5 minutes).
  2. Add the Broccoli, Chicken Broth and Seasonings to the Onion mixture and cook over low heat until the Broccoli has softened ~ about 15 minutes.
  3. Next, using either an Immersion Blender, Regular Blender or Food Processor, thoroughly blend the cooked Vegetable/Broth mixture; set aside in the large saucepan over Low heat.
  4. Meanwhile, in a small/medium bowl, combine the GF Flour blend and Milks using a whisk to thoroughly blend; Add this mixture to the Vegetable/Broth mixture in the large saucepan.
  5. Increase the temperature to Medium/Medium-Low and bring to a boil, while whisking continuously; once the mixture has thickened (about 5 minutes), remove from heat and add the Shredded Cheddar.
  6. Serve with your favorite GF Bread and Enjoy!
Appetizers, Dinner, Hors d’Oeuvres, Lunch, Main Dish, Snacks, Soup
American


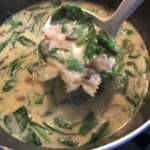
Creamy Spinach-Mushroom & Pasta Soup ~ Gluten Free!

Creamy Spinach-Mushroom & Pasta Soup ~ Gluten Free!

This is one of the BEST soups I have ever tasted! It’s also SO easy to make, sending this recipe right to the top of my Favorites list 😉 Full of freshness and comfort!
Thank You, as always, to The Pioneer Woman for sharing the original version of this delicious soup ~ I have tinkered with the ingredients a bit in order to make it GF and allergy-friendly for my family 🙂

  • 1/4 Cup Olive Oil (I use the milder version, so it doesn’t compete with the other flavors)
  • 1 1/2 Cups Mushrooms (Chopped)
  • 1 tsp Dried Thyme ((or 1 Tbsp Fresh))
  • 1 tsp Kosher Salt
  • 2 tsp Italian Seasoning ((*I make my own blend by combining 1 1/2 tsp dried Oregano, 1 tsp dried marjoram and 1/2 tsp dried Basil ~ this makes 3 tsp, so you will have 1 extra tsp to use later))
  • 1 1/2 tsp Minced Garlic (I use the already-minced Garlic in a jar)
  • 1/4 Cup Gluten-Free All Purpose Flour
  • 6 Cups Vegetable Broth (I use the Low Sodium Version)
  • 1 Cup Heavy Cream (For a little bit lighter version, I substitute 1/2 Cup of the Heavy Cream with 1/2 Cup Whole Milk)
  • 2 Cups Gluten-Free Pasta, dry (We like the Bow-Tie Pasta or the Little Shells for this recipe)
  • 4 Heaping Cups Baby Spinach
  • Ricotta Cheese, for serving ((optional))
  1. Heat the Olive Oil in a large pot (Dutch Oven) over medium heat.
  2. Add the Mushrooms, Thyme and Salt; cook until the mushrooms are browned and soft (about 5-7 minutes).
  3. Add the 2 tsp of Italian Seasoning and the Garlic; continue cooking for about 1-2 minutes.
  4. Next, sprinkle the GF Flour over the Mushroom mixture and stir until evenly coated.
  5. Stir in the Vegetable Broth and bring to a low boil; reduce temperature to Low and cook until the mixture thickens (about 8-10 minutes).
  6. Slowly pour in the Heavy Cream, mixing thoroughly.
  7. Add your choice of GF Pasta to the pot and continue cooking until the pasta is al dente (about 5-8 minutes, depending on the type of pasta).
  8. Lastly, add the Spinach and cook until it wilts ~ about 1 minute.
  9. Serve with a dollop of Ricotta Cheese, if desired.
    Enjoy 🙂
Appetizers, Dinner, Lunch, Main Dish, Side Dish, Soup, Stew


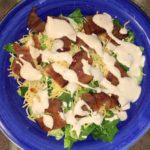
Chopped Salad with Barbecue Ranch Dressing

Chopped Salad with Barbecue Ranch Dressing

Oh my gosh! I could eat this salad every day! The combination of the fresh, crunchy lettuce, the salty bacon pieces and the slightly sweet BBQ Ranch Dressing is something that words just cannot accurately describe!! I am forever indebted to Ree Drummond (aka: “The Pioneer Woman”) for sharing the original recipe of this awesome salad (“Cowboy Chopped Salad”), which I have made a few minor adjustments to to make it allergy-friendly and GF for my family 🙂 Enjoy!!!

The Bacon:

  • 12-15 Slices Thick or Regular Bacon (Cooked and chopped into bite-size pieces)

The Barbecue Ranch Dressing:

  • 1 Cup Mayonnaise (I use Hellmann’s)
  • 1/2 Cup Lite or Regular Sour Cream (I use Daisy Lite Sour Cream)
  • 1/4 Cup Barbecue Sauce (I use Sweet Baby Ray’s )
  • 3 Tbsp Dried Parsley
  • 1/2 tsp Garlic, chopped
  • 1 pinch Kosher Salt (to taste)
  • 1 pinch Ground Black Pepper (to taste)
  • 1/2 – 3/4 Cup Buttermilk (I make my own by pouring 1 Tbsp White Vinegar into a 1 Cup measuring cup and adding enough Whole Milk to fill the rest; gently stir and let rest for 5 minutes.)

The Salad:

  • 1 Large Head of Lettuce (I use Romaine Lettuce, but Iceburg, Green or Red Leaf Lettuce, etc. is great, too)
  • 1 Cup Grape Tomatoes (halved)
  • 1-2 Chopped Green Onions/Scallions (I use both the green and white parts)
  • 3 Cups Shredded Cheddar Cheese
  • Pico de Gallo (Topping; I use store-bought once my garden has gone dormant)
  1. While the bacon is cooking, begin making the BBQ Ranch Dressing.

The BBQ Ranch Dressing:

  1. In a medium-size bowl, whisk together all of the dressing ingredients, except for the Buttermilk.
  2. Once all of the ingredients are thoroughly combined, add the Buttermilk 1/4 cup at a time until desired consistency is reached. Reserve any leftover Buttermilk in the refrigerator to add to the dressing later, as it will thicken over time.
  3. Cover and refrigerate the dressing until ready to use.

The Salad:

  1. In a very large bowl, place all of the salad ingredients, except for the Pico de Gallo, and gently toss to mix (reserve some of the Cheese and Onions for toppings).

Putting it All Together:

  1. To serve the salad, you can set up a station with the large salad bowl as center stage with the Bacon served in a side bowl (for non-bacon-eaters), as well as the Pico de Gallo and any other toppings that you want to serve separately. You can also serve the BBQ Ranch Dressing separately or sparingly toss on the salad, so individuals can add more if desired 😉
Dinner, Lunch, Main Dish, Salads, Side Dish, Snacks


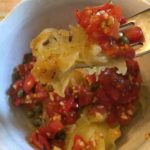
Spaghetti Squash with Tomatoes & Capers

Spaghetti Squash with Tomatoes & Capers

This dish is so Fresh and easy to make with vegetables right out of your garden or kitchen! If I do not have any Spaghetti Squash ready in my garden, I substitute Summer Squash, Zucchini, Acorn Squash, Baking Potato or a mild Fish, such as Flounder. I love this recipe, because it’s so versatile and delicious no matter what you pair with the sauteed Capers and Tomatoes! I hope you enjoy this dish as much as we do 🙂

  • 1 Large Spaghetti Squash
  • 2 tsp Garlic, minced
  • 2 Tbsp olive oil
  • 2 Tbsp Capers
  • 1 1/2 Cups Tomatoes, chopped (with juices)
  • 2 tsp Dried Oregano (or 2 Tbsp Fresh Oregano, chopped)
  • Table Salt (to taste)
  • Ground Black Pepper (to taste)

Baking the Spaghetti Squash:

  1. Preheat Oven to 400 degrees. Place rack in center position.
  2. Cut the Spaghetti Squash in half, lengthwise, scrape out the seeds and loose stringy innards and place facedown in a deep baking dish.
  3. Add enough water to cover the bottom of the dish by about 1/2 inch.
  4. Bake for about 35-40 minutes, or until the squash is soft (depends on the size of the squash).
  5. Remove the squash from the oven and set aside to cool enough to handle.
  6. Reduce oven temperature to 250 degrees.
  7. When the squash is cool enough to handle, hold it over a large, ovenproof bowl/dish and scrape out the flesh from the top to the bottom using the tines of a fork. Cover the dish with foil and place it in the oven to keep hot while you prepare the topping.

Making the Caper & Tomato Topping:

  1. In a large, nonstick skillet, heat the Olive Oil and Garlic over Medium Heat for about 2 minutes.
  2. Next, add the Capers, Tomatoes and Oregano and continue cooking for another 2 minutes.
  3. Remove from heat and add a few pinches of Salt and Pepper to taste.
  4. Spoon desired amount over the prepared Spaghetti Squash and watch it disappear!
Appetizers, Dinner, Hors d’Oeuvres, Main Dish, Salads, Side Dish


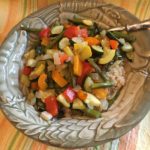
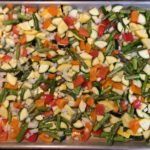
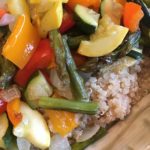
Oven-Roasted Vegetables

Oven-Roasted Vegetables

This recipe is my Go-To for an easy and healthy dish that my entire family loves! I often serve it over Rice, Quinoa or a Baked Potato (Sweet or White) for a warm and hearty meal. This medley of vegetables is very versatile and pairs well with Seafood, Chicken, Turkey, Pork, Beef…just about anything 😉 I hope you enjoy it as much as we do!
Note: This recipe was adapted from the South Beach Diet and has been thoroughly enjoyed by my family for almost 20 years 🙂

  • 1 Bunch Asparagus (cut into bite-size pieces)
  • 1-2 Medium Yellow Squash (cut into bite-size pieces)
  • 1-2 Medium Zucchini (cut into bite-size pieces)
  • 1-2 Medium Bell Pepper (I usually use a Red and Orange for the milder taste and the beautiful color; cut into bite-size pieces)
  • 1 Large Vidalia Onion (chopped into bite-size pieces)
  • 1-2 tsp Garlic, chopped ((optional))
  • 3-4 Tbsp olive oil
  • Several Pinches Kosher Salt
  • Several Pinches Ground Black Pepper
  1. Preheat oven to 450 degrees.
  2. In a very large bowl, combine all of the cut Vegetables and Olive Oil; Toss until thoroughly mixed and coated with the Oil.
    Note: add the garlic now if adding
  3. Evenly spread the Vegetable mixture onto a large baking sheet and sprinkle with the Kosher Salt and Pepper to taste.
  4. Bake for 30-45 minutes on the center rack until tender, stirring several times during the roasting process to cook evenly.
  5. Serve over Rice, Quinoa, Couscous, Pasta, Baked Potato…or as a Side Dish for your favorite protein. We often pair with Salmon and it’s delicious!!!
Dinner, Lunch, Main Dish, Salads, Side Dish


Paprika Cauliflower Bites ~ Gluten-Free

Paprika Cauliflower Bites ~ Gluten-Free

Did you know that there are three (3) different types of Paprika? There is “Sweet Paprika,” usually labeled as “Paprika” and offers a somewhat sweet pepper flavor without much heat. The second type is “Hot Paprika,” because it is exactly that…HOT! The last type is “Smoked Paprika” and comes from peppers that have been smoked and dried over a fire. “Smoked Paprika” comes in a variety of spiciness (mild, medium, medium-hot and hot), depending on the variety of peppers used.
Paprika is definitely one of my favorite spices, so I am always trying out new ways to use it in my recipes. I hope you enjoy these Paprika Cauliflower Bites 🙂

The Marinade:

  • 1/4 Cup Light Olive Oil (or Canola Oil)
  • 1/4 Cup lemon juice (Juice of 1 Large Lemon)
  • 1/4 Cup Parmesan Cheese, grated or shredded (I use grated when it’s available)
  • 1 tsp Dried Oregano
  • 1 tsp Salt (table)
  • 1 tsp Ground Black Pepper

The Cauliflower:

  • 1 Head Cauliflower (broken/cut into bite-size pieces)

The Coating:

  • 1 Cup All-Purpose Gluten Free Flour (I use King Arthur or Better Batter)
  • 4 tsp Paprika (I use “Sweet Paprika” (label usually states just “Paprika”)
  • 1/2 tsp Ground Black Pepper
  • 1 Tbsp Parmesan Cheese, shredded or grated (I use Shredded for this part for a cheesier finish)
  • 1/2 Cup Butter, salted
  1. In a medium-size bowl, combine all of the Marinade ingredients mixing well; set aside.
  2. Place the bite-size Cauliflower pieces into a large resealable plastic bag.
  3. Pour the Marinade into the bag with the Cauliflower and close bag securely. Smoosh the Cauliflower around in the marinade to evenly coat. Refrigerate for at least 2 hours.
  4. Meanwhile, combine the GF Flour, Paprika, Pepper and Parmesan Cheese in a large bowl, mixing well.
  5. Once the Cauliflower has finished marinating, melt the butter in a large non-stick skillet over medium heat.
  6. Using a slotted spoon, transfer the Cauliflower pieces from the marinade to the GF Flour mixture in the large bowl. Gently toss to evenly coat all of the Cauliflower pieces with the GF Flour mixture.
  7. Once the Cauliflower pieces are ready to cook, transfer the pieces to the large skillet containing the melted butter. Do not move the Cauliflower around for about 1-2 minutes, allowing the pieces to turn golden brown and lightly crispy. Gently flip the Cauliflower pieces over to cook all sides…you may have to reduce the temperature to prevent burning. Test a piece after about 5 minutes to see if it’s done (softened) – I usually cook mine for about 8-10 minutes.
  8. Serve with a fresh salad and your choice of protein….yummy! 🙂
Appetizers, Dinner, Hors d’Oeuvres, Side Dish


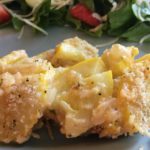
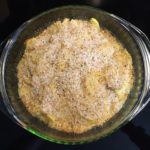
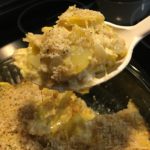
Cheesy Yellow Squash Casserole (Gluten Free)

Cheesy Yellow Squash Casserole (Gluten Free)

This Yellow Summer Squash Casserole is SO easy and cheesy that it will quickly become one of your family’s favorites! It pairs nicely with a fresh green salad and your favorite protein…a perfect accompaniment for my Maple Glazed Salmon! Enjoy 🙂

  • 2-3 Large Yellow Summer Squash, thinly sliced ((or 5-6 Medium Squash))
  • 1 Tbsp Canola Oil
  • 1 Tbsp Salted Butter (I use Land O Lakes)
  • 1 Large Vidalia Onion, thinly sliced
  • 1/2 Cup Parmesan cheese, shredded
  • 1 Cup Shredded Cheddar Cheese (I used Medium Cheddar, but Mild or Sharp works, too!)
  • 1/2 Cup Lite Sour Cream
  • 1/2 tsp Salt
  • 1/4 tsp Ground Black Pepper
  • 1/2 – 3/4 Cup Gluten Free Italian Bread Crumbs
  1. Preheat oven to 375 degrees.
  2. Grease a 2-quart casserole dish; set aside.
  3. In a large skillet, heat the Oil and Butter over medium heat until the butter is melted.
  4. Saute the thinly sliced Squash and Onion until both are soft. Sprinkle with the Salt and Pepper.
  5. Transfer the Squash and Onion to the prepared casserole dish and add the Parmesan, Cheddar and Sour Cream. Mix gently until well combined.
  6. Sprinkle the Bread Crumbs evenly over the top.
  7. Bake for about 30 minutes or until bubbly and the top is a light golden brown.
  8. Serve with a fresh green salad and your favorite protein….pairs lovely with the Maple Glazed Salmon!
Side Dish


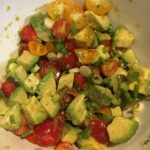
Fresh Avocado Salsa

Fresh Avocado Salsa

This Avocado Salsa is amazing! It’s so fresh, healthy, easy to make and it pairs well with just about any meal…fish, turkey, chicken, pork, beef, potatoes, etc. It is SO yummy on top of Salmon, Turkey Burgers and Baked Potatoes! The possibilities are endless!!! Enjoy 🙂

  • 1 Large Avocado (Peeled, Pitted and cut into bite-size pieces)
  • 1 Green Onion (Chopped; use both green and white parts)
  • 1/2 Cup Tomatoes (Cut into bite-size pieces; I use Red, Orange and Yellow Cherry tomatoes, cut in half or into quarters)
  • 1 Large Lemon (Use Zest and Juice)
  1. In a medium bowl, gently combine all of the ingredients until well mixed. Refrigerate until ready to serve.
  2. Serve on top of your favorite meat or veggie. It is wonderful with Salmon, Turkey Burgers and Baked Potatoes!

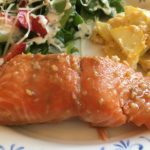
Note: This recipe was inspired by a Keto-Friendly recipe that one of my daughters found…Thank you to Amy Ramos for sharing the original recipe for this yummy Salmon and Avocado dish!!! We are forever indebted to you 🙂

Appetizers, Dinner, Hors d’Oeuvres, Lunch, Main Dish, Salads, Side Dish


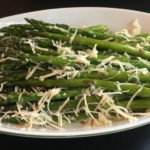
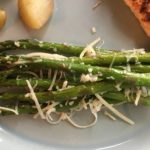
Garlic-Parmesan Asparagus

Garlic-Parmesan Asparagus

We are BIG fans of Asparagus, so I am always trying new ways to prepare this wonderful vegetable! This recipe is SO quick, easy and delicious that you will be wishing you had made more 😉 Enjoy!

  • 1 Bunch Asparagus (If you love Asparagus as much as we do, you may want to make 2 bunches)
  • 1-2 Tbsp Olive Oil
  • Kosher Salt (as much or as little as you desire)
  • Ground Pepper (as much or as little as you desire)
  • 2 tsp Garlic, chopped (I use the already prepared chopped Garlic in the jar)
  • 2-4 Tbsp Grated or shredded Parmesan (I use both – Grated for mixing with the Garlic and Shredded for topping before serving)
  1. Preheat oven to 400 degrees.
  2. Gather the ingredients.
  3. Line a baking sheet with foil and spray with non-stick cooking spray. Set aside.
  4. Rinse Asparagus in cold water and pat dry with paper towels.
  5. Spread the Asparagus onto the prepared baking sheet in a single layer. Drizzle or brush (I brush to coat more evenly) the Olive Oil over the Asparagus. Sprinkle with Kosher Salt and Pepper, coating evenly.
  6. Bake the Asparagus for about 8-10 minutes on the middle rack.
  7. While the Asparagus is baking, mix the Garlic and Grated Parmesan together in a small bowl.
  8. Sprinkle the Garlic-Parmesan mixture evenly over the Asparagus. Bake for another 5-7 minutes, or until Parmesan Cheese is melted.
  9. Sprinkle more Shredded or Grated Parmesan over the Asparagus and serve with your favorite dish! Yummy 🙂
Appetizers, Dinner, Hors d’Oeuvres, Lunch, Main Dish, Side Dish


Spicy Roasted Cauliflower (Gluten Free)

Spicy Roasted Cauliflower (Gluten Free)

I’m not a big fan of cauliflower, not because it tastes bad, but because it really doesn’t have much flavor at all. But, THIS recipe sold me on eating more cauliflower…it’s SO Spicy, Flavorful and Easy to make that I just can’t get enough!!! It’s even great cold the next day! Bon appetit! 🙂

  • 1 Head Cauliflower
  • 3/4 Cup Gluten Free All-Purpose Flour, sifted (I prefer King Arthur brand)
  • 1 tsp Paprika
  • 2 tsp Garlic Powder
  • 1/2 tsp Salt
  • 1/4 tsp Ground Pepper
  • 3/4 Cup Skim Milk (You can substitute with Rice Milk, Oat Milk, Coconut Milk or Soy Milk)

Spicy Sauce:

  • 1/4 Cup Hot Sauce or Buffalo Sauce (For a less-spicy version, use a mild Buffalo Sauce)
  • 2 Tbsps Canola Oil (You can substitute with Olive Oil, Coconut Oil, etc.)
  • 1 Tbsp Honey
  1. Preheat oven to 450 degrees.
  2. Line a baking sheet with parchment paper (or foil sprayed with non-stick cooking spray) and set aside.
  3. Cut up the Cauliflower into bite-size pieces and set aside.
  4. In a large bowl, whisk the GF Flour, Spices and Milk together until thoroughly blended. Add the Cauliflower pieces and stir to completely coat.
  5. Dump the coated Cauliflower pieces onto the prepared baking sheet and spread them out into a single layer.
  6. Bake for 20 minutes, stirring the pieces at the halfway point.
  7. While the Cauliflower is baking, thoroughly combine the Hot Sauce, Oil and Honey.
  8. After the first 20 minutes, brush or spoon the Hot Sauce mixture evenly over the Cauliflower pieces. Continue baking for another 20 minutes.
  9. Serve while hot or warm. The Sauce mixture becomes like a crusty cheese coating…it is SO yummy!

Thank you to Pierce Abernathy @ Tasty for sharing the original recipe…I just made a few minor changes to make it GF, lower in sodium and fat 😉

Appetizers, Dinner, Hors d’Oeuvres, Lunch, Main Dish, Side Dish, Snacks