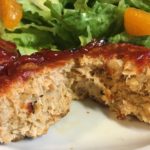
Mini Chicken “Meatloaf” Cups (Gluten-Free)

This recipe has quickly become a family favorite in our home! It can be made with any ground meat of your choice, or a combination of ground meats. I love the simplicity and versatility of this recipe and the fact that it only requires a few ingredients. You can also sneak in some finely chopped vegetables of your choice for those picky eaters. Also makes a wonderful afternoon snack! I hope you and your family enjoy it as much as we do 🙂

A huge “Thank You” to “The Pioneer Woman” (aka: “Ree Drummond”) for sharing the original version of this recipe. I have made some changes in order to make this dish GF and allergy-friendly for our family.

Mini Chicken “Meatloaf” Cups (Gluten-Free)
  • 1 1/2 Cups Gluten-Free Whole Oats (I use Bob’s Red Mill GF Whole Oats)
  • 1 Cup Whole Milk (or Unflavored Oat Milk for a dairy-free version)
  • 2 1/2 lbs Ground Chicken (or ground Turkey, Pork, Beef or combination of ground meats of your choice)
  • 2 tsp Dried Minced Parsley (or 3 Tablespoons Freshly Minced Parsley)
  • 1/2 tsp Seasoned Salt (such as “Season All” or “Lawry’s”)
  • 1/2 tsp Ground Black Pepper ( )
  • 1/2 tsp Red Pepper Flakes (optional, if you would like a bit of heat)
  • 1/4 + 3/4 Cup Ketchup (more, if needed)
  • Shredded Parmesan Cheese (optional)
  1. Preheat oven to 350 degrees.
  2. Generously spray 18-20 standard muffin cups (2 – 12-cup muffin pans) with cooking spray; set aside.
  3. In a small bowl, mix the Whole Oats and Milk together; set aside for about 5 minutes.
  4. In a large bowl, thoroughly mix the ground Meat, the Oat mixture, Parsley, Seasoned Salt, Pepper and 1/4 Cup Ketchup.
  5. Scoop a 1/4-cup portion of the Meat mixture into the prepared muffin cups and evenly flatten/smooth the tops.
  6. Next, squirt about 1/2 teaspoon of Ketchup onto the tops of each “meatloaf” and smooth the Ketchup evenly to thoroughly coat the tops.
  7. Bake for 25 minutes, then carefully remove the muffin pans from the oven and squirt another 1/2 teaspoon onto the tops of the “meatloaves,” spreading evenly with the back of the spoon to thoroughly coat each “meatloaf.”
  8. Bake for an additional 30 minutes or until edges start to crisp and/or sizzle.
  9. Remove from the oven and add any additional Ketchup to the tops; you may also lightly sprinkle the tops with shredded Parmesan Cheese, if desired; let sit in the pan for about 5 minutes before serving.
  10. Excellent served with a fresh Salad and fruit! Yummy 🙂
Appetizers, Dinner, Hors d’Oeuvres, Lunch, Main Dish, Snacks
American


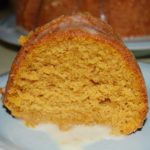
Pumpkin Spice Bundt Cake (Gluten Free)


Pumpkin Spice Bundt Cake (Gluten Free)

Wow! This cake takes it all!!! It is so moist and full of flavor…and, it's Gluten-Free 🙂 If you haven't tried "Gluten Free Heaven" Flour Mixes, then you don't know what you're missing! They have mastered the secret to GF baking – you will never know it's GF. A big shout out to Dixie Crystals for the original version of this recipe…I made a few changes in order to make it GF and allergy-friendly for my family. Thank you to Dixie Crystals and GF Heaven 🙂

Cake:

  • 1 3/4 Cups *Gluten Free Heaven" Cake & Pastry Flour (*I have not made this cake with any other GF flours; please note that all GF Flours are not created the same and results will vary if you use a different GF Flour)
  • 3/4 + 1/8 teaspoon *Xanthan Gum (*This must be added for “GF Heaven Flours” since they do not contain it; leave out if your GF Flour already contains it)
  • 1 teaspoon GF Baking Powder
  • 1/2 teaspoon GF Baking Soda
  • 2 teaspoons Ground Cinnamon
  • 1/2 teaspoon Ground Ginger
  • 1/8 teaspoon Ground Cloves
  • 1 teaspoon Salt
  • 1 Cup + 2 Tbsp Unsalted Butter (Very soft, but not melted)
  • 1 Cup Extra Fine Granulated Sugar (I always use Dixie Crystals)
  • 3 Large Eggs (room temperature)
  • 2/3 Cup Canned Pumpkin (I used Libby’s)
  • 1/3 Cup Orange Juice (I used “no pulp” kind)

Glaze:

  • 2/3 Cups Confectioner’s Sugar ((Powdered); plus more if you want a thicker consistency)
  • 2 Tbsp Orange Juice
  1. Set oven rack in the middle position; Preheat oven to 350 degrees.
  2. Butter and flour Bundt pan (you can also use a 9 x 5 – inch loaf pan); set aside.
  3. In a medium-sized bowl, whisk together the GF Flour, Xanthan Gum, Baking Soda & Powder and Spices; set aside.
  4. Using a Stand or Handheld Mixer, fitted with the paddle attachment, beat the Butter until light & fluffy; add the Granulated Sugar and blend until thoroughly mixed and fluffy.
  5. Add the Eggs, one at a time, blending well after adding each Egg; scrape sides of bowl often; whip until the mixture is very light & fluffy.
  6. Next, add the Canned Pumpkin and mix until blended.
  7. Add the Dry Ingredient mixture and Orange Juice in 3-4 segments, mixing and scraping bowl and paddle well between each addition.
  8. Scrape the batter into the prepared Bundt Pan; place in the preheated oven on the middle rack and bake for 45 minutes (check the cake around the 30-35 minute mark to make sure it isn't browning too much – if it is, cover loosely with a piece of aluminum foil); test doneness after 45 minutes with a toothpick and pressing lightly on the top to see if it springs back; bake an additional 15-30 minutes, depending on your oven (my cake was ready after 45 minutes).

  9. Once cake is done, remove from oven and let cool in the pan for approximately 10-15 minutes before turning out onto a cooling rack.
  10. While the cake is cooling, thoroughly whisk the Powdered Sugar and Orange Juice together in a small bowl until desired consistency is reached; spoon the Glaze over slightly warm or completely cooled cake.
  11. Serve with or without Vanilla Ice Cream and Enjoy! 🙂

*Use the “Spoon & Sweep” method for measuring the GF Flour: use a spoon to fill the measuring cup with the desired amount of flour, then scrape across the top with the back side of a knife to level off.

Desserts, Snacks
Gluten Free
bundt cake, Cake, dixie crystals, gluten-free, Holidays, Pumpkin, pumpkin spice, sweet treats, sweets, Treats


Quick & Easy Copycat Chick-fil-A Sauce

Quick & Easy Copycat Chick-fil-A Sauce

Just in time for the Fourth of July! This quick and easy Copycat Chick-fil-A Sauce will not disappoint! Use this dip/sauce for everything from fries and chips to veggies to spreads for sandwiches, wraps, burgers….the sky is the limit 😉

  • 1 Cup Mayonnaise (I use Hellmann’s)
  • 4 tsp Yellow Mustard
  • 4 Tbsp Barbecue Sauce (I use Sweet Baby Ray’s, but you can use whatever bbq sauce you have on hand)
  • 4 Tbsp Honey
  1. In a small bowl, combine all ingredients using a whisk or rubber spatula until completely combined.
Appetizers, Dinner, Hors d’Oeuvres, Lunch, Snacks
American


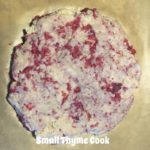
Raspberry-Lemon Scones ~ Gluten-Free

Raspberry-Lemon Scones ~ Gluten-Free

These delicious Scones are so easy to make and only require about 10 ingredients (including the usual staples – baking soda, baking powder, etc.) that we usually have in our kitchens. Plus, you can substitute whatever berries you have on hand 😉 A huge “Thank You” to Chris Scheuer of “thecafesucrefarine” for sharing the original version of this recipe – I made a few small changes to make it Gluten-Free and allergy-friendly for my family. 🙂

The Scones:

  • 1 Cup Heavy Cream
  • 8 Tbsp Unsalted Butter (melted)
  • 2 Cups All-Purpose Gluten Free Flour (I used Bob’s Red Mill GF “1 to 1 Baking Flour”)
  • 6 Tbsp Granulated Sugar
  • 1 Tbsp Baking Powder
  • 1/2 tsp Baking Soda
  • 1/4 tsp Salt
  • 1 Large Lemon (Zest (reserving the Juice for the glaze))
  • 1/2 Cup Fresh Raspberries, broken in half (or any other fresh berries that you have on-hand)

The Lemon Glaze:

  • 2 Cups Powdered Sugar
  • 3 Tbsp Half & Half (or whole milk)
  • Lemon Juice from 1 large lemon (from the Lemon used in the scone mix above)

Making the Scone Dough:

  1. Line a baking sheet with parchment paper or a silicone baking pad; set aside.
  2. Pour the 1 Cup of Heavy Cream in a freezer-proof container and freeze for 10-15 minutes.
  3. Next, melt the butter in a microwave-proof container (I do this in 30 second increments until butter is fully melted); set aside to cool a little while you prepare the rest of the dough.
  4. In a Large mixing bowl, whisk the GF Flour, Baking Powder and Soda, Sugar, Lemon Zest and Salt until thoroughly mixed.
  5. Once the Heavy Cream has been in the freezer for 10-15 minutes, combine it with the melted Butter and stir with a fork until clumps appear (looks kind of like curdled milk).
  6. Pour this Cream/Butter mix into the Flour mixture and stir with a rubber spatula until ingredients are well-combined.
  7. Gently fold the halved-raspberries into the Scone dough until the berries are evenly distributed.
  8. Dump the dough onto the prepared baking sheet and form/pat it into a circle (about 12″-14″ in diameter); place in refrigerator for 15-45 minutes.
  9. Meanwhile, place oven rack in the middle position of your oven and Preheat oven to 400 degrees.
  10. Once the dough has been refrigerated for at least 15 minutes, remove from the freezer and cut into 6 or 8 “pie pieces” (triangles) – this works best with a really sharp knife that has been sprayed with a non-stick cooking oil; separate and place the triangles evenly on the sheet, leaving at least 2″ between each one.
  11. Bake for approximately 18-20 minutes (remember, all ovens heat and cook at different rates, so keep an eye on your scones) or until they are golden brown around the edges.
  12. Remove from oven and transfer to a cooling rack to cool completely before icing.

Making the Lemon Glaze:

  1. In a medium bowl, combine the Powdered Sugar, Half & Half and Lemon Juice; whisk until smooth and pourable (add more Powdered Sugar for a thicker consistency or add more Half & Half for a thinner consistency).
  2. Enjoy!
Breakfast, Desserts, Snacks
American, English, Irish, Scottish


Creamy Spinach-Mushroom & Pasta Soup ~ Gluten Free!

Creamy Spinach-Mushroom & Pasta Soup ~ Gluten Free!

This is one of the BEST soups I have ever tasted! It’s also SO easy to make, sending this recipe right to the top of my Favorites list 😉 Full of freshness and comfort!
Thank You, as always, to The Pioneer Woman for sharing the original version of this delicious soup ~ I have tinkered with the ingredients a bit in order to make it GF and allergy-friendly for my family 🙂

  • 1/4 Cup Olive Oil (I use the milder version, so it doesn’t compete with the other flavors)
  • 1 1/2 Cups Mushrooms (Chopped)
  • 1 tsp Dried Thyme ((or 1 Tbsp Fresh))
  • 1 tsp Kosher Salt
  • 2 tsp Italian Seasoning ((*I make my own blend by combining 1 1/2 tsp dried Oregano, 1 tsp dried marjoram and 1/2 tsp dried Basil ~ this makes 3 tsp, so you will have 1 extra tsp to use later))
  • 1 1/2 tsp Minced Garlic (I use the already-minced Garlic in a jar)
  • 1/4 Cup Gluten-Free All Purpose Flour
  • 6 Cups Vegetable Broth (I use the Low Sodium Version)
  • 1 Cup Heavy Cream (For a little bit lighter version, I substitute 1/2 Cup of the Heavy Cream with 1/2 Cup Whole Milk)
  • 2 Cups Gluten-Free Pasta, dry (We like the Bow-Tie Pasta or the Little Shells for this recipe)
  • 4 Heaping Cups Baby Spinach
  • Ricotta Cheese, for serving ((optional))
  1. Heat the Olive Oil in a large pot (Dutch Oven) over medium heat.
  2. Add the Mushrooms, Thyme and Salt; cook until the mushrooms are browned and soft (about 5-7 minutes).
  3. Add the 2 tsp of Italian Seasoning and the Garlic; continue cooking for about 1-2 minutes.
  4. Next, sprinkle the GF Flour over the Mushroom mixture and stir until evenly coated.
  5. Stir in the Vegetable Broth and bring to a low boil; reduce temperature to Low and cook until the mixture thickens (about 8-10 minutes).
  6. Slowly pour in the Heavy Cream, mixing thoroughly.
  7. Add your choice of GF Pasta to the pot and continue cooking until the pasta is al dente (about 5-8 minutes, depending on the type of pasta).
  8. Lastly, add the Spinach and cook until it wilts ~ about 1 minute.
  9. Serve with a dollop of Ricotta Cheese, if desired.
    Enjoy 🙂
Appetizers, Dinner, Lunch, Main Dish, Side Dish, Soup, Stew


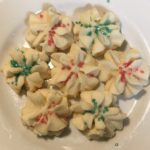
Danish Butter Cookies ~ Gluten Free

Danish Butter Cookies ~ Gluten Free

These delicious little butter cookies just melt in your mouth. And, they’re made with just 4 simple ingredients 🙂 I have made these cookies using several different Gluten Free All-Purpose flour mixes and found that the “Cup 4 Cup” brand worked the best…they taste amazing and are slightly crisp on the outside and light and buttery throughout! These cookies just moved to the TOP of my Favorites list 😉
A HUGE “Thank You” to Shelly Jaronsky (Dixie Crystals) for sharing the Original version of this recipe – I tweaked it a little to make it Gluten Free worthy.

  • 1 Cup Salted Butter (room temperature)
  • 3/4 Cup Powdered Sugar
  • 2 tsp Vanilla Extract
  • 2 Cups “Cup for Cup” All-Purpose Flour (*Use the “Spoon & Sweep” method when measuring your flour – spoon the flour to fill a 1-Cup measuring cup, then scrape off the top with the backside of a knife; do not simply scoop the flour out of its container with the measuring cup – this will pack the flour, resulting in too much flour needed for the recipe.)
  1. Gather the ingredients.
  2. Line 1-2 baking sheets with Parchment Paper or baking mats; set aside.
  3. Using a Stand Mixer, fitted with the Paddle Attachment, cream the Softened Butter, Powdered Sugar and Vanilla on the Medium setting (#4) for about 5 minutes, scraping down the inside of the bowl as needed; the mixture should be light in color and whipped.
  4. Next, lower the speed of the Mixer to the lowest setting and gradually add the GF Flour, 1/2 cup at a time; Dough will be soft and smooth.
  5. Place a large Star tip into a piping bag (or large plastic resealable bag) and transfer the dough to the piping bag.
  6. Pipe the dough onto the prepared cookie sheets in Rosette or Circle designs/shapes. The dough does not spread very much, if at all, so you can pipe a lot of cookies per sheet – I usually pipe 20 – 2″ cookies per sheet.
  7. Sprinkle each cookie with sprinkles/colored sugar, if desired.
  8. Next, place the cookie sheets into the refrigerator for 30-40 minutes to chill the dough – this helps them maintain their shape while cooking.
  9. Meanwhile, preheat the oven to 300 degrees.
  10. Once the cookies are finished chilling, bake them for 18-20 minutes, or until the edges turn a light, golden brown.
  11. Cool the cookies for about 5 minutes on the cookie sheets before transferring them to wire cooling racks to cool completely.
  12. Enjoy with a hot cup of cocoa, tea or coffee…or a glass of cold milk 😉
Desserts, Snacks


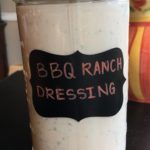
Barbecue-Ranch Dip/Salad Dressing

Barbecue-Ranch Dip/Salad Dressing

This Dressing/Dip is definitely one of my family’s favorites! I make sure to keep a fresh batch made at all times…my husband loves it as a dip for veggies and tortilla chips 🙂 And, my children love it as a salad dressing, baked potato topper and a dip for French Fries and Chicken Bites! It’s so easy to make and can be easily personalized to suit your family’s tastes by adding different herbs and spices 😉
Of course, a BIG “Thank You” to Ree Drummond (aka: “The Pioneer Woman”) for sharing the original version of this recipe!!! It’s a 5-Star recipe in our house!

  • 1 Cup Mayonnaise (I use Hellmann’s)
  • 1/2 Cup Sour Cream (I use Daisy Lite, but full-fat is fine, too)
  • 1/4 Cup Barbecue Sauce (I use Sweet Baby Ray’s, but you can use whatever bbq sauce you have on hand)
  • 3 Tbsp Dried Parsley Flakes
  • 1/2 tsp Garlic, minced (I use the already-minced garlic in a jar (usually found in the produce section))
  • 1/4-1/2 Cup Buttermilk (*usually only needed if you’re making a Salad Dressing; I make my own by adding 1 Cup Milk to 1 Tbsp Lemon Juice or White Vinegar; gently stir and let sit for 5 minutes)
  • 1/4-1/2 tsp Kosher Salt (optional)
  1. Gather the ingredients.
  2. Note: If using Buttermilk (usually only needed for the Salad Dressing version of this recipe; if you’re making this recipe as a dip, the Buttermilk is usually not needed) and you’re making your own, do so now by pouring 1 Tablespoon of White Vinegar or Lemon Juice into a 1-Cup measuring cup; then add milk (I use Whole Milk, but any fat % Milk is fine) to the Vinegar/Lemon Juice to almost fill the 1-cup measuring cup; gently stir and let sit for 5 minutes while preparing the remaining ingredients.
  3. While the Buttermilk is forming, place all of the remaining ingredients into a large bowl and whisk until thoroughly combined.
  4. To dilute/thin the dressing, add some Buttermilk, a little bit at a time, until you reach the desired consistency.
  5. Pour into a jar/vessel, cover with lid or plastic wrap and refrigerate until ready to use.
  6. Enjoy!
Appetizers, Hors d’Oeuvres, Salads, Side Dish, Snacks


Spicy Cheddar Cheese Crackers ~ Gluten Free (Just Like “Cheese Straws”)

Spicy Cheddar Cheese Crackers ~ Gluten Free (Just Like “Cheese Straws”)

Do you remember those wonderful “Cheese Straws” that were always around in abundance during the Holidays? Well, these little “Spicy Cheddar Cheese Crackers” will take you right back to your childhood! And, if you’re Gluten-Free, fear not, these are not only Gluten-Free, but are so easy to make and only require 7 ingredients (if you include water) 😉 I chose to cut my dough into leaf shapes for the Autumn season, but any shape will do (Christmas Trees, Snowmen, Wreaths, Holly Leaves, etc.) These make the perfect little Holiday Gifts 🙂
Enjoy!!!
Note: The original non-GF recipe can be found in just about every cookbook out there, but I want to give credit to Ree Drummond (aka: “The Pioneer Woman”) for her non-gf version of this recipe that I adapted to “fit” our family (please see the “Copycat Cheez-It” version for the GF and non-spicy recipe for these same crackers) 😉

  • 2 Cups Sharp Cheddar Cheese
  • 1 Cup GF All-Purpose Flour (I use “Caputo” brand – it makes an incredible dough to work with)
  • 4 Tbsp Salted Butter (cold and cut into small pieces)
  • 1/2 tsp Kosher Salt
  • 1/2 tsp Seasoned Salt (I use “Season All”)
  • 1/8-1/4 tsp Cayenned Pepper (I use 1/4 tsp for a little more “kick”)
  • 3 Tbsp Ice Water
  1. Place all of the ingredients, except for the Water, into a Food Processor and pulse until the mixture looks like “sand.”
  2. With the Food Processor running, slowly add the Ice-Cold Water, one Tbsp at a time, through the shoot until the dough forms a large ball.
  3. Wrap the Cheese dough ball in plastic and refrigerate for 1 hour.
  4. When ready to bake, preheat oven to 350 degrees.
  5. Line 1-2 baking sheets with Parchment Paper or Silicone Baking Mats; set aside.
  6. Roll the dough out to 1/4″ thickness on a lightly floured surface, cut into desired shapes and place on the prepared baking sheets.
  7. Bake for 15-18 minutes or until golden brown.
    *See notes for “crisping” up crackers if they turn soft.
  8. Allow the crackers to cool completely on a wire rack to develop the flavors and desired crispness.
  9. Enjoy 🙂

*Note: if your crackers get a little soft, simply toss them onto a baking sheet and re-heat in a 275 degree oven for about 8-10 minutes. Let cool and gobble them up!

Appetizers, Hors d’Oeuvres, Snacks


Copycat Cheez-It Cheddar Cheese Crackers ~ Gluten Free

Copycat Cheez-It Cheddar Cheese Crackers ~ Gluten Free

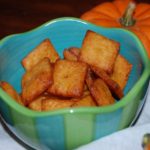
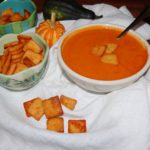
These are the yummiest Gluten-Free Cheese Crackers I have EVER tasted!!! They taste just like Cheez-It crackers! Plus, they are SO easy to make and only 6 ingredients are needed 🙂 I love them with my Roasted Red Pepper and Tomato soup…or just by themselves! A big bag of these yummy crackers would make a perfect treat for anyone.
*This recipe was adapted from a Ree Drummond (aka: “The Pioneer Woman”) recipe (“Homemade Cheddar Crackers”)…of course! Thank you SO much for sharing!

  • 2 Cups Sharp Cheddar Cheese (Shredded)
  • 1 Cup Gluten Free All-Purpose Flour Blend (I use Caputo brand – it’s a little more expensive, but well worth it – it performs like “regular” flour and is not gritty)
  • 4 Tbsp Salted Butter (Kept cold & cut into small pieces)
  • 1/2 tsp Kosher Salt
  • 1/2 tsp Seasoned Salt (I use Season-All)
  • 3 Tbsp Ice Water
  1. Place all of the ingredients, except for the Ice Water, into a Food Processor and pulse until the mixture looks like sand.
  2. With the Food Processor running, slowly add the Ice Water, one Tablespoon at a time, through the shoot until the dough forms a ball.
  3. Wrap the Cheese-dough ball in plastic and refrigerate for 1 hour.
  4. When ready to bake, preheat oven to 350 degrees.
  5. Line 1-2 baking sheets with silicone baking mats or parchment paper; set aside.
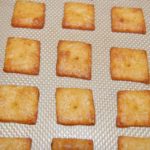
  6. Roll out the dough to 1/4″ thickness and cut into desired-size squares using a pizza cutter ~ I use a straight-edge ruler and usually cut my dough into 1″ x 1″ squares.
  7. Place the squares onto the lined baking sheets.
  8. Using the smaller end of a chop stick or wooden skewer, poke a small hole into the center of each square.
    Note: If desired, you can sprinkle the crackers with a little kosher salt at this stage, but they really do not need it 😉
  9. Bake the crackers for 15-18 minutes or until golden brown; I bake mine for the maximum amount of time since I prefer mine on the more crispy side.
  10. Allow to cool completely to fully develop the flavors and desired crispiness.
  11. Enjoy with your favorite soup, salad or all on their own 🙂
  12. Note: if your crackers get soft, simply toss them onto a baking sheet and re-heat in a 275 degree oven for about 8-10 minutes.
Appetizers, Hors d’Oeuvres, Lunch, Snacks, Soup


Frosted Pumpkin Spice Cookies ~ Gluten Free

Frosted Pumpkin Spice Cookies ~ Gluten Free

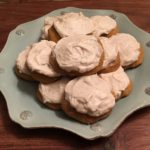
This is an updated version of my post from last year (2019), which was not a GF recipe. Fear not….this IS a Gluten Free recipe for soft, sweet and delicious Frosted Pumpkin Cookies. These wonderful little treats are mildly flavored with a blend of spices that you can adjust to satisfy your personal taste. Please let me know what you think 🙂

The Cookie:

  • 3 1/2 Cups Gluten Free All-Purpose Flour Blend (I used Better Batter brand)
  • 1 tsp Baking Powder, GF
  • 1 tsp Baking Soda
  • 1/2 tsp Table Salt
  • 2 1/2 tsp Cinnamon (increase to 3 tsp if you want a spicier taste)
  • 1/2 tsp Nutmeg (increase to 3/4 – 1 tsp for a spicier taste)
  • 1/4 tsp Ground Ginger (increase to 1/2 tsp for a spicier taste)
  • 1 Cup Dixie Crystals Extra Fine Granulated Sugar
  • 1 Cup Light Brown Sugar (packed)
  • 1 Cup Vegetable Oil (I use Canola Oil)
  • 2 Cups Canned Pumpkin Puree
  • 2 Large Eggs (lightly beaten)
  • 1 tsp Vanilla Extract (GF)

The Frosting:

  • 1 Cup Cream Cheese, softened (I use Philadelphia Cream Cheese (full fat))
  • 1/2 Cup Salted Butter, Softened
  • 3 tsp Vanilla Extract (GF)
  • 4 Cups Powdered Sugar
  • 1 tsp Ground Cinnamon

Making the Cookies:

  1. Line cookie sheet/sheets with parchment paper or silicone baking mats; set aside.
  2. Gather the ingredients.
  3. In a Large mixing bowl, sift together the GF Flour, Baking Powder, Baking Soda, Salt and Spices; Mix well; Set aside.
  4. In another Large mixing bowl, combine the Sugars, Oil, Pumpkin, Eggs and Vanilla Extract until completely blended.
  5. Gradually add the dry ingredients, one cup at a time, to the wet ingredients and mix until smooth.
  6. Cover bowl with plastic wrap or dish cloth and let rest for 30 minutes. This allows the GF Flour to absorb the moisture from the wet ingredients which reduces (hopefully, eliminates!) the grainy texture.
  7. When ready to bake the cookies, place oven rack in the middle position and preheat oven to 350 degrees.
  8. Using a Small cookie scoop (or medium, if you want larger cookies) scoop out the cookie dough onto the prepared baking sheets.
  9. Spray the back of a spoon with non-stick cooking spray and use the spoon to flatten the cookie mounds (re-apply spray as often as needed).
  10. Bake for 10-12 minutes.
  11. Let cookies cool on cookie sheet for 1-2 minutes before transferring to a wire rack to cool completely before frosting.

Making the Frosting:

  1. While the cookies are baking and cooling start making the frosting…
  2. Using a Handheld or Stand Mixer, beat the softened Butter, Cream Cheese and Vanilla Extract until well-blended.
  3. Gradually add the Powdered Sugar, one cup at a time, mixing until completely blended and creamy.
  4. Add the Ground Cinnamon and Mix thoroughly.
  5. You’re ready to frost the cookies and enjoy!

Note: The original recipe that I posted in 2019 was from “Two Sisters Crafting,” which I have updated so it is now GF, thanks in large part to “amyin the kitchen.com 🙂 I just love converting and joining recipes to see what the end results will be! Thanks so much for sharing your wonderful recipes!!!

Desserts, Snacks
American