Simply Chocolate French Silk Pie

Simply Chocolate French Silk Pie

The cool, creamy (and yes, silky!) chocolate topped with fresh homemade whipped cream definitely takes me back to my childhood! Yes, I was one of THOSE kids who preferred pie over cake for my Birthday…but not just ANY pie! It HAD to be Chocolate French Silk Pie from Miller & Rhoads Tea Room. Even though the Tea Room sadly closed years ago, this wonderful recipe will forever live on in our home and hopefully your home, as well 🙂

Pie Filling

  • 1 1/2 Sticks (or 12 Tablespoons) Salted Butter, Softened
  • 1 Cup + 2 Tablespoons Powdered Sugar
  • 1 1/2 teaspoons Vanilla Extract
  • 4 1/2 Squares Unsweetened Chocolate (Melted)
  • 2 Large Eggs (Keep Cold)
  • 1 9″ Pie Shell (Baked & Cooled)

Whipped Topping

  • 1 Cup Heavy Whipping Cream (Kept Cold)
  • 2 Tablespoons Powdered Sugar (Heaping Tablespoons)
  • 1/2 teaspoon Vanilla Extract
  • 1 Hershey Milk Chocolate Kiss

Making the Chocolate Filling

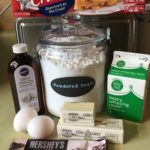
  1. Gather the ingredients
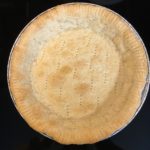
  2. Bake a 9″ pie crust and let cool while preparing the chocolate filling.
  3. Using a Stand or Handheld Mixer, cream the first 3 ingredients together on medium to medium high speed until light and creamy.
  4. Add the melted chocolate and continue beating until well blended.
  5. Add one cold egg and mix for 5 minutes on medium-high. Scrape the sides of the mixing bowl, then add the second cold egg and mix for another 5 minutes. Filling should be light and fluffy.
  6. Pour into the baked and cooled pie shell, spreading evenly. Chill in the refrigerator for at least 2 hours.

Making the Whipped Topping

  1. Using a Stand or Handheld Mixer, whip the cold Heavy Whipping Cream, 2 heaping Tablespoons of Powdered Sugar and 1/2 teaspoon Vanilla Extract on medium-high for about 3-4 minutes (until stiff peaks form).

  2. Spread the whipped cream onto the chocolate filling and add chocolate shavings, if desired (I grated 1 Hershey Kiss for the shavings).
Desserts, Snacks


Gluten Free Blueberry-Orange Muffins

Gluten Free Blueberry-Orange Muffins

The combination of Orange Zest and fresh Blueberries in these Gluten Free muffins is absolutely wonderful! And, I love the fact that they aren’t too sweet, making them perfect for Breakfast, mid-morning and afternoon snacks. Enjoy!
Note: I tweaked this recipe from America’s Test Kitchen’s “The How Can It Be Gluten Free Cookbook”

  • 8 Tablespoons Butter, Unsalted (1 Stick; Melted & cooled)
  • 2 Cups Blueberries (Fresh )
  • 3/4 Cup Granulated Sugar (Can use 1 Cup, if you want these to be a little bit sweeter)
  • 2-3 teaspoons Orange Zest (Zest of 1 large orange)
  • 1 3/4 + 2/3 Cups Gluten Free All-Purpose Flour (I made the ATK’s Gluten Free Flour Blend (recipe included below), but I also make these with Pamela’s Gluten Free All-Purpose Flour Blend, if I don’t have my own mix readily available)
  • 1 Tablespoon Gluten Free Baking Powder
  • 1/2 teaspoon Salt
  • 1/4 teaspoon Xanthan Gum
  • 1/2 Cup Plain Yogurt (I used 0% Fat Yogurt)
  • 3 Large Eggs
  • 2 Tablespoons Turbinado Sugar (i.e. Raw Sugar)
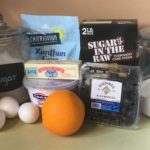
  1. Gather the ingredients.
  2. Melt the butter and let cool a bit while you begin preparing the muffin batter.
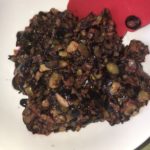
  3. In a food processor, pulse the Blueberries a few times (3-4) to coarsely chop them. Scrape them into a separate bowl and set aside.
    Note: I would normally leave them whole, but certain members of my family prefer them when chopped :).
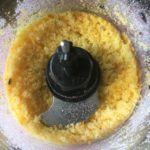
  4. In the same food processor, combine the granulated sugar and orange zest. Pulse for about 10 seconds until the consistency is sand-like.
  5. In a large bowl, combine the GF Flour mix, baking powder, salt and xanthan gum. Mix well with a whisk. Then add to the sugar mixture in the food processor, pulsing until well blended.
  6. In the same large bowl that you used to whisk together the flour mixture, combine the eggs, yogurt and melted butter. Whisk until well blended, then add to the food processor and blend until there are no lumps.
  7. Transfer the batter to the large bowl and gently fold in the chopped (or whole) blueberries. Cover the bowl with plastic wrap and let rest for 30 minutes.
    (Note: this resting period is important in order to let the grains soften or mature, so that the resulting muffins will not be grainy or sandy in texture)
  8. Meanwhile, preheat oven to 400 degrees.
    Line a muffin tin with muffin cups and spray with a non-stick cooking spray.
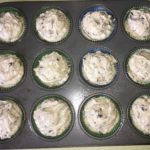
  9. After the batter has rested for 30 minutes, scoop into the lined muffin tray using a medium or large scoop. This batter does not rise much, so don’t worry about filling the cups to the top.
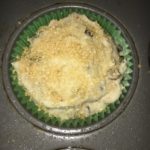
  10. Sprinkle the tops with the Turbinado sugar.
  11. Bake for about 18-20 minutes, or until lightly golden and toothpick comes out clean. Cool muffins in the pan for about 10 minutes, before transferring them to a wire rack to cool for an additional 10 minutes.
  12. Enjoy these muffins that are chock full of blueberries while warm :).
  13. Any leftovers can be completely cooled and stored in an airtight container for about 2 days or frozen for 2-3 weeks. Before serving, let thaw and microwave for about 20 seconds.

The ATK Gluten Free Flour Blend

Ingredients:

  • 4 1/2 Cups + 1/3 Cup White Rice Flour
  • 1 2/3 Cups Brown Rice Flour
  • 1 1/3 Cups Potato Starch (NOT Potato Flour)
  • 3/4 Tapioca Starch
  • 3 Tablespoons Nonfat Milk Powder (if milk allergies are an issue, substitute with Gluten Free, Lactose Free, Non-Dairy Coffee Creamer Powder, like Nestle Original Coffee-Mate).

In a large bowl, combine all of the ingredients with a whisk and transfer to an airtight container. Refrigerate for up to 3 months. Before using, bring to room temperature.


Easy Sausage Pinwheels (Only 3 Ingredients!)

Easy Sausage Pinwheels (Only 3 Ingredients!)

These are one of those yummy foods that take me right back to my childhood! My older sister was always in charge of making these for our annual Christmas parties and I remember eating dozens of them before they even left the kitchen :). They are SO easy to make and oh so yummy!

  • 2 Cans Crescent Dough Sheet (If you can’t find the sheets, just use the regular crescent dough and press the seams together)
  • 1 Pound Pork Sausage (You may use Regular or Spicy)
  • 2 Cups Shredded Cheddar Cheese (I use Sharp)
  1. Gather the ingredients.
  2. In a large bowl, combine the sausage and cheese using two forks. Mix well and set aside.
  3. On a large sheet of foil, unroll one of the Crescent Dough Sheets.
  4. Spread half of the sausage mixture onto the dough sheet using a fork.
  5. Roll up the dough and sausage mixture along the longer edge of the dough sheet.
  6. Repeat these steps with the second Dough Sheet and remaining sausage mixture.
  7. Wrap the foil around each dough roll and freeze for about 2-3 hours.
  8. When ready to bake, preheat oven to 375 degrees.
  9. Lightly spray a cookie sheet or line it with a silicone baking pad. Set aside.
  10. Slice the dough rolls into about 1/4″ – 3/8″ wide slices and place on the prepared cookie sheet.
  11. Bake for about 15 minutes or until lightly golden color.
  12. Serve warm 🙂
Appetizers, Hors d’Oeuvres, Snacks


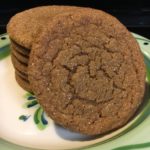
Ginger Molasses Cookies ~ Gluten Free

Ginger Molasses Cookies ~ Gluten Free

Get ready for the BEST Gluten-Free Ginger Molasses Cookies on the planet! I make batches of these soft, chewy and delicious Cookies for Christmas gifts…our family, friends and neighbors LOVE them! They make great Holiday gifts, so get out your aprons and cookie sheets and start baking! The dough freezes really well, so you can make several batches ahead of time. Enjoy!
*As a special treat for the Holidays, make my Ginger Cookie Ice Cream Sandwiches by just adding a scoop of Vanilla Bean Ice Cream between two of my GF Ginger Molasses Cookies!!! Yummy! 🙂

  • 2 Cups All-Purpose Gluten Free Flour (I use “GF Jules” all-purpose gf flour for this recipe – this GF Flour Blend already has Xanthan Gum in it, so I do NOT add Xanthan Gum)
  • *1 tsp Xanthan Gum (add this ONLY if your GF Flour blend does not already contain it)
  • 2 teaspoons Baking Soda
  • 1 teaspoon Ground Cinnamon
  • 1/2 teaspoon Ground Cloves
  • 1/2 teaspoon Ground Ginger
  • 1/2 teaspoon Salt
  • 3/4 Cup Shortening, melted (cooled for 10-15 minutes)
  • 1/4 Cup Molasses
  • 1 Cup Granulated Sugar
  • 1 Large Egg, lightly beaten
  • *1/2 – 1 Gallon Vanilla Bean Ice Cream (If you’re making my Holiday Ginger Cookie Ice Cream Sandwiches, see Notes*)
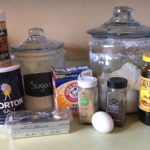
  1. Gather all your ingredients.

The Flour Mixture

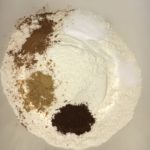
  1. In a large bowl, combine the Flour, *Xanthan Gum (only if needed), Baking Soda and spices. Mix well and set aside.

The Shortening Mixture

  1. In a small saucepan, melt the shortening, remove from heat and cool for about 10-15 minutes (this is so you don’t cook the eggs when you add it).
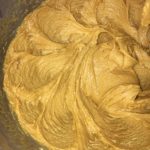
  2. While the shortening is cooling, combine the Molasses, Sugar and egg using a Stand or Handheld Mixer. Add the cooled shortening and mix well.

Combining the Wet and Dry Ingredients

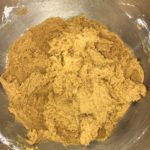
  1. Slowly add the Flour Mixture to the wet mixture, 1/2 cup at a time, blending well after each addition.
  2. Cover the bowl with plastic wrap and refrigerate for at least 1-2 hours – I find that chilling the dough overnight gets the best results.
  3. When ready to bake the cookies, preheat the oven to 350 degrees.
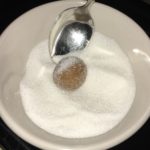
  4. While the oven is preheating shape the dough into small 1″ balls (you can use a small cookie scoop to get more uniform cookies) and roll in a bowl of granulated sugar, coating well.
  5. Space cookie balls at least 2″ apart on an ungreased cookie sheet lined with a baking mat or parchment paper.
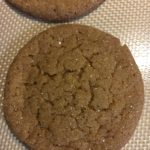
  6. Bake for 8-10 minutes, or until they are covered in “cracks.”
  7. Let cool for about 2 minutes on the cookie sheet before transferring to a wire rack to cool completely…try one (or two) while they’re still warm!
  8. Once they are completely cooled, you can package them in cellophane gift bags
  9. Enjoy!

This dough freezes really well, so you can make several batches ahead of time for Christmas gifts, parties, etc.

*Note: For my “Holiday Ginger Cookie Ice Cream Sandwiches ~ Gluten Free” just add a scoop of Vanilla Bean Ice Cream between two of my GF Ginger Molasses Cookies, wrap in plastic wrap and freeze until ready to eat! 🙂

Desserts, Snacks


Quick & Easy Barbecue Chicken Biscuits ~ Kids Love Them!

Easy Barbecue Chicken Biscuits

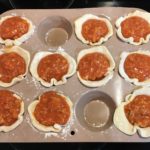
Kids adore these Barbecue Chicken Biscuits shaped into little Cups! They're slightly sweet and will remind you of those "Manwich Sloppy Joes." Kids love them because they can pick one up and eat it in just a few bites. Parents love them because these yummy little morsels are tasty, filling and not "sloppy!" Perfect for ANY night of the week :).

  • 1 lb Ground Chicken (Or Turkey or Beef)
  • 1 Cup Ketchup
  • 1 Can Tomato Soup
  • 1 Small Onion (Diced)
  • 1 1/2 tsp White Vinegar
  • 2 Tablespoons Light Brown Sugar
  • 1 10-Count Can Refrigerator Biscuits
  • 1 Cup Shredded Cheddar Cheese

Making the Chicken Barbecue Filling

  1. Gather the ingredients.
  2. In a large non-stick skillet, dump the chicken, ketchup, tomato soup, onion, vinegar and sugar.
  3. Mix well and simmer for 30 minutes.

Making the “Cups”

  1. Preheat oven to 400 degrees.
  2. While the Barbecue Filling is simmering, roll out the biscuits on a floured surface, then press each into a muffin tin.

Assembling the Barbecue Chicken Cups

  1. Fill each cup with the Barbecue Filling (you will have some leftover filling).
  2. Top with the shredded cheese.
  3. Bake for 8-11 minutes or until the edges of the biscuits are a light golden brown.
  4. Let rest for a couple of minutes before removing them from the muffin tin.
  5. Serve with a fresh green salad and Enjoy!