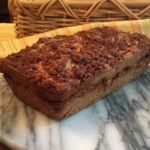
Easy Gluten Free Cinnamon-Sugar Coffee Cake
Easy Gluten Free Cinnamon-Sugar Coffee Cake

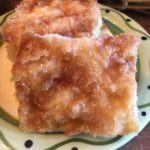
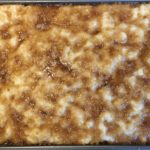
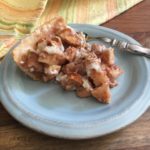
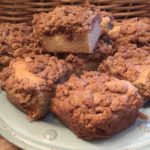
This Gluten Free Coffee Cake is SO moist, tasty and easy to make! It’s the perfect afternoon snack, dessert or breakfast for those weekend sleepovers. An instant hit with our family and friends! 🙂
*Thank You to America’s Test Kitchen for sharing this wonderful recipe!!
The Crumb Topping
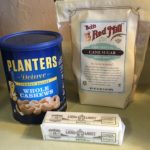
- 1/2 Cup Unsalted Butter, Melted (1 Stick or 8 Tbsp)
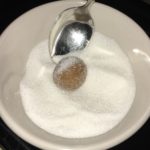
- 1/3 Cup Granulated Sugar
- 1/3 Cup Dark Brown Sugar (Packed)
- 1 Large Egg Yolk
- 1/8 tsp Salt
- 3/4 tsp Cinnamon
- 3/4 Cup + 1/3 Cup All-Purpose Gluten Free Flour, Sifted (I use Better Batter GF Multi-Purpose Flour)
The Cake
- 3/4 Cup + 1/3 Cup All-Purpose GF Flour, Sifted (I use Better Batter GF Multi-Purpose Flour)
- 1/2 Cup Granulated Sugar
- 1/4 tsp Salt
- 1/4 tsp Xanthan Gum (use ONLY if your GF Flour Blend doesn’t contain any; Better Batter contains Xanthan Gum, so I do not add it )
- 1/2 tsp Baking Soda
- 6 Tbsp Butter, Unsalted (Softened & Cut Into 6 Pieces)
- 1/2 Cup Sour Cream
- 2 Large Eggs
- 1 Large Egg Yolk
- 1 tsp Vanilla Extract
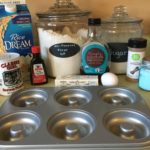
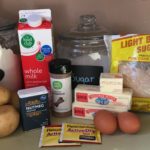
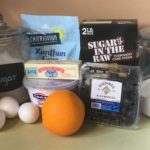
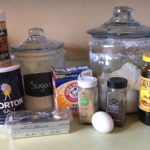
- Gather the ingredients.
- Spray an 8″ x 8″ baking pan with non-stick cooking spray. Next, fold a 16″ length of Parchment Paper to a width of 7″ and fit it into the baking pan, so that the excess hangs over the edges for easy removal of the cake. Set aside.
Making the topping:
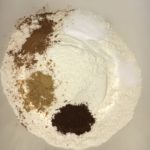
- In a small sauce pan, melt the butter over low heat. Once completely melted, remove from heat and let cool slightly.
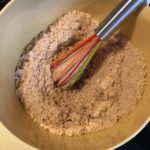
- Using a whisk, mix in the sugars, salt, cinnamon and egg yolk to the melted butter, thoroughly mixing.
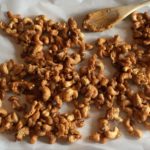
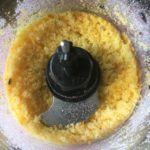
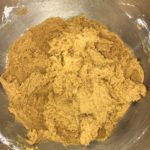
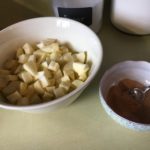
- Add the GF Flour to the butter mixture, blending well. The mixture will look like ground meat. Set aside.

Making the Cake:
- Place one of your oven racks in the upper-middle position of the oven and preheat oven to 325 degrees.
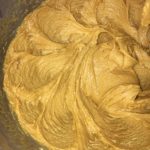
- In a stand mixer, using the paddle attachment, mix the GF Flour, Granulated Sugar, Salt, Xanthan Gum (if needed) and Baking Soda on low until completely blended.
- Next, add the Butter to the flour mixture, one piece at a time, mixing on low until butter pieces are no longer visible – mixture will resemble coarse sand.
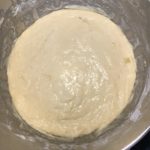
- Add the Sour Cream, Eggs, Yolk and Vanilla to the Flour mixture and mix on medium-high until batter is light and fluffy.
Putting it Together:
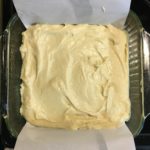
- Scrape the batter into the prepared baking pan and smooth the top.
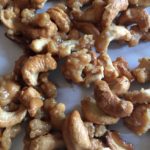
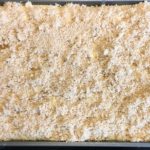
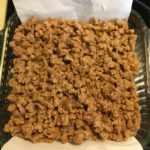
- Using your hands, break the Topping Mixture into large pea-sized pieces and sprinkle over the top of the batter to completely cover.
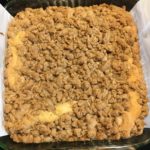
- Bake for 35-45 minutes, rotating the pan halfway through baking. It’s done when the middle is no longer jiggly and a wooden toothpick inserted into the middle comes out clean.
- Let cool in the pan for 30 minutes before removing, using the excess Parchment Paper to lift and pull the cake out.
- Place on a platter or cutting board to cut and serve. Enjoy!
**This cake stores well in an air-tight container for about 3 days.
***A HUGE “Thank You” to America’s Test Kitchen for sharing this wonderful recipe!!! 🙂