Maple Shortbread Sandwich Cookies ~ Gluten Free

Maple Shortbread Sandwich Cookies ~ Gluten Free

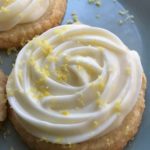
If you like the flavor of Maple, you’re going to love these delicious Maple Shortbread Sandwich Cookies! I make them as single shortbread cookies and as sandwich cookies with a yummy Maple Buttercream Filling for those who prefer a little extra touch of Maple. Either way, these little cookies melt in your mouth and are sure to please your friends and family during the holidays 🙂 Enjoy!

The Maple Shortbread Cookie:

  • 10 Tbsp Unsalted Butter, softened ((1 stick + 2 Tbsp))
  • 1/4 tsp Salt
  • 1/4 Cup Powdered Sugar
  • 1/4 Cup Maple Sugar (I do a heaping 1/4 cup ;))
  • 1/2 tsp Maple Extract (increase to 3/4 – 1 tsp if you want a stronger Maple Flavor)
  • 1 1/2 Cups All-Purpose Gluten Free Flour (I use Better Batter)
  • 1/2 tsp Xanthan Gum (add if your all-purpose GF flour does not contain Xanthan Gum)

The Maple Buttercream Filling:

  • 2 Tbsp Unsalted Butter, softened
  • 1/4 tsp Salt
  • 1/2 tsp Vanilla Extract
  • 1/4 tsp Maple Extract
  • 1 Tbsp Pure Maple Syrup (I use Grade A, but Grade B is also fine)
  • 1 1/2 Cups Powdered Sugar
  • 1 Tbsp Whole Milk (1%, 2% and Skim is also fine)

Making the Cookie Dough:

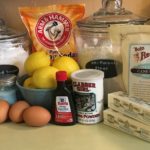
  1. Gather all the ingredients needed for the cookies.
  2. Using a Stand or Handheld Mixer, combine the Butter, Salt, Maple Sugar and Maple Extract; beat until creamy and smooth.
  3. Add the Powdered Sugar to the Butter mixture and mix on the lowest setting, scraping the sides of the bowl as needed, until well-blended and smooth.
  4. In a small bowl, measure out the 1 1/2 Cups Flour using the “spoon and scrape” method (using a spoon, scoop out the GF Flour into a Dry Measuring Cup, overfilling the cup; then scrape off the excess flour back into the flour bag/container using the back edge of a knife); gently pour the measured GF Flour into the small bowl.
  5. Add the Xanthan Gum (if your GF Flour mix doesn’t contain it) to the GF Flour in the small bowl and mix well.
  6. With the mixer set on the lowest setting, gradually add the GF Flour mixture, 1/2 cup at a time, to the Butter mixture; mix well and scrape sides of bowl as need between each addition of the Flour.
    Note: the cookie dough will be crumbly, but should hold together when squeezed into a ball; if the dough does not hold together, add 1/2-1 more Tablespoon of softened unsalted butter.
  7. Form the cookie dough into a ball and wrap in plastic wrap; Refrigerate for 30 minutes.
  8. While the dough is in the refrigerator, line 1-2 cookie sheets with parchment paper or baking mats; set aside.
  9. Preheat oven to 325 degrees.
  10. After 30 minutes, remove cookie dough from refrigerator and cut in half for a more manageable portion of dough to roll out.
    Note: if the dough is refrigerated for more than 30 minutes, set it out on your kitchen counter for about 15-20 minutes to soften up a little before trying to roll it out.
  11. Once the dough is ready, roll it out onto a lightly floured surface to about 1/4″ thickness.
  12. Using the desired cookie cutter/cutters, cut dough into shapes and place onto the prepared cookie sheet/sheets.
  13. Bake for 18-20 minutes, or until cookies are a light golden brown; cool on baking sheets. Enjoy as single Maple Shortbread Cookies or fill with the Maple Buttercream filling (recipe below).

The Maple Buttercream Filling:

  1. If making sandwich cookies, gather the ingredients for the Maple Buttercream Filling.
  2. Using a Stand or Handheld Mixer, combine all of the Filling ingredients, being sure to gradually add the Powdered Sugar, 1/2 cup at a time; adjust the Milk or Powdered Sugar as needed for the desired consistency (you want the filling to be thick and creamy).
  3. Once the cookies are completely cooled, you are ready to fill :).
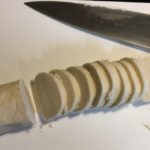
  4. Using a small knife or the back of a spoon, spread the desired amount of filling onto the backside of one of the cookies; then gently press another cookie on top of the filling and scrape any excess filling from the sides of the cookies with the knife or spoon.
  5. Serve with your a hot cup of tea or coffee and sit back and enjoy 🙂
Desserts, Snacks


Brown Sugar-Cinnamon Coffee Cake (Gluten Free)

Brown Sugar-Cinnamon Coffee Cake (Gluten Free)

Do you like Coffee Cake? Are you Gluten-intolerant or have Celiac’s and miss eating yummy treats, like Brown Sugar Cinnamon Coffee Cake? Well, now you can have your coffee cake and eat it, too 🙂 This is truly one of the BEST Coffee Cakes I have ever eaten!!! A HUGE “Thank You” to Audrey from “Mama Knows Gluten Free” for sharing this delicious recipe…my entire family thanks you 🙂

The Cake Ingredients:

  • 3 Cups All-Purpose Gluten Free Flour, Sifted (I use King Arthur brand; sifted)
  • 1 1/2 tsp Xanthan Gum (if your GF Flour Blend doesn’t already have it)
  • 1/4 tsp Salt
  • 1 Cup Granulated Sugar
  • 4 tsp Baking Powder (make sure it’s GF)
  • 1 1/2 Cups Whole Milk (you can also use Almond, Rice, Cashew or Coconut Milk for a dairy-free option)
  • 2 Large Eggs
  • 2 tsp Vanilla Extract
  • 1/2 Cup Unsalted Butter, melted (or use Earth Balance brand for a dairy-free version)

The Brown Sugar-Cinnamon Topping

  • 1 Cup Unsalted Butter, softened (or Earth Balance for dairy-free)
  • 1 Cup Light Brown Sugar, packed
  • 2 Tbsp GF All-Purpose Flour
  • 1 Tbsp Ground Cinnamon

The Glaze Ingredients:

  • 2 Cups Powdered Sugar
  • 5 Tbsp Whole Milk (or dairy-free milk of your choice)
  • 1 tsp Vanilla Extract

Making the Cake:

  1. Preheat oven to 350 degrees.
  2. Spray a 9″ x 13″ baking pan (preferably glass) with non-stick cooking spray. Set aside.
  3. Gather the ingredients needed for Cake.
  4. Melt the Butter and set aside.
  5. Using a stand or handheld mixer, fitted with the paddle attachment, mix the GF Flour, Xanthan Gum, Salt, Sugar and Baking Powder on Low until thoroughly blended.
  6. Add the Milk, Eggs and Vanilla to the Flour mixture, blending until thoroughly mixed.
  7. Slowly drizzle the Melted Butter into the Flour-Milk mixture, mixing until fully incorporated.
  8. Pour batter into the prepared baking pan. Set aside while you prepare the Brown Sugar topping.

Making the Brown Sugar-Cinnamon Topping:

  1. Using a Stand or handheld mixer, fitted with the paddle attachment, combine the softened Butter, Brown Sugar, GF Flour and Cinnamon until thoroughly mixed and creamy.
  2. Drop this Brown Sugar mixture by spoonfuls onto the coffee cake batter in the baking pan making sure to cover the surface equally.
  3. Using a sharp knife, thoroughly swirl the Brown Sugar mixture throughout the coffee cake batter.
  4. Bake in preheated oven for about 35-40 minutes, checking after 30 minutes. Cake is done when a toothpick inserted into the middle comes out clean.

Making the Glaze:

  1. In a large bowl, whisk together the Powdered Sugar, Milk and Vanilla until smooth. Drizzle over the warm Coffee Cake and let set for about 10 minutes. Slice into desired-size pieces and Enjoy with a glass of ice-cold milk :)!

Store in an air-tight comtainer. Re-heat slices in microwave for about 10-15 seconds 🙂

Breakfast, Desserts, Snacks, Sweet Breads
American


Gluten Free Lemon Cookies with Lemon-Cream Cheese Frosting

Gluten Free Lemon Cookies with Lemon-Cream Cheese Frosting

Crispy Lemon-Butter Cookies accented with Fresh Lemon Zest and topped with a Creamy Lemon Frosting infused with more Fresh Lemon Zest make these cookies sinfully delicious! I have to make a double batch every time I make these, because my family gobbles them up so quickly 🙂 If you like Lemony desserts, you’ll LOVE these cookies!

The Lemon Cookies

  • 1 Cup Unsalted Butter, softened ((2 Sticks))
  • 1 Cup Powdered Sugar
  • 1/2 tsp Salt
  • 1/2 tsp Pure Vanilla Extract
  • 1 Tbsp Lemon Zest
  • 1 Tbsp Fresh Lemon Juice
  • 2 Cups Gluten Free All-Purpose Flour (Sifted)

The Creamy Lemon Frosting

  • 1/2 Cup Cream Cheese, softened
  • 1 1/2 Cups Powdered Sugar
  • 1 Tbsp Lemon Zest
  • 1 Tbsp Fresh Lemon Juice
  • 1/8 tsp Butter, Unsalted
  1. Gather the ingredients needed for the Lemon Cookie dough.
  2. Using a Stand Mixer fitted with the Paddle attachment, cream together the Butter, Powdered Sugar and Salt until light and fluffy.
  3. Add the Vanilla Extract, Lemon Zest and Lemon Juice to the Butter mixture, mixing until combined.
  4. Next, gradually add the GF Flour, 1/2 cup at a time, to the mixing bowl, blending thoroughly between each addition and scraping down the sides of the bowl as needed.
  5. Once the cookie dough has been thoroughly blended, turn the dough out onto a large cutting board and roll into a log about 9″-10″ in length. Wrap this log tightly in plastic wrap and place in freezer for at least 2 hours.
  6. When dough is chilled enough for slicing, preheat oven to 350 degrees and remove chilled dough from the freezer.
  7. Line a cookie sheet with a nonstick baking mat or Parchment paper. Set aside.
  8. Using a sharp knife, slice the dough log into 1/4″ thick sections and place each disc about 2″ apart onto the prepared cookie sheet.
  9. Bake for 12-15 minutes, or until edges turn a light golden-brown.
  10. Let cookies cool on pan for 1-2 minutes until removing to a wire cooling rack. Cool completely before applying the frosting.

Making the Creamy Lemon Frosting

  1. Using a Stand Mixer fitted with the Paddle attachment, cream together the softened Cream Cheese and Powdered Sugar until well-blended.
  2. Add the Lemon Zest, Lemon Juice and Salt to the Cream Cheese mixture. Continue beating until completely mixed.
  3. Transfer the Frosting to a piping bag, fitted with a large star tip. Please Note: this is optional, as you can apply the frosting either using a butter knife or a piping bag (or plastic storage bag) with the end snipped off.
  4. When the cookies are completely cooled, spread or pipe the desired amount of frosting onto each cookie. Enjoy 🙂

Note: I usually make the frosting while the cookies are baking, so I can place it into the refrigerator to set. If you find that the frosting gets too soft while piping, place it into the refrigerator for 10-15 minutes to harden a little.

Desserts, Snacks


Gluten Free Lemon Bundt Cake

Gluten Free Lemon Bundt Cake

Fresh Lemon Zest and fresh Lemon Juice make this Gluten Free cake moist and delectable! My son requested this cake for his 21st Birthday and was shocked when I informed him that it was Gluten Free. I truly believe that sifting the flour is the key to making Gluten Free baked goods taste like baked goods that contain gluten. 🙂
Thank You to America’s Test Kitchen for sharing this wonderful recipe!!! #America’sTestKitchen

The Cake Release

  • 2 Tbsp Unsalted Butter, Melted
  • 1 Tbsp Gluten Free All-Purpose Flour (I use King Arthur brand)

The Cake

  • 2 3/4 Cup All-Purpose Gluten Free Flour, Sifted (King Arthur Brand)
  • 1 tsp Salt
  • 1 tsp Baking Powder
  • 1/2 tsp Baking Soda
  • 1/4 tsp Xanthan Gum
  • 3/4 Cup Whole Milk
  • 3 Tbsp Lemon Zest (3 Lemons)
  • 1/3 Cup Fresh Lemon Juice
  • 2 tsp Vanilla Extract
  • 12 Tbsp Unsalted Butter, softened (1 1/2 Sticks)
  • 1 1/2 Cup Granulated Sugar
  • 4 Large Eggs

The Glaze

  • 1 Cup Powdered Sugar
  • 4-6 tsp Fresh Lemon Juice (approximately 2 Lemons)
  1. Gather the ingredients.
  2. Preheat Oven to 350 degrees.

Prepping the Bundt Pan

  1. Mix the 2 Tbsp melted Butter with 1 Tbsp GF Flour, making a smooth paste. Using a small pastry brush, spread the paste into the Bundt pan, covering the entire inside of pan. Set aside.

Making the Cake Batter

  1. In a medium-sized bowl, sift together the GF Flour, Salt, Baking Powder, Baking Soda and Xanthan Gum. Set aside.
  2. In a separate small bowl, whisk together the Milk, Lemon Zest, Lemon Juice and Vanilla Extract until well-blended. Set aside.
  3. Using a Stand Mixer, fitted with the paddle attachment, beat the softened Butter and Granulated Sugar on Medium-High until light and fluffy.
  4. Add the Eggs, one at a time, to the Butter mixture, blending until well-combined.
  5. Reduce the speed to Low and begin alternately adding the Flour Mixture and Milk Mixture to the Butter Mixture. Continue mixing until all ingredients are combined, scraping the sides as needed.
  6. Scrape the batter into the prepared Bundt pan and smooth the top.
  7. Bake in preheated oven for 40-50 minutes, turning the pan halfway through baking. Cake is ready when it is a light golden brown and wooden skewer comes out clean.
  8. Cool cake in pan for about 10-15 minutes before running a knife around the edges to loosen. Turn out onto a wire rack to completely cool before applying the glaze.

Making the Glaze

  1. Whisk the Powdered Sugar with 4 tsp Lemon Juice until smooth. Add the remaining 2 tsp Lemon Juice, one at a time, until glaze is pourable. Drizzle the glaze evenly over the top of the Bundt cake, letting the glaze drip down the sides.
  2. Slice and Enjoy!
Desserts, Snacks