Gluten Free Lemon Pound Cake

Gluten Free Lemon Pound Cake

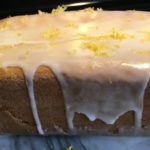
This Lemon Pound Cake turns out moist, tasty and delicious every time! Made with Fresh Lemon Juice and Lemon Zest puts this GF Lemon Pound Cake over the top! I have learned to make TWO cakes, since my family tends to inhale the first one within a few hours 😉
A big “Thank You” to America’s Test Kitchen for creating this recipe 🙂

Cake Ingredients:

  • 1 1/4 Cups King Arthur Gluten Free Multi-Purpose Flour (Sifted)
  • 1 tsp Baking Powder
  • 1/2 tsp Salt
  • 1/4 tsp Xanthan Gum
  • 1 1/4 Cup Granulated Sugar
  • 2 Tbsp Lemon Zest (about 2 lemons)
  • 1 Tbsp Lemon Juice (from the Lemons used for Zest)
  • 4 Large Eggs
  • 1/2 Cup Cream Cheese (softened)
  • 1 1/2 tsp Vanilla Extract
  • 1/2 Cup Unsalted Butter (Melted)

Glaze Ingredients:

  • 1/2 Cup Powdered Sugar
  • 2 tsp Lemon Juice

The Cake Instructions:

  1. Preheat oven to 350 degrees.
  2. Grease and flour an 8 1/2″ x 4 1/2″ loaf pan. Set aside.
  3. In a large mixing bowl, whisk the Flour, Baking Powder, Salt and Xanthan Gum until blended. Set aside.
  4. In a food processor, combine the Granulated Sugar and Lemon Zest until thoroughly mixed (about 7 pulses).
  5. Next, add the Lemon Juice, Eggs, Softened Cream Cheese and Vanilla Extract to the Sugar mixture. Process until completely blended (about 20-30 seconds)
  6. With the Food Processor running on Low, slowly drizzle the melted Butter into the Cream Cheese mixture. Continue processing until mixed completely (about 30-40 seconds).
  7. Add this Cream Cheese mixture to the Flour mixture in the large bowl. Whisk until thoroughly blended and smooth.
  8. Pour the batter into the prepared loaf pan. Bake for 15 minutes at 350 degrees. Decrease the temperature to 325 degrees and bake for an additional 35-40 minutes, or until cake is a light golden brown and toothpick inserted into the center comes out clean.
  9. Let cool in the pan on a wire rack for about 10 minutes. Remove cake from pan and continue cooling on the wire rack until completely cooled (about 1 1/2 hours).

The Glaze Instructions:

  1. In a small bowl, whisk together the Powdered Sugar and Lemon Juice until smooth, adding more sugar if not thick enough.

Putting it all Together:

  1. Once the cake is completely cooled, drizzle the Glaze over the top of the cake, letting it run down the sides. Sprinkle fresh Lemon Zest on top and let Glaze set for about 15 minutes before serving. Enjoy 🙂
Store cake at room temperature in a large plastic baggie, sealed tightly.

Breakfast, Desserts, Snacks, Sweet Breads


Gluten Free Stovetop Mac & Cheese

Gluten Free Stovetop Mac & Cheese

Gluten-Free Mac & Cheese, that’s not only delicious and creamy, but SO easy to make! This is one of those dishes that I was really missing when I found out that I could no longer eat anything containing Gluten…but, after a few adjustments and substitutions, I can once again enjoy one of my all-time favorite comfort foods 🙂
A HUGE “Thank You” to one of my favorite cooks, Ree Drummond (The Pioneer Woman) for sharing her Macaroni and Cheese recipe – I am slowly converting our favorite Pioneer Woman’s recipes to Gluten Free versions 🙂

  • 12 Oz. Gluten Free Dried Pasta ((4 Cups) Any small pasta will do (Elbow Macaroni, Fusilli, Penne, etc.))
  • 1 Large Egg (whisked)
  • 4 Tbsp Salted Butter ((1/2 stick))
  • 1/4 Cup All-Purpose Gluten Free Flour, Sifted ((sifting the flour helps cut down on the grittiness))
  • 2 1/2 Cups Whole Milk
  • 1 1/2 – 2 tsp Dry Mustard (You can substitute with Creamy Dijon (start with 1 Tbsp of the prepared mustard and increase if desired))
  • 1 lb Medium or Sharp Cheddar Cheese (Freshly grated)
  • 1/2 tsp Salt (Increase or decrease pertaining to your diet)
  • 1/4 – 1/2 tsp Freshly Ground Pepper
  • Chopped Fresh Green Onions (Topping; optional)
  1. Gather the ingredients.
  2. In a small bowl, whisk the egg and set aside.
  3. Begin cooking pasta according to the instructions on the packaging.
  4. While the pasta is cooking, melt the butter in a large pot over medium-low heat;
    whisk in the sifted GF Flour, whisking constantly for about 2 minutes.
  5. Add the Milk and Mustard to the Butter-Flour combination. Whisk until completely blended and smooth. Continue heating and whisking over medium-low heat until sauce is thick. This will take about 5 minutes.
  6. Reduce heat to low and take about 1/4 cup of the sauce and whisk it into the beaten egg, whisking constantly to prevent egg from scrambling 😉
    Once thoroughly blended, add this to the rest of the sauce, again constantly whisking to prevent egg from cooking. Add the Shredded Cheese, Salt and Pepper, mixing until completely blended and smooth.
  7. Add the cooked and drained Pasta to the sauce, stirring to evenly coat the Pasta.
  8. Top with chopped green onions, chives, parsley, etc. Serve immediately 🙂
Dinner, Lunch, Main Dish, Side Dish
American


Gluten Free Chocolate Hydrangea Cupcakes

Gluten Free Chocolate Hydrangea Cupcakes

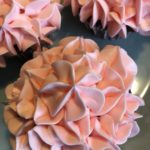
Even though I love Blue Hydrangeas, I just couldn’t bring myself to decorate these yummy cupcakes with Blue Icing….so, Pink Hydrangeas it is! The wonderful Chocolate of the cupcakes compliments the creamy Butter-Cream Icing perfectly….an instant hit in our household!!! Enjoy 🙂
A HUGE ‘Thank You” to America’s Test Kitchen for sharing this incredible Gluten Free Chocolate Cupcake recipe!

Cupcake Ingredients:

  • 1/2 Cup Canola Oil
  • 3 oz. Bittersweet Chocolate (chopped)
  • 1/3 Cup Unsweetened Cocoa Powder
  • 1/2 Cup + 2 Tbsp King Arthur Gluten Free Multi-Purpose Flour (sifted)
  • 3/4 tsp Gluten Free Baking Powder
  • 1/2 tsp Baking Soda
  • 1/2 tsp Xanthan Gum
  • 1/2 tsp Salt
  • 3 Large Eggs
  • 1 tsp Vanilla Extract
  • 3/4 Cup Granulated Sugar
  • 1/3 Cup Whole Milk

Buttercream Icing Ingredients:

  • 12 Tbsp Unsalted Butter (Softened)
  • 1 1/2 Tbsp Heavy Cream
  • 1 1/4 tsp Vanilla Extract
  • 1/8 tsp Salt
  • 1 1/2 Cups Powdered Sugar
  • Red Food Coloring Gel (as much or as little as you desire)

Making the Cupcakes:

  1. Preheat oven to 350 degrees.
  2. Line a 12-cup muffin tin with paper cupcake liners. Set aside.
  3. Gather the ingredients.
  4. In a microwave-safe bowl, microwave the Oil, Chocolate and Cocoa until chocolate is fully melted (about 2 minutes). Be sure to stir the mixture often to thoroughly mix ingredients and to prevent clumping. Remove from microwave and set aside to cool slightly.
  5. In a small bowl, whisk together the sifted GF Flour, Baking Powder, Baking Soda, Xanthan Gum and Salt. Set aside.
  6. In a large bowl, whisk together the Eggs, Vanilla Extract and Sugar until thoroughly blended.
  7. Next, whisk the Chocolate mixture and Milk into the Egg Mixture until thoroughly combined.
  8. Add the Flour Mixture to the Chocolate/Egg mixture, whisking until smooth and creamy.
  9. Using a 2″ cookie scoop or large spoon, scoop the batter into the prepared cupcake tin.
  10. Bake for 15-18 minutes, rotating the tin halfway through the baking time (my oven tends to run a little on the hot side, so 15 minutes is perfect for me), or until toothpick inserted into the middle of the cupcake comes out clean.
  11. Let cool in the cupcake tin for 10-15 minutes before transferring the cupcakes to a wire rack to cool completely.

Making the Buttercream Icing:

  1. In a Stand Mixer fitted with the whisk attachment, whisk the Butter, Heavy Cream, Vanilla Extract and Salt together on medium-high until smooth and creamy.
  2. Reduce speed to Low and slowly add the Powdered Sugar, 1/2 cup at a time, until well-blended.
  3. Increase speed to medium-high and whip until fluffy (about 5 minutes).
    If adding food coloring, do so halfway through this step and while mixer is turned OFF (I learned this the hard way ;))
  4. Once the cupcakes are completely cooled, you can begin icing them with the prepared icing/frosting using either a knife or pastry bag fitted with desired tip. Add sprinkles, too!
  5. Enjoy 🙂
Desserts, Snacks


Easy Gluten Free Cinnamon-Sugar Coffee Cake

Easy Gluten Free Cinnamon-Sugar Coffee Cake

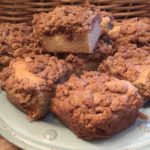
This Gluten Free Coffee Cake is SO moist, tasty and easy to make! It’s the perfect afternoon snack, dessert or breakfast for those weekend sleepovers. An instant hit with our family and friends! 🙂
*Thank You to America’s Test Kitchen for sharing this wonderful recipe!!

The Crumb Topping

  • 1/2 Cup Unsalted Butter, Melted (1 Stick or 8 Tbsp)
  • 1/3 Cup Granulated Sugar
  • 1/3 Cup Dark Brown Sugar (Packed)
  • 1 Large Egg Yolk
  • 1/8 tsp Salt
  • 3/4 tsp Cinnamon
  • 3/4 Cup + 1/3 Cup All-Purpose Gluten Free Flour, Sifted (I use Better Batter GF Multi-Purpose Flour)

The Cake

  • 3/4 Cup + 1/3 Cup All-Purpose GF Flour, Sifted (I use Better Batter GF Multi-Purpose Flour)
  • 1/2 Cup Granulated Sugar
  • 1/4 tsp Salt
  • 1/4 tsp Xanthan Gum (use ONLY if your GF Flour Blend doesn’t contain any; Better Batter contains Xanthan Gum, so I do not add it )
  • 1/2 tsp Baking Soda
  • 6 Tbsp Butter, Unsalted (Softened & Cut Into 6 Pieces)
  • 1/2 Cup Sour Cream
  • 2 Large Eggs
  • 1 Large Egg Yolk
  • 1 tsp Vanilla Extract
  1. Gather the ingredients.
  2. Spray an 8″ x 8″ baking pan with non-stick cooking spray. Next, fold a 16″ length of Parchment Paper to a width of 7″ and fit it into the baking pan, so that the excess hangs over the edges for easy removal of the cake. Set aside.

Making the topping:

  1. In a small sauce pan, melt the butter over low heat. Once completely melted, remove from heat and let cool slightly.
  2. Using a whisk, mix in the sugars, salt, cinnamon and egg yolk to the melted butter, thoroughly mixing.
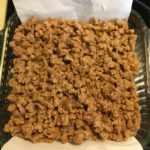
  3. Add the GF Flour to the butter mixture, blending well. The mixture will look like ground meat. Set aside.

Making the Cake:

  1. Place one of your oven racks in the upper-middle position of the oven and preheat oven to 325 degrees.
  2. In a stand mixer, using the paddle attachment, mix the GF Flour, Granulated Sugar, Salt, Xanthan Gum (if needed) and Baking Soda on low until completely blended.
  3. Next, add the Butter to the flour mixture, one piece at a time, mixing on low until butter pieces are no longer visible – mixture will resemble coarse sand.
  4. Add the Sour Cream, Eggs, Yolk and Vanilla to the Flour mixture and mix on medium-high until batter is light and fluffy.

Putting it Together:

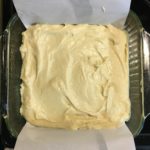
  1. Scrape the batter into the prepared baking pan and smooth the top.
  2. Using your hands, break the Topping Mixture into large pea-sized pieces and sprinkle over the top of the batter to completely cover.
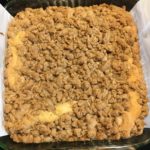
  3. Bake for 35-45 minutes, rotating the pan halfway through baking. It’s done when the middle is no longer jiggly and a wooden toothpick inserted into the middle comes out clean.
  4. Let cool in the pan for 30 minutes before removing, using the excess Parchment Paper to lift and pull the cake out.
  5. Place on a platter or cutting board to cut and serve. Enjoy!

**This cake stores well in an air-tight container for about 3 days.

***A HUGE “Thank You” to America’s Test Kitchen for sharing this wonderful recipe!!! 🙂

Breakfast, Desserts, Snacks