Pumpkin Spice Bundt Cake (Gluten Free)


Pumpkin Spice Bundt Cake (Gluten Free)
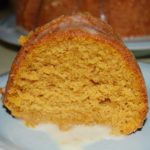
Wow! This cake takes it all!!! It is so moist and full of flavor…and, it's Gluten-Free 🙂 If you haven't tried "Gluten Free Heaven" Flour Mixes, then you don't know what you're missing! They have mastered the secret to GF baking – you will never know it's GF. A big shout out to Dixie Crystals for the original version of this recipe…I made a few changes in order to make it GF and allergy-friendly for my family. Thank you to Dixie Crystals and GF Heaven 🙂

Cake:

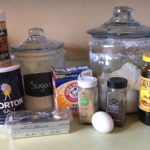
  • 1 3/4 Cups *Gluten Free Heaven" Cake & Pastry Flour (*I have not made this cake with any other GF flours; please note that all GF Flours are not created the same and results will vary if you use a different GF Flour)
  • 3/4 + 1/8 teaspoon *Xanthan Gum (*This must be added for “GF Heaven Flours” since they do not contain it; leave out if your GF Flour already contains it)
  • 1 teaspoon GF Baking Powder
  • 1/2 teaspoon GF Baking Soda
  • 2 teaspoons Ground Cinnamon
  • 1/2 teaspoon Ground Ginger
  • 1/8 teaspoon Ground Cloves
  • 1 teaspoon Salt
  • 1 Cup + 2 Tbsp Unsalted Butter (Very soft, but not melted)
  • 1 Cup Extra Fine Granulated Sugar (I always use Dixie Crystals)
  • 3 Large Eggs (room temperature)
  • 2/3 Cup Canned Pumpkin (I used Libby’s)
  • 1/3 Cup Orange Juice (I used “no pulp” kind)

Glaze:

  • 2/3 Cups Confectioner’s Sugar ((Powdered); plus more if you want a thicker consistency)
  • 2 Tbsp Orange Juice
  1. Set oven rack in the middle position; Preheat oven to 350 degrees.
  2. Butter and flour Bundt pan (you can also use a 9 x 5 – inch loaf pan); set aside.
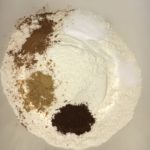
  3. In a medium-sized bowl, whisk together the GF Flour, Xanthan Gum, Baking Soda & Powder and Spices; set aside.
  4. Using a Stand or Handheld Mixer, fitted with the paddle attachment, beat the Butter until light & fluffy; add the Granulated Sugar and blend until thoroughly mixed and fluffy.
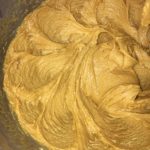
  5. Add the Eggs, one at a time, blending well after adding each Egg; scrape sides of bowl often; whip until the mixture is very light & fluffy.
  6. Next, add the Canned Pumpkin and mix until blended.
  7. Add the Dry Ingredient mixture and Orange Juice in 3-4 segments, mixing and scraping bowl and paddle well between each addition.
  8. Scrape the batter into the prepared Bundt Pan; place in the preheated oven on the middle rack and bake for 45 minutes (check the cake around the 30-35 minute mark to make sure it isn't browning too much – if it is, cover loosely with a piece of aluminum foil); test doneness after 45 minutes with a toothpick and pressing lightly on the top to see if it springs back; bake an additional 15-30 minutes, depending on your oven (my cake was ready after 45 minutes).

  9. Once cake is done, remove from oven and let cool in the pan for approximately 10-15 minutes before turning out onto a cooling rack.
  10. While the cake is cooling, thoroughly whisk the Powdered Sugar and Orange Juice together in a small bowl until desired consistency is reached; spoon the Glaze over slightly warm or completely cooled cake.
  11. Serve with or without Vanilla Ice Cream and Enjoy! 🙂

*Use the “Spoon & Sweep” method for measuring the GF Flour: use a spoon to fill the measuring cup with the desired amount of flour, then scrape across the top with the back side of a knife to level off.
Desserts, Snacks
Gluten Free
bundt cake, Cake, dixie crystals, gluten-free, Holidays, Pumpkin, pumpkin spice, sweet treats, sweets, Treats


Apple Cider Cupcakes with Cream Cheese Frosting ~ Gluten-Free

Apple Cider Cupcakes with Cream Cheese Frosting ~ Gluten-Free

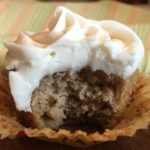
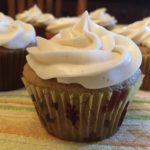
Oh my gosh! These Cupcakes are out of this world!!! I seriously could eat the entire batch 🙂 The Apple Cider adds a wonderful flavor and a bit of caramelized texture – they are delicious even without the frosting! You better double the batch like I did 😉
This recipe earned an instant 5-Star rating in our home!
Note: I adapted this wonderful recipe from forkinthekitchen.com to make it GF – Thank You for sharing!!!

Equipment

  • Muffin Tin
  • Cupcake Liners
  • Stand or handheld Mixer
  • Large Mixing Bowl

The Cupcake Ingredients:

  • 2 1/2 Cups Better Batter All Purpose Gluten Free Flour Mix
  • 1 tsp Baking Soda
  • 1 tsp Baking Powder, GF
  • 1 tsp Table Salt
  • 2 tsp Ground Cinnamon
  • 1 Cup Granulated Sugar (I use Dixie Crystal brand)
  • 1/2 Cup Light Brown Sugar, packed
  • 1 Cup Salted Butter, Softened (I use Land O’ Lakes brand)
  • 2 tsp Vanilla Extract
  • 4 Large Eggs (room temperature)
  • 1 Cup + 4 Tbsp Apple Cider

The Cream Cheese Frosting Ingredients:

  • 8 Oz. Cream Cheese, softened (I used Full Fat Philadelphia brand)
  • 1/4 Cup Salted Butter, Softened
  • 1/2 tsp Vanilla Extract
  • 2 Tbsp Apple Cider
  • 3 1/2 – 4 Cups Powdered Sugar
  • Ground Cinnamon ((optional – to either mix in with the frosting or to sprinkle on the top))

Making the Cupcakes:

  1. Place oven rack in the middle position and preheat oven to 350 degrees.
  2. Line 1-2 muffin tins with cupcake liners; set aside.
  3. In a large mixing bowl, whisk together the GF Flour, Baking Soda, Baking Powder, Salt and Cinnamon until completely blended; Set aside.
  4. Using a Stand or Handheld Mixer, fitted with the paddle attachment, cream the Butter and Sugars until light and fluffy.
  5. Next, with the mixer set on low, add the Vanilla Extract and the Eggs, one at a time; Continue mixing until thoroughly blended.
  6. With the mixer still set on Low, alternate adding the GF Flour mixture (1/2 cup at a time) and the Apple Cider (a couple of Tablespoons at a time) to the Butter-Sugar mixture, blending until just combined after each addition.
  7. Scoop the Cupcake Batter into the lined muffin tin/tins, filling each about 2/3 full.
  8. Bake for approximately 17-20 minutes, or until toothpick inserted into the center comes out clean.
  9. Let cool in the pan for about 5-10 minutes and then transfer to a wire cooling rack to cool completely before frosting.

Making the Frosting:

  1. Using a Stand or Handheld Mixer, fitted with the paddle attachment, cream the softened Cream Cheese and Butter until light and fluffy.
  2. Slowly add the Vanilla Extract and Apple Cider, blending thoroughly.
  3. Next, with the mixer set on low, add the Powdered Sugar, 1/2 cup at a time, beating well between each addition. I usually add between 3 1/2 to 4 cups of Powdered Sugar for the right consistency. Note: If you’re adding Ground Cinnamon into the Frosting, do so now (I usually add several pinches).
  4. Spread or pipe the Frosting onto each cooled cupcake and top with a little Ground Cinnamon, if desired.
  5. Enjoy!
Desserts, Snacks


Ginger Molasses Cookies ~ Gluten Free

Ginger Molasses Cookies ~ Gluten Free

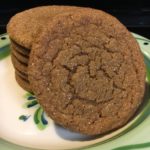
Get ready for the BEST Gluten-Free Ginger Molasses Cookies on the planet! I make batches of these soft, chewy and delicious Cookies for Christmas gifts…our family, friends and neighbors LOVE them! They make great Holiday gifts, so get out your aprons and cookie sheets and start baking! The dough freezes really well, so you can make several batches ahead of time. Enjoy!
*As a special treat for the Holidays, make my Ginger Cookie Ice Cream Sandwiches by just adding a scoop of Vanilla Bean Ice Cream between two of my GF Ginger Molasses Cookies!!! Yummy! 🙂

  • 2 Cups All-Purpose Gluten Free Flour (I use “GF Jules” all-purpose gf flour for this recipe – this GF Flour Blend already has Xanthan Gum in it, so I do NOT add Xanthan Gum)
  • *1 tsp Xanthan Gum (add this ONLY if your GF Flour blend does not already contain it)
  • 2 teaspoons Baking Soda
  • 1 teaspoon Ground Cinnamon
  • 1/2 teaspoon Ground Cloves
  • 1/2 teaspoon Ground Ginger
  • 1/2 teaspoon Salt
  • 3/4 Cup Shortening, melted (cooled for 10-15 minutes)
  • 1/4 Cup Molasses
  • 1 Cup Granulated Sugar
  • 1 Large Egg, lightly beaten
  • *1/2 – 1 Gallon Vanilla Bean Ice Cream (If you’re making my Holiday Ginger Cookie Ice Cream Sandwiches, see Notes*)
  1. Gather all your ingredients.

The Flour Mixture

  1. In a large bowl, combine the Flour, *Xanthan Gum (only if needed), Baking Soda and spices. Mix well and set aside.

The Shortening Mixture

  1. In a small saucepan, melt the shortening, remove from heat and cool for about 10-15 minutes (this is so you don’t cook the eggs when you add it).
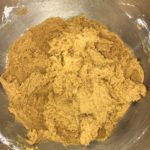
  2. While the shortening is cooling, combine the Molasses, Sugar and egg using a Stand or Handheld Mixer. Add the cooled shortening and mix well.

Combining the Wet and Dry Ingredients

  1. Slowly add the Flour Mixture to the wet mixture, 1/2 cup at a time, blending well after each addition.
  2. Cover the bowl with plastic wrap and refrigerate for at least 1-2 hours – I find that chilling the dough overnight gets the best results.
  3. When ready to bake the cookies, preheat the oven to 350 degrees.
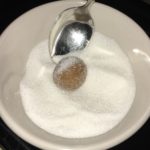
  4. While the oven is preheating shape the dough into small 1″ balls (you can use a small cookie scoop to get more uniform cookies) and roll in a bowl of granulated sugar, coating well.
  5. Space cookie balls at least 2″ apart on an ungreased cookie sheet lined with a baking mat or parchment paper.
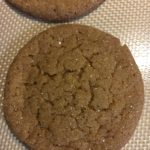
  6. Bake for 8-10 minutes, or until they are covered in “cracks.”
  7. Let cool for about 2 minutes on the cookie sheet before transferring to a wire rack to cool completely…try one (or two) while they’re still warm!
  8. Once they are completely cooled, you can package them in cellophane gift bags
  9. Enjoy!

This dough freezes really well, so you can make several batches ahead of time for Christmas gifts, parties, etc.

*Note: For my “Holiday Ginger Cookie Ice Cream Sandwiches ~ Gluten Free” just add a scoop of Vanilla Bean Ice Cream between two of my GF Ginger Molasses Cookies, wrap in plastic wrap and freeze until ready to eat! 🙂

Desserts, Snacks