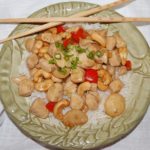
Cashew Chicken ~ Gluten Free

Cashew Chicken ~ Gluten Free

Our family’s go-to order from our favorite local Chinese restaurant was always the Cashew Chicken. However, since we moved, we have not been able to find another restaurant that makes a Cashew Chicken as well as our favorite. So, I pulled up my shirt sleeves and headed into my kitchen to try and re-create our much-loved and missed recipe 😉 After MANY failed attempts, I finally succeeded in pleasing all members of my family! I hope you enjoy it as much as we do 🙂

Soy Sauce Mixture:

  • 1/4 Cup Bragg Liquid Aminos or Soy Sauce (I use Bragg Liquid Aminos because it’s GF and Soy Free, but you can use regular or low-sodium soy sauce)
  • 1 Tbsp Rice Vinegar
  • 1 Tbsp Worcestershire sauce
  • 1 Tbsp Light Brown Sugar
  • 1/2 tsp Canola Oil
  • 1 Tbsp Fresh Ginger (finely chopped)

Chicken:

  • 4 Boneless, Skinless Chicken Breasts (cut into bite-size pieces)
  • 1-2 Pinches Table Salt
  • 1-2 Pinches Ground Black Pepper
  • 3 Tbsp Canola Oil

Garlic, Bell Peppers, etc.:

  • 1 tsp Garlic, minced ((2 cloves))
  • 1 Large Bell Pepper (Cut into bite-size pieces; I like to use Red or Orange for the color and the sweetness)
  • 2 Tbsp Fresh Ginger, chopped
  • 1 Cup Broccoli, chopped ((optional) or Snow Peas)
  • 1/4 Cup Dry Sherry

The Slurry (i.e the thickener):

  • 2 Tbsp Cornstarch (make sure it’s Gluten Free, if you’re GF)
  • 1/4 Cup Bragg Liquid Aminos or Soy Sauce

The Yummy Parts:

  • 1 Cup Whole Roasted Unsalted Cashews
  • 1/3 – 1/2 Cup Water Chestnuts, chopped (I leave mine whole for more crunch)
  • 1-2 Scallions, Green and White Parts (sliced for topping)

The Soy Sauce Mixture:

  1. In a small bowl, whisk together the Bragg Liquid Aminos (or Soy Sauce), Rice Vinegar, Worcestershire Sauce, Light Brown Sugar, Canola Oil and Ginger; Set aside.

The Chicken & Veggies:

  1. In a large non-stick skillet, heat the 3 Tablespoons of Canola Oil over medium heat.
  2. Once the oil is shimmering, add the chicken, sprinkling with salt and pepper, and saute until thoroughly cooked (about 5 – 8 minutes).
  3. Remove the cooked chicken with a slotted spoon and place in a large bowl; set aside.
  4. Reduce the temperature to medium-low, add the Garlic, Bell Pepper, and 2 Tablespoons Ginger to the same skillet; cook for about 2 minutes, keeping Peppers crisp. (Note: if you’re adding Broccoli or Snow Peas, do so now)
  5. Next, add the Sherry and stir thoroughly with the juices and Garlic-Peppers-Ginger mixture.
  6. Add the Soy Sauce Mixture that you set aside earlier to the skillet and bring to a boil (about 1 minute).
  7. In a small bowl, whisk together the Cornstarch and 1/4 Cup Bragg Aminos to make the slurry; add this to the skillet and stir thoroughly to blend well (if sauce is too thick, add 1/4 cup water).
  8. Lastly, return the Chicken to the skillet along with the Cashews and Water Chestnuts;
  9. Garnish with scallions and serve. Enjoy!
Dinner, Main Dish
Asian


Honey-Sriracha Tofu Bites ~ Dairy-Free; Gluten-Free; Vegan

Honey-Sriracha Tofu Bites ~ Dairy-Free; Gluten-Free; Vegan

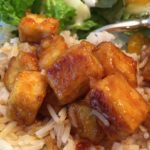
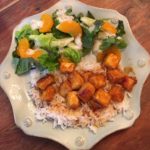
This quick & easy recipe is chock full of flavor. It’s sweet with a kick of heat and is ready in about 20 minutes! Serve over rice with your favorite veggie 🙂

  • 14 oz. Medium-Firm or Firm Tofu
  • 1 tsp Garlic, minced
  • 2 Tbsp Sriracha Sauce
  • 2 Tbsp Braggs Liquid Aminos (you may also use Soy Sauce)
  • 4 Tbsp Honey (I usually add 4 Heaping Tablespoons)
  • 2 Tbsp White Wine Vinegar (you may also use Rice Vinegar)
  • 3-4 Tbsp Potato Starch (or GF Corn Starch*)
  • 3 Tbsp Canola Oil
  • 1-2 Chopped Fresh Green Onions (optional for topping)
  1. Gather all ingredients.
  2. Drain the water off of the block of Tofu and set the tofu on several layers of paper towels for about 10 minutes, flipping over a few times (this step helps pull the water out of the tofu, so it won’t “sweat” and add a bunch of liquid to your dish while cooking).
  3. While the tofu is draining, whisk together the Garlic, Sriracha, Braggs Liquid Aminos, Honey and Vinegar until completely blended. Set aside.
  4. Next, cut up the tofu into cubes and place in a medium to large bowl.
  5. Sprinkle the Potato Starch (NOT Potato Flour) over the cubes of Tofu and gently toss to evenly coat. *You may use Corn Starch in place of the Potato Starch, but the end result will be a little different…more crispy and chewy when using the Corn Starch; the Potato Starch results in a softer outside and somewhat “gummy.” My family prefers the Potato Starch, but both end up tasting delicious 😉
  6. In a large non-stick skillet, heat the Canola Oil over Medium to Medium-High heat until it has a shimmer on the surface, which indicates that it’s ready.
  7. Carefully, add the coated Tofu cubes and spread them out evenly. Cook each side for about 2-3 minutes or until Tofu turns a light, golden brown.
  8. Add about 1/2 to 3/4 of the Honey-Sriracha Sauce (the reserve sauce is for topping) to the lightly-browned Tofu and gently stir to coat the Tofu.
  9. Lower the temperature to Low and continue cooking for another 2-3 minutes, or until the sauce has thickened.
  10. Serve over Rice, spooning a little bit of the reserve sauce over the top, and pair with your favorite vegetable. Yummy!

A BIG “Thank You” to pickledplum.com for sharing the original recipe 🙂 I made a few changes in order to make it allergy-friendly for my family.

Dinner, Lunch, Main Dish, Side Dish


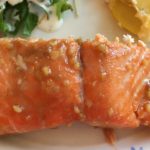
Maple Glazed Salmon (Gluten Free)

Maple Glazed Salmon (Gluten Free)

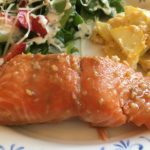
This recipe is great baked, grilled or pan-seared! The balance of sweetness from the Maple Syrup and the saltiness of the Bragg Liquid Aminos and minced Garlic is perfect! With only 4 ingredients, this recipe is wonderful for those nights when you just don’t feel like cooking a complicated recipe. As I have mentioned before, we eat A LOT of Salmon, so I am always trying new ways to prepare it. I have to admit that I prefer my salmon pan-seared, but usually end up baking it in the oven for ease and less mess 😉 I hope you enjoy this recipe as much as we do!

  • 1 lb. Salmon (Rinsed in cool water & lightly patted dry with paper towels)
  • 1/2 Cup 100% Pure Maple Syrup (not Pancake syrup)
  • 1/4 Cup Bragg Liquid Aminos (You can substitute with Soy Sauce)
  • 1 1/2 tsp Garlic, minced

Instructions for Baking (please see Cook’s Notes for Grilling & Pan-Searing Instructions):

  1. Place the Salmon into a large resealable plastic bag and set aside. *I usually place the plastic bag with the zipper part opened wide in a deep bowl while I rinse the Salmon…then I can plop the Salmon easily into the plastic bag without contaminating the outside of the bag with messy “fish hands” 😉 Set aside.
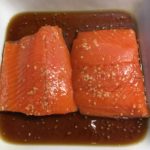
  2. In a small bowl, combine the Maple Syrup, the Bragg Liquid Aminos (or Soy Sauce) and Garlic. Mix well and pour over the Salmon in the plastic bag.
  3. Make certain that the bag is closed securely, then gently rotate the bag back-and-forth (or flip-flop) to evenly coat the Salmon with the Maple marinade. Place flat into a baking dish and refrigerate for at least 1 hour, flipping over halfway through the marinating time.
  4. Once you are ready to bake the Salmon, preheat the oven to 425 degrees.
  5. Dump the Salmon and the marinade into the baking dish.
  6. Bake for 15-18 minutes or until the Salmon flakes apart easily.
  7. Serve with your favorite sides! Enjoy!!!

Cook’s Notes:

Grilling: If you’re grilling the Salmon, discard the marinade before grilling (I usually make a separate half-batch of the marinade mixture for using as a dip/sauce to serve with the finished Salmon). I cover the grill with heavy-duty foil and spray liberally with non-stick cooking spray before placing the Salmon onto a Medium heated grill. Grill for about 5-7 minutes per side, depending on the thickness of your Salmon. Once the Salmon flakes apart easily, it is done.

Pan-Searing: Over medium to medium-high, heat 1 Tablespoon of Olive Oil and 1 Tablespoon of Salted Butter in a non-stick skillet until the surface shimmers and the butter is sizzling when you “swish” the liquid around in the pan. Place the marinated Salmon (discarding the marinade; Again, I usually make a separate half-batch of the marinade mixture for using as a dip/sauce to serve with the finished Salmon), skin side up, into the heated pan and cook, without moving the fillets, for about 4-5 minutes (you can reduce heat to medium if it’s “spitting”). Gently flip the Salmon fillets over and reduce the heat to medium or medium-low. Continue cooking for another 4-5 minutes. Salmon will still be slightly pink inside, but buttery and crispy outside. Enjoy!

Dinner, Main Dish