Brown Sugar & Cinnamon Breakfast Rolls ~ Gluten Free – Yum!

Brown Sugar & Cinnamon Breakfast Rolls ~ Gluten Free – Yum!
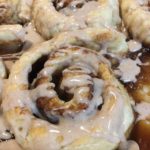
These taste just like the ones I remember from my childhood AND they’re gluten-free! My oldest daughter states that they remind her of a better version of the ones from the can 😉 These GF Cinnamon Rolls truly are yummy and are surprisingly easy to make! Now, our family can have our annual Cinnamon Rolls on Christmas morning (and weekend mornings!)!!! A BIG “Thank You” to Nicole @ glutenfreeonashoestring for sharing this wonderful recipe 🙂

Ingredients for the Rolls:

  • 3 1/4 Cups Gluten Free All-Purpose Flour (I use Better Batter brand and it works beautifully)
  • 1 1/2 tsp Xanthan Gum (use ONLY if your GF Flour blend doesn’t already contain it – (Better Batter brand already contains Xanthan Gum, so I skip this ingredeint))
  • 1/2 Cup Nonfat Dry Milk (you can also use cultured buttermilk blend powder)
  • 2 tsp Rapid Rise or Instant Yeast
  • 1/4 tsp Cream of Tartar
  • 1/4 tsp Baking Soda
  • 2 Tbsp Light Brown Sugar (packed)
  • 1 tsp Kosher Salt
  • 1 tsp Apple Cider Vinegar
  • 2 Tbsp Unsalted Butter (softened to room temperature)
  • 1 Large Egg, lightly beaten (at room temperature)
  • 1 1/2 Cups Warm Water (approximately 95 degrees )

Ingredients for the Filling:

  • 6 Tbsp Unsalted Butter (softened to room temperature; divided)
  • 1 1/2 Cup Light Brown Sugar (packed & divided)
  • 2 tsp Ground Cinnamon (divided)

Ingredients for the Glaze:

  • 1 Cup Powdered Sugar
  • 1 Tbsp Milk (I use Whole Milk, but any kind is fine)
  • 1/2 tsp Ground Cinnamon
  1. Grease a 9″ x 13″ baking dish; set aside

Making the Dough:

  1. Using a Stand or Handheld Mixer, fitted with the Paddle attachment, combine the GF Flour, Xanthan Gum (only if needed), Nonfat Dry Milk, Yeast, Cream of Tartar, Baking Soda, Brown Sugar and Salt; mix until completely blended.
  2. Next, slowly add the Vinegar, Butter and Egg; mix until thoroughly blended.
  3. Lastly, with the Mixer set on Low, add the Warm Water gradually in a slow, steady stream…let it trickle down the inside of the bowl until all of the Water has been added.
  4. Scrape down the sides of the bowl, then turn the Mixer up to Med-High and let mix for 3 minutes; dough should be moist and starting to pull away from the sides of the bowl.
  5. Gently scrape the dough out onto a lightly floured working surface; lightly flour the top with more flour and gently knead until smooth.
  6. Divide the dough in half and place half under a towel or plastic wrap to keep it from drying out.
  7. Lightly flour the working half of the dough and roll into a rectangle, about 9″ x 12″ and 1/2″ thick, with a rolling pin (add flour as needed to prevent sticking).

Adding the Filling:

  1. Using an offset spatula or a butter knife, spread 1/2 of the softened butter onto the dough, leaving a 1″ border around the edges.
  2. Next, sprinkle 1/2 of the Brown Sugar on top of the butter and gently pat it down with your fingers; sprinkle 1/2 of the Cinnamon onto the Brown Sugar.
  3. Starting on one of the short sides of the dough, roll tightly into a coil/tube and gently pinch the end of the roll with the body of the roll to seal together.
  4. Using a very sharp knife, slice the dough roll into 2″ wide sections (I know this seems quite large, but you’re going to press them down) and place them into the prepared Baking Dish, about 1″ apart; gently press each roll down by about 1/3.
  5. Repeat these steps with the remaining half of the dough and filling.
  6. Cover the Baking Dish with lightly oiled plastic wrap (I use non-stick cooking spray) and place in a warm, draft-free place to rise for about 1 hour; the dough should double in size.

Baking the Rolls:

  1. Once the dough has almost finished rising, preheat the oven to 350 degrees.
  2. Remove the plastic wrap and bake on the center rack for about 23-27 minutes, or until the rolls are golden brown and cooked in the middle.
  3. Let cool to room temperature before adding the glaze.

Making the Glaze:

  1. While the rolls are cooling, combine the Powdered Sugar, Milk and Cinnamon in a small bowl, mixing until smooth; add additional Milk, a little at a time, if needed to reach desired consistency (the glaze should be thick, but able to be drizzled)
  2. Enjoy!!!
Breakfast, Desserts, Snacks


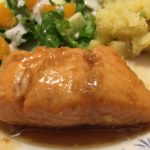
Maple-Brown Sugar Salmon

Maple-Brown Sugar Salmon

Are you looking for a quick & easy recipe for dinner? Well, here it is! Since my family eats a lot of Salmon, I am always experimenting with new seasonings & marinades and different ways of cooking our cherished Salmon. This recipe only calls for 7 ingredients (if you include the spices) and it’s ready in under 30 minutes 🙂 I added Cayenne for a little kick, but you can omit this if desired. Enjoy!

  • 1 1/2 lbs Fresh Salmon (rinsed in cold water and patted dry with paper towels)
  • 1/4 Cup 100% Pure Maple Syrup (not Pancake syrup)
  • 1/4 Cup Light Brown Sugar (not packed)
  • 2 Tbsp Canola Oil
  • 1 tsp Garlic, minced (fresh or jar)
  • 1/8-1/4 tsp Salt (regular, not Kosher)
  • 1-2 Pinches Cayenne Pepper, ground (add 1 pinch at a time to taste (optional))
  1. Preheat oven to 425 degrees.
  2. Gather the ingredients.
  3. Place rinsed and dried Salmon in a small, deep baking dish (8″ x 8″ or 9″ x 9″) – you want the Salmon to take up most of the room in the dish, so it stays submerged in the sauce while cooking.
  4. Combine all of the remaining ingredients in a small bowl or glass measuring cup that has a pour spout; Whisk together until thoroughly blended; pour or spoon this over the Salmon.
  5. Note: you can leave the Salmon with meat side facing up for a milder flavor or gently flip the Salmon over, so the meat side faces down and is submerged in the sauce during the baking process for a stronger flavor.
  6. Bake on the middle rack for 16-18 minutes (depending on the thickness of your Salmon), spooning some of the sauce over the Salmon halfway through the cooking time (if you’re baking with the meat side facing up). Salmon is ready when it flakes apart easily with a fork.
  7. Spoon sauce over the top before serving and enjoy with your favorite sides 🙂

Note:

  1. You can prepare the sauce and marinate the Salmon for 1-12 hours in a large resealable plastic bag for a stronger flavor before cooking.
  2. You can also cook the Salmon by grilling or pan-searing it for approximately 3-5 minutes per side (depending on the thickness of the fillet).
Dinner, Lunch, Main Dish


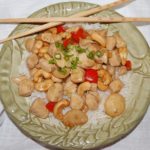
Cashew Chicken ~ Gluten Free

Cashew Chicken ~ Gluten Free

Our family’s go-to order from our favorite local Chinese restaurant was always the Cashew Chicken. However, since we moved, we have not been able to find another restaurant that makes a Cashew Chicken as well as our favorite. So, I pulled up my shirt sleeves and headed into my kitchen to try and re-create our much-loved and missed recipe 😉 After MANY failed attempts, I finally succeeded in pleasing all members of my family! I hope you enjoy it as much as we do 🙂

Soy Sauce Mixture:

  • 1/4 Cup Bragg Liquid Aminos or Soy Sauce (I use Bragg Liquid Aminos because it’s GF and Soy Free, but you can use regular or low-sodium soy sauce)
  • 1 Tbsp Rice Vinegar
  • 1 Tbsp Worcestershire sauce
  • 1 Tbsp Light Brown Sugar
  • 1/2 tsp Canola Oil
  • 1 Tbsp Fresh Ginger (finely chopped)

Chicken:

  • 4 Boneless, Skinless Chicken Breasts (cut into bite-size pieces)
  • 1-2 Pinches Table Salt
  • 1-2 Pinches Ground Black Pepper
  • 3 Tbsp Canola Oil

Garlic, Bell Peppers, etc.:

  • 1 tsp Garlic, minced ((2 cloves))
  • 1 Large Bell Pepper (Cut into bite-size pieces; I like to use Red or Orange for the color and the sweetness)
  • 2 Tbsp Fresh Ginger, chopped
  • 1 Cup Broccoli, chopped ((optional) or Snow Peas)
  • 1/4 Cup Dry Sherry

The Slurry (i.e the thickener):

  • 2 Tbsp Cornstarch (make sure it’s Gluten Free, if you’re GF)
  • 1/4 Cup Bragg Liquid Aminos or Soy Sauce

The Yummy Parts:

  • 1 Cup Whole Roasted Unsalted Cashews
  • 1/3 – 1/2 Cup Water Chestnuts, chopped (I leave mine whole for more crunch)
  • 1-2 Scallions, Green and White Parts (sliced for topping)

The Soy Sauce Mixture:

  1. In a small bowl, whisk together the Bragg Liquid Aminos (or Soy Sauce), Rice Vinegar, Worcestershire Sauce, Light Brown Sugar, Canola Oil and Ginger; Set aside.

The Chicken & Veggies:

  1. In a large non-stick skillet, heat the 3 Tablespoons of Canola Oil over medium heat.
  2. Once the oil is shimmering, add the chicken, sprinkling with salt and pepper, and saute until thoroughly cooked (about 5 – 8 minutes).
  3. Remove the cooked chicken with a slotted spoon and place in a large bowl; set aside.
  4. Reduce the temperature to medium-low, add the Garlic, Bell Pepper, and 2 Tablespoons Ginger to the same skillet; cook for about 2 minutes, keeping Peppers crisp. (Note: if you’re adding Broccoli or Snow Peas, do so now)
  5. Next, add the Sherry and stir thoroughly with the juices and Garlic-Peppers-Ginger mixture.
  6. Add the Soy Sauce Mixture that you set aside earlier to the skillet and bring to a boil (about 1 minute).
  7. In a small bowl, whisk together the Cornstarch and 1/4 Cup Bragg Aminos to make the slurry; add this to the skillet and stir thoroughly to blend well (if sauce is too thick, add 1/4 cup water).
  8. Lastly, return the Chicken to the skillet along with the Cashews and Water Chestnuts;
  9. Garnish with scallions and serve. Enjoy!
Dinner, Main Dish
Asian


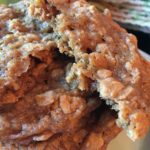
Brown Sugar Oatmeal Cookies ~ Gluten-Free

Brown Sugar Oatmeal Cookies ~ Gluten-Free

These Oatmeal Cookies are so buttery and chewy that they melt in your mouth. I also love the fact that there are only 8 ingredients needed…all ingredients that we usually have on-hand.
Of course, a HUGE “Thank You” to Ree Drummond (aka: The Pioneer Woman) for sharing the original recipe for these wonderful cookies! The only thing that I changed was swapping out the regular flour with Gluten-Free Flour 😉 These cookies earned a 5-Star review in our house!

  • 2 Cups Dark Brown Sugar (firmly packed)
  • 1 Cup Salted Butter, Softened
  • 2 tsp Vanilla Extract
  • 2 Large Eggs
  • 1 1/2 Cups Better Batter All Purpose Gluten Free Flour Mix (you can use other brands, but make sure they contain Xanthan Gum – results will vary)
  • 1 tsp Salt (table)
  • 1/2 tsp Baking Soda
  • 3 Cups Gluten-Free Old Fashioned Oats (I use Quaker Brand)
  • 1/2 Cup Finely Chopped Nuts (optional ~ I did not include nuts due to nut allergies)
  1. Preheat oven to 350 degrees.
  2. Gather the ingredients.
  3. Line 1-2 cookie sheets with Parchment Paper or a baking pad. Set aside.
  4. Using a stand mixer, with the paddle attachment, combine the Brown Sugar and Softened Butter until light and fluffy.
  5. Next, add the Vanilla and the Eggs, one at a time, scraping down the sides of the bowl after adding each Egg.
  6. In a separate bowl, combine the GF Flour, Salt and Baking Soda until well-blended.
  7. Slowly add the Flour mixture to the Butter mixture, one cup at a time, mixing until just combined after each addition.
  8. Next, add the Oats (and Chopped Nuts, if using), one cup at a time, scraping the sides of the bowl after each addition. Mix until all Oats are blended (be sure to check the very bottom of the bowl for any dry oats).
  9. Using a cookie scoop or spoon of your desired size (I used a 2″ cookie scoop), drop cookie dough balls onto prepared cookie sheets several inches apart (they spread!)
  10. Bake for 12-14 minutes (longer if you want crispy cookies).
  11. Cool on the cookie sheets for about 2 minutes before transferring them to a wire cooling rack.
  12. Enjoy with a cold glass of milk or a bowl of Vanilla Ice Cream 🙂
Desserts, Snacks


Brown Sugar-Cinnamon Coffee Cake (Gluten Free)

Brown Sugar-Cinnamon Coffee Cake (Gluten Free)

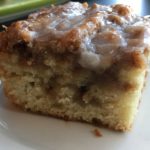
Do you like Coffee Cake? Are you Gluten-intolerant or have Celiac’s and miss eating yummy treats, like Brown Sugar Cinnamon Coffee Cake? Well, now you can have your coffee cake and eat it, too 🙂 This is truly one of the BEST Coffee Cakes I have ever eaten!!! A HUGE “Thank You” to Audrey from “Mama Knows Gluten Free” for sharing this delicious recipe…my entire family thanks you 🙂

The Cake Ingredients:

  • 3 Cups All-Purpose Gluten Free Flour, Sifted (I use King Arthur brand; sifted)
  • 1 1/2 tsp Xanthan Gum (if your GF Flour Blend doesn’t already have it)
  • 1/4 tsp Salt
  • 1 Cup Granulated Sugar
  • 4 tsp Baking Powder (make sure it’s GF)
  • 1 1/2 Cups Whole Milk (you can also use Almond, Rice, Cashew or Coconut Milk for a dairy-free option)
  • 2 Large Eggs
  • 2 tsp Vanilla Extract
  • 1/2 Cup Unsalted Butter, melted (or use Earth Balance brand for a dairy-free version)

The Brown Sugar-Cinnamon Topping

  • 1 Cup Unsalted Butter, softened (or Earth Balance for dairy-free)
  • 1 Cup Light Brown Sugar, packed
  • 2 Tbsp GF All-Purpose Flour
  • 1 Tbsp Ground Cinnamon

The Glaze Ingredients:

  • 2 Cups Powdered Sugar
  • 5 Tbsp Whole Milk (or dairy-free milk of your choice)
  • 1 tsp Vanilla Extract

Making the Cake:

  1. Preheat oven to 350 degrees.
  2. Spray a 9″ x 13″ baking pan (preferably glass) with non-stick cooking spray. Set aside.
  3. Gather the ingredients needed for Cake.
  4. Melt the Butter and set aside.
  5. Using a stand or handheld mixer, fitted with the paddle attachment, mix the GF Flour, Xanthan Gum, Salt, Sugar and Baking Powder on Low until thoroughly blended.
  6. Add the Milk, Eggs and Vanilla to the Flour mixture, blending until thoroughly mixed.
  7. Slowly drizzle the Melted Butter into the Flour-Milk mixture, mixing until fully incorporated.
  8. Pour batter into the prepared baking pan. Set aside while you prepare the Brown Sugar topping.

Making the Brown Sugar-Cinnamon Topping:

  1. Using a Stand or handheld mixer, fitted with the paddle attachment, combine the softened Butter, Brown Sugar, GF Flour and Cinnamon until thoroughly mixed and creamy.
  2. Drop this Brown Sugar mixture by spoonfuls onto the coffee cake batter in the baking pan making sure to cover the surface equally.
  3. Using a sharp knife, thoroughly swirl the Brown Sugar mixture throughout the coffee cake batter.
  4. Bake in preheated oven for about 35-40 minutes, checking after 30 minutes. Cake is done when a toothpick inserted into the middle comes out clean.

Making the Glaze:

  1. In a large bowl, whisk together the Powdered Sugar, Milk and Vanilla until smooth. Drizzle over the warm Coffee Cake and let set for about 10 minutes. Slice into desired-size pieces and Enjoy with a glass of ice-cold milk :)!

Store in an air-tight comtainer. Re-heat slices in microwave for about 10-15 seconds 🙂

Breakfast, Desserts, Snacks, Sweet Breads
American


One Dish Brown Sugar Garlic Chicken & Potatoes

One Dish Brown Sugar Chicken & Potatoes

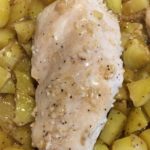
This sweet and savory recipe is perfect for those nights when you’re in a rush and need a quick and easy-to-prepare dinner with few ingredients! I also use this same recipe for Pork Chops that I found @ dinnerthendessert.com…one of my favorite food websites! 🙂

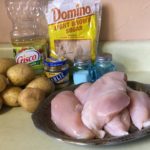
  • 3-4 Large Boneless, Skinless Chicken Breasts (Rinsed and trimmed)
  • 1/2 Cup Light Brown Sugar (Firmly packed; increase to 3/4 Cup if you prefer sweeter taste)
  • 2 Tablespoons minced garlic (Fresh or in the jar)
  • 1/2 + 1/4 teaspoon Salt (1/2 tsp for the potatoes and 1/4 tsp for the chicken)
  • 1/4 + 1/4 teaspoon Freshly Ground Pepper (1/4 tsp for potatoes & 1/4 tsp for chicken)
  • 8-10 Medium Yukon Potatoes (Cut into bite-size pieces)
  • 2 + 1 Tablespoons Canola Oil (2 T for potatoes & 1 T for chicken)
  1. Preheat oven to 400 degrees.
  2. Gather the ingredients.
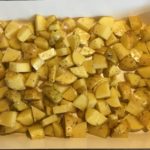
  3. In a large bowl, combine the Potatoes, 1/2 teaspoon Salt, 1/4 teaspoon Pepper and 2 Tablespoons Oil. Toss to coat well. Spread into a 9″ x 13″ deep baking dish.
  4. Using the same large bowl, combine the Brown Sugar, Garlic, 1/4 teaspoon Salt, 1/4 teaspoon Pepper and 1 Tablespoon Oil. Mix well.
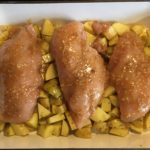
  5. Add the Chicken to the Brown Sugar mix, turning to coat well (I kind of mush the chicken around a little). Place Chicken on top of the potatoes in pan. If you have any leftover Brown Sugar mix, spread it amongst the chicken breasts in the pan.
  6. Bake for 30-35 minutes, turning Chicken over halfway through.
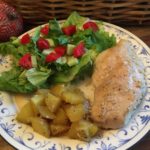
  7. Be sure to drizzle some of the savory juices over the Chicken and Potatoes before serving. Serve with your favorite veggie and enjoy! 🙂
Main Dish, Side Dish
American


Quick & Easy Barbecue Chicken Biscuits ~ Kids Love Them!

Easy Barbecue Chicken Biscuits

Kids adore these Barbecue Chicken Biscuits shaped into little Cups! They're slightly sweet and will remind you of those "Manwich Sloppy Joes." Kids love them because they can pick one up and eat it in just a few bites. Parents love them because these yummy little morsels are tasty, filling and not "sloppy!" Perfect for ANY night of the week :).

  • 1 lb Ground Chicken (Or Turkey or Beef)
  • 1 Cup Ketchup
  • 1 Can Tomato Soup
  • 1 Small Onion (Diced)
  • 1 1/2 tsp White Vinegar
  • 2 Tablespoons Light Brown Sugar
  • 1 10-Count Can Refrigerator Biscuits
  • 1 Cup Shredded Cheddar Cheese

Making the Chicken Barbecue Filling

  1. Gather the ingredients.
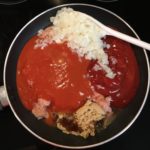
  2. In a large non-stick skillet, dump the chicken, ketchup, tomato soup, onion, vinegar and sugar.
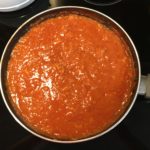
  3. Mix well and simmer for 30 minutes.

Making the “Cups”

  1. Preheat oven to 400 degrees.
  2. While the Barbecue Filling is simmering, roll out the biscuits on a floured surface, then press each into a muffin tin.

Assembling the Barbecue Chicken Cups

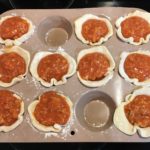
  1. Fill each cup with the Barbecue Filling (you will have some leftover filling).
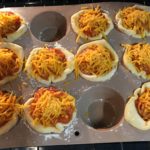
  2. Top with the shredded cheese.
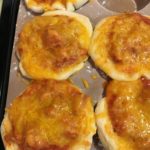
  3. Bake for 8-11 minutes or until the edges of the biscuits are a light golden brown.
  4. Let rest for a couple of minutes before removing them from the muffin tin.
  5. Serve with a fresh green salad and Enjoy!