Chocolate Frosted Brownies ~ Gluten Free

Chocolate Frosted Brownies ~ Gluten Free
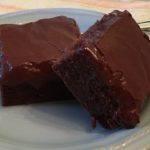
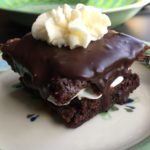
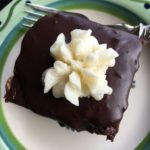
These GF Chocolate Frosted Brownies are incredibly fudgy, rich and delicious!!! I adapted this recipe from a very popular Brownie recipe from many peoples’ childhoods, called the “Lunch Lady Brownies” – the only changes that I made was to substitute the regular gluten-containing flour with GF All-Purpose Flour and they turned out perfect! My family had NO idea that they were Gluten Free 😉 Yummy!!!
A huge “Thank You” to Holly @ Life In The Lofthouse for sharing the original “Lunch Lady Brownies” recipe 🙂

Equipment:

  • 9″ x 13″ Baking Pan
  • Aluminum Foil
  • Non-Stick Cooking Spray
  • Stand or Handheld Mixer

The Brownie Ingredients:

  • 1 Cup (2 Sticks) Salted Butter (Melted)
  • 1/2 Cup Unsweetened Cocoa Powder
  • 2 Cups All-Purpose Gluten Free Flour (I used Better Batter)
  • 2 Cups Dixie Crystals Extra Fine Granulated Sugar (You may use your desired brand of granulated sugar)
  • 4 Large Eggs (I use Egglands Best, but any brand is fine)
  • 4 teaspoons Vanilla Extract

The Chocolate Frosting Ingredients:

  • 1/4 Cup (1/2 Stick) Salted Butter, softened (I use Land O Lakes brand)
  • 1/4 Cup Milk (I use Whole Milk, but 2% or 1% are fine, too)
  • 1/4 Cup Unsweetened Cocoa Powder
  • 3 Cups Powdered Sugar
  1. Preheat oven to 350 degrees.
  2. Line a 9″ x 13″ baking pan with foil and spray with non-stick cooking spray. Set aside.
  3. Using a Stand Mixer or Handheld mixer, fitted with the Paddle attachment, blend the Melted Butter and Cocoa Powder until smooth.
  4. Next, add the GF Flour and Granulated Sugar, mixing until blended…scraping the sides as needed.
  5. Add the eggs, one at a time, until just blended.
  6. Slowly mix in the Vanilla Extract, blending until just combined. The batter will be thick.
  7. Evenly spread the Brownie batter into the prepared Baking Dish.
  8. Bake for 25 to 30 minutes, or until a toothpick inserted into the center comes out clean.
  9. Remove from oven and allow to cool for 15 minutes while preparing the Chocolate Frosting. Note: You want the Brownies to still be warm when you apply the Frosting.

Making the Chocolate Frosting:

  1. Using a Stand Mixer or Handheld Mixer, fitted with the Paddle attachment, combine the Softened Butter, Milk and Cocoa until smooth and creamy.
  2. Gradually add the Powdered Sugar, 1/2 Cup at a time, starting on Low each time to avoid a HUGE powdery mess 😉
  3. Once all of the Powdered Sugar has been added, beat on Medium to Medium-High speed for about 2 minutes, or until light and creamy.
  4. Spread evenly over the top of the Brownies and let cool completely (I know it’s hard to do!!!) before slicing. Note: I remove the entire Brownie using the foil to lift it…and then I slice them 🙂
  5. Serve by themselves, with a glass of cold milk or your choice of Ice Cream! Enjoy!!!
Desserts, Snacks


Gluten Free Chocolate Brownie-Cream Sandwiches

Gluten Free Chocolate Brownie & Cream Sandwiches

These little treats are sinfully rich, moist and delicious 🙂 They are certain to please any Gluten-Free Chocoholic! I converted this recipe from The Pioneer Woman’s (aka: Ree Drummond) “Chocolate Devils,” which were intended to be a cake-like consistency, but to our delight the Gluten-Free version turned out to be a moist, brownie-like consistency. A 5-Star hit in our household 🙂

Brownie Ingredients:

  • 2 Cups Gluten Free All-Purpose Flour, sifted (must be sifted to reduce grittiness)
  • 2 Cups Granulated Sugar
  • 1/4 tsp Salt
  • 1 Cup Butter, salted (2 sticks)
  • 4 Tbsp Cocoa (heaping Tbsps)
  • 1 Cup Boiling Water
  • 1/2 Cup Buttermilk
  • 1 tsp Baking Soda
  • 1 tsp Vanilla Extract
  • 2 Large Eggs

The Cream-Filling Ingredients:

  • 5 Tbsps All-Purpose Gluten Free Flour, Sifted (again, must be sifted to reduce grittiness)
  • 1 Cup Whole Milk
  • 1 tsp Vanilla Extract
  • 1 Cup Salted Butter, Softened ((2 sticks))
  • 1 Cup Granulated Sugar

The Ganache Ingredients:

  • 3 Cups Heavy Cream
  • 2 tsp Vanilla Extract
  • 4 Cups Semi-Sweet Chocolate Chips

Making the Gluten-Free Brownies

  1. Preheat Oven to 350 degrees.
  2. Gather the ingredients.
  3. Spray a cookie sheet with non-stick cooking spray. Line the cookie sheet with parchment paper and spray the paper as well. Set aside.
  4. In a stand mixer, combine the Flour, Sugar and Salt on low. Set aside while moving to the next step.
  5. In a small or medium saucepan, melt the butter. Add the Cocoa Powder and mix until completely combined. Add 1 Cup boiling water to the saucepan, mixing well and bring to a boil. Let boil for about 30 seconds. Add this mixture to the Flour mixture and blend on low until combined. Let cool slightly.
  6. In a medium-sized bowl, whisk the Buttermilk, Baking Soda, Vanilla and Eggs until thoroughly combined. Pour this into the Flour-Butter mixture and blend on low until completely combined.
  7. Scrape the Brownie mixture into the prepared cookie sheet, spreading evenly over the parchment paper.
  8. Bake for 20-25 minutes, or until toothpick inserted into the center comes out clean. Cool completely! This is very important – if brownies are not cooled all the way, the cream filling will just melt and turn to goop 🙁 If I have the time, I let mine cool overnight.
  9. Once completely cooled, cut the brownies into 2″ squares and place on a wire rack on another cookie sheet (you can use a square cookie cutter if you have one). Set in a cool spot while you prepare the cream filling.

Making the Cream Filling:

  1. In a small saucepan, whisk the GF Flour and Milk together and heat over medium-low heat, stirring constantly, until very thick (like pancake batter). Remove and cool completely. Add the Vanilla and blend thoroughly.
  2. Meanwhile, in a stand mixer fitted with the paddle attachment, cream the softened Butter and Sugar until VERY light, smooth and fluffy.
  3. Next, add the completely cooled Flour-Milk-Vanilla mixture to the Butter-Sugar mixture and beat on medium to medium-high for about 5-7 minutes – you want it to look like whipped cream.
  4. Using a pastry bag or plastic freezer (these are thicker and sturdier than regular ones) baggie fitted with a large star tip, fill the bag with the Cream Filling and pipe onto one of the cooled brownies. Place another brownie on top and press down gently. Repeat with the remaining brownies, reserving a small amount of the cream for the tops of the brownies. Set aside while you prepare the Ganache.

Making the Ganache:

  1. In a large saucepan, heat the Heavy Cream over medium-low until VERY hot. Add the Vanilla and Chocolate Morsels and stir until all of the chocolate is melted and blended completely.
  2. Remove Ganache from the heat and ladle over each Brownie Sandwich. Chill in the refrigerator for at least 1 hour.
  3. When ready to serve, top each Brownie Sandwich with some of the Cream and perhaps a cherry or raspberry 🙂
  4. Enjoy!

I know that there are a lot of steps involved, but believe me it’s well worth it!!!

Desserts, Snacks


Hot Chocolate Brownie Bites (Gluten Free)

Hot Chocolate Brownie Bites (Gluten Free)

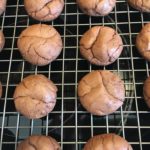
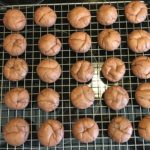
These little Hot Chocolate Brownie Bites are the BEST Gluten Free cookies that I have ever tasted!!! I thought I would never say this, but I actually prefer these without icing! They are, of course, delicious and quite sinful with or without the icing 🙂

Ingredients for the Cookie

  • 1/2 Cup Butter, Unsalted (1 Stick)
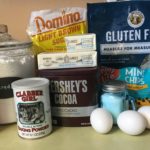
  • 1 1/2 Cups Semi-Sweet Chocolate Chips (I used “Enjoy Life” Mini Semi-Sweet Chocolate Chips (allergy friendly), but Nestle is just fine!)
  • 1 1/2 Cups Gluten Free All-Purpose Flour (I used “King Arthur” Cup-for-Cup GF All-Purpose Flour)
  • 1/4 Cup Unsweetened Cocoa Powder (I used Hershey’s Cocoa (100% Cacao))
  • 1 1/2 tsp Baking Powder
  • 1/4 tsp Salt
  • 1 1/4 Cup Light Brown Sugar
  • 3 Large Eggs
  • 1 1/2 tsp Vanilla Extract

Ingredients for the Icing

  • 4 Tablespoons Unsalted Butter, Melted
  • 2 Cups Confectioner’s Sugar
  • 1/4 Cup Unsweetened Cocoa Powder (Hershey’s Cocoa)
  • 1/4 Cup Hot Water (Hot Water from the tap…not boiling)
  • 1/2 tsp Vanila Extract
  • Decorative Sprinkles

Making the Cookies

  1. Gather the ingredients.
  2. In a small heavy pot, melt the 1/2 Cup Unsalted Butter on Low. Once the butter is melted, add the 1 1/2 Cups Semi-Sweet Chocolate Morsels and continue heating over low until the chocolate is melted. Mixture should be smooth and creamy. Remove from heat.
  3. Meanwhile, in a medium-sized bowl, combine the dry ingredients (Flour, Cocoa Powder, Baking Powder and Salt). Mix well and set aside.
  4. Either using a Standing or Handheld Mixer, beat the Eggs, Brown Sugar and Vanilla Extract on low until blended.
  5. Add the cooled Chocolate mixture to the Egg mixture and mix on Low until blended.
  6. Next, add the Flour mixture 1/2 Cup at a time to the Wet Mixture and beat on Low until well blended. The dough will be thick, like Brownies. Cover the bowl with foil or plastic wrap and refrigerate for 3-4 hours.
  7. Once the dough has “hardened” to the consistency of modeling clay, remove the dough from the refrigerator.
  8. Preheat oven to 325 degrees.
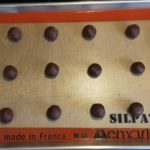
  9. Line 1-2 cookie sheets with Parchment Paper or Silicone Baking Mats and set aside.
  10. Using a Small Cookie Scoop, scoop out dough and roll into balls. Place them 2″ apart on the prepared cookie sheets.
  11. Bake for 10-12 minutes or until they start to form cracks on their tops.
  12. Let cookies sit on cookie sheet for a few minutes before transferring them to a wire rack to cool completely.

Making the Icing

  1. While the cookies are cooling, combine the 4 Tablespoons melted Butter, 1/4 Cup Cocoa Powder, 1/4 Cup Hot Water, Vanilla Extract and 2 Cups Confectioner’s Sugar. Mix on Low until well blended. If mixture is too thick, add a little bit of water (1 Tablespoon at a time) until icing is a little runny.
  2. Next, keeping the cooled cookies on the cooling rack, place rack on a cookie sheet or paper towels to catch the run-off icing.
  3. Spoon desired amount of icing onto 2-3 cookies at a time and then add sprinkles….icing sets up quickly, so only apply icing to a few cookies at a time.
  4. Continue applying the icing and decorative sprinkles to the rest of the cookies until done.
    Enjoy!

Note: Instead of adding Icing to these cookies, try rolling them in Confectioner’s Sugar before baking or leave plain 🙂

Desserts, Snacks