Instant Pot Turkey Chili

Instant Pot Turkey Chili
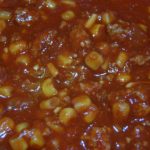
I don’t think that there is anything better than a hot bowl of Chili and fresh Corn Bread on a cold afternoon! Plus, making it in an Instant Pot brings this delicious Chili to fruition in about 30 minutes (prep and cook time!) I hope you enjoy this yummy Turkey Chili as much as we do 🙂
A HUGE “Thank You” to Olena @ ifoodreal.com for sharing the original version of this wonderful recipe – due to multiple food allergies I had to make some changes and omissions to her recipe.

  • 1-2 Tbsp Canola Oil
  • 2 lbs Ground Turkey
  • 2 Cups Beef Broth (you can use any other broth desired)
  • 3 tsp Garlic, minced (I use the garlic in a jar, found in the produce section)
  • 1/2 Large Vidalia Onion, chopped
  • 1 15 oz. Can Corn (If you like Corn, use 2 cans)
  • 4 Tbsp Chili Powder
  • 2 tsp Ground Cumin
  • 2 tsp Dried Oregano, Chopped
  • 1 tsp Paprika
  • 1 tsp Salt
  • 2 15 oz. Can Tomato Sauce
  • 1 12 oz. Can Tomato Paste (add more if you like a really thick chili)
  1. Gather all ingredients.
  2. In a 6-qt (or 8-qt) Instant Pot, add the 1-2 Tbsp Canola Oil and put in the “Saute” mode until the oil starts to shimmer.
  3. Swirl the Oil around to coat the bottom of the pot and add the Ground Turkey, breaking it up into smaller pieces; cook for 4-5 minutes (it does not have to cook completely at this stage).
  4. Add the Broth and press the “Cancel” button to turn the Instant Pot off.
  5. Next, add the Garlic, Onion, Corn, all of the Spices, Tomato Sauce and Tomato Paste: do NOT stir! (the bottom will Burn if you stir).
  6. Place the lid on the Instant Pot and seal; press the “Pressure Cook” button and make sure it’s on “High” – set for 15 minutes.
  7. After the 15 minutes cook time is up, release the pressure by turning or pressing down the Quick Release valve (this will take about 2-3 minutes)
  8. Once the Instant Pot has de-pressurized, remove the lid and stir thoroughly.
  9. Serve hot with your favorite toppings and some fresh Corn Bread or crusty French Bread 🙂

Store any leftovers in a airtight container in the refrigerator for 4-5 days.

You can also freeze fully cooked and cooled chili in an airtight container for up to 3 months; thaw on the stovetop on Low.

Dinner, Lunch, Main Dish, Soup, Stew


Honey-Sriracha Tofu Bites ~ Dairy-Free; Gluten-Free; Vegan

Honey-Sriracha Tofu Bites ~ Dairy-Free; Gluten-Free; Vegan

This quick & easy recipe is chock full of flavor. It’s sweet with a kick of heat and is ready in about 20 minutes! Serve over rice with your favorite veggie 🙂

  • 14 oz. Medium-Firm or Firm Tofu
  • 1 tsp Garlic, minced
  • 2 Tbsp Sriracha Sauce
  • 2 Tbsp Braggs Liquid Aminos (you may also use Soy Sauce)
  • 4 Tbsp Honey (I usually add 4 Heaping Tablespoons)
  • 2 Tbsp White Wine Vinegar (you may also use Rice Vinegar)
  • 3-4 Tbsp Potato Starch (or GF Corn Starch*)
  • 3 Tbsp Canola Oil
  • 1-2 Chopped Fresh Green Onions (optional for topping)
  1. Gather all ingredients.
  2. Drain the water off of the block of Tofu and set the tofu on several layers of paper towels for about 10 minutes, flipping over a few times (this step helps pull the water out of the tofu, so it won’t “sweat” and add a bunch of liquid to your dish while cooking).
  3. While the tofu is draining, whisk together the Garlic, Sriracha, Braggs Liquid Aminos, Honey and Vinegar until completely blended. Set aside.
  4. Next, cut up the tofu into cubes and place in a medium to large bowl.
  5. Sprinkle the Potato Starch (NOT Potato Flour) over the cubes of Tofu and gently toss to evenly coat. *You may use Corn Starch in place of the Potato Starch, but the end result will be a little different…more crispy and chewy when using the Corn Starch; the Potato Starch results in a softer outside and somewhat “gummy.” My family prefers the Potato Starch, but both end up tasting delicious 😉
  6. In a large non-stick skillet, heat the Canola Oil over Medium to Medium-High heat until it has a shimmer on the surface, which indicates that it’s ready.
  7. Carefully, add the coated Tofu cubes and spread them out evenly. Cook each side for about 2-3 minutes or until Tofu turns a light, golden brown.
  8. Add about 1/2 to 3/4 of the Honey-Sriracha Sauce (the reserve sauce is for topping) to the lightly-browned Tofu and gently stir to coat the Tofu.
  9. Lower the temperature to Low and continue cooking for another 2-3 minutes, or until the sauce has thickened.
  10. Serve over Rice, spooning a little bit of the reserve sauce over the top, and pair with your favorite vegetable. Yummy!

A BIG “Thank You” to pickledplum.com for sharing the original recipe 🙂 I made a few changes in order to make it allergy-friendly for my family.

Dinner, Lunch, Main Dish, Side Dish


Spicy Roasted Cauliflower (Gluten Free)

Spicy Roasted Cauliflower (Gluten Free)

I’m not a big fan of cauliflower, not because it tastes bad, but because it really doesn’t have much flavor at all. But, THIS recipe sold me on eating more cauliflower…it’s SO Spicy, Flavorful and Easy to make that I just can’t get enough!!! It’s even great cold the next day! Bon appetit! 🙂

  • 1 Head Cauliflower
  • 3/4 Cup Gluten Free All-Purpose Flour, sifted (I prefer King Arthur brand)
  • 1 tsp Paprika
  • 2 tsp Garlic Powder
  • 1/2 tsp Salt
  • 1/4 tsp Ground Pepper
  • 3/4 Cup Skim Milk (You can substitute with Rice Milk, Oat Milk, Coconut Milk or Soy Milk)

Spicy Sauce:

  • 1/4 Cup Hot Sauce or Buffalo Sauce (For a less-spicy version, use a mild Buffalo Sauce)
  • 2 Tbsps Canola Oil (You can substitute with Olive Oil, Coconut Oil, etc.)
  • 1 Tbsp Honey
  1. Preheat oven to 450 degrees.
  2. Line a baking sheet with parchment paper (or foil sprayed with non-stick cooking spray) and set aside.
  3. Cut up the Cauliflower into bite-size pieces and set aside.
  4. In a large bowl, whisk the GF Flour, Spices and Milk together until thoroughly blended. Add the Cauliflower pieces and stir to completely coat.
  5. Dump the coated Cauliflower pieces onto the prepared baking sheet and spread them out into a single layer.
  6. Bake for 20 minutes, stirring the pieces at the halfway point.
  7. While the Cauliflower is baking, thoroughly combine the Hot Sauce, Oil and Honey.
  8. After the first 20 minutes, brush or spoon the Hot Sauce mixture evenly over the Cauliflower pieces. Continue baking for another 20 minutes.
  9. Serve while hot or warm. The Sauce mixture becomes like a crusty cheese coating…it is SO yummy!

Thank you to Pierce Abernathy @ Tasty for sharing the original recipe…I just made a few minor changes to make it GF, lower in sodium and fat 😉

Appetizers, Dinner, Hors d’Oeuvres, Lunch, Main Dish, Side Dish, Snacks