Easy Creamy Broccoli & Cheddar Soup ~ Gluten Free

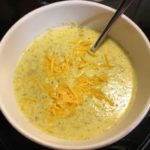
This quick & easy recipe reminds me of my favorite Broccoli-Cheddar Soup from Panera Bread, but without the Gluten 🙂 It’s so fresh and flavorful that I can’t stop at just one bowl! I owe a HUGE “Thank You” to Holly Nilsson @ spendwithpennies.com for sharing the original version of this yummy soup!! I made a few adjustments in order to make it Gluten-Free and allergy-friendly for my family.

Easy Creamy Broccoli & Cheddar Soup ~ Gluten Free
  • 1 Tbsp Butter (unsalted)
  • 1 Small Onion (Chopped)
  • 1/2 Cup Carrots (Diced)
  • 1/2 teaspoon Garlic (minced)
  • 1 Large Head Broccoli (Chopped (about 3 Cups))
  • 2 Cups Chicken Broth (Low Sodium or Regular)
  • 1/2 teaspoon Dried Thyme
  • Salt & Pepper (to taste)
  • 2 Tbsp All-Purpose Gluten Free Flour (I use Bob’s Red Mill 1-to-1 GF Flour)
  • 3/4 Cup Whole Milk
  • 3/4 Cup Skim Milk
  • 1 Cup Sharp Cheddar Cheese (Shredded)
  1. In a large saucepan, melt the Butter over medium-low heat. Once Butter is melted, add the Onions, Carrots and Garlic; cook until the Onions are translucent and soft (about 3-5 minutes).
  2. Add the Broccoli, Chicken Broth and Seasonings to the Onion mixture and cook over low heat until the Broccoli has softened ~ about 15 minutes.
  3. Next, using either an Immersion Blender, Regular Blender or Food Processor, thoroughly blend the cooked Vegetable/Broth mixture; set aside in the large saucepan over Low heat.
  4. Meanwhile, in a small/medium bowl, combine the GF Flour blend and Milks using a whisk to thoroughly blend; Add this mixture to the Vegetable/Broth mixture in the large saucepan.
  5. Increase the temperature to Medium/Medium-Low and bring to a boil, while whisking continuously; once the mixture has thickened (about 5 minutes), remove from heat and add the Shredded Cheddar.
  6. Serve with your favorite GF Bread and Enjoy!
Appetizers, Dinner, Hors d’Oeuvres, Lunch, Main Dish, Snacks, Soup
American


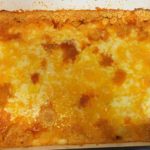
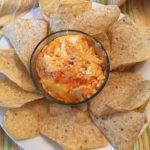
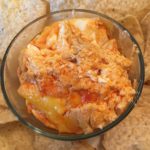
Buffalo Chicken Dip

Buffalo Chicken Dip

This is our middle daughter’s favorite food…I seriously think she would eat it for Breakfast, Lunch and Dinner EVERY day of her life if others didn’t step in and insist on some variety in her diet 😉
It really IS delicious, though! Our family doesn’t just eat it as an appetizer or hors d’oeuvres, but as a meal with fresh bread/rolls and a big salad 🙂 A definite 5-Stars in this household!

  • 4-6 Large Boneless, Skinless Chicken Breasts (about 3 lbs.; boiled and shredded)
  • 1 1/4 Cup Hot Sauce (I use Sweet Baby Ray’s Buffalo Wing Sauce because it’s Gluten Free and SO yummy!)
  • 2 Cups Ranch Dressing (I make my own using Hidden Valley Ranch Powder, but store-bought in the bottle is just fine ;))
  • 2 Blocks Cream Cheese ((16 oz) I use full fat Philadelphia Cream Cheese)
  • 3 Cups Shredded Cheddar Cheese (You can also use half Cheddar and half Monterey Jack)
  1. Preheat oven to 350 degrees.
  2. In a 9″ x 13″ (or 4 quart) baking dish dish, mix together the Chicken, the Hot Sauce and 1 1/2 Cups Shredded Cheese until thoroughly blended; Spread out evenly in the pan and set aside.
  3. In a medium saucepan, heat the Ranch Dressing and the Cream Cheese over Low heat until the Cream Cheese has completely melted and the mixture is smooth. Pour this mixture evenly over the Chicken mixture in the baking dish.
  4. Top with the remaining Shredded Cheese.
  5. Bake uncovered for approximately 30-35 minutes, or until edges are bubbly and the top is lightly brown.
  6. Serve with your favorite chips, pita chips, bread, etc. Enjoy 🙂
Appetizers, Dinner, Hors d’Oeuvres, Lunch, Main Dish, Side Dish, Snacks
American


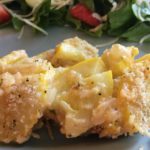
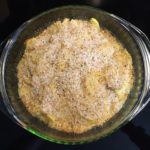
Cheesy Yellow Squash Casserole (Gluten Free)

Cheesy Yellow Squash Casserole (Gluten Free)

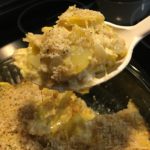
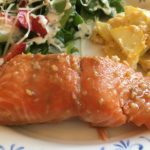
This Yellow Summer Squash Casserole is SO easy and cheesy that it will quickly become one of your family’s favorites! It pairs nicely with a fresh green salad and your favorite protein…a perfect accompaniment for my Maple Glazed Salmon! Enjoy 🙂

  • 2-3 Large Yellow Summer Squash, thinly sliced ((or 5-6 Medium Squash))
  • 1 Tbsp Canola Oil
  • 1 Tbsp Salted Butter (I use Land O Lakes)
  • 1 Large Vidalia Onion, thinly sliced
  • 1/2 Cup Parmesan cheese, shredded
  • 1 Cup Shredded Cheddar Cheese (I used Medium Cheddar, but Mild or Sharp works, too!)
  • 1/2 Cup Lite Sour Cream
  • 1/2 tsp Salt
  • 1/4 tsp Ground Black Pepper
  • 1/2 – 3/4 Cup Gluten Free Italian Bread Crumbs
  1. Preheat oven to 375 degrees.
  2. Grease a 2-quart casserole dish; set aside.
  3. In a large skillet, heat the Oil and Butter over medium heat until the butter is melted.
  4. Saute the thinly sliced Squash and Onion until both are soft. Sprinkle with the Salt and Pepper.
  5. Transfer the Squash and Onion to the prepared casserole dish and add the Parmesan, Cheddar and Sour Cream. Mix gently until well combined.
  6. Sprinkle the Bread Crumbs evenly over the top.
  7. Bake for about 30 minutes or until bubbly and the top is a light golden brown.
  8. Serve with a fresh green salad and your favorite protein….pairs lovely with the Maple Glazed Salmon!
Side Dish


Gluten Free Chicken Quesadillas

Gluten Free Chicken Quesadillas

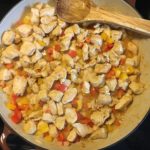
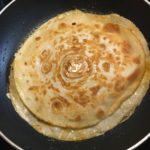
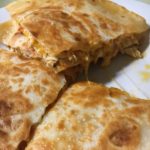
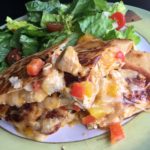
I absolutely LOVE these Chicken Quesadillas! The crispy tortilla wraps paired with the spicy chicken, veggies and cheese really give these Quesadillas an authentic Mexican taste! And, they are surprisingly easy to prepare and oh so delicious 🙂

The Quesadilla:

  • 3-4 Large Boneless, Skinless Chicken Breasts (Cut into bite-size pieces)
  • 2-3 Tbsp Olive Oil
  • 2-3 Tbsp Gluten Free Taco Seasoning (I use McCormick Gluten Free Taco Seasoning Mix or make my own)
  • 1 Large Onion, diced
  • 3 Large Bell Peppers, seeded & diced (I use whatever peppers I have on hand)
  • 1-2 Tbsp Fresh Lime Juice (Freshly squeezed over the top of Chicken and Veggies)
  • 1-2 pinches Freshly Ground Pepper
  • 3-4 Cups Shredded Cheese (Monterey Jack & Cheddar combination is wonderful)
  • 12 Gluten Free Tortilla Wraps (I use “Mission” brand)
  • 10-12 Tbsp Salted Butter (I usually use softened butter and spread desired amount on one side of each Tortilla Shell for frying)

Toppings:

  • Sour Cream (I use Lite)
  • Pico de Gallo (This is wonderful either by itself or mixed with Ranch Dressing for dipping)
  • Ranch Dressing (either store-bought or homemade (see recipe below in the Notes)
  • Shredded Cheese (any variety)
  • Fresh Cilantro, chopped (or Parsley)
  1. Gather the ingredients.
  2. In a large skillet, heat about 1-1 1/2 Tbsp Olive Oil over medium heat.
  3. Add the Chicken pieces, Taco Seasoning and Ground Pepper to the skillet, gently stirring/tossing until chicken is well-coated with the seasonings. Cook until chicken is done (about 5-8 minutes). Remove chicken from the skillet with a slotted spoon/spatula, placing it into a bowl to rest. Set aside.
  4. In the same skillet, lower the temperature to medium-low and add another 1 -1 1/2 Tbsp Olive OIl and the diced Onion and Peppers. Cook for about 3 minutes, stirring often.
  5. Once the veggies are done, reduce temperature to low and add the cooked chicken. Stir to mix well. Add the Fresh Lime Juice at this step.
  6. In a separate skillet, melt about 1/2 Tbsp Butter over medium-low heat and place one Tortilla Wrap/Shell in the skillet.
  7. Next, start building the Quesadillas by sprinkling some shredded cheese to cover the shell; then add some of the chicken & veggie mixture; then place more shredded cheese on top of the chicken/veggies; top with a second tortilla shell.
  8. Once the bottom tortilla is starting to get crispy and golden brown, lift the Quesadilla using a large spatula, and drop another 1/2 tbsp of butter into the pan. Now, carefully flip the Quesadilla onto the other side and cook until crispy and golden. Repeat these steps with the remaining tortillas and chicken mixture.
  9. Cut each Quesadilla into quarters and serve with a fresh salad and an assortment of the toppings.
  10. Enjoy!

This recipe can easily be cut in half or doubled, depending on the desired amount.

Fresh Homemade Ranch Recipe: https://smallthymecook.com/recipe/homemade-ranch-dressing-dip/

Dinner, Lunch, Main Dish
Mexican


Gluten Free Stovetop Mac & Cheese

Gluten Free Stovetop Mac & Cheese

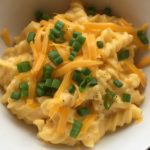
Gluten-Free Mac & Cheese, that’s not only delicious and creamy, but SO easy to make! This is one of those dishes that I was really missing when I found out that I could no longer eat anything containing Gluten…but, after a few adjustments and substitutions, I can once again enjoy one of my all-time favorite comfort foods 🙂
A HUGE “Thank You” to one of my favorite cooks, Ree Drummond (The Pioneer Woman) for sharing her Macaroni and Cheese recipe – I am slowly converting our favorite Pioneer Woman’s recipes to Gluten Free versions 🙂

  • 12 Oz. Gluten Free Dried Pasta ((4 Cups) Any small pasta will do (Elbow Macaroni, Fusilli, Penne, etc.))
  • 1 Large Egg (whisked)
  • 4 Tbsp Salted Butter ((1/2 stick))
  • 1/4 Cup All-Purpose Gluten Free Flour, Sifted ((sifting the flour helps cut down on the grittiness))
  • 2 1/2 Cups Whole Milk
  • 1 1/2 – 2 tsp Dry Mustard (You can substitute with Creamy Dijon (start with 1 Tbsp of the prepared mustard and increase if desired))
  • 1 lb Medium or Sharp Cheddar Cheese (Freshly grated)
  • 1/2 tsp Salt (Increase or decrease pertaining to your diet)
  • 1/4 – 1/2 tsp Freshly Ground Pepper
  • Chopped Fresh Green Onions (Topping; optional)
  1. Gather the ingredients.
  2. In a small bowl, whisk the egg and set aside.
  3. Begin cooking pasta according to the instructions on the packaging.
  4. While the pasta is cooking, melt the butter in a large pot over medium-low heat;
    whisk in the sifted GF Flour, whisking constantly for about 2 minutes.
  5. Add the Milk and Mustard to the Butter-Flour combination. Whisk until completely blended and smooth. Continue heating and whisking over medium-low heat until sauce is thick. This will take about 5 minutes.
  6. Reduce heat to low and take about 1/4 cup of the sauce and whisk it into the beaten egg, whisking constantly to prevent egg from scrambling 😉
    Once thoroughly blended, add this to the rest of the sauce, again constantly whisking to prevent egg from cooking. Add the Shredded Cheese, Salt and Pepper, mixing until completely blended and smooth.
  7. Add the cooked and drained Pasta to the sauce, stirring to evenly coat the Pasta.
  8. Top with chopped green onions, chives, parsley, etc. Serve immediately 🙂
Dinner, Lunch, Main Dish, Side Dish
American