Chocolate Pudding with Cookie Crumbles & Fresh Whipped Cream (Gluten Free)

Chocolate Pudding with Cookie Crumbles & Fresh Whipped Cream (Gluten Free)

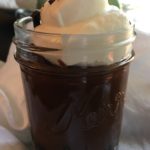
Pudding is one of my favorite comfort foods. However, I must confess…I always made it from a box 😉 So, I decided to make it from scratch to see if there was a big difference and YES there is! Homemade chocolate pudding is definitely worth making 🙂 I added the chocolate cookie crumbles in the bottom after finding a wonderful recipe by Ree Drummond (thank you, Ree!) Let me know what you think…box or homemade?

Ingredients for the Cookie Crumble (optional):

  • 22-24 Gluten Free Chocolate Sandwich Cookies (if not GF, use Oreos)
  • 4 Tbsp Salted Butter, Melted (I use Land O Lakes)

Ingredients for the Pudding:

  • 1 1/2 Cups Granulated Sugar
  • 1/4 Cup All-Purpose Gluten Free Corn Starch
  • 1/4 tsp Salt
  • 3 Cups Skim Milk (You can substitute with 1%, 2%, Whole or any non-dairy milk)
  • 4 Large Egg Yolks
  • 6 1/2 ounces Bittersweet Chocolate
  • 2 Tbsp Butter, salted
  • 2 tsp Vanilla Extract

Ingredients for the Whipped Topping:

  • 1 Cup Heavy Whipping Cream (very cold)
  • 2-3 Tbsp Powdered Sugar
  • 1/2 tsp Vanilla Extract

Making the Cookie Crumble:

  1. In a food processor, pulse the melted Butter and Sandwich Cookies until finely crushed. Then spoon desired amount into the bottom of your serving dishes/cups (reserving some for garnish). Note: I spoon about 2 Tbsp into the bottom of each glass.

Making the Pudding:

  1. In a medium saucepan, whisk together the Sugar, Cornstarch and Salt until well-blended.
  2. Add the Milk and Egg Yolks to the Sugar mixture and whisk well.
  3. Heat this mixture over medium heat for about 8-10 minutes, stirring constantly so mixture doesn’t burn or clump. Immediately remove from the heat once it starts to thicken (like pudding ;))
  4. Add the Butter and Vanilla to the pudding mixture, stirring until butter is completely melted and blended.
  5. Pour the mixture into desired serving bowls/cups. Refrigerate for at least 2 hours.

Making the Whipped Cream:

  1. Just before serving the pudding, make the Whipped Cream by combining the Heavy Whipping Cream, Powdered Sugar (1 Tablespoon at a time) and Vanilla Extract using a Stand or Handheld Mixer. Beat on medium-high until stiff peaks form (about 4-5 minutes)
  2. Spoon desired amount on top of each pudding and add a few Cookie Crumbles for garnish. Yum!
Desserts, Snacks
American


Gluten Free Chocolate Brownie-Cream Sandwiches

Gluten Free Chocolate Brownie & Cream Sandwiches

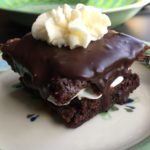
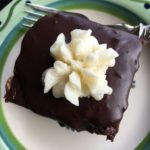
These little treats are sinfully rich, moist and delicious 🙂 They are certain to please any Gluten-Free Chocoholic! I converted this recipe from The Pioneer Woman’s (aka: Ree Drummond) “Chocolate Devils,” which were intended to be a cake-like consistency, but to our delight the Gluten-Free version turned out to be a moist, brownie-like consistency. A 5-Star hit in our household 🙂

Brownie Ingredients:

  • 2 Cups Gluten Free All-Purpose Flour, sifted (must be sifted to reduce grittiness)
  • 2 Cups Granulated Sugar
  • 1/4 tsp Salt
  • 1 Cup Butter, salted (2 sticks)
  • 4 Tbsp Cocoa (heaping Tbsps)
  • 1 Cup Boiling Water
  • 1/2 Cup Buttermilk
  • 1 tsp Baking Soda
  • 1 tsp Vanilla Extract
  • 2 Large Eggs

The Cream-Filling Ingredients:

  • 5 Tbsps All-Purpose Gluten Free Flour, Sifted (again, must be sifted to reduce grittiness)
  • 1 Cup Whole Milk
  • 1 tsp Vanilla Extract
  • 1 Cup Salted Butter, Softened ((2 sticks))
  • 1 Cup Granulated Sugar

The Ganache Ingredients:

  • 3 Cups Heavy Cream
  • 2 tsp Vanilla Extract
  • 4 Cups Semi-Sweet Chocolate Chips

Making the Gluten-Free Brownies

  1. Preheat Oven to 350 degrees.
  2. Gather the ingredients.
  3. Spray a cookie sheet with non-stick cooking spray. Line the cookie sheet with parchment paper and spray the paper as well. Set aside.
  4. In a stand mixer, combine the Flour, Sugar and Salt on low. Set aside while moving to the next step.
  5. In a small or medium saucepan, melt the butter. Add the Cocoa Powder and mix until completely combined. Add 1 Cup boiling water to the saucepan, mixing well and bring to a boil. Let boil for about 30 seconds. Add this mixture to the Flour mixture and blend on low until combined. Let cool slightly.
  6. In a medium-sized bowl, whisk the Buttermilk, Baking Soda, Vanilla and Eggs until thoroughly combined. Pour this into the Flour-Butter mixture and blend on low until completely combined.
  7. Scrape the Brownie mixture into the prepared cookie sheet, spreading evenly over the parchment paper.
  8. Bake for 20-25 minutes, or until toothpick inserted into the center comes out clean. Cool completely! This is very important – if brownies are not cooled all the way, the cream filling will just melt and turn to goop 🙁 If I have the time, I let mine cool overnight.
  9. Once completely cooled, cut the brownies into 2″ squares and place on a wire rack on another cookie sheet (you can use a square cookie cutter if you have one). Set in a cool spot while you prepare the cream filling.

Making the Cream Filling:

  1. In a small saucepan, whisk the GF Flour and Milk together and heat over medium-low heat, stirring constantly, until very thick (like pancake batter). Remove and cool completely. Add the Vanilla and blend thoroughly.
  2. Meanwhile, in a stand mixer fitted with the paddle attachment, cream the softened Butter and Sugar until VERY light, smooth and fluffy.
  3. Next, add the completely cooled Flour-Milk-Vanilla mixture to the Butter-Sugar mixture and beat on medium to medium-high for about 5-7 minutes – you want it to look like whipped cream.
  4. Using a pastry bag or plastic freezer (these are thicker and sturdier than regular ones) baggie fitted with a large star tip, fill the bag with the Cream Filling and pipe onto one of the cooled brownies. Place another brownie on top and press down gently. Repeat with the remaining brownies, reserving a small amount of the cream for the tops of the brownies. Set aside while you prepare the Ganache.

Making the Ganache:

  1. In a large saucepan, heat the Heavy Cream over medium-low until VERY hot. Add the Vanilla and Chocolate Morsels and stir until all of the chocolate is melted and blended completely.
  2. Remove Ganache from the heat and ladle over each Brownie Sandwich. Chill in the refrigerator for at least 1 hour.
  3. When ready to serve, top each Brownie Sandwich with some of the Cream and perhaps a cherry or raspberry 🙂
  4. Enjoy!

I know that there are a lot of steps involved, but believe me it’s well worth it!!!

Desserts, Snacks


Gluten Free Chocolate Hydrangea Cupcakes

Gluten Free Chocolate Hydrangea Cupcakes

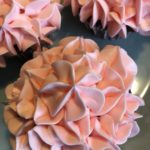
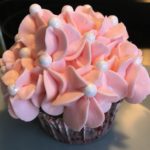
Even though I love Blue Hydrangeas, I just couldn’t bring myself to decorate these yummy cupcakes with Blue Icing….so, Pink Hydrangeas it is! The wonderful Chocolate of the cupcakes compliments the creamy Butter-Cream Icing perfectly….an instant hit in our household!!! Enjoy 🙂
A HUGE ‘Thank You” to America’s Test Kitchen for sharing this incredible Gluten Free Chocolate Cupcake recipe!

Cupcake Ingredients:

  • 1/2 Cup Canola Oil
  • 3 oz. Bittersweet Chocolate (chopped)
  • 1/3 Cup Unsweetened Cocoa Powder
  • 1/2 Cup + 2 Tbsp King Arthur Gluten Free Multi-Purpose Flour (sifted)
  • 3/4 tsp Gluten Free Baking Powder
  • 1/2 tsp Baking Soda
  • 1/2 tsp Xanthan Gum
  • 1/2 tsp Salt
  • 3 Large Eggs
  • 1 tsp Vanilla Extract
  • 3/4 Cup Granulated Sugar
  • 1/3 Cup Whole Milk

Buttercream Icing Ingredients:

  • 12 Tbsp Unsalted Butter (Softened)
  • 1 1/2 Tbsp Heavy Cream
  • 1 1/4 tsp Vanilla Extract
  • 1/8 tsp Salt
  • 1 1/2 Cups Powdered Sugar
  • Red Food Coloring Gel (as much or as little as you desire)

Making the Cupcakes:

  1. Preheat oven to 350 degrees.
  2. Line a 12-cup muffin tin with paper cupcake liners. Set aside.
  3. Gather the ingredients.
  4. In a microwave-safe bowl, microwave the Oil, Chocolate and Cocoa until chocolate is fully melted (about 2 minutes). Be sure to stir the mixture often to thoroughly mix ingredients and to prevent clumping. Remove from microwave and set aside to cool slightly.
  5. In a small bowl, whisk together the sifted GF Flour, Baking Powder, Baking Soda, Xanthan Gum and Salt. Set aside.
  6. In a large bowl, whisk together the Eggs, Vanilla Extract and Sugar until thoroughly blended.
  7. Next, whisk the Chocolate mixture and Milk into the Egg Mixture until thoroughly combined.
  8. Add the Flour Mixture to the Chocolate/Egg mixture, whisking until smooth and creamy.
  9. Using a 2″ cookie scoop or large spoon, scoop the batter into the prepared cupcake tin.
  10. Bake for 15-18 minutes, rotating the tin halfway through the baking time (my oven tends to run a little on the hot side, so 15 minutes is perfect for me), or until toothpick inserted into the middle of the cupcake comes out clean.
  11. Let cool in the cupcake tin for 10-15 minutes before transferring the cupcakes to a wire rack to cool completely.

Making the Buttercream Icing:

  1. In a Stand Mixer fitted with the whisk attachment, whisk the Butter, Heavy Cream, Vanilla Extract and Salt together on medium-high until smooth and creamy.
  2. Reduce speed to Low and slowly add the Powdered Sugar, 1/2 cup at a time, until well-blended.
  3. Increase speed to medium-high and whip until fluffy (about 5 minutes).
    If adding food coloring, do so halfway through this step and while mixer is turned OFF (I learned this the hard way ;))
  4. Once the cupcakes are completely cooled, you can begin icing them with the prepared icing/frosting using either a knife or pastry bag fitted with desired tip. Add sprinkles, too!
  5. Enjoy 🙂
Desserts, Snacks


Hot Chocolate Brownie Bites (Gluten Free)

Hot Chocolate Brownie Bites (Gluten Free)

These little Hot Chocolate Brownie Bites are the BEST Gluten Free cookies that I have ever tasted!!! I thought I would never say this, but I actually prefer these without icing! They are, of course, delicious and quite sinful with or without the icing 🙂

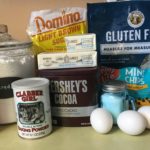
Ingredients for the Cookie

  • 1/2 Cup Butter, Unsalted (1 Stick)
  • 1 1/2 Cups Semi-Sweet Chocolate Chips (I used “Enjoy Life” Mini Semi-Sweet Chocolate Chips (allergy friendly), but Nestle is just fine!)
  • 1 1/2 Cups Gluten Free All-Purpose Flour (I used “King Arthur” Cup-for-Cup GF All-Purpose Flour)
  • 1/4 Cup Unsweetened Cocoa Powder (I used Hershey’s Cocoa (100% Cacao))
  • 1 1/2 tsp Baking Powder
  • 1/4 tsp Salt
  • 1 1/4 Cup Light Brown Sugar
  • 3 Large Eggs
  • 1 1/2 tsp Vanilla Extract

Ingredients for the Icing

  • 4 Tablespoons Unsalted Butter, Melted
  • 2 Cups Confectioner’s Sugar
  • 1/4 Cup Unsweetened Cocoa Powder (Hershey’s Cocoa)
  • 1/4 Cup Hot Water (Hot Water from the tap…not boiling)
  • 1/2 tsp Vanila Extract
  • Decorative Sprinkles

Making the Cookies

  1. Gather the ingredients.
  2. In a small heavy pot, melt the 1/2 Cup Unsalted Butter on Low. Once the butter is melted, add the 1 1/2 Cups Semi-Sweet Chocolate Morsels and continue heating over low until the chocolate is melted. Mixture should be smooth and creamy. Remove from heat.
  3. Meanwhile, in a medium-sized bowl, combine the dry ingredients (Flour, Cocoa Powder, Baking Powder and Salt). Mix well and set aside.
  4. Either using a Standing or Handheld Mixer, beat the Eggs, Brown Sugar and Vanilla Extract on low until blended.
  5. Add the cooled Chocolate mixture to the Egg mixture and mix on Low until blended.
  6. Next, add the Flour mixture 1/2 Cup at a time to the Wet Mixture and beat on Low until well blended. The dough will be thick, like Brownies. Cover the bowl with foil or plastic wrap and refrigerate for 3-4 hours.
  7. Once the dough has “hardened” to the consistency of modeling clay, remove the dough from the refrigerator.
  8. Preheat oven to 325 degrees.
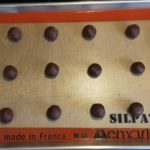
  9. Line 1-2 cookie sheets with Parchment Paper or Silicone Baking Mats and set aside.
  10. Using a Small Cookie Scoop, scoop out dough and roll into balls. Place them 2″ apart on the prepared cookie sheets.
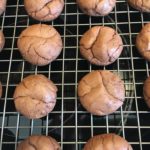
  11. Bake for 10-12 minutes or until they start to form cracks on their tops.
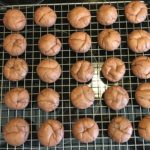
  12. Let cookies sit on cookie sheet for a few minutes before transferring them to a wire rack to cool completely.

Making the Icing

  1. While the cookies are cooling, combine the 4 Tablespoons melted Butter, 1/4 Cup Cocoa Powder, 1/4 Cup Hot Water, Vanilla Extract and 2 Cups Confectioner’s Sugar. Mix on Low until well blended. If mixture is too thick, add a little bit of water (1 Tablespoon at a time) until icing is a little runny.
  2. Next, keeping the cooled cookies on the cooling rack, place rack on a cookie sheet or paper towels to catch the run-off icing.
  3. Spoon desired amount of icing onto 2-3 cookies at a time and then add sprinkles….icing sets up quickly, so only apply icing to a few cookies at a time.
  4. Continue applying the icing and decorative sprinkles to the rest of the cookies until done.
    Enjoy!

Note: Instead of adding Icing to these cookies, try rolling them in Confectioner’s Sugar before baking or leave plain 🙂

Desserts, Snacks


Simply Chocolate French Silk Pie

Simply Chocolate French Silk Pie

The cool, creamy (and yes, silky!) chocolate topped with fresh homemade whipped cream definitely takes me back to my childhood! Yes, I was one of THOSE kids who preferred pie over cake for my Birthday…but not just ANY pie! It HAD to be Chocolate French Silk Pie from Miller & Rhoads Tea Room. Even though the Tea Room sadly closed years ago, this wonderful recipe will forever live on in our home and hopefully your home, as well 🙂

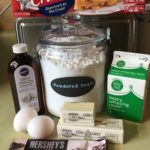
Pie Filling

  • 1 1/2 Sticks (or 12 Tablespoons) Salted Butter, Softened
  • 1 Cup + 2 Tablespoons Powdered Sugar
  • 1 1/2 teaspoons Vanilla Extract
  • 4 1/2 Squares Unsweetened Chocolate (Melted)
  • 2 Large Eggs (Keep Cold)
  • 1 9″ Pie Shell (Baked & Cooled)

Whipped Topping

  • 1 Cup Heavy Whipping Cream (Kept Cold)
  • 2 Tablespoons Powdered Sugar (Heaping Tablespoons)
  • 1/2 teaspoon Vanilla Extract
  • 1 Hershey Milk Chocolate Kiss

Making the Chocolate Filling

  1. Gather the ingredients
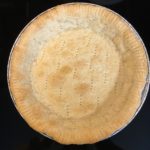
  2. Bake a 9″ pie crust and let cool while preparing the chocolate filling.
  3. Using a Stand or Handheld Mixer, cream the first 3 ingredients together on medium to medium high speed until light and creamy.
  4. Add the melted chocolate and continue beating until well blended.
  5. Add one cold egg and mix for 5 minutes on medium-high. Scrape the sides of the mixing bowl, then add the second cold egg and mix for another 5 minutes. Filling should be light and fluffy.
  6. Pour into the baked and cooled pie shell, spreading evenly. Chill in the refrigerator for at least 2 hours.

Making the Whipped Topping

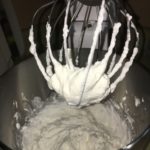
  1. Using a Stand or Handheld Mixer, whip the cold Heavy Whipping Cream, 2 heaping Tablespoons of Powdered Sugar and 1/2 teaspoon Vanilla Extract on medium-high for about 3-4 minutes (until stiff peaks form).
  2. Spread the whipped cream onto the chocolate filling and add chocolate shavings, if desired (I grated 1 Hershey Kiss for the shavings).
Desserts, Snacks


Halloween Witch’s Hat Cookies

Halloween Witch’s Hat Cookies

These are the easiest Halloween Treats to make! You just need three ingredients, a decorating tip and a somewhat steady hand. I made these every year for each of my children’s classrooms and they were always a hit with the kids :).

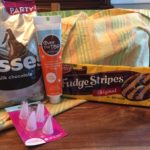
  • 1 24-Pack Keebler Fudge Stripe Original Fudge Stripe Cookies
  • 24 Hershey Kisses (I used the Regular Milk Chocolate ones, but you may use any flavor you desire)
  • 1-2 4 oz Tubes Decorating Icing (I used Orange and Yellow, but again choose any colors you want)
  • 1-2 #2 Tiny Round Decorating Tip
  1. Gather the ingredients
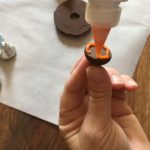
  2. Pipe around the bottom of a Hershey Kiss with the decorating icing.
  3. Place the Hershey Kiss rightside up on top of solid chocolate side of the Fudge Stripe cookie and press gently to secure.
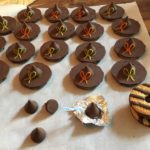
  4. Next, “draw” a bow with the decorating frosting on the Hershey Kiss and cookie (see photo).
  5. Repeat with the rest of the cookies and Kisses until done. I usually make enough for each child/adult to have 2 cookies.
  6. I hope you and your family enjoy these as much as we do!

Unfortunately, I injured my right hand…so my bows aren’t as neat as they used to be ;).

Desserts, Snacks