Gluten Free Blueberry-Orange Muffins

Gluten Free Blueberry-Orange Muffins

The combination of Orange Zest and fresh Blueberries in these Gluten Free muffins is absolutely wonderful! And, I love the fact that they aren’t too sweet, making them perfect for Breakfast, mid-morning and afternoon snacks. Enjoy!
Note: I tweaked this recipe from America’s Test Kitchen’s “The How Can It Be Gluten Free Cookbook”

  • 8 Tablespoons Butter, Unsalted (1 Stick; Melted & cooled)
  • 2 Cups Blueberries (Fresh )
  • 3/4 Cup Granulated Sugar (Can use 1 Cup, if you want these to be a little bit sweeter)
  • 2-3 teaspoons Orange Zest (Zest of 1 large orange)
  • 1 3/4 + 2/3 Cups Gluten Free All-Purpose Flour (I made the ATK’s Gluten Free Flour Blend (recipe included below), but I also make these with Pamela’s Gluten Free All-Purpose Flour Blend, if I don’t have my own mix readily available)
  • 1 Tablespoon Gluten Free Baking Powder
  • 1/2 teaspoon Salt
  • 1/4 teaspoon Xanthan Gum
  • 1/2 Cup Plain Yogurt (I used 0% Fat Yogurt)
  • 3 Large Eggs
  • 2 Tablespoons Turbinado Sugar (i.e. Raw Sugar)
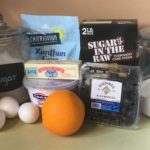
  1. Gather the ingredients.
  2. Melt the butter and let cool a bit while you begin preparing the muffin batter.
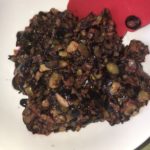
  3. In a food processor, pulse the Blueberries a few times (3-4) to coarsely chop them. Scrape them into a separate bowl and set aside.
    Note: I would normally leave them whole, but certain members of my family prefer them when chopped :).
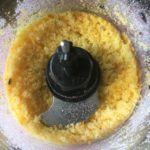
  4. In the same food processor, combine the granulated sugar and orange zest. Pulse for about 10 seconds until the consistency is sand-like.
  5. In a large bowl, combine the GF Flour mix, baking powder, salt and xanthan gum. Mix well with a whisk. Then add to the sugar mixture in the food processor, pulsing until well blended.
  6. In the same large bowl that you used to whisk together the flour mixture, combine the eggs, yogurt and melted butter. Whisk until well blended, then add to the food processor and blend until there are no lumps.
  7. Transfer the batter to the large bowl and gently fold in the chopped (or whole) blueberries. Cover the bowl with plastic wrap and let rest for 30 minutes.
    (Note: this resting period is important in order to let the grains soften or mature, so that the resulting muffins will not be grainy or sandy in texture)
  8. Meanwhile, preheat oven to 400 degrees.
    Line a muffin tin with muffin cups and spray with a non-stick cooking spray.
  9. After the batter has rested for 30 minutes, scoop into the lined muffin tray using a medium or large scoop. This batter does not rise much, so don’t worry about filling the cups to the top.
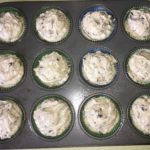
  10. Sprinkle the tops with the Turbinado sugar.
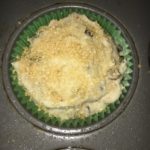
  11. Bake for about 18-20 minutes, or until lightly golden and toothpick comes out clean. Cool muffins in the pan for about 10 minutes, before transferring them to a wire rack to cool for an additional 10 minutes.
  12. Enjoy these muffins that are chock full of blueberries while warm :).
  13. Any leftovers can be completely cooled and stored in an airtight container for about 2 days or frozen for 2-3 weeks. Before serving, let thaw and microwave for about 20 seconds.

The ATK Gluten Free Flour Blend

Ingredients:

  • 4 1/2 Cups + 1/3 Cup White Rice Flour
  • 1 2/3 Cups Brown Rice Flour
  • 1 1/3 Cups Potato Starch (NOT Potato Flour)
  • 3/4 Tapioca Starch
  • 3 Tablespoons Nonfat Milk Powder (if milk allergies are an issue, substitute with Gluten Free, Lactose Free, Non-Dairy Coffee Creamer Powder, like Nestle Original Coffee-Mate).

In a large bowl, combine all of the ingredients with a whisk and transfer to an airtight container. Refrigerate for up to 3 months. Before using, bring to room temperature.

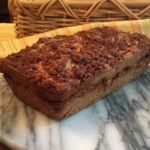

Gluten Free Cinnamon Bread

Gluten Free Cinnamon Bread

Oh my gosh! This recipe for Gluten Free Cinnamon Bread is so delicious and easy to make! You will have a hard time telling that it’s Gluten Free :). I make several of these at a time, since my family can polish off an entire loaf in an afternoon!

Dry Ingredients for Bread

  • 2 Cups Gluten Free All-Purpose Flour (I use Pamela’s All-Pupose Flour – Gluten Free + Vegan Artisan Blend or my own blend if I have some on-hand)
  • 1 Cup Granulated Sugar
  • 2 Teaspoons Gluten Free Baking Powder (I use Clabber Girl)
  • 1/2 Teaspoon Baking Soda
  • 1 Teaspoon Salt
  • 2 Teaspoons Ground Cinnamon

Wet Ingredients for Bread

  • 2 Large Eggs
  • 1 Cup Buttermilk
  • 1/4 Cup Canola Oil
  • 2 Teaspoons Vanilla Extract

Cinnamon Topping

  • 4 Tablespoons Granulated Sugar
  • 2 Teaspoons Ground Cinnamon
  • 4 Teaspoons Butter, Salted (Keep cold)

Preparation

  1. Preheat oven to 350 degrees
  2. Using a solid shortening, grease a 9″ x 5″ bread pan. Set aside.

Mixing the Dry Ingredients

  1. In a large bowl, combine the Dry Ingredients (the first 6 ingredients for bread mix). Mix well and set aside.

Mixing the Wet Ingredients

  1. Using a standard Stand Mixer, whisk the eggs. Then slowly add the Buttermilk and oil. Blend well.
  2. Add vanilla and blend until well combined.

Combining the Dry and Wet Ingredients

  1. Mixing on medium-low speed, slowly add the Flour mixture, one cup at a time, to the Egg mixture, making sure to scrape down the sides between additions. Note: mixture will be sticky/gummy.

Making the Cinnamon-Sugar Layer & Topping

  1. Note: You may make this at the beginning and set aside, while making the loaf part…or make it at this step.
  2. In a small bowl, mix the 4 Tablespoons of sugar with the 2 teaspoons cinnamon. Next, cut in the cold butter with a sharp knife and blend until crumbly.

Putting it All Together

  1. Pour half of the Bread dough mixture into the prepared loaf pan. Spread evenly.
  2. Sprinkle half of the Cinnamon-Sugar mixture on top of this layer.
  3. Pour remaining Bread Dough mixture on top of the Cinnamon layer. Spread evenly.
  4. Sprinkle top with remaining Cinnamon-Sugar mixture.
  5. Bake for 45-50 minutes, or until toothpick comes out clean.
  6. Let rest for about 10 minutes before removing from pan. Cool on a rack before slicing. Enjoy!
Desserts, Snacks


Simple Apple Pie

Simple Apple Pie

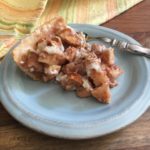
This is the simplest-to-make Apple Pie recipe on the planet. It only requires 6 ingredients and is oh so yummy! Served with or without vanilla ice cream, it’s delicious either way. Enjoy 🙂

Pie Crust

  • 1 Package Refrigerated Pie Crusts (I used “Pillsbury” Pie Crust, found in the Danish/Biscuit area)

Apple Filling

  • 6 Medium Apples (I used Golden Delicious)
  • 1/2 Cup Granulated Sugar
  • 1 teaspoon Cinnamon

Topping

  • 3/4 Cup Flour (I used All-Purpose, Unbleached)
  • 1/2 Cup Granulated Sugar
  • 1/3 Cup Butter, salted (Cold)
  1. Preheat oven to 400 degrees. Gather your ingredients.

The Topping

  1. In a small bowl, mix the flour and 1/2 cup sugar together. Set aside.

The Filling

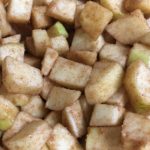
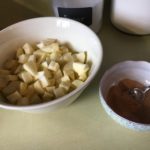
  1. Peel and cut apples into bite-size pieces and place in a large bowl (you may leave peels on the apples, if desired). If the apples start to brown, add cold water and a few ice cubes. In a separate small bowl, mix the 1/2 cup sugar and cinnamon together.
  2. Dump the sugar mixture over the apples and gently toss with a large spoon making sure all of the apples are well-coated.

The Pie Crust

  1. Let pie crust sit out for about 15 minutes before unrolling into the pie dish – this makes it much easier to unroll and press into the dish. Do NOT prick the dough with a fork.

Assembling the Pie

  1. Simply dump the filling into the freshly rolled out pie crust and spread out evenly.
  2. Sprinkle the sugar/flour topping evenly over the apples. Then cut the cold butter into tiny squares and place them evenly on top of the apples.
  3. Bake for 40-50 minutes or until golden brown. Remove from oven and let cool for about 30 minutes before slicing.
  4. Serve with or without vanilla bean ice cream!
Desserts, Snacks
Apples, dessert, Pie, simple, sweets


Zucchini Bread

Zucchini Bread ~ Gluten-Free

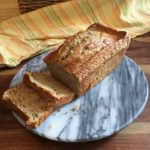
Moist, delicious AND Healthy Zucchini Bread! Thankfully, this recipe is for 2 loaves, since my family gobbles up the first loaf within hours (okay, minutes!) of it coming out of the oven ;). The combination of spices and Lemon zest adds a wonderful flavor to this already tasty Sweet Bread. I bet your first loaf will also disappear within the first day! Enjoy :).

  • 3 Cups Zucchini (shredded)
  • 4 Cups All-Purpose Gluten Free Flour (I used Better Batter brand for this recipe)
  • 1 Cup Granulated Sugar
  • 2 Tablespoons Granulated Sugar (Divided, for the pans)
  • 1/4 Cup Light Brown Sugar (Firmly packed)
  • 5 teaspoons Baking Powder
  • 1 1/2 teaspoons Ground Cinnamon
  • 1/2 teaspoon Salt
  • 1/4 teaspoon Ground Nutmeg
  • 1 Tablespoon Lemon Zest
  • 1 1/2 Cups Skim Milk
  • 6 Tablespoons Vegetable Oil (I use Canola)
  • 2 teaspoons Vanilla Extract
  • 2 Large Eggs (Lightly beaten)
  • Non-Stick Cooking Spray (I use Pam’s Coconut Spray)
  • 1/2 Cup Walnuts or Pecans (Chopped (Optional))
  1. Preheat oven to 350 degrees.
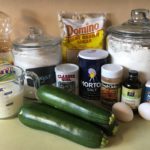
  2. Gather all ingredients.
  3. Spray two 8″ x 4″ loaf pans with the non-stick cooking spray. Sprinkle each pan with 1 Tablespoon Granulated sugar. Set aside.

Flour Mixture

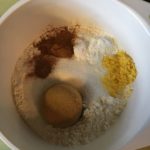
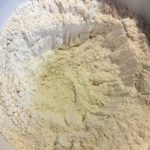
  1. In a large bowl, combine the flour, 1 cup granulated sugar, brown sugar and the next 5 ingredients (Note: if you’re adding Pecans or Walnuts, do so now).
  2. Form a well in the center of the flour mixture. Set aside.

Zucchini Mixture

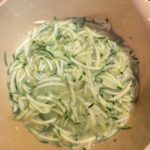
  1. Using a food processor or handheld grater, shred the zucchini and place it in a strainer to drain the liquid – I use a wooden spoon to press zucchini against the strainer, as well as squeezing the shredded zucchini with my hands to get as much liquid out.

  2. In a large bowl, whisk the milk, vegetable oil, vanilla extract and eggs until well blended. Add the shredded zucchini and mix well.

Making the Batter

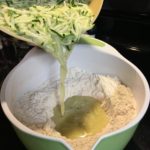
  1. Add the Zucchini Mixture to the center of the Flour Mixture.
  2. Mix well using a fork to start with to help break up the shredded zucchini. Then switch to a spoon to ensure that you get all of the ingredients off of the bottom of the bowl.

Baking the Bread

  1. Divide the batter between the two prepared loaf pans. If desired, you can also sprinkle the tops with more granulated sugar (I do not do this, as I find that the sprinkled sugar inside the pans is usually enough to satisfy our family’s sweet tooth).
  2. Bake for 50-60 minutes (time will vary with each oven). Start checking the loaves around 45 minutes with a wooden pick. Loaves are done when pick comes out clean.
  3. Cool in their pans on a wire rack for about 10 minutes.
  4. Remove loaves from pans and cool completely on wire rack before slicing…if you can keep the rest of your family from pouncing on them!
  5. Once completely cooled, slice and enjoy!
Desserts, Snacks, Sweet Breads
Gluten Free
dessert, gluten-free, snacks, sweet breads, sweets, zucchini