Instant Pot Turkey Chili

Instant Pot Turkey Chili
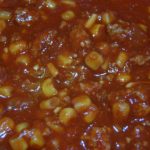
I don’t think that there is anything better than a hot bowl of Chili and fresh Corn Bread on a cold afternoon! Plus, making it in an Instant Pot brings this delicious Chili to fruition in about 30 minutes (prep and cook time!) I hope you enjoy this yummy Turkey Chili as much as we do 🙂
A HUGE “Thank You” to Olena @ ifoodreal.com for sharing the original version of this wonderful recipe – due to multiple food allergies I had to make some changes and omissions to her recipe.

  • 1-2 Tbsp Canola Oil
  • 2 lbs Ground Turkey
  • 2 Cups Beef Broth (you can use any other broth desired)
  • 3 tsp Garlic, minced (I use the garlic in a jar, found in the produce section)
  • 1/2 Large Vidalia Onion, chopped
  • 1 15 oz. Can Corn (If you like Corn, use 2 cans)
  • 4 Tbsp Chili Powder
  • 2 tsp Ground Cumin
  • 2 tsp Dried Oregano, Chopped
  • 1 tsp Paprika
  • 1 tsp Salt
  • 2 15 oz. Can Tomato Sauce
  • 1 12 oz. Can Tomato Paste (add more if you like a really thick chili)
  1. Gather all ingredients.
  2. In a 6-qt (or 8-qt) Instant Pot, add the 1-2 Tbsp Canola Oil and put in the “Saute” mode until the oil starts to shimmer.
  3. Swirl the Oil around to coat the bottom of the pot and add the Ground Turkey, breaking it up into smaller pieces; cook for 4-5 minutes (it does not have to cook completely at this stage).
  4. Add the Broth and press the “Cancel” button to turn the Instant Pot off.
  5. Next, add the Garlic, Onion, Corn, all of the Spices, Tomato Sauce and Tomato Paste: do NOT stir! (the bottom will Burn if you stir).
  6. Place the lid on the Instant Pot and seal; press the “Pressure Cook” button and make sure it’s on “High” – set for 15 minutes.
  7. After the 15 minutes cook time is up, release the pressure by turning or pressing down the Quick Release valve (this will take about 2-3 minutes)
  8. Once the Instant Pot has de-pressurized, remove the lid and stir thoroughly.
  9. Serve hot with your favorite toppings and some fresh Corn Bread or crusty French Bread 🙂

Store any leftovers in a airtight container in the refrigerator for 4-5 days.

You can also freeze fully cooked and cooled chili in an airtight container for up to 3 months; thaw on the stovetop on Low.

Dinner, Lunch, Main Dish, Soup, Stew


Maple-Brown Sugar Salmon

Maple-Brown Sugar Salmon

Are you looking for a quick & easy recipe for dinner? Well, here it is! Since my family eats a lot of Salmon, I am always experimenting with new seasonings & marinades and different ways of cooking our cherished Salmon. This recipe only calls for 7 ingredients (if you include the spices) and it’s ready in under 30 minutes 🙂 I added Cayenne for a little kick, but you can omit this if desired. Enjoy!

  • 1 1/2 lbs Fresh Salmon (rinsed in cold water and patted dry with paper towels)
  • 1/4 Cup 100% Pure Maple Syrup (not Pancake syrup)
  • 1/4 Cup Light Brown Sugar (not packed)
  • 2 Tbsp Canola Oil
  • 1 tsp Garlic, minced (fresh or jar)
  • 1/8-1/4 tsp Salt (regular, not Kosher)
  • 1-2 Pinches Cayenne Pepper, ground (add 1 pinch at a time to taste (optional))
  1. Preheat oven to 425 degrees.
  2. Gather the ingredients.
  3. Place rinsed and dried Salmon in a small, deep baking dish (8″ x 8″ or 9″ x 9″) – you want the Salmon to take up most of the room in the dish, so it stays submerged in the sauce while cooking.
  4. Combine all of the remaining ingredients in a small bowl or glass measuring cup that has a pour spout; Whisk together until thoroughly blended; pour or spoon this over the Salmon.
  5. Note: you can leave the Salmon with meat side facing up for a milder flavor or gently flip the Salmon over, so the meat side faces down and is submerged in the sauce during the baking process for a stronger flavor.
  6. Bake on the middle rack for 16-18 minutes (depending on the thickness of your Salmon), spooning some of the sauce over the Salmon halfway through the cooking time (if you’re baking with the meat side facing up). Salmon is ready when it flakes apart easily with a fork.
  7. Spoon sauce over the top before serving and enjoy with your favorite sides 🙂

Note:

  1. You can prepare the sauce and marinate the Salmon for 1-12 hours in a large resealable plastic bag for a stronger flavor before cooking.
  2. You can also cook the Salmon by grilling or pan-searing it for approximately 3-5 minutes per side (depending on the thickness of the fillet).
Dinner, Lunch, Main Dish


Spicy Cheddar Cheese Crackers ~ Gluten Free (Just Like “Cheese Straws”)

Spicy Cheddar Cheese Crackers ~ Gluten Free (Just Like “Cheese Straws”)

Do you remember those wonderful “Cheese Straws” that were always around in abundance during the Holidays? Well, these little “Spicy Cheddar Cheese Crackers” will take you right back to your childhood! And, if you’re Gluten-Free, fear not, these are not only Gluten-Free, but are so easy to make and only require 7 ingredients (if you include water) 😉 I chose to cut my dough into leaf shapes for the Autumn season, but any shape will do (Christmas Trees, Snowmen, Wreaths, Holly Leaves, etc.) These make the perfect little Holiday Gifts 🙂
Enjoy!!!
Note: The original non-GF recipe can be found in just about every cookbook out there, but I want to give credit to Ree Drummond (aka: “The Pioneer Woman”) for her non-gf version of this recipe that I adapted to “fit” our family (please see the “Copycat Cheez-It” version for the GF and non-spicy recipe for these same crackers) 😉

  • 2 Cups Sharp Cheddar Cheese
  • 1 Cup GF All-Purpose Flour (I use “Caputo” brand – it makes an incredible dough to work with)
  • 4 Tbsp Salted Butter (cold and cut into small pieces)
  • 1/2 tsp Kosher Salt
  • 1/2 tsp Seasoned Salt (I use “Season All”)
  • 1/8-1/4 tsp Cayenned Pepper (I use 1/4 tsp for a little more “kick”)
  • 3 Tbsp Ice Water
  1. Place all of the ingredients, except for the Water, into a Food Processor and pulse until the mixture looks like “sand.”
  2. With the Food Processor running, slowly add the Ice-Cold Water, one Tbsp at a time, through the shoot until the dough forms a large ball.
  3. Wrap the Cheese dough ball in plastic and refrigerate for 1 hour.
  4. When ready to bake, preheat oven to 350 degrees.
  5. Line 1-2 baking sheets with Parchment Paper or Silicone Baking Mats; set aside.
  6. Roll the dough out to 1/4″ thickness on a lightly floured surface, cut into desired shapes and place on the prepared baking sheets.
  7. Bake for 15-18 minutes or until golden brown.
    *See notes for “crisping” up crackers if they turn soft.
  8. Allow the crackers to cool completely on a wire rack to develop the flavors and desired crispness.
  9. Enjoy 🙂

*Note: if your crackers get a little soft, simply toss them onto a baking sheet and re-heat in a 275 degree oven for about 8-10 minutes. Let cool and gobble them up!

Appetizers, Hors d’Oeuvres, Snacks


“Instant Pot” Beef Pot Roast

“Instant Pot” Beef Pot Roast

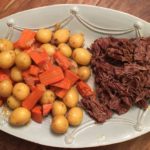
This recipe takes me right back to my childhood! I LOVED Pot Roast…and still do, but I don’t care for the taste of the pre-packaged Pot Roast seasoning mixes, nor do I like the LOOOONG wait while cooking in my slow cooker. Enter the Instant Pot! I hate to admit that a small Kitchen appliance could intimidate me, but the Instant Pot did. However, thanks to Tiffany @ lecremedelacrumb, I put my big girl pants on and broke out last year’s Christmas gift…the Instant Pot! Her recipe for “Instant Pot” Pot Roast is out of this world AND it’s ready in a little over 1 hour (depending on the size of your roast). I am ready to conquer many more recipes using my Instant Pot (my family also thanks you, Tiffany!)
I hope those of you who are afraid of your Instant Pots will try this recipe and see exactly what I mean 🙂

The Roast:

  • 3-5 lb Beef Chuck Roast
  • 1-2 Tbsp Canola Oil
  • 1 tsp Salt
  • 1 tsp Onion Powder
  • 1 tsp Garlic Powder
  • 1/2 tsp Ground Black Pepper
  • 1/2 tsp Paprika
  • 1 lb Baby Yukon Potatoes (or Baby Red Potatoes, Idaho (cut into bit-size pieces))
  • 4 Large Carrots (cut into bite-size pieces or Baby Carrots)
  • 1 Large Vidalia Onion (or Red, Yellow; cut into large chunks)
  • 4 Cups Beef Broth (Regular or Reduced Sodium; a 32 oz (2 lb) box)
  • 2 Tbsp Worcestershire sauce

The Slurry to make Gravy:

  • 1/4 Cup Water
  • 2 Tbsp GF Corn Starch
  1. In a small bowl, combine the spices (salt, onion and garlic powders, black pepper and paprika) and rub all over the Chuck Roast; set aside.
  2. Set your Instant Pot to “Saute” and drizzle in the Canola Oil; let heat for about 30 seconds, then place the Roast into the Instant Pot – do not disturb for 3-4 minutes until that side is browned; using tongs and a long meat fork, turn the Roast onto the next side and let “saute” for 3-4 minutes without disturbing; repeat this process until all sides are browned/seared.
  3. Once all sides of Roast are browned (to seal in the juices), turn the Instant Pot to “Pressure Cook” on “high” for 60-80 minutes (60 minutes for a 3 lb. Roast; 70 minutes for 4 lbs and 80 minutes for 5 lbs).
  4. Add the Onion, Beef Broth and Worcestershire Sauce to the Instant Pot and place lid on top, turning to the “locked” position.
  5. When the pressure cooking time is finished for the Roast, allow the Instant Pot to do a natural release for 10 minutes (it will start counting up in minutes – do not disturb the pot and allow it to de-pressurize); after the 10 minutes, press the vent down (or turn to the release position, depending on your make of Instant Pot) and allow all of the steam to release until the float valve drops down, indicating that the pot is de-pressurized and it’s safe to remove the lid.
  6. Next, add the Baby Potatoes and Carrots and, once again, set to “pressure cook” for 10 minutes.
    *Note: if you put the potatoes and carrots in at the beginning of the cooking process (along with the Roast and onions), they will be VERY mushy.
  7. Once the 10 minutes are up, press or turn the vent to the release position to allow steam to release again.
  8. Once the Instant Pot has de-pressurized and the float valve has dropped, remove the lid and carefully transfer the Roast, Potatoes, Carrots and Onions to a serving platter; shred the roast with two forks; set aside.
  9. Using a slotted spoon or handheld strainer, remove any bits from the broth in the Instant Pot; turn setting to the “Soup/Stew” position and let broth come to a boil.
  10. Meanwhile, make a “slurry” out of mixing the Water and Corn Starch thoroughly together in a small bowl.
  11. Once the broth in the Instant Pot is boiling, add the “slurry” and whisk until the liquid thickens to form a gravy; add salt, pepper and onion powder, if needed.
  12. Drizzle desired amount of the gravy over the shredded Pot Roast and Veggies; Garnish with fresh Thyme or Parsley.
    Yummy! 🙂

Notes: if using a frozen Roast, skip the searing step and just rub the spices over the Roast and add 20-30 minutes to the initial “Pressure-cooking” time. Proceed with the remaining steps.

Dinner, Lunch, Main Dish
American


Stovetop Chicken Cordon Bleu ~ Gluten Free

Stovetop Chicken Cordon Bleu

My mother used to make Chicken Cordon Bleu when I was growing up and it always made me feel so special, because she put so much time into pounding out the chicken until it was really thin and then rolling it up with Swiss Cheese and Ham (and sometimes a sweet pickle in the very center!), then breading the outside and baking it in the oven until all of the sweet and salty flavors melded together! This easier and quicker version has all of the same delicious flavors, but without all of the pounding, rolling and baking…and it’s Gluten-Free 😉 Enjoy!

  • 2 Cups Broccoli, chopped
  • 3 Cups Dry Gluten Free Pasta (I use Fusilli or Elbow)
  • 2 Tbsp Butter, salted
  • 4 Boneless, Skinless Chicken Breasts (rinsed, patted dry with paper towels and cut into bite-size pieces)
  • 1/2 Medium Vidalia Onion, chopped
  • 2 large pinches Ground Pepper
  • 2 Heaping Tbsp Dijon mustard (Creamy or with seeds)
  • 2 Cups Skim Milk (or 1%; 2%; Whole (I use Skim for a healthier version))
  • 1 Heaping Cup Swiss Cheese, shredded
  • 1 1/2 Cups Ham, diced (I use GF Honey Ham for a bit of sweetness)
  • 2-3 Tbsp Dried Parsley (for serving to add a bit of color ;))
  • GF Italian Flavored Bread Crumbs (for serving (I just sprinkle a little on top after plating))
  1. Gather all of the ingredients.
  2. In a large pot, bring water to a boil and add the Broccoli, cooking for just about 3 minutes (you want the broccoli to be just tender and bright green). Remove broccoli from the boiling water (do not discard water) with a slotted spoon and place in a large bowl; set aside.
  3. Add the GF Pasta to the boiling broccoli water and cook as instructed on the package. Drain, rinse and add to the reserved Broccoli in the large bowl; set aside.
  4. Note: I usually start this step while the pasta is cooking 😉
    In a very large, non-stick skillet (3.5-4 qt) melt the 2 Tbsp butter over medium-low heat.
  5. Once the butter is melted, add the chopped onions and cook until translucent.
  6. Next, add the bite-size Chicken pieces and Black Pepper; cook until no longer pink (about 8-10 minutes).
  7. Add the 3 Tbsp GF Flour blend and the 2 Tbsp Dijon Mustard to the Chicken and Onions; stir to evenly coat.
  8. Next, add the 2 Cups of Milk and bring to a low boil, stirring often to prevent clumping; cook until the sauce begins to thicken (usually about 3-5 minutes).
  9. Reduce the temperature to Low and add the Pasta and Broccoli to the Chicken mixture, stirring to mix well.
  10. Add the shredded Swiss Cheese and Ham; mix until cheese is completely melted.
  11. Serve with or without the GF Bread Crumbs sprinkled on top and Parsley. Yummy!!!

Note: If you want to make this dish ahead of time, turn it into a casserole! Just scoop the finished skillet ingredients into a 9 x 13 casserole dish (minus the Bread Crumbs or Parsley at this point) and refrigerate for 1-2 days or freeze for up to 3 months. Once you are ready to heat it up, preheat the oven to 375 degrees; sprinkle the top with desired amount of Bread Crumbs (about 3/4 cup); cook for about 30 minutes or until bread crumbs are a golden brown (if cooking from frozen, add about 20-25 minutes); top with Parsley and serve!

Dinner, Main Dish


Spaghetti Squash with Tomatoes & Capers

Spaghetti Squash with Tomatoes & Capers

This dish is so Fresh and easy to make with vegetables right out of your garden or kitchen! If I do not have any Spaghetti Squash ready in my garden, I substitute Summer Squash, Zucchini, Acorn Squash, Baking Potato or a mild Fish, such as Flounder. I love this recipe, because it’s so versatile and delicious no matter what you pair with the sauteed Capers and Tomatoes! I hope you enjoy this dish as much as we do 🙂

  • 1 Large Spaghetti Squash
  • 2 tsp Garlic, minced
  • 2 Tbsp olive oil
  • 2 Tbsp Capers
  • 1 1/2 Cups Tomatoes, chopped (with juices)
  • 2 tsp Dried Oregano (or 2 Tbsp Fresh Oregano, chopped)
  • Table Salt (to taste)
  • Ground Black Pepper (to taste)

Baking the Spaghetti Squash:

  1. Preheat Oven to 400 degrees. Place rack in center position.
  2. Cut the Spaghetti Squash in half, lengthwise, scrape out the seeds and loose stringy innards and place facedown in a deep baking dish.
  3. Add enough water to cover the bottom of the dish by about 1/2 inch.
  4. Bake for about 35-40 minutes, or until the squash is soft (depends on the size of the squash).
  5. Remove the squash from the oven and set aside to cool enough to handle.
  6. Reduce oven temperature to 250 degrees.
  7. When the squash is cool enough to handle, hold it over a large, ovenproof bowl/dish and scrape out the flesh from the top to the bottom using the tines of a fork. Cover the dish with foil and place it in the oven to keep hot while you prepare the topping.

Making the Caper & Tomato Topping:

  1. In a large, nonstick skillet, heat the Olive Oil and Garlic over Medium Heat for about 2 minutes.
  2. Next, add the Capers, Tomatoes and Oregano and continue cooking for another 2 minutes.
  3. Remove from heat and add a few pinches of Salt and Pepper to taste.
  4. Spoon desired amount over the prepared Spaghetti Squash and watch it disappear!
Appetizers, Dinner, Hors d’Oeuvres, Main Dish, Salads, Side Dish


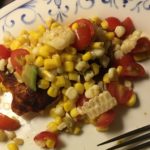
Corn & Tomato Salsa

Corn & Tomato Salsa

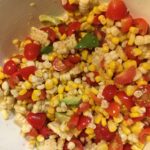
Are you wondering what to do with the 2,387 tomatoes in your garden?!? 😉 Well, here is a wonderful fresh Salsa that’s quick and easy and oh, so fresh and healthy!!! I serve it over Salmon, Chicken, Baked Potatoes and Fresh Green Leaf Lettuce…the possibilities are endless! Enjoy 🙂

  • 1 – 1 1/2 Cup Fresh Tomatoes (Cut into bite-size pieces; )
  • 1 – 1 1/2 Cup Fresh Corn (Cut off of the cob; can use canned corn, if desired)
  • 1 Large Avocado (Cut into bite-size pieces)
  • 1 Large Lime (Juice and Zest)
  • Table Salt (to taste)
  • Ground Black Pepper (to taste)
  • Chile Powder (to taste)
  • 1 Small Vidalia Onion ((optional) chopped)
  1. Add all of the chopped ingredients to a large mixing bowl and gently toss with the Lime Juice and seasonings to taste. If not serving immediately, wait to cut up the Avocado right before serving so it doesn’t brown. Cover tightly with plastic and refrigerate until ready to serve.
  2. So yummy over Salmon!
Appetizers, Hors d’Oeuvres, Lunch, Salads, Side Dish, Snacks


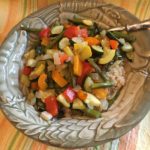
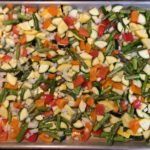
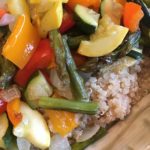
Oven-Roasted Vegetables

Oven-Roasted Vegetables

This recipe is my Go-To for an easy and healthy dish that my entire family loves! I often serve it over Rice, Quinoa or a Baked Potato (Sweet or White) for a warm and hearty meal. This medley of vegetables is very versatile and pairs well with Seafood, Chicken, Turkey, Pork, Beef…just about anything 😉 I hope you enjoy it as much as we do!
Note: This recipe was adapted from the South Beach Diet and has been thoroughly enjoyed by my family for almost 20 years 🙂

  • 1 Bunch Asparagus (cut into bite-size pieces)
  • 1-2 Medium Yellow Squash (cut into bite-size pieces)
  • 1-2 Medium Zucchini (cut into bite-size pieces)
  • 1-2 Medium Bell Pepper (I usually use a Red and Orange for the milder taste and the beautiful color; cut into bite-size pieces)
  • 1 Large Vidalia Onion (chopped into bite-size pieces)
  • 1-2 tsp Garlic, chopped ((optional))
  • 3-4 Tbsp olive oil
  • Several Pinches Kosher Salt
  • Several Pinches Ground Black Pepper
  1. Preheat oven to 450 degrees.
  2. In a very large bowl, combine all of the cut Vegetables and Olive Oil; Toss until thoroughly mixed and coated with the Oil.
    Note: add the garlic now if adding
  3. Evenly spread the Vegetable mixture onto a large baking sheet and sprinkle with the Kosher Salt and Pepper to taste.
  4. Bake for 30-45 minutes on the center rack until tender, stirring several times during the roasting process to cook evenly.
  5. Serve over Rice, Quinoa, Couscous, Pasta, Baked Potato…or as a Side Dish for your favorite protein. We often pair with Salmon and it’s delicious!!!
Dinner, Lunch, Main Dish, Salads, Side Dish


Brown Sugar & Garlic Pork Chops with Yukon Gold Potatoes

Brown Sugar & Garlic Pork Chops with Yukon Gold Potatoes

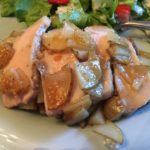
Are you looking for a quick & easy dinner recipe? This one-dish sweet and savory Pork recipe is perfect for those nights when you just don’t feel like spending a lot of time in the kitchen 😉 I sometimes use thin Pork Chops, if I’m in a hurry and when I have more time, I use thick Pork Chops and slice them after cooking. I particularly like this recipe, because it only requires 5 ingredients (not including salt & pepper) and it tastes like you’ve been cooking all day 🙂 A 5-Star recipe in our home!
Note: If you do not like Pork, Chicken is a wonderful substitute

Equipment:

  • 9″ x 13″ Baking Dish
  • Large Mixing Bowl

The Ingredients:

  • 3-4 Thin or Thick Pork Chops (Pat dry; Note: see Instructions for comments on thickness of Pork)
  • 1/2 Cup Light Brown Sugar (Increase to 3/4 Cup if you prefer a sweeter taste)
  • 2 Tbsp Minced Garlic (I use the already minced Garlic in a Jar from the produce section)
  • 1/2 + 1/4 tsp Table Salt (1/2 tsp for the Potatoes; 1/4 tsp for the Pork)
  • 1/4 + 1/4 tsp Ground Black Pepper (1/4 tsp for the Potatoes; 1/4 tsp for the Pork)
  • 8-10 small/medium Yukon Gold Potatoes, thinly sliced (I use Yukon Gold for their buttery flavor, but any potatoe will do 😉 Use enough to cover the bottom of your baking dish)
  • 2 + 1 Tbsp Canola Oil (2 Tbsp for the Potatoes; 1 Tbsp for the Pork)
  1. Preheat oven to 375 degrees.
  2. Gather the ingredients.
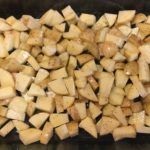
  3. In a large bowl, combine the thinly sliced Potatoes, 1/2 tsp Salt, 1/4 tsp Pepper and 2 Tablespoons Oil. Toss to coat well and spread into the 9″ x 13″ baking dish.
    Note: If my Pork Chops are on the thinner side, I place the potatoes in the oven while I prepare the Pork Chops, to give the potatoes a little head start 😉
  4. Using the same large bowl that you used for the Potatoes, combine the Brown Sugar, Garlic, 1/4 tsp Salt, 1/4 tsp Pepper and 1 Tbsp Oil. Mix well.
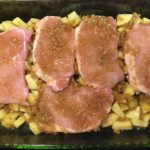
  5. Add the Pork Chops to the Brown Sugar mixture, one at a time, turning them over and kind of “mushing” them around to coat well. Place the Pork Chops on top of the Potatoes in the baking dish. Note: if you have any leftover Brown Sugar mixture drop it amongst the potatoes.
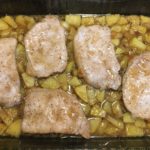
  6. Bake, uncovered, for approximately 30 to 35 minutes, depending on the thickness of your Pork Chops. The Pork is done when the internal temperature measures 145 degrees.
  7. If your Pork Chops are on the thicker side, slice thinly and serve on top of the Potatoes, being certain to drizzle some of the yummy juices over the top before serving.
  8. Serve with your favorite veggie and enjoy 🙂
Dinner, Main Dish


Oven Baked Barbecue Spare Ribs

Oven Baked Barbecue Spare Ribs

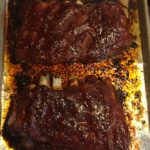
These Barbecue Ribs are a perfect combination of sweet with a touch of heat and the meat literally falls off the bones! I could eat the entire rack!!! I have always LOVED Barbecue Spare Ribs, but have never attempted to make them myself…until now 😉 This wonderful recipe comes from cafedelites.com ~ Thank You for sharing! Also, a HUGE “Thank You” to “Cooking with Ry” for sharing “How to Easily Remove the Membrane From Your Ribs” on his YouTube Channel 🙂

The Rub:

  • 2 tsp Garlic Powder
  • 2 tsp Paprika
  • 2 tsp Table Salt
  • 1 tsp Onion Powder
  • 1 tsp Ground Black Pepper
  • 1 tsp Cayenne Powder
  • 1/2 tsp Ground Cumin
  • 2 Tbsp olive oil
  • 4 lbs Pork Ribs (Baby Back or St. Louis Cut)

The Barbecue Sauce:

  • 2 Cups Barbecue Sauce (I use Sweet Baby Ray’s Original, but use your favorite)
  • 3 Tbsp minced garlic
  • 2 Tbsp olive oil
  • 1 Tbsp Worcestershire sauce
  • 1 tsp Table Salt
  1. Preheat oven to 350 degrees. Place rack in center position of oven.
  2. Line a baking tray with foil and spray with non-stick cooking spray. Set aside.
  3. Remove the membrane from the underside of the ribs and place on the prepared baking sheet. Note: If you have never done this before, go to “Cooking With Ry” on YouTube and search for “How to Easily Remove The Membrane From Your Ribs” – his instructions are very easy to follow and all you need is a dinner knife and some paper towels 😉

Making the Rub:

  1. In a small jar or bowl, combine all of the seasonings for the rub and mix well.
  2. Sprinkle the Rub over the Ribs; then drizzle with the Olive Oil. Rub the seasonings and Oil thoroughly over both sides of the Ribs.
  3. Cover the entire baking sheet with foil.
  4. Bake for 2 hours.

Making the Barbecue Sauce:

  1. While the Ribs are baking, combine the sauce ingredients in a medium bowl until thoroughly blended. Set aside.

Putting it All Together:

  1. Once the Ribs have finished baking, remove them from the oven and take the foil off of the top.
  2. Increase oven temperature to 460 degrees.
  3. While the oven temperature is rising, thoroughly coat the tops of the Ribs with the Barbecue Sauce, reserving some for serving with the Ribs.
  4. Return the Ribs, uncovered, to the oven and bake for 10 minutes.
  5. To caramelize the edges of the Ribs, change the oven setting to Broil, leaving the rack in the center position, and broil for about 3 minutes.
  6. Remove Ribs from the oven and let rest for 10 minutes before slicing.
  7. I hope you enjoy this as much as we did!
Dinner, Main Dish
American