Turkey & Pork Meatball-Pasta Casserole ~ Gluten Free

Turkey & Pork Meatball-Pasta Casserole ~ Gluten Free

If you’re looking for a REALLY yummy meal that will not only fill your family’s stomachs, but will have them coming back for more, then you have found the perfect recipe! My family loves Italian food, so this one was right up our alley 🙂 I always double this recipe, so I can serve one immediately and freeze the other one for those busier nights. To save on time, you can use a GF Pasta Sauce instead of making the sauce from scratch. Also, most grocery stores sell already-made meatballs (or frozen) in their meat section, but I highly recommend making your own using ground Turkey and Italian sausage…it really adds a wonderful flavor!
As usual, a BIG “Thank You” to The Pioneer Woman for sharing the original version of this recipe – I made a few changes to make it GF and allergy-friendly for my family 😉

Homemade Sauce:

  • 1 Tbsp olive oil (I use the Light variety)
  • 1 1/2 tsp minced garlic (I use the already minced Garlic in a jar)
  • 1 Medium Onion, chopped (I use Vidalia, but any variety is fine)
  • 2 15 oz. cans Tomato Sauce (30 total ounces; I use the plain variety (no spices))
  • 1 12 oz. can Tomato Puree
  • 1 Tbsp Dried Parsley
  • 1 Tbsp Dried Basil
  • 2 Tbsp Granulated Sugar
  • 1/2 tsp Salt (optional)
  • 1/4 tsp Ground Black Pepper
  • 1/2 Cup Whole Milk, room temperature (1% and 2% are also fine)

Homemade Meatballs:

  • 1 lb. Ground Turkey
  • 1 lb. Ground Pork (I use the mild version)
  • 1/4 Cup GF Whole Oats
  • 1/4 Cup Grated Parmesan Cheese
  • 1 Tbsp Dried Parsley
  • 1/2 tsp Dried Oregano
  • 1 Tbsp Milk (Whole, 1% or 2%)
  • 1 Large Egg (lightly beaten)
  • 1 pinch Salt (optional)
  • 1-2 pinches Ground Black Pepper
  • 1-2 Tbsp Light Olive Oil

The Layers:

  • 1 12 oz. Box Gluten Free Pasta Shells (I highly recommend “Jovial” brand – I have tried just about all of the GF Pastas out there and this one comes the closest to tasting like the “real” thing!)
  • 1 16 oz (1 lb) Fresh Mozzarella Cheese, sliced (You can also use the “Pearls” )
  • 1/2 Cup Grated Parmesan Cheese

Making the Homemade Sauce:

  1. In a large saucepan/pot, heat 1-2 Tbsp. Olive Oil over Medium/Low heat until it shimmers on the surface.
  2. Once the oil is hot, add the Garlic and Onion and cook for about 2-3 minutes, or until the Onion is transparent.
  3. Lower the temperature to Low and add the Tomato Sauce, Tomato Puree, Parsley, Basil, Sugar, Salt and Pepper; stir until fully blended; add the Milk and stir to incorporate.
  4. Cover and let simmer while you cook the Meatballs and Pasta.

Making the Meatballs:

  1. In a large bowl, mix the Ground Turkey, Ground Sausage, Oats, Parmesan Cheese, Parsley, Oregano, Salt and Pepper until thoroughly blended.
  2. Next, add the Milk and Egg and mix well using either your hands or two forks.
  3. Using a 1″ or 2″ scooper, scoop and form meatballs and place on a cookie sheet or large plate; you should end up with about 24 – 2″ meatballs or 48 – 1″ meatballs.
  4. Using a large non-stick skillet, heat the Olive Oil over Medium/Low to Medium heat until the surface shimmers.
  5. Once the oil is heated, add 6-8 meatballs (leave enough working room in the skillet to flip/turn the meatballs) and brown on each side (about 3-4 minutes per side). Transfer the browned meatballs to a clean dish/plate, while you cook the remaining meatballs.

The Pasta:

  1. While you are cooking the meatballs, bring a large pot of water to a boil; cook the Pasta according to the package instructions for al dente; drain and set aside.

Putting it All Together:

  1. While you’re layering the casserole, preheat the oven to 350 degrees.
  2. Spray a 9″ x 13″ Baking Dish with non-stick cooking spray.
  3. Ladle a thin layer of sauce onto the bottom of the baking dish and spread out evenly to cover the bottom.
  4. Next, add half of the meatballs.
  5. Then, add half of the Pasta onto and around the meatballs.
  6. Next, layer with half of the Mozzarella Slices (or “Pearls”).
  7. Repeat these layers with the remaining ingredients: Sauce, Meatballs, Pasta, Mozzarella.
  8. Sprinkle the top evenly with the 1/2 cup of Parmesan Cheese.
  9. Bake on a cookie sheet (to prevent spills in the oven) for about 30 minutes or until cheese is golden and bubbly.
  10. Allow to cool for about 10-15 minutes before serving.
  11. Yummy!!! Serve with a fresh green salad and Enjoy! 🙂
Dinner, Lunch, Main Dish
Italian


Chocolate Frosted Brownies ~ Gluten Free

Chocolate Frosted Brownies ~ Gluten Free

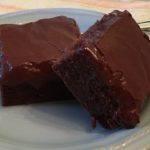
These GF Chocolate Frosted Brownies are incredibly fudgy, rich and delicious!!! I adapted this recipe from a very popular Brownie recipe from many peoples’ childhoods, called the “Lunch Lady Brownies” – the only changes that I made was to substitute the regular gluten-containing flour with GF All-Purpose Flour and they turned out perfect! My family had NO idea that they were Gluten Free 😉 Yummy!!!
A huge “Thank You” to Holly @ Life In The Lofthouse for sharing the original “Lunch Lady Brownies” recipe 🙂

Equipment:

  • 9″ x 13″ Baking Pan
  • Aluminum Foil
  • Non-Stick Cooking Spray
  • Stand or Handheld Mixer

The Brownie Ingredients:

  • 1 Cup (2 Sticks) Salted Butter (Melted)
  • 1/2 Cup Unsweetened Cocoa Powder
  • 2 Cups All-Purpose Gluten Free Flour (I used Better Batter)
  • 2 Cups Dixie Crystals Extra Fine Granulated Sugar (You may use your desired brand of granulated sugar)
  • 4 Large Eggs (I use Egglands Best, but any brand is fine)
  • 4 teaspoons Vanilla Extract

The Chocolate Frosting Ingredients:

  • 1/4 Cup (1/2 Stick) Salted Butter, softened (I use Land O Lakes brand)
  • 1/4 Cup Milk (I use Whole Milk, but 2% or 1% are fine, too)
  • 1/4 Cup Unsweetened Cocoa Powder
  • 3 Cups Powdered Sugar
  1. Preheat oven to 350 degrees.
  2. Line a 9″ x 13″ baking pan with foil and spray with non-stick cooking spray. Set aside.
  3. Using a Stand Mixer or Handheld mixer, fitted with the Paddle attachment, blend the Melted Butter and Cocoa Powder until smooth.
  4. Next, add the GF Flour and Granulated Sugar, mixing until blended…scraping the sides as needed.
  5. Add the eggs, one at a time, until just blended.
  6. Slowly mix in the Vanilla Extract, blending until just combined. The batter will be thick.
  7. Evenly spread the Brownie batter into the prepared Baking Dish.
  8. Bake for 25 to 30 minutes, or until a toothpick inserted into the center comes out clean.
  9. Remove from oven and allow to cool for 15 minutes while preparing the Chocolate Frosting. Note: You want the Brownies to still be warm when you apply the Frosting.

Making the Chocolate Frosting:

  1. Using a Stand Mixer or Handheld Mixer, fitted with the Paddle attachment, combine the Softened Butter, Milk and Cocoa until smooth and creamy.
  2. Gradually add the Powdered Sugar, 1/2 Cup at a time, starting on Low each time to avoid a HUGE powdery mess 😉
  3. Once all of the Powdered Sugar has been added, beat on Medium to Medium-High speed for about 2 minutes, or until light and creamy.
  4. Spread evenly over the top of the Brownies and let cool completely (I know it’s hard to do!!!) before slicing. Note: I remove the entire Brownie using the foil to lift it…and then I slice them 🙂
  5. Serve by themselves, with a glass of cold milk or your choice of Ice Cream! Enjoy!!!
Desserts, Snacks


Brown Sugar Oatmeal Cookies ~ Gluten-Free

Brown Sugar Oatmeal Cookies ~ Gluten-Free

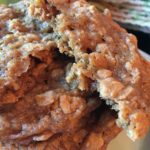
These Oatmeal Cookies are so buttery and chewy that they melt in your mouth. I also love the fact that there are only 8 ingredients needed…all ingredients that we usually have on-hand.
Of course, a HUGE “Thank You” to Ree Drummond (aka: The Pioneer Woman) for sharing the original recipe for these wonderful cookies! The only thing that I changed was swapping out the regular flour with Gluten-Free Flour 😉 These cookies earned a 5-Star review in our house!

  • 2 Cups Dark Brown Sugar (firmly packed)
  • 1 Cup Salted Butter, Softened
  • 2 tsp Vanilla Extract
  • 2 Large Eggs
  • 1 1/2 Cups Better Batter All Purpose Gluten Free Flour Mix (you can use other brands, but make sure they contain Xanthan Gum – results will vary)
  • 1 tsp Salt (table)
  • 1/2 tsp Baking Soda
  • 3 Cups Gluten-Free Old Fashioned Oats (I use Quaker Brand)
  • 1/2 Cup Finely Chopped Nuts (optional ~ I did not include nuts due to nut allergies)
  1. Preheat oven to 350 degrees.
  2. Gather the ingredients.
  3. Line 1-2 cookie sheets with Parchment Paper or a baking pad. Set aside.
  4. Using a stand mixer, with the paddle attachment, combine the Brown Sugar and Softened Butter until light and fluffy.
  5. Next, add the Vanilla and the Eggs, one at a time, scraping down the sides of the bowl after adding each Egg.
  6. In a separate bowl, combine the GF Flour, Salt and Baking Soda until well-blended.
  7. Slowly add the Flour mixture to the Butter mixture, one cup at a time, mixing until just combined after each addition.
  8. Next, add the Oats (and Chopped Nuts, if using), one cup at a time, scraping the sides of the bowl after each addition. Mix until all Oats are blended (be sure to check the very bottom of the bowl for any dry oats).
  9. Using a cookie scoop or spoon of your desired size (I used a 2″ cookie scoop), drop cookie dough balls onto prepared cookie sheets several inches apart (they spread!)
  10. Bake for 12-14 minutes (longer if you want crispy cookies).
  11. Cool on the cookie sheets for about 2 minutes before transferring them to a wire cooling rack.
  12. Enjoy with a cold glass of milk or a bowl of Vanilla Ice Cream 🙂
Desserts, Snacks


Zucchini Bread – Gluten-Free & Dairy-Free

Zucchini Bread – Gluten-Free & Dairy-Free

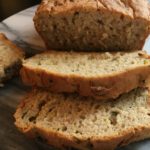
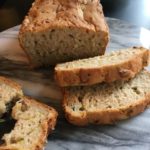
This moist, delicious Gluten-Free, Dairy-Free Zucchini Bread is packed full of nutrients and spices! I always make a double batch (this recipe is for 2 loaves), because it disappears very quickly in our house 😉 I attempted to make a Vegan version (substituting applesauce for the eggs) for my daughter, but it turned out like a VERY wet brick…I will continue trying different Vegan versions until I succeed! In the meantime, let me know what you think of this GF, DF version 🙂

  • 3 Cups Zucchini, shredded (water squeezed out)
  • 4 Cups Better Batter All Purpose Gluten Free Flour Mix (You can use other cup-for-cup GF flours, but end results may vary)
  • 1 Cup Granulated Sugar
  • 2-3 Tbsp Granulated Sugar (for sprinkling in both pans)
  • 1/4 Cup Light Brown Sugar (Firmly Packed)
  • 5 tsp Baking Powder, GF
  • 1 1/2 tsp Ground Cinnamon
  • 1/2 tsp Salt
  • 1/4 tsp Nutmeg
  • 1 Tbsp Lemon Zest
  • 1 1/2 Cups Plain Rice Milk (or any other non-dairy unflavored milk (if you’re not DF, you can use Skim, 1%, 2% or Whole Milk))
  • 1/4 Cup + 2 Tbsp Vegetable Oil (I use Canola)
  • 2 tsp Vanilla Extract
  • 2 Large Eggs (lightly beaten)
  • Non-Stick Cooking Spray
  • 1/2 Cup Pecans or Walnuts, chopped (optional)
  1. Preheat oven to 350 degrees.
  2. Gather the ingredients.
  3. Spray two 8″ x 4″ loaf pans with the non-stick cooking spray. Sprinkle all sides and bottom of each pan with about 1 Tbsp Granulated Sugar. Set aside.

The Flour Mixture:

  1. In a large bowl, combine the GF Flour, 1 Cup Granulated Sugar, Light Brown Sugar, Baking Powder, Spices and Lemon Zest. Mix thoroughly and form a well in the center. Set aside.

The Zucchini Mixture:

  1. Using a food processor or handheld grater, shred the Zucchini and place on paper towels in a large bowl to absorb the water.
  2. In another large bowl, mix the milk, oil, vanilla and eggs until well combined. Add the shredded zucchini and mix well.

Making the Batter:

  1. Add the Zucchini Mixture to the center of the Flour Mixture.
  2. Mix well using a fork to start with to help break up the Zucchini. Then switch to a large spoon to ensure that you get all of the ingredients off of the bottom. (Note: if you’re adding nuts, do so at this step).

Baking the Bread:

  1. Divide the batter between the two prepared loaf pans. If desired, you may sprinkle the tops with additional granulated sugar.
  2. Bake on the center rack for 50-60 minutes or until toothpick comes out clean.
  3. Cool in their pans for about 10 minutes.
  4. Transfer loaves to wire cooling rack and let cool completely before slicing.
  5. Enjoy!
Breakfast, Desserts, Lunch, Snacks, Sweet Breads


Sunshine Lemon Cooler Cookies (Gluten Free)

Sunshine Lemon Cooler Cookies (Gluten Free)

This copycat recipe for Sunshine Lemon Cooler cookies earned 5 Stars with our family! Growing up, these were my favorite cookies!!! I was SO sad when the Sunshine Company stopped making/selling them 🙁 I have tried many copycat recipes over the years, but this one from “Dixie Crystals” is by far the best (a HUGE “Thank You” to dixiecrystals.com). I simply swapped out the regular flour with “Better Batter All Purpose Gluten Free Flour Mix” and voila! the memories came flooding back as these crunchy, lemony morsels of Heaven dissolved in my mouth 🙂 Enjoy!

The Powdered Sugar Coating:

  • 1 Cup Powdered Sugar
  • 1 Envelope Kool-Aid Powdered Lemonade (about 1 1/2 teaspoons)

The Cookie:

  • 2 Cups Better Batter All Purpose Gluten Free Flour Mix (I find that this brand works best)
  • 2 teaspoons Gluten Free Baking Powder
  • 1/4 teaspoon Salt
  • 1/2 Cup Unsalted Butter, Room Temp (I use Land O Lakes)
  • 3/4 Cup Powdered Sugar
  • 1/3 Cup Dixie Crystals Extra Fine Granulated Sugar
  • 1 Large Egg (lightly beaten)
  • 1 teaspoon Vanilla Extract
  • 2 teaspoons Lemon Zest
  • 1 Tablespoon Lemon Juice

Directions for Making the Powdered Sugar Coating:

  1. In a large resealable plastic bag, combine the 1 Cup Powdered Sugar with the Kool-Aid Powdered Lemonade; set aside.

Directions for Making the Cookies:

  1. Preheat oven to 350 degrees.
  2. Line 1-2 cookie sheets with parchment paper; set aside.
  3. In a medium bowl, mix the GF Flour Mix, Baking Powder and Salt; set aside.
  4. Using a Stand Mixer, combine the Butter and Sugars until smooth and creamy.
  5. Next, add the Egg, Vanilla, Lemon Zest and Lemon Juice to the Butter-Sugar mixture, blending well.
  6. Add the Flour Mixture, 1/2 cup at a time, to the dough, mixing on the Low setting until just combined.
  7. Using a small cookie scoop (or spoon and rolling the dough into balls), scoop out the cookie dough onto the prepared cookie sheets, placing them 2″ apart. Using the palm of your hand or the bottom of a glass, slightly flatten each cookie to form disks.
  8. Bake for 12-15 minutes, depending on your oven. I bake mine for 14-15 minutes, because I prefer these cookies to be slightly crunchy, like the original Sunshine recipe.
  9. Let the cookies cool on the sheets for about 5 minutes.
  10. Carefully toss 3-4 cookies at a time in the powdered sugar mixture, coating each cookie well.
  11. Place the powdered cookies on a cooling rack to continue cooling.
  12. Enjoy!
Desserts, Snacks


Chocolate Pudding with Cookie Crumbles & Fresh Whipped Cream (Gluten Free)

Chocolate Pudding with Cookie Crumbles & Fresh Whipped Cream (Gluten Free)

Pudding is one of my favorite comfort foods. However, I must confess…I always made it from a box 😉 So, I decided to make it from scratch to see if there was a big difference and YES there is! Homemade chocolate pudding is definitely worth making 🙂 I added the chocolate cookie crumbles in the bottom after finding a wonderful recipe by Ree Drummond (thank you, Ree!) Let me know what you think…box or homemade?

Ingredients for the Cookie Crumble (optional):

  • 22-24 Gluten Free Chocolate Sandwich Cookies (if not GF, use Oreos)
  • 4 Tbsp Salted Butter, Melted (I use Land O Lakes)

Ingredients for the Pudding:

  • 1 1/2 Cups Granulated Sugar
  • 1/4 Cup All-Purpose Gluten Free Corn Starch
  • 1/4 tsp Salt
  • 3 Cups Skim Milk (You can substitute with 1%, 2%, Whole or any non-dairy milk)
  • 4 Large Egg Yolks
  • 6 1/2 ounces Bittersweet Chocolate
  • 2 Tbsp Butter, salted
  • 2 tsp Vanilla Extract

Ingredients for the Whipped Topping:

  • 1 Cup Heavy Whipping Cream (very cold)
  • 2-3 Tbsp Powdered Sugar
  • 1/2 tsp Vanilla Extract

Making the Cookie Crumble:

  1. In a food processor, pulse the melted Butter and Sandwich Cookies until finely crushed. Then spoon desired amount into the bottom of your serving dishes/cups (reserving some for garnish). Note: I spoon about 2 Tbsp into the bottom of each glass.

Making the Pudding:

  1. In a medium saucepan, whisk together the Sugar, Cornstarch and Salt until well-blended.
  2. Add the Milk and Egg Yolks to the Sugar mixture and whisk well.
  3. Heat this mixture over medium heat for about 8-10 minutes, stirring constantly so mixture doesn’t burn or clump. Immediately remove from the heat once it starts to thicken (like pudding ;))
  4. Add the Butter and Vanilla to the pudding mixture, stirring until butter is completely melted and blended.
  5. Pour the mixture into desired serving bowls/cups. Refrigerate for at least 2 hours.

Making the Whipped Cream:

  1. Just before serving the pudding, make the Whipped Cream by combining the Heavy Whipping Cream, Powdered Sugar (1 Tablespoon at a time) and Vanilla Extract using a Stand or Handheld Mixer. Beat on medium-high until stiff peaks form (about 4-5 minutes)
  2. Spoon desired amount on top of each pudding and add a few Cookie Crumbles for garnish. Yum!
Desserts, Snacks
American


Baked Turkey-Ranch Meatballs with Spicy Avocado Sauce (Gluten Free)

Baked Turkey-Ranch Meatballs with Spicy Avocado Sauce (Gluten Free)

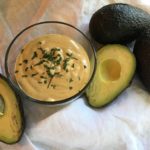
Oh my goodness! These savory and slightly sweet meatballs paired with the spicy Avocado dipping sauce is out of this world!!! I always make a triple batch when I’m making any type of meatball, so I can freeze some for another busy night. However, after making a triple batch of these yummy meatballs, I didn’t have enough to freeze…my family LOVED them and not only went back for seconds, but thirds 🙂 I served this with a fresh salad, topped with cucumbers, strawberries and a store-bought Honey Poppy Seed dressing…delicious! I hope you enjoy 🙂

The Meatballs:

  • 3 lbs Ground Turkey
  • 2 Large Eggs
  • 1 Cup Gluten Free Seasoned Bread Crumbs
  • 1/8 Cup + 1 Tablespoon Worcestershire sauce
  • 2 Tablespoons (heaping) Ranch Dressing Powder Mix (I use Hidden Valley Ranch)
  • 1/4 Cup Light Brown Sugar (I do not pack this)
  • 2-3 Pinches Ground Black Pepper

The Spicy Avocado Sauce:

  • 1 Large Ripe Avocado (seed removed and sliced into smaller pieces)
  • 2/3 Cup Mayonnaise (I use Hellmann’s Mayonnaise)
  • 2/3 Cup Buttermilk or Buttermilk Substitute (Since Buttermilk is difficult to find right now, you can make your own: pour 1 Tablespoon White Vinegar (or Lemon Juice) in a 1 Cup measuring cup, then add milk of your choice to fill remaining cup (I used Plain Rice Milk))
  • 3-4 tsp Onion Powder
  • 3 tsp Garlic Powder
  • 1 tsp Kosher Salt
  • 1 tsp Paprika
  • 1/2 tsp Cayenne Pepper
  • 1/2 tsp Ground Black Pepper
  • Dried Parsley (for sprinkling on top)

Making the Meatballs:

  1. Gather the meatball ingredients.
  2. Preheat oven to 375 degrees.
  3. Line 2-3 baking sheets with parchment paper. Set aside.
  4. In a large mixing bowl, combine all of the Turkey Meatball ingredients and mix very well, either with a fork or your hands.
  5. Using a 2″ cookie scooper (or spoon), scoop turkey mixture onto the prepared baking sheets (16 meatballs per sheet). You may either form the meatballs using your hands or just drop meatballs directly onto sheet using the cookie scooper.
  6. Bake for 16-18 minutes, or until inside temperature measures 165 degrees (I usually cut the center-most meatball in half to check for any pinkness).

Making the Spicy Avocado Dipping Sauce:

  1. Gather the Avocado ingredients.
  2. While the meatballs are cooking, blend the Avocado ingredients (except for the Parsley) in a blender or food processor until smooth and creamy.
  3. Pour into serving bowl and top with dried Parsley. Refrigerate until ready to serve.
  4. Once the meatballs are cooked, drizzle some Spicy Avocado Sauce over the tops and serve with your favorite veggie! Yum!!!

*Thank you to californiaavocado.com for sharing the Spicy Avocado Ranch Dressing recipe…I made a few minor adjustments 😉

Appetizers, Dinner, Hors d’Oeuvres, Lunch, Main Dish
American


Easy Gluten Free Cinnamon-Sugar Coffee Cake

Easy Gluten Free Cinnamon-Sugar Coffee Cake

This Gluten Free Coffee Cake is SO moist, tasty and easy to make! It’s the perfect afternoon snack, dessert or breakfast for those weekend sleepovers. An instant hit with our family and friends! 🙂
*Thank You to America’s Test Kitchen for sharing this wonderful recipe!!

The Crumb Topping

  • 1/2 Cup Unsalted Butter, Melted (1 Stick or 8 Tbsp)
  • 1/3 Cup Granulated Sugar
  • 1/3 Cup Dark Brown Sugar (Packed)
  • 1 Large Egg Yolk
  • 1/8 tsp Salt
  • 3/4 tsp Cinnamon
  • 3/4 Cup + 1/3 Cup All-Purpose Gluten Free Flour, Sifted (I use Better Batter GF Multi-Purpose Flour)

The Cake

  • 3/4 Cup + 1/3 Cup All-Purpose GF Flour, Sifted (I use Better Batter GF Multi-Purpose Flour)
  • 1/2 Cup Granulated Sugar
  • 1/4 tsp Salt
  • 1/4 tsp Xanthan Gum (use ONLY if your GF Flour Blend doesn’t contain any; Better Batter contains Xanthan Gum, so I do not add it )
  • 1/2 tsp Baking Soda
  • 6 Tbsp Butter, Unsalted (Softened & Cut Into 6 Pieces)
  • 1/2 Cup Sour Cream
  • 2 Large Eggs
  • 1 Large Egg Yolk
  • 1 tsp Vanilla Extract
  1. Gather the ingredients.
  2. Spray an 8″ x 8″ baking pan with non-stick cooking spray. Next, fold a 16″ length of Parchment Paper to a width of 7″ and fit it into the baking pan, so that the excess hangs over the edges for easy removal of the cake. Set aside.

Making the topping:

  1. In a small sauce pan, melt the butter over low heat. Once completely melted, remove from heat and let cool slightly.
  2. Using a whisk, mix in the sugars, salt, cinnamon and egg yolk to the melted butter, thoroughly mixing.
  3. Add the GF Flour to the butter mixture, blending well. The mixture will look like ground meat. Set aside.

Making the Cake:

  1. Place one of your oven racks in the upper-middle position of the oven and preheat oven to 325 degrees.
  2. In a stand mixer, using the paddle attachment, mix the GF Flour, Granulated Sugar, Salt, Xanthan Gum (if needed) and Baking Soda on low until completely blended.
  3. Next, add the Butter to the flour mixture, one piece at a time, mixing on low until butter pieces are no longer visible – mixture will resemble coarse sand.
  4. Add the Sour Cream, Eggs, Yolk and Vanilla to the Flour mixture and mix on medium-high until batter is light and fluffy.

Putting it Together:

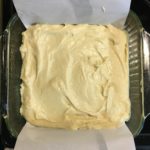
  1. Scrape the batter into the prepared baking pan and smooth the top.
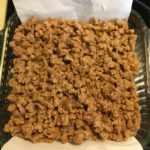
  2. Using your hands, break the Topping Mixture into large pea-sized pieces and sprinkle over the top of the batter to completely cover.
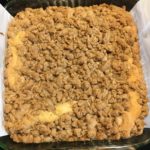
  3. Bake for 35-45 minutes, rotating the pan halfway through baking. It’s done when the middle is no longer jiggly and a wooden toothpick inserted into the middle comes out clean.
  4. Let cool in the pan for 30 minutes before removing, using the excess Parchment Paper to lift and pull the cake out.
  5. Place on a platter or cutting board to cut and serve. Enjoy!

**This cake stores well in an air-tight container for about 3 days.

***A HUGE “Thank You” to America’s Test Kitchen for sharing this wonderful recipe!!! 🙂

Breakfast, Desserts, Snacks