Pumpkin Spice Bundt Cake (Gluten Free)


Pumpkin Spice Bundt Cake (Gluten Free)

Wow! This cake takes it all!!! It is so moist and full of flavor…and, it's Gluten-Free 🙂 If you haven't tried "Gluten Free Heaven" Flour Mixes, then you don't know what you're missing! They have mastered the secret to GF baking – you will never know it's GF. A big shout out to Dixie Crystals for the original version of this recipe…I made a few changes in order to make it GF and allergy-friendly for my family. Thank you to Dixie Crystals and GF Heaven 🙂

Cake:

  • 1 3/4 Cups *Gluten Free Heaven" Cake & Pastry Flour (*I have not made this cake with any other GF flours; please note that all GF Flours are not created the same and results will vary if you use a different GF Flour)
  • 3/4 + 1/8 teaspoon *Xanthan Gum (*This must be added for “GF Heaven Flours” since they do not contain it; leave out if your GF Flour already contains it)
  • 1 teaspoon GF Baking Powder
  • 1/2 teaspoon GF Baking Soda
  • 2 teaspoons Ground Cinnamon
  • 1/2 teaspoon Ground Ginger
  • 1/8 teaspoon Ground Cloves
  • 1 teaspoon Salt
  • 1 Cup + 2 Tbsp Unsalted Butter (Very soft, but not melted)
  • 1 Cup Extra Fine Granulated Sugar (I always use Dixie Crystals)
  • 3 Large Eggs (room temperature)
  • 2/3 Cup Canned Pumpkin (I used Libby’s)
  • 1/3 Cup Orange Juice (I used “no pulp” kind)

Glaze:

  • 2/3 Cups Confectioner’s Sugar ((Powdered); plus more if you want a thicker consistency)
  • 2 Tbsp Orange Juice
  1. Set oven rack in the middle position; Preheat oven to 350 degrees.
  2. Butter and flour Bundt pan (you can also use a 9 x 5 – inch loaf pan); set aside.
  3. In a medium-sized bowl, whisk together the GF Flour, Xanthan Gum, Baking Soda & Powder and Spices; set aside.
  4. Using a Stand or Handheld Mixer, fitted with the paddle attachment, beat the Butter until light & fluffy; add the Granulated Sugar and blend until thoroughly mixed and fluffy.
  5. Add the Eggs, one at a time, blending well after adding each Egg; scrape sides of bowl often; whip until the mixture is very light & fluffy.
  6. Next, add the Canned Pumpkin and mix until blended.
  7. Add the Dry Ingredient mixture and Orange Juice in 3-4 segments, mixing and scraping bowl and paddle well between each addition.
  8. Scrape the batter into the prepared Bundt Pan; place in the preheated oven on the middle rack and bake for 45 minutes (check the cake around the 30-35 minute mark to make sure it isn't browning too much – if it is, cover loosely with a piece of aluminum foil); test doneness after 45 minutes with a toothpick and pressing lightly on the top to see if it springs back; bake an additional 15-30 minutes, depending on your oven (my cake was ready after 45 minutes).

  9. Once cake is done, remove from oven and let cool in the pan for approximately 10-15 minutes before turning out onto a cooling rack.
  10. While the cake is cooling, thoroughly whisk the Powdered Sugar and Orange Juice together in a small bowl until desired consistency is reached; spoon the Glaze over slightly warm or completely cooled cake.
  11. Serve with or without Vanilla Ice Cream and Enjoy! 🙂

*Use the “Spoon & Sweep” method for measuring the GF Flour: use a spoon to fill the measuring cup with the desired amount of flour, then scrape across the top with the back side of a knife to level off.
Desserts, Snacks
Gluten Free
bundt cake, Cake, dixie crystals, gluten-free, Holidays, Pumpkin, pumpkin spice, sweet treats, sweets, Treats


Quick & Easy Orange Chicken ~ Ground (Gluten Free)

Quick & Easy Orange Chicken ~ Ground (Gluten Free)

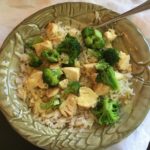
Wow! Full of flavor and SO quick & easy to prepare makes this dish an instant winner in our house!!! Serve over rice and with your favorite veggies 🙂
*Thank You to dinnerthendessert.com for sharing the original version of this recipe ~ I have made several adjustments to the ingredients in order to make it Gluten-Free and Allergy-friendly for my family 😉

The Chicken:

  • 3 lbs Ground Chicken
  • 1 Tbsp Canola Oil
  • 1 1/2 tsp Ground Ginger (or 2-3 Tbsp Fresh Ginger Root, minced)
  • 1 1/2 Tbsp Garlic, minced (I use the already-minced Garlic in a jar)
  • 1/2 – 3/4 tsp Red Pepper Flakes

The Orange Sauce:

  • 1/2 Cup Water
  • 2 tsp Canola Oil
  • 1/4 Cup Braggs Liquid Aminos (or GF Soy Sauce (low sodium or regular))
  • 1/2 – 3/4 Cup Granulated Sugar
  • 3-5 Tbsp White Vinegar (I use 3 Tbsp since my family does not like a strong vinegar taste)
  • 2 Medium Oranges, Zest (Squeeze some of the fresh orange juice over the dish before serving, if you want that extra orange punch)

The Slurry (Thickener):

  • 3 Tbsp Warm Water
  • 3 Tbsp Gluten Free Cornstarch

The Chicken:

  1. In a large non-stick saucepan, cook the Ground Chicken over Medium-Low heat (cook on Medium, if you want a crust to form) until done.
  2. When the Chicken is almost finished cooking, add the Ginger, Garlic and Red Pepper Flakes; cook for about 1 minute.

The Sauce:

  1. While the Chicken is cooking, mix the Sauce ingredients together in a medium-sized bowl until thoroughly blended.

Putting it Together:

  1. Once the Chicken is finished cooking, reduce the temperature to Low and pour the Orange Sauce over the Chicken; bring to a low boil.

The Slurry:

  1. While the Chicken and Sauce are simmering, stir the Cornstarch into the warm Water in a small bowl until completely dissolved.
  2. Pour this Cornstarch Slurry into the Orange-Chicken mixture and stir until combined and sauce begins to thicken.
    *If you prefer a thinner sauce, add more warm water or the fresh-squeezed orange juice at this point.
  3. If you want to add any veggies (Broccoli, Asparagus, Snow Peas, etc.), do so now and cover the pot with a lid to lightly cook the veggies for about 3-5 minutes.
  4. Serve over rice and enjoy 🙂
Dinner, Lunch, Main Dish
American, Asian


Cashew Chicken ~ Gluten Free

Cashew Chicken ~ Gluten Free

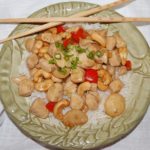
Our family’s go-to order from our favorite local Chinese restaurant was always the Cashew Chicken. However, since we moved, we have not been able to find another restaurant that makes a Cashew Chicken as well as our favorite. So, I pulled up my shirt sleeves and headed into my kitchen to try and re-create our much-loved and missed recipe 😉 After MANY failed attempts, I finally succeeded in pleasing all members of my family! I hope you enjoy it as much as we do 🙂

Soy Sauce Mixture:

  • 1/4 Cup Bragg Liquid Aminos or Soy Sauce (I use Bragg Liquid Aminos because it’s GF and Soy Free, but you can use regular or low-sodium soy sauce)
  • 1 Tbsp Rice Vinegar
  • 1 Tbsp Worcestershire sauce
  • 1 Tbsp Light Brown Sugar
  • 1/2 tsp Canola Oil
  • 1 Tbsp Fresh Ginger (finely chopped)

Chicken:

  • 4 Boneless, Skinless Chicken Breasts (cut into bite-size pieces)
  • 1-2 Pinches Table Salt
  • 1-2 Pinches Ground Black Pepper
  • 3 Tbsp Canola Oil

Garlic, Bell Peppers, etc.:

  • 1 tsp Garlic, minced ((2 cloves))
  • 1 Large Bell Pepper (Cut into bite-size pieces; I like to use Red or Orange for the color and the sweetness)
  • 2 Tbsp Fresh Ginger, chopped
  • 1 Cup Broccoli, chopped ((optional) or Snow Peas)
  • 1/4 Cup Dry Sherry

The Slurry (i.e the thickener):

  • 2 Tbsp Cornstarch (make sure it’s Gluten Free, if you’re GF)
  • 1/4 Cup Bragg Liquid Aminos or Soy Sauce

The Yummy Parts:

  • 1 Cup Whole Roasted Unsalted Cashews
  • 1/3 – 1/2 Cup Water Chestnuts, chopped (I leave mine whole for more crunch)
  • 1-2 Scallions, Green and White Parts (sliced for topping)

The Soy Sauce Mixture:

  1. In a small bowl, whisk together the Bragg Liquid Aminos (or Soy Sauce), Rice Vinegar, Worcestershire Sauce, Light Brown Sugar, Canola Oil and Ginger; Set aside.

The Chicken & Veggies:

  1. In a large non-stick skillet, heat the 3 Tablespoons of Canola Oil over medium heat.
  2. Once the oil is shimmering, add the chicken, sprinkling with salt and pepper, and saute until thoroughly cooked (about 5 – 8 minutes).
  3. Remove the cooked chicken with a slotted spoon and place in a large bowl; set aside.
  4. Reduce the temperature to medium-low, add the Garlic, Bell Pepper, and 2 Tablespoons Ginger to the same skillet; cook for about 2 minutes, keeping Peppers crisp. (Note: if you’re adding Broccoli or Snow Peas, do so now)
  5. Next, add the Sherry and stir thoroughly with the juices and Garlic-Peppers-Ginger mixture.
  6. Add the Soy Sauce Mixture that you set aside earlier to the skillet and bring to a boil (about 1 minute).
  7. In a small bowl, whisk together the Cornstarch and 1/4 Cup Bragg Aminos to make the slurry; add this to the skillet and stir thoroughly to blend well (if sauce is too thick, add 1/4 cup water).
  8. Lastly, return the Chicken to the skillet along with the Cashews and Water Chestnuts;
  9. Garnish with scallions and serve. Enjoy!
Dinner, Main Dish
Asian


Stovetop Chicken in an Indian Curry Sauce

Stovetop Chicken in an Indian Curry Sauce

My mouth was watering just smelling this sweet and savory light Indian Curry Sauce simmering on the stove! The spices, cream and honey meld together perfectly into the most fragrant and delectable sauce that I have ever tasted 🙂 This yummy sauce pairs nicely with just about any vegetable, protein and/or starch. I hope you enjoy it!

The Curry Sauce:

  • 1/4 Cup Vegetable OIl (I used Canola Oil)
  • 1 Medium Onion, Finely Chopped (I used a Vidalia Onion)
  • 3 tsp Minced Garlic (I use the already minced Garlic in a jar)
  • 1/2 tsp Ground Ginger
  • 2 Tbsp Curry Powder (I used Madras Curry for a little bit more heat)
  • 3 1/2 Cups Chicken Broth
  • 1 Cup Heavy Cream (You can also use Half & Half or Whole MIlk)
  • 1 Tbsp Gluten Free Cornstarch
  • 2 heaping tsp Honey
  • 2-3 Pinches Salt
  • 2-3 Pinches Ground Black Pepper

The Chicken:

  • 4 Boneless, Skinless Chicken Breasts (Rinsed, trimmed and patted dry with a paper towel)
  • 1-2 Tbsp Salted Butter
  • 1-2 Tbsp Canola Oil
  • Salt & Pepper (Sprinkled over both sides of Chicken)

Making the Curry Sauce:

  1. Gather ingredients.
  2. In a medium-sized heavy saucepan, heat the Canola Oil over Medium heat.
  3. Add the finely chopped onion and cook for about 5 minutes, or until onion is translucent.
  4. Stir in the Garlic, Ginger and Curry and cook until fragrant (1-2 minutes).
  5. Add the Chicken Broth and stir well. Reduce heat to Low and simmer for about 20 minutes to reduce the mixture a little.
  6. While the broth is reducing, whisk the Cream, Cornstarch and Honey together in a small bowl until completely blended and smooth.
  7. Slowly whisk the Cream mixture into the Chicken Broth mixture, combining the ingredients completely. Simmer for about 5 minutes. Add a few pinches of Salt and Pepper to taste.
  8. Keep the sauce warm while cooking the chicken.

Cooking the Stovetop Chicken:

  1. In a large skillet, heat the Butter and Oil over medium-low heat until the butter is completely melted and bubbling.
  2. Add the Chicken Breasts, sprinkling with Salt & Pepper on both sides. Cook on each side for about 5-7 minutes per side, making sure that both sides are a light golden brown (internal temperature should be 165 degrees)
  3. Once the Chicken Breasts are nicely browned on both sides, use a ladle to spoon several scoops of sauce over the Chicken Breasts in the skillet. Turn the breasts over to thoroughly coat in the sauce.
  4. Serve the Chicken Breasts whole with your favorite side and vegetable and more sauce drizzled over the top…or cut up into bite-sized pieces and serve over Rice and with Steamed Broccoli and more yummy sauce!!!
    Enjoy!
Dinner, Main Dish
Indian


Honey-Ginger Pork Tenderloin

Honey-Ginger Pork Tenderloin

This wonderful dish has quickly become one of our regular Favorite meals! It turns out tender and very flavorful every time 🙂 It’s SO easy to prepare and goes well with just about any side dish. I usually marinate two tenderloins at a time – one for that day’s meal and one to freeze for later (perfect for those days when you just don’t feel like cooking). A HUGE “Thank You” to www.thechunkychef.com for sharing this incredible recipe 🙂

  • 1 Pork Tenderloin (trimmed, rinsed and patted dry with paper towels)
  • 1/2 Cup Honey
  • 1 1/2 Tbsp Fresh Ginger, grated
  • 2 Tbsp Fresh Lemon Juice (or bottled)
  • 2 1/2 Tbsp Soy Sauce (I use the Low-sodium variety)
  • 2 tsp Garlic, minced (I use the all-ready minced Garlic in the jar)
  • Pinch Cayenne Pepper
  • Kosher Salt (to taste)
  • Ground Black Pepper (to taste)
  • 1-2 Tbsp Olive Oil (for searing)
  • Fresh, Chopped Parsley (garnish)
  1. Gather the ingredients.
  2. Place the trimmed, rinsed and patted dry Pork Tenderloin into a large Ziploc baggie. Set aside.
  3. In a small/medium bowl, combine the Honey, Ginger, Lemon Juice, Soy Sauce, Garlic and spices. Whisk/mix until well combined.
  4. Pour half of the marinade into the baggie with the Pork and seal. Let marinate in refrigerator for 4-24 hours. Reserve the other half in an airtight container in the refrigerator for later.
  5. When ready to bake the pork, preheat oven to 400 degrees.
  6. Line a baking sheet with foil and set aside.
  7. Remove the reserved marinade from refrigerator and set aside.
  8. In a large skillet, heat the Olive Oil over Medium to Medium-High heat.
  9. Once the oil is heated, remove the Pork Tenderloin from the marinade and place into the heated oil/pan. Sear all sides of the tenderloin until a light golden brown.
  10. Place the seared Pork onto the prepared baking sheet and bake for about 15 minutes, or until inside temperature of Pork reaches 132-134 degrees.
  11. Evenly brush the Pork with the reserved marinade and continue baking for 5-7 more minutes, or until inside temperature reaches 140 degrees. Note: you may broil the Pork on High for a couple of minutes instead of continuing to bake, if desired.
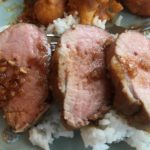
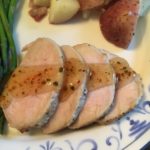
  12. Remove the Pork from the oven and cover loosely with foil. Let rest for about 5 minutes – pork will continue to cook and should register 145 degrees with light pink insides (see photo).
  13. Brush the Pork with run-off marinade from baking sheet and sprinkle the top with the Fresh, Chopped Parsley. Slice into desired thickness and serve with your favorite sides and veggies. Enjoy!

Note: If you’re preparing 2 Tenderloins, simply double all ingredients.

Dinner, Lunch, Main Dish
American, Asian


Gluten Free Chicken in Ginger-Scallion Sauce (Keto Friendly)

Gluten Free Chicken in Ginger-Scallion Sauce (Keto Friendly)

If you’re looking for a tasty, quick and easy-to-make meal, look no further! I use this Ginger-Scallion sauce for Chicken, Fish, Pork, Beef, Rice, Veggies, etc. and it comes out delicious every time. And…it’s Gluten Free and Keto Friendly!!! 🙂

  • 3-4 Breasts Boneless, Skinless Chicken Breasts (Rinsed, trimmed and patted dry with paper towels)
  • 2/3 Cup Apple Cider Vinegar
  • 5 Tablespoons Gluten Free Soy Sauce
  • 4 teaspoons Olive Oil (Or Canola Oil)
  • 4 teaspoons Grated Ginger (I use Ginger Paste)
  • 2 teaspoons Garlic (chopped)
  • 1/2 Cup Green Onions (chopped)
  1. Preheat oven to 400 degrees.
  2. Gather the ingredients.
  3. Place the rinsed, trimmed and dried chicken breasts in a 9″ x 13″ baking dish. Set aside.
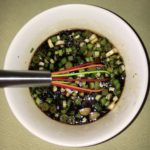
  4. In a small bowl, whisk together all of the ingredients except for the chicken.
  5. Drizzle half of this sauce over the chicken in the baking dish. Reserve the other half for serving with the Chicken.
  6. Bake for approximately 25 minutes, depending on the size of the chicken breasts.
  7. Serve with your favorite side and veggie! Be sure to drizzle the reserved sauce over each Chicken Breast, as well as the side dishes (I usually serve some in a small ramekin with each plate).
    Now, that’s quick and easy 🙂
Main Dish


Gluten Free Citrus Ginger Pork Tenderloin

Gluten Free Citrus Ginger Pork Tenderloin

I make this Gluten Free Citrus Ginger marinade for Pork Tenderloin, Pork Chops or Chicken…it’s so versatile and delicious! The combination of citrus, honey, ginger and soy sauce make this dish especially tasty and tender. And, the leftovers are even tastier! It’s a perfect make-ahead meal for those busy nights. 🙂

  • 1 Large Gluten Free Pork Tenderloin (This marinade makes enough for 2 small Pork Tenderloins or 1 Large Tenderloin)
  • 1/2 Cup Orange Juice
  • 1/3 Cup lemon juice (Fresh or bottled)
  • 1/2 Cup Chicken Broth
  • 2 Tablespoon Honey
  • 1 Tablespoon Gluten Free Soy Sauce
  • 2 teaspoons Ginger (Freshly grated of from tube)
  • 1 teaspoon Yellow Mustard
  • 1 teaspoon minced garlic (Fresh or from jar)
  • 1 Tablespoon olive oil
  • Salt & Pepper
  1. Gather the ingredients (please note: Chicken Broth is not pictured).
  2. Trim excess fat from tenderloin, rinse and pat with paper towels to remove excess water. Place in a large resealable plastic bag. Set aside.

Making the Marinade

  1. In a large bowl, combine the next 8 ingredients and mix well.
  2. Pour marinade over the tenderloin in the plastic bag, seal tightly and refrigerate for at least 8 hours (I usually place this in a baking dish or large bowl, so I can turn it over easily and to prevent any leaking).
  3. When ready to bake, preheat oven to 450 degrees. Line a baking sheet with foil and set aside.
  4. Remove the tenderloin from the bag and place on the baking sheet. Brush with the Olive Oil and sprinkle with salt and pepper on all sides.
  5. Bake for 20-30 minutes, depending on the size of tenderloin. Inside temperature should measure at least 125 degrees (I cook mine to 145 degrees).
  6. Serve with rice or potatoes and a veggie for a quick and easy meal!
Main Dish


Ginger Molasses Cookies ~ Gluten Free

Ginger Molasses Cookies ~ Gluten Free

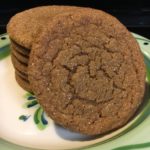
Get ready for the BEST Gluten-Free Ginger Molasses Cookies on the planet! I make batches of these soft, chewy and delicious Cookies for Christmas gifts…our family, friends and neighbors LOVE them! They make great Holiday gifts, so get out your aprons and cookie sheets and start baking! The dough freezes really well, so you can make several batches ahead of time. Enjoy!
*As a special treat for the Holidays, make my Ginger Cookie Ice Cream Sandwiches by just adding a scoop of Vanilla Bean Ice Cream between two of my GF Ginger Molasses Cookies!!! Yummy! 🙂

  • 2 Cups All-Purpose Gluten Free Flour (I use “GF Jules” all-purpose gf flour for this recipe – this GF Flour Blend already has Xanthan Gum in it, so I do NOT add Xanthan Gum)
  • *1 tsp Xanthan Gum (add this ONLY if your GF Flour blend does not already contain it)
  • 2 teaspoons Baking Soda
  • 1 teaspoon Ground Cinnamon
  • 1/2 teaspoon Ground Cloves
  • 1/2 teaspoon Ground Ginger
  • 1/2 teaspoon Salt
  • 3/4 Cup Shortening, melted (cooled for 10-15 minutes)
  • 1/4 Cup Molasses
  • 1 Cup Granulated Sugar
  • 1 Large Egg, lightly beaten
  • *1/2 – 1 Gallon Vanilla Bean Ice Cream (If you’re making my Holiday Ginger Cookie Ice Cream Sandwiches, see Notes*)
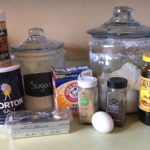
  1. Gather all your ingredients.

The Flour Mixture

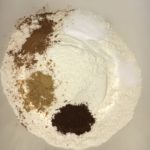
  1. In a large bowl, combine the Flour, *Xanthan Gum (only if needed), Baking Soda and spices. Mix well and set aside.

The Shortening Mixture

  1. In a small saucepan, melt the shortening, remove from heat and cool for about 10-15 minutes (this is so you don’t cook the eggs when you add it).
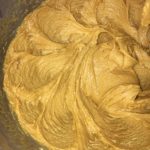
  2. While the shortening is cooling, combine the Molasses, Sugar and egg using a Stand or Handheld Mixer. Add the cooled shortening and mix well.

Combining the Wet and Dry Ingredients

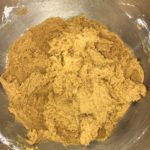
  1. Slowly add the Flour Mixture to the wet mixture, 1/2 cup at a time, blending well after each addition.
  2. Cover the bowl with plastic wrap and refrigerate for at least 1-2 hours – I find that chilling the dough overnight gets the best results.
  3. When ready to bake the cookies, preheat the oven to 350 degrees.
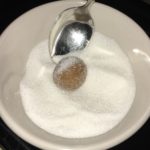
  4. While the oven is preheating shape the dough into small 1″ balls (you can use a small cookie scoop to get more uniform cookies) and roll in a bowl of granulated sugar, coating well.
  5. Space cookie balls at least 2″ apart on an ungreased cookie sheet lined with a baking mat or parchment paper.
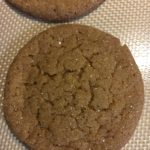
  6. Bake for 8-10 minutes, or until they are covered in “cracks.”
  7. Let cool for about 2 minutes on the cookie sheet before transferring to a wire rack to cool completely…try one (or two) while they’re still warm!
  8. Once they are completely cooled, you can package them in cellophane gift bags
  9. Enjoy!

This dough freezes really well, so you can make several batches ahead of time for Christmas gifts, parties, etc.

*Note: For my “Holiday Ginger Cookie Ice Cream Sandwiches ~ Gluten Free” just add a scoop of Vanilla Bean Ice Cream between two of my GF Ginger Molasses Cookies, wrap in plastic wrap and freeze until ready to eat! 🙂

Desserts, Snacks


Ginger Lime Chicken Bites

Ginger Lime Chicken Bites

These little chicken bites are a huge favorite with children. They cook up quickly, making them perfect for busy weeknights and school lunches! Tasty and Easy to prepare…Enjoy 🙂

Chicken

  • 3 Large Boneless, Skinless Chicken Breasts (Rinsed, dried and cut into bite-size pieces)
  • 1 Tablespoon Coconut OIl

Ginger Lime Sauce

  • 2 Tablespoons Soy Sauce
  • 1-2 Tablespoon Lime Juice (Fresh or bottled)
  • 1 Tablespoon olive oil
  • 1 Tablespoon Honey
  • 1 teaspoon Ginger (Freshly grated or from the tube)
  • 1 teaspoon Granulated Onion
  • 1 Clove garlic (Minced)

Toppings (Optional)

  • Chopped Green Onions
  • Lime Juice (to squirt over the chicken before serving)
  • Sesame Seeds
  • Sour Cream
  • Sliced Lime Wedges
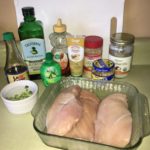
  1. Gather the ingredients

Making the Ginger Lime Sauce

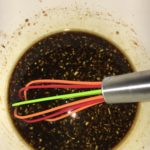
  1. In a medium-sized bowl, combine all of the sauce ingredients and blend well. Set aside.

Cooking the Chicken

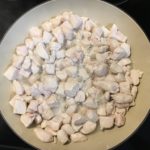
  1. In a large saucepan, heat up the Coconut Oil over medium-high heat. Add the chicken pieces and cook until almost done (about 5 minutes).

Putting it All Together

  1. Pour the sauce over the chicken pieces and continue cooking over low heat for about another 5 minutes.
  2. Serve over rice and top with whatever toppings you desire. I usually squirt a little extra lime juice over the chicken just before serving.
Appetizers, Lunch, Main Dish