Danish Butter Cookies ~ Gluten Free

Danish Butter Cookies ~ Gluten Free
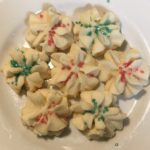
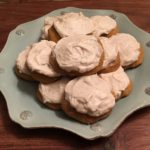
These delicious little butter cookies just melt in your mouth. And, they’re made with just 4 simple ingredients 🙂 I have made these cookies using several different Gluten Free All-Purpose flour mixes and found that the “Cup 4 Cup” brand worked the best…they taste amazing and are slightly crisp on the outside and light and buttery throughout! These cookies just moved to the TOP of my Favorites list 😉
A HUGE “Thank You” to Shelly Jaronsky (Dixie Crystals) for sharing the Original version of this recipe – I tweaked it a little to make it Gluten Free worthy.

  • 1 Cup Salted Butter (room temperature)
  • 3/4 Cup Powdered Sugar
  • 2 tsp Vanilla Extract
  • 2 Cups “Cup for Cup” All-Purpose Flour (*Use the “Spoon & Sweep” method when measuring your flour – spoon the flour to fill a 1-Cup measuring cup, then scrape off the top with the backside of a knife; do not simply scoop the flour out of its container with the measuring cup – this will pack the flour, resulting in too much flour needed for the recipe.)
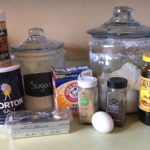
  1. Gather the ingredients.
  2. Line 1-2 baking sheets with Parchment Paper or baking mats; set aside.
  3. Using a Stand Mixer, fitted with the Paddle Attachment, cream the Softened Butter, Powdered Sugar and Vanilla on the Medium setting (#4) for about 5 minutes, scraping down the inside of the bowl as needed; the mixture should be light in color and whipped.
  4. Next, lower the speed of the Mixer to the lowest setting and gradually add the GF Flour, 1/2 cup at a time; Dough will be soft and smooth.
  5. Place a large Star tip into a piping bag (or large plastic resealable bag) and transfer the dough to the piping bag.
  6. Pipe the dough onto the prepared cookie sheets in Rosette or Circle designs/shapes. The dough does not spread very much, if at all, so you can pipe a lot of cookies per sheet – I usually pipe 20 – 2″ cookies per sheet.
  7. Sprinkle each cookie with sprinkles/colored sugar, if desired.
  8. Next, place the cookie sheets into the refrigerator for 30-40 minutes to chill the dough – this helps them maintain their shape while cooking.
  9. Meanwhile, preheat the oven to 300 degrees.
  10. Once the cookies are finished chilling, bake them for 18-20 minutes, or until the edges turn a light, golden brown.
  11. Cool the cookies for about 5 minutes on the cookie sheets before transferring them to wire cooling racks to cool completely.
  12. Enjoy with a hot cup of cocoa, tea or coffee…or a glass of cold milk 😉
Desserts, Snacks


Maple Shortbread Sandwich Cookies ~ Gluten Free

Maple Shortbread Sandwich Cookies ~ Gluten Free

If you like the flavor of Maple, you’re going to love these delicious Maple Shortbread Sandwich Cookies! I make them as single shortbread cookies and as sandwich cookies with a yummy Maple Buttercream Filling for those who prefer a little extra touch of Maple. Either way, these little cookies melt in your mouth and are sure to please your friends and family during the holidays 🙂 Enjoy!

The Maple Shortbread Cookie:

  • 10 Tbsp Unsalted Butter, softened ((1 stick + 2 Tbsp))
  • 1/4 tsp Salt
  • 1/4 Cup Powdered Sugar
  • 1/4 Cup Maple Sugar (I do a heaping 1/4 cup ;))
  • 1/2 tsp Maple Extract (increase to 3/4 – 1 tsp if you want a stronger Maple Flavor)
  • 1 1/2 Cups All-Purpose Gluten Free Flour (I use Better Batter)
  • 1/2 tsp Xanthan Gum (add if your all-purpose GF flour does not contain Xanthan Gum)

The Maple Buttercream Filling:

  • 2 Tbsp Unsalted Butter, softened
  • 1/4 tsp Salt
  • 1/2 tsp Vanilla Extract
  • 1/4 tsp Maple Extract
  • 1 Tbsp Pure Maple Syrup (I use Grade A, but Grade B is also fine)
  • 1 1/2 Cups Powdered Sugar
  • 1 Tbsp Whole Milk (1%, 2% and Skim is also fine)

Making the Cookie Dough:

  1. Gather all the ingredients needed for the cookies.
  2. Using a Stand or Handheld Mixer, combine the Butter, Salt, Maple Sugar and Maple Extract; beat until creamy and smooth.
  3. Add the Powdered Sugar to the Butter mixture and mix on the lowest setting, scraping the sides of the bowl as needed, until well-blended and smooth.
  4. In a small bowl, measure out the 1 1/2 Cups Flour using the “spoon and scrape” method (using a spoon, scoop out the GF Flour into a Dry Measuring Cup, overfilling the cup; then scrape off the excess flour back into the flour bag/container using the back edge of a knife); gently pour the measured GF Flour into the small bowl.
  5. Add the Xanthan Gum (if your GF Flour mix doesn’t contain it) to the GF Flour in the small bowl and mix well.
  6. With the mixer set on the lowest setting, gradually add the GF Flour mixture, 1/2 cup at a time, to the Butter mixture; mix well and scrape sides of bowl as need between each addition of the Flour.
    Note: the cookie dough will be crumbly, but should hold together when squeezed into a ball; if the dough does not hold together, add 1/2-1 more Tablespoon of softened unsalted butter.
  7. Form the cookie dough into a ball and wrap in plastic wrap; Refrigerate for 30 minutes.
  8. While the dough is in the refrigerator, line 1-2 cookie sheets with parchment paper or baking mats; set aside.
  9. Preheat oven to 325 degrees.
  10. After 30 minutes, remove cookie dough from refrigerator and cut in half for a more manageable portion of dough to roll out.
    Note: if the dough is refrigerated for more than 30 minutes, set it out on your kitchen counter for about 15-20 minutes to soften up a little before trying to roll it out.
  11. Once the dough is ready, roll it out onto a lightly floured surface to about 1/4″ thickness.
  12. Using the desired cookie cutter/cutters, cut dough into shapes and place onto the prepared cookie sheet/sheets.
  13. Bake for 18-20 minutes, or until cookies are a light golden brown; cool on baking sheets. Enjoy as single Maple Shortbread Cookies or fill with the Maple Buttercream filling (recipe below).

The Maple Buttercream Filling:

  1. If making sandwich cookies, gather the ingredients for the Maple Buttercream Filling.
  2. Using a Stand or Handheld Mixer, combine all of the Filling ingredients, being sure to gradually add the Powdered Sugar, 1/2 cup at a time; adjust the Milk or Powdered Sugar as needed for the desired consistency (you want the filling to be thick and creamy).
  3. Once the cookies are completely cooled, you are ready to fill :).
  4. Using a small knife or the back of a spoon, spread the desired amount of filling onto the backside of one of the cookies; then gently press another cookie on top of the filling and scrape any excess filling from the sides of the cookies with the knife or spoon.
  5. Serve with your a hot cup of tea or coffee and sit back and enjoy 🙂
Desserts, Snacks


Frosted Pumpkin Spice Cookies ~ Gluten Free

Frosted Pumpkin Spice Cookies ~ Gluten Free

This is an updated version of my post from last year (2019), which was not a GF recipe. Fear not….this IS a Gluten Free recipe for soft, sweet and delicious Frosted Pumpkin Cookies. These wonderful little treats are mildly flavored with a blend of spices that you can adjust to satisfy your personal taste. Please let me know what you think 🙂

The Cookie:

  • 3 1/2 Cups Gluten Free All-Purpose Flour Blend (I used Better Batter brand)
  • 1 tsp Baking Powder, GF
  • 1 tsp Baking Soda
  • 1/2 tsp Table Salt
  • 2 1/2 tsp Cinnamon (increase to 3 tsp if you want a spicier taste)
  • 1/2 tsp Nutmeg (increase to 3/4 – 1 tsp for a spicier taste)
  • 1/4 tsp Ground Ginger (increase to 1/2 tsp for a spicier taste)
  • 1 Cup Dixie Crystals Extra Fine Granulated Sugar
  • 1 Cup Light Brown Sugar (packed)
  • 1 Cup Vegetable Oil (I use Canola Oil)
  • 2 Cups Canned Pumpkin Puree
  • 2 Large Eggs (lightly beaten)
  • 1 tsp Vanilla Extract (GF)

The Frosting:

  • 1 Cup Cream Cheese, softened (I use Philadelphia Cream Cheese (full fat))
  • 1/2 Cup Salted Butter, Softened
  • 3 tsp Vanilla Extract (GF)
  • 4 Cups Powdered Sugar
  • 1 tsp Ground Cinnamon

Making the Cookies:

  1. Line cookie sheet/sheets with parchment paper or silicone baking mats; set aside.
  2. Gather the ingredients.
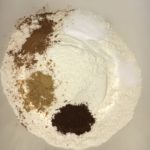
  3. In a Large mixing bowl, sift together the GF Flour, Baking Powder, Baking Soda, Salt and Spices; Mix well; Set aside.
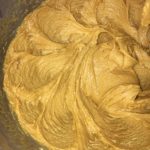
  4. In another Large mixing bowl, combine the Sugars, Oil, Pumpkin, Eggs and Vanilla Extract until completely blended.
  5. Gradually add the dry ingredients, one cup at a time, to the wet ingredients and mix until smooth.
  6. Cover bowl with plastic wrap or dish cloth and let rest for 30 minutes. This allows the GF Flour to absorb the moisture from the wet ingredients which reduces (hopefully, eliminates!) the grainy texture.
  7. When ready to bake the cookies, place oven rack in the middle position and preheat oven to 350 degrees.
  8. Using a Small cookie scoop (or medium, if you want larger cookies) scoop out the cookie dough onto the prepared baking sheets.
  9. Spray the back of a spoon with non-stick cooking spray and use the spoon to flatten the cookie mounds (re-apply spray as often as needed).
  10. Bake for 10-12 minutes.
  11. Let cookies cool on cookie sheet for 1-2 minutes before transferring to a wire rack to cool completely before frosting.

Making the Frosting:

  1. While the cookies are baking and cooling start making the frosting…
  2. Using a Handheld or Stand Mixer, beat the softened Butter, Cream Cheese and Vanilla Extract until well-blended.
  3. Gradually add the Powdered Sugar, one cup at a time, mixing until completely blended and creamy.
  4. Add the Ground Cinnamon and Mix thoroughly.
  5. You’re ready to frost the cookies and enjoy!

Note: The original recipe that I posted in 2019 was from “Two Sisters Crafting,” which I have updated so it is now GF, thanks in large part to “amyin the kitchen.com 🙂 I just love converting and joining recipes to see what the end results will be! Thanks so much for sharing your wonderful recipes!!!

Desserts, Snacks
American


Ginger Molasses Cookies ~ Gluten Free

Ginger Molasses Cookies ~ Gluten Free

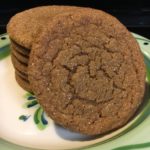
Get ready for the BEST Gluten-Free Ginger Molasses Cookies on the planet! I make batches of these soft, chewy and delicious Cookies for Christmas gifts…our family, friends and neighbors LOVE them! They make great Holiday gifts, so get out your aprons and cookie sheets and start baking! The dough freezes really well, so you can make several batches ahead of time. Enjoy!
*As a special treat for the Holidays, make my Ginger Cookie Ice Cream Sandwiches by just adding a scoop of Vanilla Bean Ice Cream between two of my GF Ginger Molasses Cookies!!! Yummy! 🙂

  • 2 Cups All-Purpose Gluten Free Flour (I use “GF Jules” all-purpose gf flour for this recipe – this GF Flour Blend already has Xanthan Gum in it, so I do NOT add Xanthan Gum)
  • *1 tsp Xanthan Gum (add this ONLY if your GF Flour blend does not already contain it)
  • 2 teaspoons Baking Soda
  • 1 teaspoon Ground Cinnamon
  • 1/2 teaspoon Ground Cloves
  • 1/2 teaspoon Ground Ginger
  • 1/2 teaspoon Salt
  • 3/4 Cup Shortening, melted (cooled for 10-15 minutes)
  • 1/4 Cup Molasses
  • 1 Cup Granulated Sugar
  • 1 Large Egg, lightly beaten
  • *1/2 – 1 Gallon Vanilla Bean Ice Cream (If you’re making my Holiday Ginger Cookie Ice Cream Sandwiches, see Notes*)
  1. Gather all your ingredients.

The Flour Mixture

  1. In a large bowl, combine the Flour, *Xanthan Gum (only if needed), Baking Soda and spices. Mix well and set aside.

The Shortening Mixture

  1. In a small saucepan, melt the shortening, remove from heat and cool for about 10-15 minutes (this is so you don’t cook the eggs when you add it).
  2. While the shortening is cooling, combine the Molasses, Sugar and egg using a Stand or Handheld Mixer. Add the cooled shortening and mix well.

Combining the Wet and Dry Ingredients

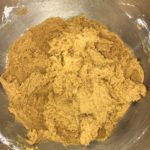
  1. Slowly add the Flour Mixture to the wet mixture, 1/2 cup at a time, blending well after each addition.
  2. Cover the bowl with plastic wrap and refrigerate for at least 1-2 hours – I find that chilling the dough overnight gets the best results.
  3. When ready to bake the cookies, preheat the oven to 350 degrees.
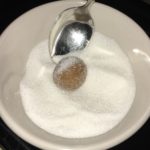
  4. While the oven is preheating shape the dough into small 1″ balls (you can use a small cookie scoop to get more uniform cookies) and roll in a bowl of granulated sugar, coating well.
  5. Space cookie balls at least 2″ apart on an ungreased cookie sheet lined with a baking mat or parchment paper.
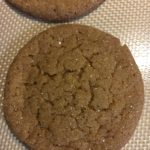
  6. Bake for 8-10 minutes, or until they are covered in “cracks.”
  7. Let cool for about 2 minutes on the cookie sheet before transferring to a wire rack to cool completely…try one (or two) while they’re still warm!
  8. Once they are completely cooled, you can package them in cellophane gift bags
  9. Enjoy!

This dough freezes really well, so you can make several batches ahead of time for Christmas gifts, parties, etc.

*Note: For my “Holiday Ginger Cookie Ice Cream Sandwiches ~ Gluten Free” just add a scoop of Vanilla Bean Ice Cream between two of my GF Ginger Molasses Cookies, wrap in plastic wrap and freeze until ready to eat! 🙂

Desserts, Snacks