Easy Creamy Broccoli & Cheddar Soup ~ Gluten Free

This quick & easy recipe reminds me of my favorite Broccoli-Cheddar Soup from Panera Bread, but without the Gluten 🙂 It’s so fresh and flavorful that I can’t stop at just one bowl! I owe a HUGE “Thank You” to Holly Nilsson @ spendwithpennies.com for sharing the original version of this yummy soup!! I made a few adjustments in order to make it Gluten-Free and allergy-friendly for my family.

Easy Creamy Broccoli & Cheddar Soup ~ Gluten Free

  • 1 Tbsp Butter (unsalted)
  • 1 Small Onion (Chopped)
  • 1/2 Cup Carrots (Diced)
  • 1/2 teaspoon Garlic (minced)
  • 1 Large Head Broccoli (Chopped (about 3 Cups))
  • 2 Cups Chicken Broth (Low Sodium or Regular)
  • 1/2 teaspoon Dried Thyme
  • Salt & Pepper (to taste)
  • 2 Tbsp All-Purpose Gluten Free Flour (I use Bob’s Red Mill 1-to-1 GF Flour)
  • 3/4 Cup Whole Milk
  • 3/4 Cup Skim Milk
  • 1 Cup Sharp Cheddar Cheese (Shredded)
  1. In a large saucepan, melt the Butter over medium-low heat. Once Butter is melted, add the Onions, Carrots and Garlic; cook until the Onions are translucent and soft (about 3-5 minutes).
  2. Add the Broccoli, Chicken Broth and Seasonings to the Onion mixture and cook over low heat until the Broccoli has softened ~ about 15 minutes.
  3. Next, using either an Immersion Blender, Regular Blender or Food Processor, thoroughly blend the cooked Vegetable/Broth mixture; set aside in the large saucepan over Low heat.
  4. Meanwhile, in a small/medium bowl, combine the GF Flour blend and Milks using a whisk to thoroughly blend; Add this mixture to the Vegetable/Broth mixture in the large saucepan.
  5. Increase the temperature to Medium/Medium-Low and bring to a boil, while whisking continuously; once the mixture has thickened (about 5 minutes), remove from heat and add the Shredded Cheddar.
  6. Serve with your favorite GF Bread and Enjoy!
Appetizers, Dinner, Hors d’Oeuvres, Lunch, Main Dish, Snacks, Soup
American


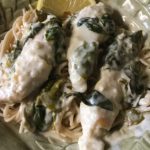
Creamy Lemon Chicken over Gluten-Free Pasta

Creamy Lemon Chicken over Gluten-Free Pasta

This recipe has quickly become one of our favorites! It’s so quick and easy to make, but tastes like you’ve been in the kitchen for hours 😉 Serve with a fresh garden salad and you’re good to go!
As usual, I found this recipe in The Pioneer Woman’s collection and made a few simple changes to make it Gluten-Free and allergy-friendly for my family.

  • 1/2 Cup All-Purpose Gluten Free Flour (I use Bob’s Red Mill GF 1-to-1 Baking Flour)
  • 2-3 Tbsp Olive Oil (I use the lighter Olive Oil, so it doesn’t interfere with the flavors)
  • 1-1 1/2 lbs Chicken Tender (you can really use any cut of chicken, but I usually prefer Chicken Tenders for ease and convenience)
  • 1 1/2 tsp Garlic, minced (I use the already minced garlic in a jar)
  • 1/4 Cup Low Sodium Chicken Broth (You can also use Vegetable Broth)
  • 3/4 Cup Heavy Cream (or Half & Half)
  • 1/2 Cup Parmesan Cheese, grated (Fresh is much better here)
  • 1 Large Lemon (Zest & Juice)
  • Salt & Pepper (to taste)
  • 3 Large Handfuls (Baby Spinach (optional))
  • Basil or Parsley (for garnish)
  • 12 oz. box Gluten Free Pasta (You can use any type of GF Pasta of your choice, but I have found that GF Spaghetti, Fettuccine or Capellini work best)
  1. Place the flour in a shallow dish and season with salt & pepper, if desired. Set aside.
  2. Heat the oil in a large skillet over medium heat until the oil begins to shimmer on the surface.
  3. Meanwhile, dredge the Chicken Tenders through the flour to fully coat and shake off excess flour.
  4. Carefully place the floured Chicken Tenders into the hot oil and cook for about 3-4 minutes on each side or until thoroughly cooked; remove the chicken and place on a plate.
  5. While the Chicken is cooking, bring a large pot of water to boil and cook the GF Pasta according to directions; drain and set aside.
  6. Once all of the Chicken has cooked and been removed from the pan, lower the temperature to Simmer/Low and add the Minced Garlic; cook for about 1 minute.
  7. Carefully add the Chicken Broth and stir well.
  8. Next, add the Cream, Parmesan Cheese, Lemon Zest and Juice stirring well to combine all of the ingredients; add salt & pepper to taste; simmer until the sauce begins to thicken (about 2-3 minutes).
  9. Return the Chicken Tenders to the pan and cover completely with the sauce; add the Spinach, if desired, and cook for about 1 minute (or until the Spinach is wilted).
  10. Serve over your choice of GF Pasta and garnish with Basil or Parsley, if desired.
Dinner, Main Dish
American


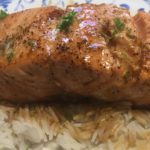
Honey-Lime Salmon

Honey-Lime Salmon

Yes, I’m posting another Salmon recipe 😉 My family just LOVES Salmon SO much that I am always in search of new and different ways to prepare it! We also adore anything citrus, so this recipe is perfect for us!!! With just a few ingredients needed and about 20 minutes, this yummy dish earns 5-stars in this household 🙂
As usual, I have to thank Ree Drummond for sharing the original version of this wonderful recipe! I made a few adjustments to the original version in order to make it Gluten-Free and allergy-friendly for my family.

  • 1-1 1/2 lb Salmon (cut into 4 fillets; skin removed, if desired)
  • 1-2 Tbsp Canola Oil
  • 4 Tbsp Butter, Unsalted (divided)
  • 1-2 pinches Salt
  • 1-2 pinches Ground Black Pepper
  • 1-2 Tbsp Honey (start with 1 Tbsp and add more for desired sweetness)
  • 1 Tbsp Gluten Free Soy Sauce
  • 2 Medium Limes, Zest & Juice (Divided)
  • 2 + 1/2 Tbsp Fresh Parsley, chopped (reserve the 1/2 Tablespoon for serving)
  • 1-1 1/2 Cups Rice, cooked (for serving)
  1. Begin cooking the rice while you prepare the Salmon (both should be done at about the same time).
  2. Preheat oven to 250 degrees.
  3. In a large non-stick skillet, heat the oil and 2 Tablespoons of the butter over medium heat until the butter is completely melted and the surface begins to shimmer.
  4. Gently add the Salmon fillets to the pan, skin side down, and season the tops with salt & pepper; cook each side for approximately 3-5 minutes, depending on the thickness of the fillets (they are done when they begin to flake apart);
  5. When the Salmon fillets are done, carefully transfer them to an oven-proof plate/dish and place in the preheated oven to keep warm.
  6. Meanwhile, reduce heat to medium-low and return the skillet to the cooktop.
  7. Add the remaining 2 Tablespoons of Butter, Honey, GF Soy Sauce, Zest & Juice of 1 Lime to the skillet and stir until the butter is completely melted and the mixture begins to boil; cook until the sauce begins to thicken (about 1-2 minutes); add the chopped Parsley and mix thoroughly.
  8. Next, carefully add the Salmon fillets back into the skillet and spoon the sauce evenly over each fillet; continue cooking for 1-2 minutes while continuing to baste the fillets with the sauce mixture.
  9. Mix the remaining Zest & Juice of the other Lime into cooked rice; serve the Salmon fillets over the rice and drizzle remaining sauce and reserved Parsley over the tops of each fillet.
  10. Enjoy!
Dinner, Lunch, Main Dish
American


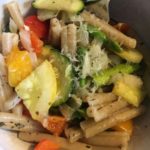
Pasta Primavera in a Lemon-Butter Sauce ~ Gluten Free

Pasta Primavera in a Lemon-Butter Sauce ~ Gluten Free

What better way to celebrate Spring than making “Pasta Primavera,” a healthy Spring Vegetable & Pasta dish…after all, “primavera” means ‘spring style’ in Italian 😉 I love this easy and very versatile recipe….I use as many veggies that I can find in my refrigerator before they go bad. Asparagus, squash, broccoli, bell peppers, carrots, zucchini, onions, snow peas…the possibilities are endless! And, the light lemony-butter sauce makes this recipe irresistible 🙂
*The original version of this recipe came from evolvingtable.com – thank you SO much for sharing! I have adjusted the original recipe in order to make it gluten-free and allergy-friendly for my family.

The Pasta:

  • 4 Cups Gluten-Free Pasta, dry (any style is fine)

The Vegetables:

  • 1 lb Asparagus (trim ends and cut into 2″ pieces)
  • 1 large Yellow Squash (quartered lengthwise & cut into bite-size pieces)
  • 1 large Zucchini (quartered lengthwise & cut into bite-size pieces)
  • 2 large Bell Peppers, any color (cut into bite-size pieces)
  • 1 large Vidalia Onion (cut into bite-size pieces)
  • 2-3 Tbsp Olive Oil
  • 1/2-1 tsp Kosher Salt
  • 1/4-1/2 tsp Ground Black Pepper
  • 1 tsp Dried Oregano
  • 1/2 tsp Dried Thyme
  • 1/2 tsp Dried Marjoram
  • 1/2 tsp Dried Basil

The Lemon-Butter Sauce:

  • 4 Tbsp Butter, salted ((1/2 stick))
  • 1 Large Lemon (Zest and juice)
  • 1 1/2 tsp Garlic, minced (I use the already-minced Garlic in a jar)
  • 1/2 Cup Water (reserved from the pasta water)
  • 1 Tbsp Dried Basil (or 1/4 Cup fresh, chopped)
  • 1/2-3/4 Cup Parmesan, grated (fresh is best)
  • 1/2-1 tsp Salt (to taste)

The Pasta:

  1. In a large pot, cook the pasta according to the package instructions for al dente; reserve 1/2 cup pasta water for the sauce before draining the rest of the water; set the pasta aside in a colander & keep the large pot available for cooking the sauce, etc.

The Vegetables:

  1. Preheat oven to 425 degrees.
  2. Line a large baking sheet with foil and lightly spray with non-stick cooking spray; set aside.
  3. While the Pasta is cooking, cut up all of the vegetables into bite-size pieces and place them into a large bowl. *This step can be done ahead of time, if desired (just keep veggies refrigerated until ready to use).
  4. Add the Olive Oil and spices to the vegetables in the bowl and toss to thoroughly coat; spread the veggies evenly onto the prepared baking sheet and bake for 15-18 minutes or until veggies are tender.

The Lemon-Butter Sauce:

  1. Using the same pot that you used to cook the pasta, add the butter, lemon zest, lemon juice and garlic; cook over medium-low heat until the butter is completely melted and the garlic becomes fragrant (about 2 minutes).
  2. Add the cooked Pasta, the reserved Pasta Water and the roasted vegetables to the Lemon-Butter mixture, tossing until thoroughly coated.
  3. Next, add the Basil, 1/2 cup Parmesan and Salt (to taste); toss to combine.
  4. Serve with freshly-grated Parmesan and fresh chopped Basil, if desired.
  5. Oh, so yummy! Enjoy 🙂
Dinner, Lunch, Main Dish
American, Italian


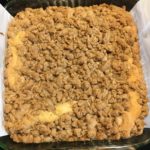
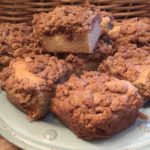
Easy Gluten Free Cinnamon-Sugar Coffee Cake

Easy Gluten Free Cinnamon-Sugar Coffee Cake

This Gluten Free Coffee Cake is SO moist, tasty and easy to make! It’s the perfect afternoon snack, dessert or breakfast for those weekend sleepovers. An instant hit with our family and friends! 🙂
*Thank You to America’s Test Kitchen for sharing this wonderful recipe!!

The Crumb Topping

  • 1/2 Cup Unsalted Butter, Melted (1 Stick or 8 Tbsp)
  • 1/3 Cup Granulated Sugar
  • 1/3 Cup Dark Brown Sugar (Packed)
  • 1 Large Egg Yolk
  • 1/8 tsp Salt
  • 3/4 tsp Cinnamon
  • 3/4 Cup + 1/3 Cup All-Purpose Gluten Free Flour, Sifted (I use Better Batter GF Multi-Purpose Flour)

The Cake

  • 3/4 Cup + 1/3 Cup All-Purpose GF Flour, Sifted (I use Better Batter GF Multi-Purpose Flour)
  • 1/2 Cup Granulated Sugar
  • 1/4 tsp Salt
  • 1/4 tsp Xanthan Gum (use ONLY if your GF Flour Blend doesn’t contain any; Better Batter contains Xanthan Gum, so I do not add it )
  • 1/2 tsp Baking Soda
  • 6 Tbsp Butter, Unsalted (Softened & Cut Into 6 Pieces)
  • 1/2 Cup Sour Cream
  • 2 Large Eggs
  • 1 Large Egg Yolk
  • 1 tsp Vanilla Extract
  1. Gather the ingredients.
  2. Spray an 8″ x 8″ baking pan with non-stick cooking spray. Next, fold a 16″ length of Parchment Paper to a width of 7″ and fit it into the baking pan, so that the excess hangs over the edges for easy removal of the cake. Set aside.

Making the topping:

  1. In a small sauce pan, melt the butter over low heat. Once completely melted, remove from heat and let cool slightly.
  2. Using a whisk, mix in the sugars, salt, cinnamon and egg yolk to the melted butter, thoroughly mixing.
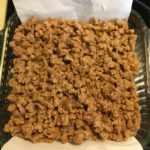
  3. Add the GF Flour to the butter mixture, blending well. The mixture will look like ground meat. Set aside.

Making the Cake:

  1. Place one of your oven racks in the upper-middle position of the oven and preheat oven to 325 degrees.
  2. In a stand mixer, using the paddle attachment, mix the GF Flour, Granulated Sugar, Salt, Xanthan Gum (if needed) and Baking Soda on low until completely blended.
  3. Next, add the Butter to the flour mixture, one piece at a time, mixing on low until butter pieces are no longer visible – mixture will resemble coarse sand.
  4. Add the Sour Cream, Eggs, Yolk and Vanilla to the Flour mixture and mix on medium-high until batter is light and fluffy.

Putting it Together:

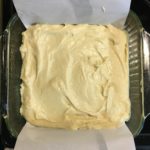
  1. Scrape the batter into the prepared baking pan and smooth the top.
  2. Using your hands, break the Topping Mixture into large pea-sized pieces and sprinkle over the top of the batter to completely cover.
  3. Bake for 35-45 minutes, rotating the pan halfway through baking. It’s done when the middle is no longer jiggly and a wooden toothpick inserted into the middle comes out clean.
  4. Let cool in the pan for 30 minutes before removing, using the excess Parchment Paper to lift and pull the cake out.
  5. Place on a platter or cutting board to cut and serve. Enjoy!

**This cake stores well in an air-tight container for about 3 days.

***A HUGE “Thank You” to America’s Test Kitchen for sharing this wonderful recipe!!! 🙂

Breakfast, Desserts, Snacks