Italian Sandwich Bread (Gluten Free)

Italian Sandwich Bread (Gluten Free)

I panicked when I found out that I was allergic to Gluten…that meant NO BREAD!!! 🙁 I tried the frozen GF Breads in the grocery store, but they all tasted wrong! And the texture was well, also wrong!! So, I decided to hit the internet and cookbooks for a good GF Bread Recipe. I had tried SO many different recipes and was just about to give up when I discovered a wonderful GF Bread Flour Blend by Kim (“letthemeatgfcake”). Everyone in my family couldn’t believe that it was Gluten Free…it tasted JUST like “regular” gluten bread 🙂 I bake at least one loaf per day…sometimes 2….yes, it’s THAT great!!! Now, I can have my GF Bread and eat it, too 🙂
A HUGE “Thank You” to Kim @ “letthemeatgfcake.com” for sharing this delicious recipe!

  • 3 Cups + 3 Tbsp (453 g) GF Bread Flour Blend (recipe in the notes*)
  • 2 Tbsp + 1 tsp Granulated Sugar
  • 2 tsp Kosher Salt
  • 2 tsp Quick Rise Yeast (Instant)
  • 2 Cups Milk (You can use Whole, 2%, 1%, Skim, Rice Milk, Cashew Milk, Oat Milk, etc.)
  • 4 Tbsp Unsalted Butter (melted; You can also use a dairy-free butter, such as “Earth Balance”)
  1. Thoroughly coat the bread pan/pans with shortening and then a dusting of GF Flour, being sure to bang the pan to get rid of any extra flour. Set aside.
  2. In a small microwave-proof bowl, melt the butter and set aside.
  3. Using a stand mixer, combine (on Low) the GF Flour Blend, Sugar, Salt and Yeast until completely mixed (about 1 minute).
  4. In another microwave-proof bowl, heat the milk for 45-60 seconds or until just slightly warm.
    Note: I use a 2-Cup Glass measuring cup with a pour spout to make it easier to add to the flour mixture.
  5. Pour the melted butter into the luke-warm milk.
  6. Turn the mixer on to Low and slowly pour the Milk/Butter mixture into the Flour blend until completely combined.
  7. Scrape down the sides of bowl and increase the speed to Medium-High and beat for 5 minutes.
  8. Using a rubber spatula, scrape the bread dough into the prepared bread pan and spread dough out evenly.
  9. Cover the pan with plastic wrap and place in a warm spot to rise for about 1 1/2 – 2 hours or until it has doubled in size.
    Note: I place my breads on top of our cable box since it is nice and warm 🙂
  10. Once the bread dough is ready to bake, place one oven rack in the lowest position and the other rack in the middle position of your oven. Next, place an oven-proof baking pan/dish on the bottom rack (off to one side, so it isn’t directly underneath where the bread will be baking – you don’t want to block heat to the bread above it); add about 1 cup of water to the pan (this is for producing steam for the baking bread).
  11. Preheat oven to 425 degrees.
  12. Remove plastic covering from bread loaf and bake for 35-40 minutes. Bread is done with it starts pulling away from the sides and it makes a hollow thud sound when you thump it lightly.
    Note: if bread starts to get too dark on the top, cover with foil – start checking at about 15 minutes.
  13. Remove from oven and place on a cooling rack while still in the pan for about 10 minutes. Then, remove bread from pan and continue cooling on the wire rack.
  14. Enjoy with butter and honey or fresh strawberry jam or with your favorite sandwich fixings 🙂

Before I start with the recipe for the Gluten Free Bread Flour blend, I need to point out a few things:

1st, kitchen scales would be very helpful since the ingredients in this recipe have to be weighed (in grams).

2nd, weigh each ingredient separately and then add to the storage container or ziploc baggie used to keep the flour fresh.

3rd, I have found that it is much easier to store my flours and flour blends in large plastic containers with tight-fitting tops – easy to scoop from 😉

GF Bread Flour Blend Recipe (makes 5 Cups):

  • Potato Starch – 280 grams
  • Superfine White Rice Flour – 245 grams
  • Tapioca Starch/Flour – 75 grams
  • Whey Protein Isolate (unflavored) – 75 grams
  • Xanthan Gum – 15 grams
Breakfast, Dinner, Lunch, Snacks
American, Italian


Baked Herb-Mayonnaise Chicken

Baked Herb-Mayonnaise Chicken

This recipe is SO quick and easy to make and I bet most of you already have these ingredients in your kitchen! Plus, you can easily swap the herbs with ones that you have on hand, as well as the mayo…you can use regular mayo, lite mayo or substitute sour cream for the mayo (I recently made it with half mayo and half sour cream, because we were running low on mayonnaise, and it was delicious!) The chicken comes out very moist and tender every time 🙂
A BIG “Thank You” to allrecipes for sharing the original recipe for Mayo Chicken…it is divine!!! 🙂

  • 4-6 Boneless, Skinless Chicken Breasts
  • 1 Cup Mayonnaise (I used Hellmann’s Regular Mayonnaise, but you can use Lite or substitute with Sour Cream*)
  • 1 tsp Crushed Garlic
  • 1/2 heaping tsp Dried Basil (or whatever you have on hand)
  • 1/2 heaping tsp Dried Oregano (or whatever you have on hand)
  • 3/4 tsp Salt
  • pinch Pepper
  • 1/2 – 3/4 Cup Parmesan Cheese (grated or shredded)
  1. Preheat oven to 350 degrees.
  2. Spray a 9″ x 13″ baking dish with non-stick cooking spray. Set aside.
  3. In a medium bowl, mix together the Mayonnaise (or Sour Cream), Garlic, Herbs, Salt & Pepper until well-blended.
  4. Place Chicken Breasts in the baking dish, leaving a little space between each breast.
  5. Using a pastry brush or back-side of spoon, spread the Mayonnaise mixture onto both sides of the Chicken Breasts, coating evenly.
  6. Sprinkle desired amount of Parmesan Cheese onto the top of each Chicken Breast.
  7. Bake uncovered for 30-45 minutes, or until inside temperature of chicken registers 160 degrees.
  8. Serve with your favorite side. Enjoy!

*The original recipe called for 1 Cup regular mayonnaise and 1 Tbsp of fresh Rosemary. However, as I noted in the Ingredients section, you can use regular or lite mayonnaise or 1/2 mayo + 1/2 Sour Cream or all sour cream. As far as the herbs are concerned, have fun and try different herbs (dried and/or fresh)…the sky is the limits 😉

Dinner, Main Dish
American


Brown Sugar-Cinnamon Coffee Cake (Gluten Free)

Brown Sugar-Cinnamon Coffee Cake (Gluten Free)

Do you like Coffee Cake? Are you Gluten-intolerant or have Celiac’s and miss eating yummy treats, like Brown Sugar Cinnamon Coffee Cake? Well, now you can have your coffee cake and eat it, too 🙂 This is truly one of the BEST Coffee Cakes I have ever eaten!!! A HUGE “Thank You” to Audrey from “Mama Knows Gluten Free” for sharing this delicious recipe…my entire family thanks you 🙂

The Cake Ingredients:

  • 3 Cups All-Purpose Gluten Free Flour, Sifted (I use King Arthur brand; sifted)
  • 1 1/2 tsp Xanthan Gum (if your GF Flour Blend doesn’t already have it)
  • 1/4 tsp Salt
  • 1 Cup Granulated Sugar
  • 4 tsp Baking Powder (make sure it’s GF)
  • 1 1/2 Cups Whole Milk (you can also use Almond, Rice, Cashew or Coconut Milk for a dairy-free option)
  • 2 Large Eggs
  • 2 tsp Vanilla Extract
  • 1/2 Cup Unsalted Butter, melted (or use Earth Balance brand for a dairy-free version)

The Brown Sugar-Cinnamon Topping

  • 1 Cup Unsalted Butter, softened (or Earth Balance for dairy-free)
  • 1 Cup Light Brown Sugar, packed
  • 2 Tbsp GF All-Purpose Flour
  • 1 Tbsp Ground Cinnamon

The Glaze Ingredients:

  • 2 Cups Powdered Sugar
  • 5 Tbsp Whole Milk (or dairy-free milk of your choice)
  • 1 tsp Vanilla Extract

Making the Cake:

  1. Preheat oven to 350 degrees.
  2. Spray a 9″ x 13″ baking pan (preferably glass) with non-stick cooking spray. Set aside.
  3. Gather the ingredients needed for Cake.
  4. Melt the Butter and set aside.
  5. Using a stand or handheld mixer, fitted with the paddle attachment, mix the GF Flour, Xanthan Gum, Salt, Sugar and Baking Powder on Low until thoroughly blended.
  6. Add the Milk, Eggs and Vanilla to the Flour mixture, blending until thoroughly mixed.
  7. Slowly drizzle the Melted Butter into the Flour-Milk mixture, mixing until fully incorporated.
  8. Pour batter into the prepared baking pan. Set aside while you prepare the Brown Sugar topping.

Making the Brown Sugar-Cinnamon Topping:

  1. Using a Stand or handheld mixer, fitted with the paddle attachment, combine the softened Butter, Brown Sugar, GF Flour and Cinnamon until thoroughly mixed and creamy.
  2. Drop this Brown Sugar mixture by spoonfuls onto the coffee cake batter in the baking pan making sure to cover the surface equally.
  3. Using a sharp knife, thoroughly swirl the Brown Sugar mixture throughout the coffee cake batter.
  4. Bake in preheated oven for about 35-40 minutes, checking after 30 minutes. Cake is done when a toothpick inserted into the middle comes out clean.

Making the Glaze:

  1. In a large bowl, whisk together the Powdered Sugar, Milk and Vanilla until smooth. Drizzle over the warm Coffee Cake and let set for about 10 minutes. Slice into desired-size pieces and Enjoy with a glass of ice-cold milk :)!

Store in an air-tight comtainer. Re-heat slices in microwave for about 10-15 seconds 🙂

Breakfast, Desserts, Snacks, Sweet Breads
American


Easy Gluten Free Cinnamon-Sugar Coffee Cake

Easy Gluten Free Cinnamon-Sugar Coffee Cake

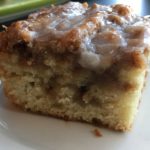
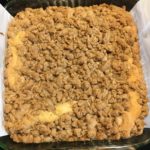
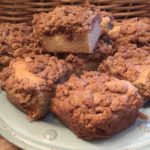
This Gluten Free Coffee Cake is SO moist, tasty and easy to make! It’s the perfect afternoon snack, dessert or breakfast for those weekend sleepovers. An instant hit with our family and friends! 🙂
*Thank You to America’s Test Kitchen for sharing this wonderful recipe!!

The Crumb Topping

  • 1/2 Cup Unsalted Butter, Melted (1 Stick or 8 Tbsp)
  • 1/3 Cup Granulated Sugar
  • 1/3 Cup Dark Brown Sugar (Packed)
  • 1 Large Egg Yolk
  • 1/8 tsp Salt
  • 3/4 tsp Cinnamon
  • 3/4 Cup + 1/3 Cup All-Purpose Gluten Free Flour, Sifted (I use Better Batter GF Multi-Purpose Flour)

The Cake

  • 3/4 Cup + 1/3 Cup All-Purpose GF Flour, Sifted (I use Better Batter GF Multi-Purpose Flour)
  • 1/2 Cup Granulated Sugar
  • 1/4 tsp Salt
  • 1/4 tsp Xanthan Gum (use ONLY if your GF Flour Blend doesn’t contain any; Better Batter contains Xanthan Gum, so I do not add it )
  • 1/2 tsp Baking Soda
  • 6 Tbsp Butter, Unsalted (Softened & Cut Into 6 Pieces)
  • 1/2 Cup Sour Cream
  • 2 Large Eggs
  • 1 Large Egg Yolk
  • 1 tsp Vanilla Extract
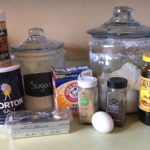
  1. Gather the ingredients.
  2. Spray an 8″ x 8″ baking pan with non-stick cooking spray. Next, fold a 16″ length of Parchment Paper to a width of 7″ and fit it into the baking pan, so that the excess hangs over the edges for easy removal of the cake. Set aside.

Making the topping:

  1. In a small sauce pan, melt the butter over low heat. Once completely melted, remove from heat and let cool slightly.
  2. Using a whisk, mix in the sugars, salt, cinnamon and egg yolk to the melted butter, thoroughly mixing.
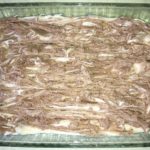
  3. Add the GF Flour to the butter mixture, blending well. The mixture will look like ground meat. Set aside.

Making the Cake:

  1. Place one of your oven racks in the upper-middle position of the oven and preheat oven to 325 degrees.
  2. In a stand mixer, using the paddle attachment, mix the GF Flour, Granulated Sugar, Salt, Xanthan Gum (if needed) and Baking Soda on low until completely blended.
  3. Next, add the Butter to the flour mixture, one piece at a time, mixing on low until butter pieces are no longer visible – mixture will resemble coarse sand.
  4. Add the Sour Cream, Eggs, Yolk and Vanilla to the Flour mixture and mix on medium-high until batter is light and fluffy.

Putting it Together:

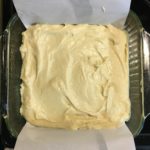
  1. Scrape the batter into the prepared baking pan and smooth the top.
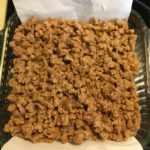
  2. Using your hands, break the Topping Mixture into large pea-sized pieces and sprinkle over the top of the batter to completely cover.
  3. Bake for 35-45 minutes, rotating the pan halfway through baking. It’s done when the middle is no longer jiggly and a wooden toothpick inserted into the middle comes out clean.
  4. Let cool in the pan for 30 minutes before removing, using the excess Parchment Paper to lift and pull the cake out.
  5. Place on a platter or cutting board to cut and serve. Enjoy!

**This cake stores well in an air-tight container for about 3 days.

***A HUGE “Thank You” to America’s Test Kitchen for sharing this wonderful recipe!!! 🙂

Breakfast, Desserts, Snacks


Ginger Molasses Cookies ~ Gluten Free

Ginger Molasses Cookies ~ Gluten Free

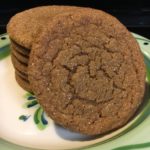
Get ready for the BEST Gluten-Free Ginger Molasses Cookies on the planet! I make batches of these soft, chewy and delicious Cookies for Christmas gifts…our family, friends and neighbors LOVE them! They make great Holiday gifts, so get out your aprons and cookie sheets and start baking! The dough freezes really well, so you can make several batches ahead of time. Enjoy!
*As a special treat for the Holidays, make my Ginger Cookie Ice Cream Sandwiches by just adding a scoop of Vanilla Bean Ice Cream between two of my GF Ginger Molasses Cookies!!! Yummy! 🙂

  • 2 Cups All-Purpose Gluten Free Flour (I use “GF Jules” all-purpose gf flour for this recipe – this GF Flour Blend already has Xanthan Gum in it, so I do NOT add Xanthan Gum)
  • *1 tsp Xanthan Gum (add this ONLY if your GF Flour blend does not already contain it)
  • 2 teaspoons Baking Soda
  • 1 teaspoon Ground Cinnamon
  • 1/2 teaspoon Ground Cloves
  • 1/2 teaspoon Ground Ginger
  • 1/2 teaspoon Salt
  • 3/4 Cup Shortening, melted (cooled for 10-15 minutes)
  • 1/4 Cup Molasses
  • 1 Cup Granulated Sugar
  • 1 Large Egg, lightly beaten
  • *1/2 – 1 Gallon Vanilla Bean Ice Cream (If you’re making my Holiday Ginger Cookie Ice Cream Sandwiches, see Notes*)
  1. Gather all your ingredients.

The Flour Mixture

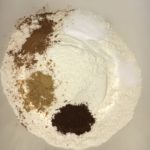
  1. In a large bowl, combine the Flour, *Xanthan Gum (only if needed), Baking Soda and spices. Mix well and set aside.

The Shortening Mixture

  1. In a small saucepan, melt the shortening, remove from heat and cool for about 10-15 minutes (this is so you don’t cook the eggs when you add it).
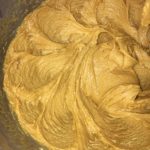
  2. While the shortening is cooling, combine the Molasses, Sugar and egg using a Stand or Handheld Mixer. Add the cooled shortening and mix well.

Combining the Wet and Dry Ingredients

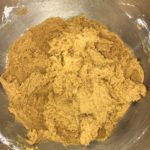
  1. Slowly add the Flour Mixture to the wet mixture, 1/2 cup at a time, blending well after each addition.
  2. Cover the bowl with plastic wrap and refrigerate for at least 1-2 hours – I find that chilling the dough overnight gets the best results.
  3. When ready to bake the cookies, preheat the oven to 350 degrees.
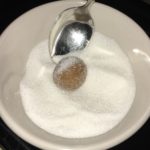
  4. While the oven is preheating shape the dough into small 1″ balls (you can use a small cookie scoop to get more uniform cookies) and roll in a bowl of granulated sugar, coating well.
  5. Space cookie balls at least 2″ apart on an ungreased cookie sheet lined with a baking mat or parchment paper.
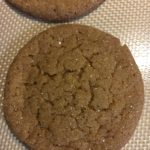
  6. Bake for 8-10 minutes, or until they are covered in “cracks.”
  7. Let cool for about 2 minutes on the cookie sheet before transferring to a wire rack to cool completely…try one (or two) while they’re still warm!
  8. Once they are completely cooled, you can package them in cellophane gift bags
  9. Enjoy!

This dough freezes really well, so you can make several batches ahead of time for Christmas gifts, parties, etc.

*Note: For my “Holiday Ginger Cookie Ice Cream Sandwiches ~ Gluten Free” just add a scoop of Vanilla Bean Ice Cream between two of my GF Ginger Molasses Cookies, wrap in plastic wrap and freeze until ready to eat! 🙂

Desserts, Snacks