“Instant Pot” Beef Pot Roast

“Instant Pot” Beef Pot Roast
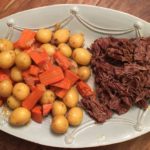
This recipe takes me right back to my childhood! I LOVED Pot Roast…and still do, but I don’t care for the taste of the pre-packaged Pot Roast seasoning mixes, nor do I like the LOOOONG wait while cooking in my slow cooker. Enter the Instant Pot! I hate to admit that a small Kitchen appliance could intimidate me, but the Instant Pot did. However, thanks to Tiffany @ lecremedelacrumb, I put my big girl pants on and broke out last year’s Christmas gift…the Instant Pot! Her recipe for “Instant Pot” Pot Roast is out of this world AND it’s ready in a little over 1 hour (depending on the size of your roast). I am ready to conquer many more recipes using my Instant Pot (my family also thanks you, Tiffany!)
I hope those of you who are afraid of your Instant Pots will try this recipe and see exactly what I mean 🙂

The Roast:

  • 3-5 lb Beef Chuck Roast
  • 1-2 Tbsp Canola Oil
  • 1 tsp Salt
  • 1 tsp Onion Powder
  • 1 tsp Garlic Powder
  • 1/2 tsp Ground Black Pepper
  • 1/2 tsp Paprika
  • 1 lb Baby Yukon Potatoes (or Baby Red Potatoes, Idaho (cut into bit-size pieces))
  • 4 Large Carrots (cut into bite-size pieces or Baby Carrots)
  • 1 Large Vidalia Onion (or Red, Yellow; cut into large chunks)
  • 4 Cups Beef Broth (Regular or Reduced Sodium; a 32 oz (2 lb) box)
  • 2 Tbsp Worcestershire sauce

The Slurry to make Gravy:

  • 1/4 Cup Water
  • 2 Tbsp GF Corn Starch
  1. In a small bowl, combine the spices (salt, onion and garlic powders, black pepper and paprika) and rub all over the Chuck Roast; set aside.
  2. Set your Instant Pot to “Saute” and drizzle in the Canola Oil; let heat for about 30 seconds, then place the Roast into the Instant Pot – do not disturb for 3-4 minutes until that side is browned; using tongs and a long meat fork, turn the Roast onto the next side and let “saute” for 3-4 minutes without disturbing; repeat this process until all sides are browned/seared.
  3. Once all sides of Roast are browned (to seal in the juices), turn the Instant Pot to “Pressure Cook” on “high” for 60-80 minutes (60 minutes for a 3 lb. Roast; 70 minutes for 4 lbs and 80 minutes for 5 lbs).
  4. Add the Onion, Beef Broth and Worcestershire Sauce to the Instant Pot and place lid on top, turning to the “locked” position.
  5. When the pressure cooking time is finished for the Roast, allow the Instant Pot to do a natural release for 10 minutes (it will start counting up in minutes – do not disturb the pot and allow it to de-pressurize); after the 10 minutes, press the vent down (or turn to the release position, depending on your make of Instant Pot) and allow all of the steam to release until the float valve drops down, indicating that the pot is de-pressurized and it’s safe to remove the lid.
  6. Next, add the Baby Potatoes and Carrots and, once again, set to “pressure cook” for 10 minutes.
    *Note: if you put the potatoes and carrots in at the beginning of the cooking process (along with the Roast and onions), they will be VERY mushy.
  7. Once the 10 minutes are up, press or turn the vent to the release position to allow steam to release again.
  8. Once the Instant Pot has de-pressurized and the float valve has dropped, remove the lid and carefully transfer the Roast, Potatoes, Carrots and Onions to a serving platter; shred the roast with two forks; set aside.
  9. Using a slotted spoon or handheld strainer, remove any bits from the broth in the Instant Pot; turn setting to the “Soup/Stew” position and let broth come to a boil.
  10. Meanwhile, make a “slurry” out of mixing the Water and Corn Starch thoroughly together in a small bowl.
  11. Once the broth in the Instant Pot is boiling, add the “slurry” and whisk until the liquid thickens to form a gravy; add salt, pepper and onion powder, if needed.
  12. Drizzle desired amount of the gravy over the shredded Pot Roast and Veggies; Garnish with fresh Thyme or Parsley.
    Yummy! 🙂

Notes: if using a frozen Roast, skip the searing step and just rub the spices over the Roast and add 20-30 minutes to the initial “Pressure-cooking” time. Proceed with the remaining steps.

Dinner, Lunch, Main Dish
American


Maple Shortbread Sandwich Cookies ~ Gluten Free

Maple Shortbread Sandwich Cookies ~ Gluten Free

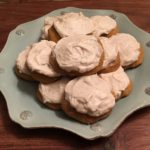
If you like the flavor of Maple, you’re going to love these delicious Maple Shortbread Sandwich Cookies! I make them as single shortbread cookies and as sandwich cookies with a yummy Maple Buttercream Filling for those who prefer a little extra touch of Maple. Either way, these little cookies melt in your mouth and are sure to please your friends and family during the holidays 🙂 Enjoy!

The Maple Shortbread Cookie:

  • 10 Tbsp Unsalted Butter, softened ((1 stick + 2 Tbsp))
  • 1/4 tsp Salt
  • 1/4 Cup Powdered Sugar
  • 1/4 Cup Maple Sugar (I do a heaping 1/4 cup ;))
  • 1/2 tsp Maple Extract (increase to 3/4 – 1 tsp if you want a stronger Maple Flavor)
  • 1 1/2 Cups All-Purpose Gluten Free Flour (I use Better Batter)
  • 1/2 tsp Xanthan Gum (add if your all-purpose GF flour does not contain Xanthan Gum)

The Maple Buttercream Filling:

  • 2 Tbsp Unsalted Butter, softened
  • 1/4 tsp Salt
  • 1/2 tsp Vanilla Extract
  • 1/4 tsp Maple Extract
  • 1 Tbsp Pure Maple Syrup (I use Grade A, but Grade B is also fine)
  • 1 1/2 Cups Powdered Sugar
  • 1 Tbsp Whole Milk (1%, 2% and Skim is also fine)

Making the Cookie Dough:

  1. Gather all the ingredients needed for the cookies.
  2. Using a Stand or Handheld Mixer, combine the Butter, Salt, Maple Sugar and Maple Extract; beat until creamy and smooth.
  3. Add the Powdered Sugar to the Butter mixture and mix on the lowest setting, scraping the sides of the bowl as needed, until well-blended and smooth.
  4. In a small bowl, measure out the 1 1/2 Cups Flour using the “spoon and scrape” method (using a spoon, scoop out the GF Flour into a Dry Measuring Cup, overfilling the cup; then scrape off the excess flour back into the flour bag/container using the back edge of a knife); gently pour the measured GF Flour into the small bowl.
  5. Add the Xanthan Gum (if your GF Flour mix doesn’t contain it) to the GF Flour in the small bowl and mix well.
  6. With the mixer set on the lowest setting, gradually add the GF Flour mixture, 1/2 cup at a time, to the Butter mixture; mix well and scrape sides of bowl as need between each addition of the Flour.
    Note: the cookie dough will be crumbly, but should hold together when squeezed into a ball; if the dough does not hold together, add 1/2-1 more Tablespoon of softened unsalted butter.
  7. Form the cookie dough into a ball and wrap in plastic wrap; Refrigerate for 30 minutes.
  8. While the dough is in the refrigerator, line 1-2 cookie sheets with parchment paper or baking mats; set aside.
  9. Preheat oven to 325 degrees.
  10. After 30 minutes, remove cookie dough from refrigerator and cut in half for a more manageable portion of dough to roll out.
    Note: if the dough is refrigerated for more than 30 minutes, set it out on your kitchen counter for about 15-20 minutes to soften up a little before trying to roll it out.
  11. Once the dough is ready, roll it out onto a lightly floured surface to about 1/4″ thickness.
  12. Using the desired cookie cutter/cutters, cut dough into shapes and place onto the prepared cookie sheet/sheets.
  13. Bake for 18-20 minutes, or until cookies are a light golden brown; cool on baking sheets. Enjoy as single Maple Shortbread Cookies or fill with the Maple Buttercream filling (recipe below).

The Maple Buttercream Filling:

  1. If making sandwich cookies, gather the ingredients for the Maple Buttercream Filling.
  2. Using a Stand or Handheld Mixer, combine all of the Filling ingredients, being sure to gradually add the Powdered Sugar, 1/2 cup at a time; adjust the Milk or Powdered Sugar as needed for the desired consistency (you want the filling to be thick and creamy).
  3. Once the cookies are completely cooled, you are ready to fill :).
  4. Using a small knife or the back of a spoon, spread the desired amount of filling onto the backside of one of the cookies; then gently press another cookie on top of the filling and scrape any excess filling from the sides of the cookies with the knife or spoon.
  5. Serve with your a hot cup of tea or coffee and sit back and enjoy 🙂
Desserts, Snacks


Cashew Chicken ~ Gluten Free

Cashew Chicken ~ Gluten Free

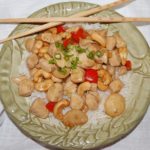
Our family’s go-to order from our favorite local Chinese restaurant was always the Cashew Chicken. However, since we moved, we have not been able to find another restaurant that makes a Cashew Chicken as well as our favorite. So, I pulled up my shirt sleeves and headed into my kitchen to try and re-create our much-loved and missed recipe 😉 After MANY failed attempts, I finally succeeded in pleasing all members of my family! I hope you enjoy it as much as we do 🙂

Soy Sauce Mixture:

  • 1/4 Cup Bragg Liquid Aminos or Soy Sauce (I use Bragg Liquid Aminos because it’s GF and Soy Free, but you can use regular or low-sodium soy sauce)
  • 1 Tbsp Rice Vinegar
  • 1 Tbsp Worcestershire sauce
  • 1 Tbsp Light Brown Sugar
  • 1/2 tsp Canola Oil
  • 1 Tbsp Fresh Ginger (finely chopped)

Chicken:

  • 4 Boneless, Skinless Chicken Breasts (cut into bite-size pieces)
  • 1-2 Pinches Table Salt
  • 1-2 Pinches Ground Black Pepper
  • 3 Tbsp Canola Oil

Garlic, Bell Peppers, etc.:

  • 1 tsp Garlic, minced ((2 cloves))
  • 1 Large Bell Pepper (Cut into bite-size pieces; I like to use Red or Orange for the color and the sweetness)
  • 2 Tbsp Fresh Ginger, chopped
  • 1 Cup Broccoli, chopped ((optional) or Snow Peas)
  • 1/4 Cup Dry Sherry

The Slurry (i.e the thickener):

  • 2 Tbsp Cornstarch (make sure it’s Gluten Free, if you’re GF)
  • 1/4 Cup Bragg Liquid Aminos or Soy Sauce

The Yummy Parts:

  • 1 Cup Whole Roasted Unsalted Cashews
  • 1/3 – 1/2 Cup Water Chestnuts, chopped (I leave mine whole for more crunch)
  • 1-2 Scallions, Green and White Parts (sliced for topping)

The Soy Sauce Mixture:

  1. In a small bowl, whisk together the Bragg Liquid Aminos (or Soy Sauce), Rice Vinegar, Worcestershire Sauce, Light Brown Sugar, Canola Oil and Ginger; Set aside.

The Chicken & Veggies:

  1. In a large non-stick skillet, heat the 3 Tablespoons of Canola Oil over medium heat.
  2. Once the oil is shimmering, add the chicken, sprinkling with salt and pepper, and saute until thoroughly cooked (about 5 – 8 minutes).
  3. Remove the cooked chicken with a slotted spoon and place in a large bowl; set aside.
  4. Reduce the temperature to medium-low, add the Garlic, Bell Pepper, and 2 Tablespoons Ginger to the same skillet; cook for about 2 minutes, keeping Peppers crisp. (Note: if you’re adding Broccoli or Snow Peas, do so now)
  5. Next, add the Sherry and stir thoroughly with the juices and Garlic-Peppers-Ginger mixture.
  6. Add the Soy Sauce Mixture that you set aside earlier to the skillet and bring to a boil (about 1 minute).
  7. In a small bowl, whisk together the Cornstarch and 1/4 Cup Bragg Aminos to make the slurry; add this to the skillet and stir thoroughly to blend well (if sauce is too thick, add 1/4 cup water).
  8. Lastly, return the Chicken to the skillet along with the Cashews and Water Chestnuts;
  9. Garnish with scallions and serve. Enjoy!
Dinner, Main Dish
Asian


Frosted Pumpkin Spice Cookies ~ Gluten Free

Frosted Pumpkin Spice Cookies ~ Gluten Free

This is an updated version of my post from last year (2019), which was not a GF recipe. Fear not….this IS a Gluten Free recipe for soft, sweet and delicious Frosted Pumpkin Cookies. These wonderful little treats are mildly flavored with a blend of spices that you can adjust to satisfy your personal taste. Please let me know what you think 🙂

The Cookie:

  • 3 1/2 Cups Gluten Free All-Purpose Flour Blend (I used Better Batter brand)
  • 1 tsp Baking Powder, GF
  • 1 tsp Baking Soda
  • 1/2 tsp Table Salt
  • 2 1/2 tsp Cinnamon (increase to 3 tsp if you want a spicier taste)
  • 1/2 tsp Nutmeg (increase to 3/4 – 1 tsp for a spicier taste)
  • 1/4 tsp Ground Ginger (increase to 1/2 tsp for a spicier taste)
  • 1 Cup Dixie Crystals Extra Fine Granulated Sugar
  • 1 Cup Light Brown Sugar (packed)
  • 1 Cup Vegetable Oil (I use Canola Oil)
  • 2 Cups Canned Pumpkin Puree
  • 2 Large Eggs (lightly beaten)
  • 1 tsp Vanilla Extract (GF)

The Frosting:

  • 1 Cup Cream Cheese, softened (I use Philadelphia Cream Cheese (full fat))
  • 1/2 Cup Salted Butter, Softened
  • 3 tsp Vanilla Extract (GF)
  • 4 Cups Powdered Sugar
  • 1 tsp Ground Cinnamon

Making the Cookies:

  1. Line cookie sheet/sheets with parchment paper or silicone baking mats; set aside.
  2. Gather the ingredients.
  3. In a Large mixing bowl, sift together the GF Flour, Baking Powder, Baking Soda, Salt and Spices; Mix well; Set aside.
  4. In another Large mixing bowl, combine the Sugars, Oil, Pumpkin, Eggs and Vanilla Extract until completely blended.
  5. Gradually add the dry ingredients, one cup at a time, to the wet ingredients and mix until smooth.
  6. Cover bowl with plastic wrap or dish cloth and let rest for 30 minutes. This allows the GF Flour to absorb the moisture from the wet ingredients which reduces (hopefully, eliminates!) the grainy texture.
  7. When ready to bake the cookies, place oven rack in the middle position and preheat oven to 350 degrees.
  8. Using a Small cookie scoop (or medium, if you want larger cookies) scoop out the cookie dough onto the prepared baking sheets.
  9. Spray the back of a spoon with non-stick cooking spray and use the spoon to flatten the cookie mounds (re-apply spray as often as needed).
  10. Bake for 10-12 minutes.
  11. Let cookies cool on cookie sheet for 1-2 minutes before transferring to a wire rack to cool completely before frosting.

Making the Frosting:

  1. While the cookies are baking and cooling start making the frosting…
  2. Using a Handheld or Stand Mixer, beat the softened Butter, Cream Cheese and Vanilla Extract until well-blended.
  3. Gradually add the Powdered Sugar, one cup at a time, mixing until completely blended and creamy.
  4. Add the Ground Cinnamon and Mix thoroughly.
  5. You’re ready to frost the cookies and enjoy!

Note: The original recipe that I posted in 2019 was from “Two Sisters Crafting,” which I have updated so it is now GF, thanks in large part to “amyin the kitchen.com 🙂 I just love converting and joining recipes to see what the end results will be! Thanks so much for sharing your wonderful recipes!!!

Desserts, Snacks
American


Chicken Parmesan ~ Gluten Free

Chicken Parmesan ~ Gluten Free

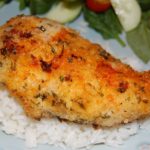
Wow! This is the tastiest and easiest recipe on the planet!!! My husband truly thought I had been in the kitchen for hours, when in fact it only took less than 30 minutes to get this dish ready to pop into the oven! Then, 40-45 minutes baking time for the juiciest, yummiest chicken ever 🙂 I make 5-6 large chicken breasts at a time, so we are certain to have plenty of leftovers…plus, chicken breasts are usually so large these days, that we each eat just half of a chicken breast. This recipe is perfect for a large family 🙂
A definite 5-Stars in our home!!!

  • 6 Medium/Large Boneless, Skinless Chicken Breasts (Rinsed and patted dry with paper towels)
  • 3/4 – 1 Cup Gluten Free Bread Crumbs (I use Plain, so not to interfere with the spices/seasonings)
  • 1/2 – 3/4 Cup Grated Parmesan Cheese
  • 3 Heaping Tbsp Dried Parsley
  • 1/2 tsp Table Salt
  • 1/4 tsp Ground Black Pepper
  • 1/2 tsp Garlic Powder
  • 3/4 Cup Salted Butter, melted
  • 3 Tbsp Lemon Juice (Juice of 2 Lemons)
  • Paprika (for sprinkling on top)
  1. Preheat oven to 350 degrees. Place oven rack in the center position.
  2. In a large bowl, combine the Bread Crumbs, Parmesan Cheese, Parsley, Salt, Pepper and Garlic Powder until well blended. Set aside.
  3. In a microwave-proof bowl, melt the butter.
  4. Next, set up a “work station” with the following in a row or circle:
    1. Chicken Breasts
    2. Melted Butter
    3. Bread Crumb Mixture
    4. 9″ x 13″ Baking Dish (you may need 2 Baking Dishes, depending on the size of your Chicken Breasts – do NOT crowd your Chicken).
  5. Dip each Chicken Breast into the Melted Butter, coating well. Then, transfer to the Bread Crumb mixture and roll around to coat completely. Place into the Baking Dish and repeat these steps with the remaining Chicken Breasts.
  6. Once all of the Chicken Breasts have been prepared, drizzle any leftover Melted Butter and the Lemon Juice evenly over the tops of the Chicken. Sprinkle with Paprika.
  7. Bake for approximately 40-45 minutes – check the center Chicken Breast by cutting it in half to check for any pinkness.
  8. Drizzle juices from pan over the Chicken Breasts before serving. Yum!!!

NOTE: The original recipe for this incredible dish came from a wonderful cookbook that was published by the supporters of the American Cancer Society in 1989, called “VIP Cookbook: A Potpourri of Virginia Cooking.” If you can get your hands on one of these cookbooks, it would be well-worth it!!! 🙂

Dinner, Main Dish


Spaghetti Squash with Tomatoes & Capers

Spaghetti Squash with Tomatoes & Capers

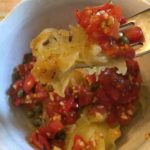
This dish is so Fresh and easy to make with vegetables right out of your garden or kitchen! If I do not have any Spaghetti Squash ready in my garden, I substitute Summer Squash, Zucchini, Acorn Squash, Baking Potato or a mild Fish, such as Flounder. I love this recipe, because it’s so versatile and delicious no matter what you pair with the sauteed Capers and Tomatoes! I hope you enjoy this dish as much as we do 🙂

  • 1 Large Spaghetti Squash
  • 2 tsp Garlic, minced
  • 2 Tbsp olive oil
  • 2 Tbsp Capers
  • 1 1/2 Cups Tomatoes, chopped (with juices)
  • 2 tsp Dried Oregano (or 2 Tbsp Fresh Oregano, chopped)
  • Table Salt (to taste)
  • Ground Black Pepper (to taste)

Baking the Spaghetti Squash:

  1. Preheat Oven to 400 degrees. Place rack in center position.
  2. Cut the Spaghetti Squash in half, lengthwise, scrape out the seeds and loose stringy innards and place facedown in a deep baking dish.
  3. Add enough water to cover the bottom of the dish by about 1/2 inch.
  4. Bake for about 35-40 minutes, or until the squash is soft (depends on the size of the squash).
  5. Remove the squash from the oven and set aside to cool enough to handle.
  6. Reduce oven temperature to 250 degrees.
  7. When the squash is cool enough to handle, hold it over a large, ovenproof bowl/dish and scrape out the flesh from the top to the bottom using the tines of a fork. Cover the dish with foil and place it in the oven to keep hot while you prepare the topping.

Making the Caper & Tomato Topping:

  1. In a large, nonstick skillet, heat the Olive Oil and Garlic over Medium Heat for about 2 minutes.
  2. Next, add the Capers, Tomatoes and Oregano and continue cooking for another 2 minutes.
  3. Remove from heat and add a few pinches of Salt and Pepper to taste.
  4. Spoon desired amount over the prepared Spaghetti Squash and watch it disappear!
Appetizers, Dinner, Hors d’Oeuvres, Main Dish, Salads, Side Dish


Corn & Tomato Salsa

Corn & Tomato Salsa

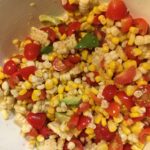
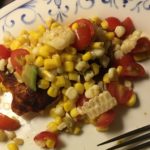
Are you wondering what to do with the 2,387 tomatoes in your garden?!? 😉 Well, here is a wonderful fresh Salsa that’s quick and easy and oh, so fresh and healthy!!! I serve it over Salmon, Chicken, Baked Potatoes and Fresh Green Leaf Lettuce…the possibilities are endless! Enjoy 🙂

  • 1 – 1 1/2 Cup Fresh Tomatoes (Cut into bite-size pieces; )
  • 1 – 1 1/2 Cup Fresh Corn (Cut off of the cob; can use canned corn, if desired)
  • 1 Large Avocado (Cut into bite-size pieces)
  • 1 Large Lime (Juice and Zest)
  • Table Salt (to taste)
  • Ground Black Pepper (to taste)
  • Chile Powder (to taste)
  • 1 Small Vidalia Onion ((optional) chopped)
  1. Add all of the chopped ingredients to a large mixing bowl and gently toss with the Lime Juice and seasonings to taste. If not serving immediately, wait to cut up the Avocado right before serving so it doesn’t brown. Cover tightly with plastic and refrigerate until ready to serve.
  2. So yummy over Salmon!
Appetizers, Hors d’Oeuvres, Lunch, Salads, Side Dish, Snacks


Buffalo Chicken Dip

Buffalo Chicken Dip

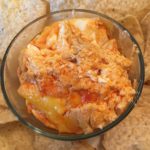
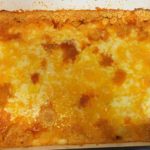
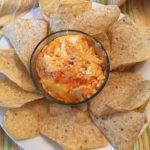
This is our middle daughter’s favorite food…I seriously think she would eat it for Breakfast, Lunch and Dinner EVERY day of her life if others didn’t step in and insist on some variety in her diet 😉
It really IS delicious, though! Our family doesn’t just eat it as an appetizer or hors d’oeuvres, but as a meal with fresh bread/rolls and a big salad 🙂 A definite 5-Stars in this household!

  • 4-6 Large Boneless, Skinless Chicken Breasts (about 3 lbs.; boiled and shredded)
  • 1 1/4 Cup Hot Sauce (I use Sweet Baby Ray’s Buffalo Wing Sauce because it’s Gluten Free and SO yummy!)
  • 2 Cups Ranch Dressing (I make my own using Hidden Valley Ranch Powder, but store-bought in the bottle is just fine ;))
  • 2 Blocks Cream Cheese ((16 oz) I use full fat Philadelphia Cream Cheese)
  • 3 Cups Shredded Cheddar Cheese (You can also use half Cheddar and half Monterey Jack)
  1. Preheat oven to 350 degrees.
  2. In a 9″ x 13″ (or 4 quart) baking dish dish, mix together the Chicken, the Hot Sauce and 1 1/2 Cups Shredded Cheese until thoroughly blended; Spread out evenly in the pan and set aside.
  3. In a medium saucepan, heat the Ranch Dressing and the Cream Cheese over Low heat until the Cream Cheese has completely melted and the mixture is smooth. Pour this mixture evenly over the Chicken mixture in the baking dish.
  4. Top with the remaining Shredded Cheese.
  5. Bake uncovered for approximately 30-35 minutes, or until edges are bubbly and the top is lightly brown.
  6. Serve with your favorite chips, pita chips, bread, etc. Enjoy 🙂
Appetizers, Dinner, Hors d’Oeuvres, Lunch, Main Dish, Side Dish, Snacks
American


Apple Cider Cupcakes with Cream Cheese Frosting ~ Gluten-Free

Apple Cider Cupcakes with Cream Cheese Frosting ~ Gluten-Free

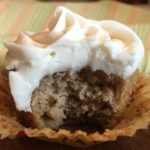
Oh my gosh! These Cupcakes are out of this world!!! I seriously could eat the entire batch 🙂 The Apple Cider adds a wonderful flavor and a bit of caramelized texture – they are delicious even without the frosting! You better double the batch like I did 😉
This recipe earned an instant 5-Star rating in our home!
Note: I adapted this wonderful recipe from forkinthekitchen.com to make it GF – Thank You for sharing!!!

Equipment

  • Muffin Tin
  • Cupcake Liners
  • Stand or handheld Mixer
  • Large Mixing Bowl

The Cupcake Ingredients:

  • 2 1/2 Cups Better Batter All Purpose Gluten Free Flour Mix
  • 1 tsp Baking Soda
  • 1 tsp Baking Powder, GF
  • 1 tsp Table Salt
  • 2 tsp Ground Cinnamon
  • 1 Cup Granulated Sugar (I use Dixie Crystal brand)
  • 1/2 Cup Light Brown Sugar, packed
  • 1 Cup Salted Butter, Softened (I use Land O’ Lakes brand)
  • 2 tsp Vanilla Extract
  • 4 Large Eggs (room temperature)
  • 1 Cup + 4 Tbsp Apple Cider

The Cream Cheese Frosting Ingredients:

  • 8 Oz. Cream Cheese, softened (I used Full Fat Philadelphia brand)
  • 1/4 Cup Salted Butter, Softened
  • 1/2 tsp Vanilla Extract
  • 2 Tbsp Apple Cider
  • 3 1/2 – 4 Cups Powdered Sugar
  • Ground Cinnamon ((optional – to either mix in with the frosting or to sprinkle on the top))

Making the Cupcakes:

  1. Place oven rack in the middle position and preheat oven to 350 degrees.
  2. Line 1-2 muffin tins with cupcake liners; set aside.
  3. In a large mixing bowl, whisk together the GF Flour, Baking Soda, Baking Powder, Salt and Cinnamon until completely blended; Set aside.
  4. Using a Stand or Handheld Mixer, fitted with the paddle attachment, cream the Butter and Sugars until light and fluffy.
  5. Next, with the mixer set on low, add the Vanilla Extract and the Eggs, one at a time; Continue mixing until thoroughly blended.
  6. With the mixer still set on Low, alternate adding the GF Flour mixture (1/2 cup at a time) and the Apple Cider (a couple of Tablespoons at a time) to the Butter-Sugar mixture, blending until just combined after each addition.
  7. Scoop the Cupcake Batter into the lined muffin tin/tins, filling each about 2/3 full.
  8. Bake for approximately 17-20 minutes, or until toothpick inserted into the center comes out clean.
  9. Let cool in the pan for about 5-10 minutes and then transfer to a wire cooling rack to cool completely before frosting.

Making the Frosting:

  1. Using a Stand or Handheld Mixer, fitted with the paddle attachment, cream the softened Cream Cheese and Butter until light and fluffy.
  2. Slowly add the Vanilla Extract and Apple Cider, blending thoroughly.
  3. Next, with the mixer set on low, add the Powdered Sugar, 1/2 cup at a time, beating well between each addition. I usually add between 3 1/2 to 4 cups of Powdered Sugar for the right consistency. Note: If you’re adding Ground Cinnamon into the Frosting, do so now (I usually add several pinches).
  4. Spread or pipe the Frosting onto each cooled cupcake and top with a little Ground Cinnamon, if desired.
  5. Enjoy!
Desserts, Snacks


Oven-Roasted Vegetables

Oven-Roasted Vegetables

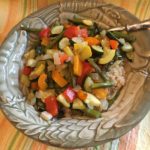
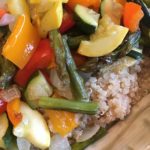
This recipe is my Go-To for an easy and healthy dish that my entire family loves! I often serve it over Rice, Quinoa or a Baked Potato (Sweet or White) for a warm and hearty meal. This medley of vegetables is very versatile and pairs well with Seafood, Chicken, Turkey, Pork, Beef…just about anything 😉 I hope you enjoy it as much as we do!
Note: This recipe was adapted from the South Beach Diet and has been thoroughly enjoyed by my family for almost 20 years 🙂

  • 1 Bunch Asparagus (cut into bite-size pieces)
  • 1-2 Medium Yellow Squash (cut into bite-size pieces)
  • 1-2 Medium Zucchini (cut into bite-size pieces)
  • 1-2 Medium Bell Pepper (I usually use a Red and Orange for the milder taste and the beautiful color; cut into bite-size pieces)
  • 1 Large Vidalia Onion (chopped into bite-size pieces)
  • 1-2 tsp Garlic, chopped ((optional))
  • 3-4 Tbsp olive oil
  • Several Pinches Kosher Salt
  • Several Pinches Ground Black Pepper
  1. Preheat oven to 450 degrees.
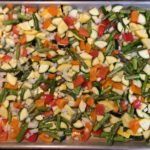
  2. In a very large bowl, combine all of the cut Vegetables and Olive Oil; Toss until thoroughly mixed and coated with the Oil.
    Note: add the garlic now if adding
  3. Evenly spread the Vegetable mixture onto a large baking sheet and sprinkle with the Kosher Salt and Pepper to taste.
  4. Bake for 30-45 minutes on the center rack until tender, stirring several times during the roasting process to cook evenly.
  5. Serve over Rice, Quinoa, Couscous, Pasta, Baked Potato…or as a Side Dish for your favorite protein. We often pair with Salmon and it’s delicious!!!
Dinner, Lunch, Main Dish, Salads, Side Dish