Italian Sandwich Bread (Gluten Free)

Italian Sandwich Bread (Gluten Free)

I panicked when I found out that I was allergic to Gluten…that meant NO BREAD!!! 🙁 I tried the frozen GF Breads in the grocery store, but they all tasted wrong! And the texture was well, also wrong!! So, I decided to hit the internet and cookbooks for a good GF Bread Recipe. I had tried SO many different recipes and was just about to give up when I discovered a wonderful GF Bread Flour Blend by Kim (“letthemeatgfcake”). Everyone in my family couldn’t believe that it was Gluten Free…it tasted JUST like “regular” gluten bread 🙂 I bake at least one loaf per day…sometimes 2….yes, it’s THAT great!!! Now, I can have my GF Bread and eat it, too 🙂
A HUGE “Thank You” to Kim @ “letthemeatgfcake.com” for sharing this delicious recipe!

  • 3 Cups + 3 Tbsp (453 g) GF Bread Flour Blend (recipe in the notes*)
  • 2 Tbsp + 1 tsp Granulated Sugar
  • 2 tsp Kosher Salt
  • 2 tsp Quick Rise Yeast (Instant)
  • 2 Cups Milk (You can use Whole, 2%, 1%, Skim, Rice Milk, Cashew Milk, Oat Milk, etc.)
  • 4 Tbsp Unsalted Butter (melted; You can also use a dairy-free butter, such as “Earth Balance”)
  1. Thoroughly coat the bread pan/pans with shortening and then a dusting of GF Flour, being sure to bang the pan to get rid of any extra flour. Set aside.
  2. In a small microwave-proof bowl, melt the butter and set aside.
  3. Using a stand mixer, combine (on Low) the GF Flour Blend, Sugar, Salt and Yeast until completely mixed (about 1 minute).
  4. In another microwave-proof bowl, heat the milk for 45-60 seconds or until just slightly warm.
    Note: I use a 2-Cup Glass measuring cup with a pour spout to make it easier to add to the flour mixture.
  5. Pour the melted butter into the luke-warm milk.
  6. Turn the mixer on to Low and slowly pour the Milk/Butter mixture into the Flour blend until completely combined.
  7. Scrape down the sides of bowl and increase the speed to Medium-High and beat for 5 minutes.
  8. Using a rubber spatula, scrape the bread dough into the prepared bread pan and spread dough out evenly.
  9. Cover the pan with plastic wrap and place in a warm spot to rise for about 1 1/2 – 2 hours or until it has doubled in size.
    Note: I place my breads on top of our cable box since it is nice and warm 🙂
  10. Once the bread dough is ready to bake, place one oven rack in the lowest position and the other rack in the middle position of your oven. Next, place an oven-proof baking pan/dish on the bottom rack (off to one side, so it isn’t directly underneath where the bread will be baking – you don’t want to block heat to the bread above it); add about 1 cup of water to the pan (this is for producing steam for the baking bread).
  11. Preheat oven to 425 degrees.
  12. Remove plastic covering from bread loaf and bake for 35-40 minutes. Bread is done with it starts pulling away from the sides and it makes a hollow thud sound when you thump it lightly.
    Note: if bread starts to get too dark on the top, cover with foil – start checking at about 15 minutes.
  13. Remove from oven and place on a cooling rack while still in the pan for about 10 minutes. Then, remove bread from pan and continue cooling on the wire rack.
  14. Enjoy with butter and honey or fresh strawberry jam or with your favorite sandwich fixings 🙂

Before I start with the recipe for the Gluten Free Bread Flour blend, I need to point out a few things:

1st, kitchen scales would be very helpful since the ingredients in this recipe have to be weighed (in grams).

2nd, weigh each ingredient separately and then add to the storage container or ziploc baggie used to keep the flour fresh.

3rd, I have found that it is much easier to store my flours and flour blends in large plastic containers with tight-fitting tops – easy to scoop from 😉

GF Bread Flour Blend Recipe (makes 5 Cups):

  • Potato Starch – 280 grams
  • Superfine White Rice Flour – 245 grams
  • Tapioca Starch/Flour – 75 grams
  • Whey Protein Isolate (unflavored) – 75 grams
  • Xanthan Gum – 15 grams
Breakfast, Dinner, Lunch, Snacks
American, Italian


Homemade Ranch Dressing/Dip

Homemade Ranch Dressing/Dip

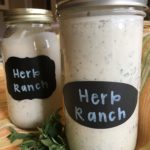
Fresh Herbs make this Homemade Ranch Dressing/Dip extra delicious! Our family uses it on just about everything from salads, fresh veggie strips and baked potatoes to french fries or chips 🙂 Oh, so yummy!!!

  • 1 Cup Mayonnaise (I use Hellmann’s Real Mayo)
  • 1/2 Cup Whole Milk (You can also use 1%, 2%, Skim or Buttermilk)
  • 1/2 Cup Sour Cream (I use Lite, but Regular is fine)
  • 1/4 Cup Fresh Parsley, finely chopped (Flat or Curly)
  • 1/4 Cup Fresh Basil, finely chopped
  • 2 Tbsp Fresh Oregano, finely chopped
  • 2 Tbsp Fresh Chives, finely chopped
  • 1 Tbsp White Vinegar
  • 2-3 tsp Worcestershire Sauce
  • 1/2 tsp Salt
  • 1/4 tsp Freshly Ground Pepper
  1. In a large mixing bowl, whisk all ingredients together until well-blended. Add more milk if you want a runnier consistency.
  2. Pour into jars with tight-fitting lids and refrigerate for 1-2 hours.
  3. Enjoy!

I adapted this recipe from Ree Drummond’s “Herby Ranch Dressing,” who I thank from the bottom of my heart for sharing this incredible recipe!!!

Hors d’Oeuvres, Salads, Side Dish


Homemade Vanilla Marshmallows

Homemade Vanilla Marshmallows

There’s nothing better than a Hot Cup of Cocoa with Homemade Marshmallows, a good Book and a Crackling Fire on a cold Winter’s night! This recipe can be easily tweaked by adding different flavored Gelatins or Extracts, adding hot cocoa powder to the powdered sugar to make chocolate marshmallows and cutting the marshmallows into fun designs using cookie cutters! Let your imagination soar 🙂 Thank you to dinnerthendessert.com for this awesome recipe!

  • 3 1/4 oz. packets Unflavored Gelatin (3/4 oz. Total)
  • 1/2 + 1/2 Cup Water (1 Cup Total)
  • 1 1/2 Cups Granulated Sugar
  • 1 Cup Light Corn Syrup
  • 1/8 tsp Salt
  • 1 Tablespoon Vanilla Extract (Can substitute different extract flavors)
  • 1/2 Cup Confectioner’s Sugar (Divided)
  • 1 Candy Thermometer (I know this isn’t an ingredient, but please make sure you have one of these before beginning)
  1. Gather the ingredients.
  2. Sprinkle 1/4 Cup of the Confectioner’s Sugar into a 9″ x 13″ baking dish. Set aside.
  3. Add the 3 Packets of Gelatin and 1/2 cup Water to the bowl of your Standing Mixer.
  4. Meanwhile, in a medium heavy saucepan, fitted with the Candy Thermometer, combine the Sugar, Corn Syrup, Salt and 1/2 Cup Water. Heat over Medium Heat, whisking until all of the Sugar is dissolved. Continue cooking until temperature reaches 240 degrees F. (Note: you do not need to whisk the entire time…let the mixture boil on its own after the sugar has dissolved, but do not leave unattended).
  5. Once the Sugar mixture has reached 240 degrees, turn off heat and leave the pot on the stove while you turn your Standing Mixer on to the Low setting.
  6. Slowly and carefully add the Sugar mixture to the Gelatin mixture in the Standing Mixer and blend for about 2 minutes, until thoroughly mixed.
  7. Next, increase the speed to High and mix for approximately 10 minutes, or until mixture has reached the consistency of Marshmallow Fluff.
  8. Add the Vanilla (or whatever flavor you desire) Extract and mix for another minute to thoroughly blend.
  9. Pour the Marshmallow mixture into the prepared 9″ x 13″ Baking Dish, spreading with a spatula to smooth out the surface.
  10. With the remaining 1/4 Cup Confectioner’s Sugar, sprinkle evenly over the top of the Marshmallow mixture. Place somewhere to let rest and firm up for 24 hours.
  11. Once the Marshmallow has firmed up, remove from the baking dish and place on a cutting surface.
  12. Using a sharp knife, cut into squares or use cookie cutters to make different-themed shapes (dip knife and/or cookie cutters into Confectioner’s Sugar to help prevent sticking).
  13. Enjoy with a Hot Cup of Cocoa, a good book and a roaring fire!
Desserts, Snacks


Easy Homemade Beef & Chicken Chili (No Beans; Gluten-Free & Keto Friendly)

Easy Homemade Beef & Chicken Chili (No Beans; Gluten-Free & Keto Friendly)

There is nothing better than a huge pot of Homemade Chili simmering on the stove! I make this Beef & Chicken Chili just about every other weekend throughout the Fall and Winter seasons. It’s so easy to make and the mix of chili spices is delectable! And, it’s Gluten-Free and Keto Friendly! Enjoy 🙂

  • 2 lbs Lean Ground Beef
  • 2 lbs Lean Ground Chicken
  • 1 Large Onion, diced (I use Vidalia)
  • 1 Tablespoon Olive Oil
  • 5 Tablespoons Chili Powder
  • 4 Tablespoons Ground Cumin
  • 2 Tablespoons Garlic Powder
  • 2 teaspoons Salt
  • 1 teaspoon Ground Pepper
  • 1/2 teaspoon Cayenne Pepper (Increase by 1/8 teaspoon at a time of you want a spicier chili)
  • 1 12 oz. Canned Tomato Paste
  • 1 Cup Beef or Chicken Broth (I usually use Beef Broth)
  • 1 Large Fresh Tomato, diced (Or canned (Otional))
  • Shredded Cheddar Cheese (Topping)
  • Sour Cream (Topping)
  • Green Onions (Topping)

The Meats

  1. Gather Ingredients
  2. In a large pot, heat the oil over medium to medium-high heat for about 2-3 minutes. Add the chopped onions and cook until translucent, about 5 minutes.
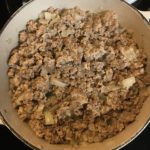
  3. Add the ground meats to the pot and cook until browned (about 8-10 minutes). Lower temperature to medium-low.

The Spices

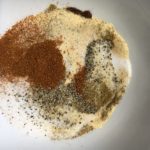
  1. In a medium sized bowl, add all of the spices and blend well.
  2. Next, add the blended spices to the meat mixture. Mix well.

The Broth and Tomato

  1. Add the tomato paste, diced tomato and broth to the pot. Mix well.
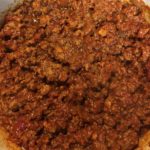
  2. Cook for 20-30 minutes, stirring occasionally.
  3. Serve with shredded cheddar cheese, sour cream, onions, etc.
Lunch, Main Dish
Mexican