Brown Sugar & Cinnamon Breakfast Rolls ~ Gluten Free – Yum!

Brown Sugar & Cinnamon Breakfast Rolls ~ Gluten Free – Yum!

These taste just like the ones I remember from my childhood AND they’re gluten-free! My oldest daughter states that they remind her of a better version of the ones from the can 😉 These GF Cinnamon Rolls truly are yummy and are surprisingly easy to make! Now, our family can have our annual Cinnamon Rolls on Christmas morning (and weekend mornings!)!!! A BIG “Thank You” to Nicole @ glutenfreeonashoestring for sharing this wonderful recipe 🙂

Ingredients for the Rolls:

  • 3 1/4 Cups Gluten Free All-Purpose Flour (I use Better Batter brand and it works beautifully)
  • 1 1/2 tsp Xanthan Gum (use ONLY if your GF Flour blend doesn’t already contain it – (Better Batter brand already contains Xanthan Gum, so I skip this ingredeint))
  • 1/2 Cup Nonfat Dry Milk (you can also use cultured buttermilk blend powder)
  • 2 tsp Rapid Rise or Instant Yeast
  • 1/4 tsp Cream of Tartar
  • 1/4 tsp Baking Soda
  • 2 Tbsp Light Brown Sugar (packed)
  • 1 tsp Kosher Salt
  • 1 tsp Apple Cider Vinegar
  • 2 Tbsp Unsalted Butter (softened to room temperature)
  • 1 Large Egg, lightly beaten (at room temperature)
  • 1 1/2 Cups Warm Water (approximately 95 degrees )

Ingredients for the Filling:

  • 6 Tbsp Unsalted Butter (softened to room temperature; divided)
  • 1 1/2 Cup Light Brown Sugar (packed & divided)
  • 2 tsp Ground Cinnamon (divided)

Ingredients for the Glaze:

  • 1 Cup Powdered Sugar
  • 1 Tbsp Milk (I use Whole Milk, but any kind is fine)
  • 1/2 tsp Ground Cinnamon
  1. Grease a 9″ x 13″ baking dish; set aside

Making the Dough:

  1. Using a Stand or Handheld Mixer, fitted with the Paddle attachment, combine the GF Flour, Xanthan Gum (only if needed), Nonfat Dry Milk, Yeast, Cream of Tartar, Baking Soda, Brown Sugar and Salt; mix until completely blended.
  2. Next, slowly add the Vinegar, Butter and Egg; mix until thoroughly blended.
  3. Lastly, with the Mixer set on Low, add the Warm Water gradually in a slow, steady stream…let it trickle down the inside of the bowl until all of the Water has been added.
  4. Scrape down the sides of the bowl, then turn the Mixer up to Med-High and let mix for 3 minutes; dough should be moist and starting to pull away from the sides of the bowl.
  5. Gently scrape the dough out onto a lightly floured working surface; lightly flour the top with more flour and gently knead until smooth.
  6. Divide the dough in half and place half under a towel or plastic wrap to keep it from drying out.
  7. Lightly flour the working half of the dough and roll into a rectangle, about 9″ x 12″ and 1/2″ thick, with a rolling pin (add flour as needed to prevent sticking).

Adding the Filling:

  1. Using an offset spatula or a butter knife, spread 1/2 of the softened butter onto the dough, leaving a 1″ border around the edges.
  2. Next, sprinkle 1/2 of the Brown Sugar on top of the butter and gently pat it down with your fingers; sprinkle 1/2 of the Cinnamon onto the Brown Sugar.
  3. Starting on one of the short sides of the dough, roll tightly into a coil/tube and gently pinch the end of the roll with the body of the roll to seal together.
  4. Using a very sharp knife, slice the dough roll into 2″ wide sections (I know this seems quite large, but you’re going to press them down) and place them into the prepared Baking Dish, about 1″ apart; gently press each roll down by about 1/3.
  5. Repeat these steps with the remaining half of the dough and filling.
  6. Cover the Baking Dish with lightly oiled plastic wrap (I use non-stick cooking spray) and place in a warm, draft-free place to rise for about 1 hour; the dough should double in size.

Baking the Rolls:

  1. Once the dough has almost finished rising, preheat the oven to 350 degrees.
  2. Remove the plastic wrap and bake on the center rack for about 23-27 minutes, or until the rolls are golden brown and cooked in the middle.
  3. Let cool to room temperature before adding the glaze.

Making the Glaze:

  1. While the rolls are cooling, combine the Powdered Sugar, Milk and Cinnamon in a small bowl, mixing until smooth; add additional Milk, a little at a time, if needed to reach desired consistency (the glaze should be thick, but able to be drizzled)
  2. Enjoy!!!
Breakfast, Desserts, Snacks


Spicy Cheddar Cheese Crackers ~ Gluten Free (Just Like “Cheese Straws”)

Spicy Cheddar Cheese Crackers ~ Gluten Free (Just Like “Cheese Straws”)

Do you remember those wonderful “Cheese Straws” that were always around in abundance during the Holidays? Well, these little “Spicy Cheddar Cheese Crackers” will take you right back to your childhood! And, if you’re Gluten-Free, fear not, these are not only Gluten-Free, but are so easy to make and only require 7 ingredients (if you include water) 😉 I chose to cut my dough into leaf shapes for the Autumn season, but any shape will do (Christmas Trees, Snowmen, Wreaths, Holly Leaves, etc.) These make the perfect little Holiday Gifts 🙂
Enjoy!!!
Note: The original non-GF recipe can be found in just about every cookbook out there, but I want to give credit to Ree Drummond (aka: “The Pioneer Woman”) for her non-gf version of this recipe that I adapted to “fit” our family (please see the “Copycat Cheez-It” version for the GF and non-spicy recipe for these same crackers) 😉

  • 2 Cups Sharp Cheddar Cheese
  • 1 Cup GF All-Purpose Flour (I use “Caputo” brand – it makes an incredible dough to work with)
  • 4 Tbsp Salted Butter (cold and cut into small pieces)
  • 1/2 tsp Kosher Salt
  • 1/2 tsp Seasoned Salt (I use “Season All”)
  • 1/8-1/4 tsp Cayenned Pepper (I use 1/4 tsp for a little more “kick”)
  • 3 Tbsp Ice Water
  1. Place all of the ingredients, except for the Water, into a Food Processor and pulse until the mixture looks like “sand.”
  2. With the Food Processor running, slowly add the Ice-Cold Water, one Tbsp at a time, through the shoot until the dough forms a large ball.
  3. Wrap the Cheese dough ball in plastic and refrigerate for 1 hour.
  4. When ready to bake, preheat oven to 350 degrees.
  5. Line 1-2 baking sheets with Parchment Paper or Silicone Baking Mats; set aside.
  6. Roll the dough out to 1/4″ thickness on a lightly floured surface, cut into desired shapes and place on the prepared baking sheets.
  7. Bake for 15-18 minutes or until golden brown.
    *See notes for “crisping” up crackers if they turn soft.
  8. Allow the crackers to cool completely on a wire rack to develop the flavors and desired crispness.
  9. Enjoy 🙂

*Note: if your crackers get a little soft, simply toss them onto a baking sheet and re-heat in a 275 degree oven for about 8-10 minutes. Let cool and gobble them up!

Appetizers, Hors d’Oeuvres, Snacks


Chicken Parmesan ~ Gluten Free

Chicken Parmesan ~ Gluten Free

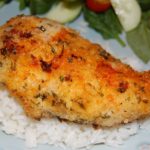
Wow! This is the tastiest and easiest recipe on the planet!!! My husband truly thought I had been in the kitchen for hours, when in fact it only took less than 30 minutes to get this dish ready to pop into the oven! Then, 40-45 minutes baking time for the juiciest, yummiest chicken ever 🙂 I make 5-6 large chicken breasts at a time, so we are certain to have plenty of leftovers…plus, chicken breasts are usually so large these days, that we each eat just half of a chicken breast. This recipe is perfect for a large family 🙂
A definite 5-Stars in our home!!!

  • 6 Medium/Large Boneless, Skinless Chicken Breasts (Rinsed and patted dry with paper towels)
  • 3/4 – 1 Cup Gluten Free Bread Crumbs (I use Plain, so not to interfere with the spices/seasonings)
  • 1/2 – 3/4 Cup Grated Parmesan Cheese
  • 3 Heaping Tbsp Dried Parsley
  • 1/2 tsp Table Salt
  • 1/4 tsp Ground Black Pepper
  • 1/2 tsp Garlic Powder
  • 3/4 Cup Salted Butter, melted
  • 3 Tbsp Lemon Juice (Juice of 2 Lemons)
  • Paprika (for sprinkling on top)
  1. Preheat oven to 350 degrees. Place oven rack in the center position.
  2. In a large bowl, combine the Bread Crumbs, Parmesan Cheese, Parsley, Salt, Pepper and Garlic Powder until well blended. Set aside.
  3. In a microwave-proof bowl, melt the butter.
  4. Next, set up a “work station” with the following in a row or circle:
    1. Chicken Breasts
    2. Melted Butter
    3. Bread Crumb Mixture
    4. 9″ x 13″ Baking Dish (you may need 2 Baking Dishes, depending on the size of your Chicken Breasts – do NOT crowd your Chicken).
  5. Dip each Chicken Breast into the Melted Butter, coating well. Then, transfer to the Bread Crumb mixture and roll around to coat completely. Place into the Baking Dish and repeat these steps with the remaining Chicken Breasts.
  6. Once all of the Chicken Breasts have been prepared, drizzle any leftover Melted Butter and the Lemon Juice evenly over the tops of the Chicken. Sprinkle with Paprika.
  7. Bake for approximately 40-45 minutes – check the center Chicken Breast by cutting it in half to check for any pinkness.
  8. Drizzle juices from pan over the Chicken Breasts before serving. Yum!!!

NOTE: The original recipe for this incredible dish came from a wonderful cookbook that was published by the supporters of the American Cancer Society in 1989, called “VIP Cookbook: A Potpourri of Virginia Cooking.” If you can get your hands on one of these cookbooks, it would be well-worth it!!! 🙂

Dinner, Main Dish


Brown Sugar Oatmeal Cookies ~ Gluten-Free

Brown Sugar Oatmeal Cookies ~ Gluten-Free

These Oatmeal Cookies are so buttery and chewy that they melt in your mouth. I also love the fact that there are only 8 ingredients needed…all ingredients that we usually have on-hand.
Of course, a HUGE “Thank You” to Ree Drummond (aka: The Pioneer Woman) for sharing the original recipe for these wonderful cookies! The only thing that I changed was swapping out the regular flour with Gluten-Free Flour 😉 These cookies earned a 5-Star review in our house!

  • 2 Cups Dark Brown Sugar (firmly packed)
  • 1 Cup Salted Butter, Softened
  • 2 tsp Vanilla Extract
  • 2 Large Eggs
  • 1 1/2 Cups Better Batter All Purpose Gluten Free Flour Mix (you can use other brands, but make sure they contain Xanthan Gum – results will vary)
  • 1 tsp Salt (table)
  • 1/2 tsp Baking Soda
  • 3 Cups Gluten-Free Old Fashioned Oats (I use Quaker Brand)
  • 1/2 Cup Finely Chopped Nuts (optional ~ I did not include nuts due to nut allergies)
  1. Preheat oven to 350 degrees.
  2. Gather the ingredients.
  3. Line 1-2 cookie sheets with Parchment Paper or a baking pad. Set aside.
  4. Using a stand mixer, with the paddle attachment, combine the Brown Sugar and Softened Butter until light and fluffy.
  5. Next, add the Vanilla and the Eggs, one at a time, scraping down the sides of the bowl after adding each Egg.
  6. In a separate bowl, combine the GF Flour, Salt and Baking Soda until well-blended.
  7. Slowly add the Flour mixture to the Butter mixture, one cup at a time, mixing until just combined after each addition.
  8. Next, add the Oats (and Chopped Nuts, if using), one cup at a time, scraping the sides of the bowl after each addition. Mix until all Oats are blended (be sure to check the very bottom of the bowl for any dry oats).
  9. Using a cookie scoop or spoon of your desired size (I used a 2″ cookie scoop), drop cookie dough balls onto prepared cookie sheets several inches apart (they spread!)
  10. Bake for 12-14 minutes (longer if you want crispy cookies).
  11. Cool on the cookie sheets for about 2 minutes before transferring them to a wire cooling rack.
  12. Enjoy with a cold glass of milk or a bowl of Vanilla Ice Cream 🙂
Desserts, Snacks


Paprika Cauliflower Bites ~ Gluten-Free

Paprika Cauliflower Bites ~ Gluten-Free

Did you know that there are three (3) different types of Paprika? There is “Sweet Paprika,” usually labeled as “Paprika” and offers a somewhat sweet pepper flavor without much heat. The second type is “Hot Paprika,” because it is exactly that…HOT! The last type is “Smoked Paprika” and comes from peppers that have been smoked and dried over a fire. “Smoked Paprika” comes in a variety of spiciness (mild, medium, medium-hot and hot), depending on the variety of peppers used.
Paprika is definitely one of my favorite spices, so I am always trying out new ways to use it in my recipes. I hope you enjoy these Paprika Cauliflower Bites 🙂

The Marinade:

  • 1/4 Cup Light Olive Oil (or Canola Oil)
  • 1/4 Cup lemon juice (Juice of 1 Large Lemon)
  • 1/4 Cup Parmesan Cheese, grated or shredded (I use grated when it’s available)
  • 1 tsp Dried Oregano
  • 1 tsp Salt (table)
  • 1 tsp Ground Black Pepper

The Cauliflower:

  • 1 Head Cauliflower (broken/cut into bite-size pieces)

The Coating:

  • 1 Cup All-Purpose Gluten Free Flour (I use King Arthur or Better Batter)
  • 4 tsp Paprika (I use “Sweet Paprika” (label usually states just “Paprika”)
  • 1/2 tsp Ground Black Pepper
  • 1 Tbsp Parmesan Cheese, shredded or grated (I use Shredded for this part for a cheesier finish)
  • 1/2 Cup Butter, salted
  1. In a medium-size bowl, combine all of the Marinade ingredients mixing well; set aside.
  2. Place the bite-size Cauliflower pieces into a large resealable plastic bag.
  3. Pour the Marinade into the bag with the Cauliflower and close bag securely. Smoosh the Cauliflower around in the marinade to evenly coat. Refrigerate for at least 2 hours.
  4. Meanwhile, combine the GF Flour, Paprika, Pepper and Parmesan Cheese in a large bowl, mixing well.
  5. Once the Cauliflower has finished marinating, melt the butter in a large non-stick skillet over medium heat.
  6. Using a slotted spoon, transfer the Cauliflower pieces from the marinade to the GF Flour mixture in the large bowl. Gently toss to evenly coat all of the Cauliflower pieces with the GF Flour mixture.
  7. Once the Cauliflower pieces are ready to cook, transfer the pieces to the large skillet containing the melted butter. Do not move the Cauliflower around for about 1-2 minutes, allowing the pieces to turn golden brown and lightly crispy. Gently flip the Cauliflower pieces over to cook all sides…you may have to reduce the temperature to prevent burning. Test a piece after about 5 minutes to see if it’s done (softened) – I usually cook mine for about 8-10 minutes.
  8. Serve with a fresh salad and your choice of protein….yummy! 🙂
Appetizers, Dinner, Hors d’Oeuvres, Side Dish


Sour Cream Chicken Tenders (Gluten Free)

Sour Cream Chicken Tenders (Gluten Free)

These baked Chicken Tenders turn out tender and juicy inside with a light and crispy outside every time. I bake these quite often for my family and always make a double batch to ensure there are plenty of leftovers for the next day 🙂 This dish is one of our son’s most-requested meals! Enjoy 🙂

The Sour Cream Marinade:

  • 2 Cups Daisy Lite Sour Cream (You may use Regular Sour Cream, if desired)
  • 1/4 Cup Fresh Lemon Juice
  • 4-5 tsp Worcestershire sauce
  • 2 tsp Paprika
  • 1/2 tsp Garlic, minced
  • 1 tsp Salt
  • 2 tsp Ground Black Pepper
  • 2 Packages (9-10 per pack) Chicken Tenders (rinsed and lightly dried with paper towels)

The Crispy Outer Crust:

  • 1 1/2-2 Cups Gluten Free Italian Bread Crumbs
  • 1/2 Cup Salted Butter, melted

Making the Sour Cream Marinade:

  1. In a large bowl, combine the first 7 ingredients and mix well. Set aside.
  2. Place the prepared Chicken Tenders into a large resealable plastic bag.
  3. Pour the Sour Cream marinade into the bag with the Chicken, close the bag securely, and then “smoosh” the chicken around to evenly coat with the marinade. Place flat in the refrigerator overnight (12-24 hours).

Breading the Chicken:

  1. When the chicken is ready to bake, preheat the oven to 350 degrees.
  2. Line a cookie sheet with parchment paper or foil (if using foil, spray with non-stick cooking spray); set aside.
  3. Pour the Bread Crumbs into a shallow bowl or dish and place beside the prepared cookie sheet.
  4. Remove the marinating Chicken from the refrigerator and place next to the dish containing the bread crumbs (I place mine in a large bowl to keep the bag from tipping over).
  5. Once your “station” is set up, remove a few (3-4) Chicken tenders from the bag and dredge them through the bread crumbs to evenly coat them. Then place onto the prepared cookie sheet. Repeat these steps with the remaining chicken.
  6. Once all of the chicken is prepared and lined up on the cookie sheet, drizzle them with the melted butter.
  7. Bake uncovered for approximately 15-18 minutes, depending on your oven, turning them over halfway through.
  8. Serve with your favorite sides and watch them disappear…I serve ours with my Homemade Ranch Dressing/Dip or my Honey Mustard Sauce/Dip 😉
Dinner, Lunch, Main Dish


Chocolate Pudding with Cookie Crumbles & Fresh Whipped Cream (Gluten Free)

Chocolate Pudding with Cookie Crumbles & Fresh Whipped Cream (Gluten Free)

Pudding is one of my favorite comfort foods. However, I must confess…I always made it from a box 😉 So, I decided to make it from scratch to see if there was a big difference and YES there is! Homemade chocolate pudding is definitely worth making 🙂 I added the chocolate cookie crumbles in the bottom after finding a wonderful recipe by Ree Drummond (thank you, Ree!) Let me know what you think…box or homemade?

Ingredients for the Cookie Crumble (optional):

  • 22-24 Gluten Free Chocolate Sandwich Cookies (if not GF, use Oreos)
  • 4 Tbsp Salted Butter, Melted (I use Land O Lakes)

Ingredients for the Pudding:

  • 1 1/2 Cups Granulated Sugar
  • 1/4 Cup All-Purpose Gluten Free Corn Starch
  • 1/4 tsp Salt
  • 3 Cups Skim Milk (You can substitute with 1%, 2%, Whole or any non-dairy milk)
  • 4 Large Egg Yolks
  • 6 1/2 ounces Bittersweet Chocolate
  • 2 Tbsp Butter, salted
  • 2 tsp Vanilla Extract

Ingredients for the Whipped Topping:

  • 1 Cup Heavy Whipping Cream (very cold)
  • 2-3 Tbsp Powdered Sugar
  • 1/2 tsp Vanilla Extract

Making the Cookie Crumble:

  1. In a food processor, pulse the melted Butter and Sandwich Cookies until finely crushed. Then spoon desired amount into the bottom of your serving dishes/cups (reserving some for garnish). Note: I spoon about 2 Tbsp into the bottom of each glass.

Making the Pudding:

  1. In a medium saucepan, whisk together the Sugar, Cornstarch and Salt until well-blended.
  2. Add the Milk and Egg Yolks to the Sugar mixture and whisk well.
  3. Heat this mixture over medium heat for about 8-10 minutes, stirring constantly so mixture doesn’t burn or clump. Immediately remove from the heat once it starts to thicken (like pudding ;))
  4. Add the Butter and Vanilla to the pudding mixture, stirring until butter is completely melted and blended.
  5. Pour the mixture into desired serving bowls/cups. Refrigerate for at least 2 hours.

Making the Whipped Cream:

  1. Just before serving the pudding, make the Whipped Cream by combining the Heavy Whipping Cream, Powdered Sugar (1 Tablespoon at a time) and Vanilla Extract using a Stand or Handheld Mixer. Beat on medium-high until stiff peaks form (about 4-5 minutes)
  2. Spoon desired amount on top of each pudding and add a few Cookie Crumbles for garnish. Yum!
Desserts, Snacks
American


Rustic Strawberry Tart (Gluten Free)

Rustic Strawberry Tart (Gluten Free)

We look forward to Spring every year because we get to make jam, jelly, frozen yogurt pies and yummy tarts with our buckets of fresh, plump Strawberries! This recipe was adapted from two of my favorite cooks/bakers/chefs….Ree Drummond (aka: The Pioneer Woman) and Kim (“letthemeatgfcake”). I simply swapped out the “regular” pie crust with Kim’s recipe for Gluten Free Pie Crust and filled it with a GF version of Ree’s Strawberry Filling. Topped with freshly whipped cream, this tart is out of this world!!! Enjoy 🙂

The Gluten Free Pie Crust:

  • 1 1/2 Cups Unsalted Butter (Chilled and Cut into 1/2″ pieces)
  • 3 Cups Gluten Free All-Purpose Flour Blend (this blend must include Xanthan Gum )
  • 1 Large Egg (beaten)
  • 1 Tbsp White Vinegar
  • 7-9 Tbsp Ice-cold Water
  • 1 tsp Salt
  • 1 Large Egg (for outside of crust)
  • 1 Tbsp Water (for outside of crust)

The GF Strawberry Filling:

  • 4 Cups Strawberries (cut into bite-size pieces)
  • 1/2 Cup Granulated Sugar
  • 2 Tbsp All-Purpose Gluten Free Flour (plus more for dusting work surface)
  • 1 tsp Vanilla Extract
  • 1 tsp Lemon Zest
  • 1 tsp lemon juice
  • 1/3 Cup Orange Marmalade (This is for using as a glaze for the strawberry filling; you can use just about any preserves, jams or marmalades that you have in your frig ;))
  • Splash Water

The Fresh Whipped Cream:

  • 1 Cup Heavy Whipping Cream (cold)
  • 3-4 Tbsp Powdered Sugar
  • 1 tsp Vanilla Extract

Making the GF Pie Crusts:

  1. NOTE: This recipe makes 2 pie crusts. You can refrigerate any unused & uncooked dough for up to 3 days, or freeze it for up to 3 months, well wrapped. To thaw the dough, move it to the refrigerator overnight, then let dough warm a little for about 20-30 minutes at room temperature.
  2. Gather the ingredients for the pie crusts.
  3. In a food processor, pulse together the GF Flour Blend and Salt until well combined.
  4. Next, add the Cold Butter pieces to the food processor and pulse until the butter is in large chunks.
  5. Add the Beaten Egg and Vinegar to the Butter/Flour mixture and pulse until just combined.
  6. Slowly add the Ice-cold Water, 1 Tablespoon at a time, to the dough mixture while pulsing. Note: depending on the humidity, you may not need all of the water. Pulse until the dough comes together.
  7. Divide the dough in half (I weigh mine) and wrap each half in plastic wrap, flattening the dough into discs. Refrigerate for at least 30 minutes.

Making the Strawberry Filling (while the Pie Dough is chilling):

  1. Gather the ingredients for the filling.
  2. Place one of your oven racks in the center position and preheat oven to 400 degrees.
  3. In a large bowl, combine the cut-up Strawberries, Sugar, GF Flour, Vanilla Extract, Lemon Zest and Juice until the Strawberries are well coated. Set aside while you roll out the pie dough.
  4. Lightly flour a piece of parchment paper and place one of the pie dough discs on top. Using a rolling pin, roll the dough out into an oval shape about 19″ x 11″ (thickness of dough should be about 1/4″).
  5. Transfer the rolled-out dough and the Parchment Paper to a baking sheet and spoon the Strawberry filling onto the center of the dough. Spread the filling evenly out, leaving a 1-2″ border of dough.
  6. Very gently fold the edges of the dough over the Strawberries, pinching together any folds in the dough.
  7. In a small bowl, whisk together 1 Large Egg and 1 Tbsp of water. Brush this egg wash onto the folded edges of the dough.
  8. Bake on the center rack for about 30 minutes, rotating the pan halfway through to evenly bake.
  9. While the tart is baking, warm the Preserves (or Jam/Jelly/Marmalade) with a splash of water (to help the Preserves spread).
  10. Once the crust is a golden brown, remove the Tart from the oven and gently brush the Strawberry filling with the warmed Preserves. Cool completely.

Making the Whipped Cream:

  1. Using a Stand Mixer, fitted with the Whisk attachment, whisk the Heavy Whipping Cream, Powdered Sugar and Vanilla Extract on Medium-High until soft peaks have formed.
  2. Serve the cooled Tart with a large dollop of freshly made Whipped Cream and watch it disappear!
Desserts, Lunch, Snacks
American