Raspberry-Lemon Scones ~ Gluten-Free

Raspberry-Lemon Scones ~ Gluten-Free

These delicious Scones are so easy to make and only require about 10 ingredients (including the usual staples – baking soda, baking powder, etc.) that we usually have in our kitchens. Plus, you can substitute whatever berries you have on hand 😉 A huge “Thank You” to Chris Scheuer of “thecafesucrefarine” for sharing the original version of this recipe – I made a few small changes to make it Gluten-Free and allergy-friendly for my family. 🙂

The Scones:

  • 1 Cup Heavy Cream
  • 8 Tbsp Unsalted Butter (melted)
  • 2 Cups All-Purpose Gluten Free Flour (I used Bob’s Red Mill GF “1 to 1 Baking Flour”)
  • 6 Tbsp Granulated Sugar
  • 1 Tbsp Baking Powder
  • 1/2 tsp Baking Soda
  • 1/4 tsp Salt
  • 1 Large Lemon (Zest (reserving the Juice for the glaze))
  • 1/2 Cup Fresh Raspberries, broken in half (or any other fresh berries that you have on-hand)

The Lemon Glaze:

  • 2 Cups Powdered Sugar
  • 3 Tbsp Half & Half (or whole milk)
  • Lemon Juice from 1 large lemon (from the Lemon used in the scone mix above)

Making the Scone Dough:

  1. Line a baking sheet with parchment paper or a silicone baking pad; set aside.
  2. Pour the 1 Cup of Heavy Cream in a freezer-proof container and freeze for 10-15 minutes.
  3. Next, melt the butter in a microwave-proof container (I do this in 30 second increments until butter is fully melted); set aside to cool a little while you prepare the rest of the dough.
  4. In a Large mixing bowl, whisk the GF Flour, Baking Powder and Soda, Sugar, Lemon Zest and Salt until thoroughly mixed.
  5. Once the Heavy Cream has been in the freezer for 10-15 minutes, combine it with the melted Butter and stir with a fork until clumps appear (looks kind of like curdled milk).
  6. Pour this Cream/Butter mix into the Flour mixture and stir with a rubber spatula until ingredients are well-combined.
  7. Gently fold the halved-raspberries into the Scone dough until the berries are evenly distributed.
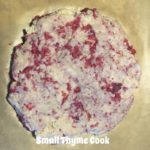
  8. Dump the dough onto the prepared baking sheet and form/pat it into a circle (about 12″-14″ in diameter); place in refrigerator for 15-45 minutes.
  9. Meanwhile, place oven rack in the middle position of your oven and Preheat oven to 400 degrees.
  10. Once the dough has been refrigerated for at least 15 minutes, remove from the freezer and cut into 6 or 8 “pie pieces” (triangles) – this works best with a really sharp knife that has been sprayed with a non-stick cooking oil; separate and place the triangles evenly on the sheet, leaving at least 2″ between each one.
  11. Bake for approximately 18-20 minutes (remember, all ovens heat and cook at different rates, so keep an eye on your scones) or until they are golden brown around the edges.
  12. Remove from oven and transfer to a cooling rack to cool completely before icing.

Making the Lemon Glaze:

  1. In a medium bowl, combine the Powdered Sugar, Half & Half and Lemon Juice; whisk until smooth and pourable (add more Powdered Sugar for a thicker consistency or add more Half & Half for a thinner consistency).
  2. Enjoy!
Breakfast, Desserts, Snacks
American, English, Irish, Scottish


Pasta Primavera in a Lemon-Butter Sauce ~ Gluten Free

Pasta Primavera in a Lemon-Butter Sauce ~ Gluten Free

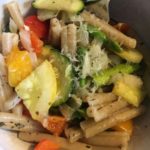
What better way to celebrate Spring than making “Pasta Primavera,” a healthy Spring Vegetable & Pasta dish…after all, “primavera” means ‘spring style’ in Italian 😉 I love this easy and very versatile recipe….I use as many veggies that I can find in my refrigerator before they go bad. Asparagus, squash, broccoli, bell peppers, carrots, zucchini, onions, snow peas…the possibilities are endless! And, the light lemony-butter sauce makes this recipe irresistible 🙂
*The original version of this recipe came from evolvingtable.com – thank you SO much for sharing! I have adjusted the original recipe in order to make it gluten-free and allergy-friendly for my family.

The Pasta:

  • 4 Cups Gluten-Free Pasta, dry (any style is fine)

The Vegetables:

  • 1 lb Asparagus (trim ends and cut into 2″ pieces)
  • 1 large Yellow Squash (quartered lengthwise & cut into bite-size pieces)
  • 1 large Zucchini (quartered lengthwise & cut into bite-size pieces)
  • 2 large Bell Peppers, any color (cut into bite-size pieces)
  • 1 large Vidalia Onion (cut into bite-size pieces)
  • 2-3 Tbsp Olive Oil
  • 1/2-1 tsp Kosher Salt
  • 1/4-1/2 tsp Ground Black Pepper
  • 1 tsp Dried Oregano
  • 1/2 tsp Dried Thyme
  • 1/2 tsp Dried Marjoram
  • 1/2 tsp Dried Basil

The Lemon-Butter Sauce:

  • 4 Tbsp Butter, salted ((1/2 stick))
  • 1 Large Lemon (Zest and juice)
  • 1 1/2 tsp Garlic, minced (I use the already-minced Garlic in a jar)
  • 1/2 Cup Water (reserved from the pasta water)
  • 1 Tbsp Dried Basil (or 1/4 Cup fresh, chopped)
  • 1/2-3/4 Cup Parmesan, grated (fresh is best)
  • 1/2-1 tsp Salt (to taste)

The Pasta:

  1. In a large pot, cook the pasta according to the package instructions for al dente; reserve 1/2 cup pasta water for the sauce before draining the rest of the water; set the pasta aside in a colander & keep the large pot available for cooking the sauce, etc.

The Vegetables:

  1. Preheat oven to 425 degrees.
  2. Line a large baking sheet with foil and lightly spray with non-stick cooking spray; set aside.
  3. While the Pasta is cooking, cut up all of the vegetables into bite-size pieces and place them into a large bowl. *This step can be done ahead of time, if desired (just keep veggies refrigerated until ready to use).
  4. Add the Olive Oil and spices to the vegetables in the bowl and toss to thoroughly coat; spread the veggies evenly onto the prepared baking sheet and bake for 15-18 minutes or until veggies are tender.

The Lemon-Butter Sauce:

  1. Using the same pot that you used to cook the pasta, add the butter, lemon zest, lemon juice and garlic; cook over medium-low heat until the butter is completely melted and the garlic becomes fragrant (about 2 minutes).
  2. Add the cooked Pasta, the reserved Pasta Water and the roasted vegetables to the Lemon-Butter mixture, tossing until thoroughly coated.
  3. Next, add the Basil, 1/2 cup Parmesan and Salt (to taste); toss to combine.
  4. Serve with freshly-grated Parmesan and fresh chopped Basil, if desired.
  5. Oh, so yummy! Enjoy 🙂
Dinner, Lunch, Main Dish
American, Italian


Quick & Easy Lemon-Garlic Salmon ~ Yum!

Quick & Easy Lemon-Garlic Salmon ~ Yum!

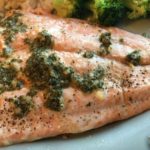
As many of you already know, Salmon is one of my family’s most-requested meals…so, I am always looking for new Salmon recipes to try. And, this one is a winner! It’s not only delicious and nutritious, but it’s SO quick and easy to prepare. I hope you enjoy it as much as we do 🙂
A huge “Thank You” to wellplated.com for posting the original version of this wonderful recipe. Please note: I have made substitutions and changes to the original recipe to suit my family.

  • 1 2-2.5 lbs Salmon Fillets w/ Skin (I purchase a whole fillet and bake it in tact)
  • 4 Tbsp Salted Butter, softened ((1/2 stick))
  • 1 Large Lemon (Zest & Juice)
  • 2-3 Heaping Teaspoons Garlic, minced (I use the already minced Garlic in a jar)
  • 2 tsp Dried Parsley
  • 1-2 large pinches Black Pepper
  • 1/2 tsp Salt
  1. Preheat oven to 400 degrees.
  2. Line a baking sheet with aluminum foil and spray with non-stick cooking spray.
  3. Rinse the Salmon in cold water, pat dry with paper towels and place in the center of the prepared baking sheet, skin side down; set aside.
  4. In a small bowl, mash together the Softened Butter, Lemon Zest, Garlic, Parsley, Pepper and Salt until well-combined.
  5. Using a butter knife, rubber spatula or your fingers, spread the Butter paste over the Salmon Fillets; Note: I usually end up using my fingers to spread the Butter mixture ~ the warmth of your skin helps spread the butter more easily.
  6. Next, squeeze the Lemon Juice evenly over the Salmon Fillets and sprinkle with extra salt and pepper, if desired.
  7. Bake in pre-heated oven on the center rack for 15-20 minutes, depending on the thickness of your fillets. The fillets will flake apart easily with a fork when done and should measure 145 degrees.
  8. Serve with wedges of fresh lemon and sprinkle with extra Parsley. Enjoy!
Dinner, Main Dish


Chicken Parmesan ~ Gluten Free

Chicken Parmesan ~ Gluten Free

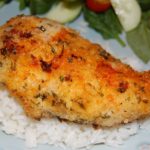
Wow! This is the tastiest and easiest recipe on the planet!!! My husband truly thought I had been in the kitchen for hours, when in fact it only took less than 30 minutes to get this dish ready to pop into the oven! Then, 40-45 minutes baking time for the juiciest, yummiest chicken ever 🙂 I make 5-6 large chicken breasts at a time, so we are certain to have plenty of leftovers…plus, chicken breasts are usually so large these days, that we each eat just half of a chicken breast. This recipe is perfect for a large family 🙂
A definite 5-Stars in our home!!!

  • 6 Medium/Large Boneless, Skinless Chicken Breasts (Rinsed and patted dry with paper towels)
  • 3/4 – 1 Cup Gluten Free Bread Crumbs (I use Plain, so not to interfere with the spices/seasonings)
  • 1/2 – 3/4 Cup Grated Parmesan Cheese
  • 3 Heaping Tbsp Dried Parsley
  • 1/2 tsp Table Salt
  • 1/4 tsp Ground Black Pepper
  • 1/2 tsp Garlic Powder
  • 3/4 Cup Salted Butter, melted
  • 3 Tbsp Lemon Juice (Juice of 2 Lemons)
  • Paprika (for sprinkling on top)
  1. Preheat oven to 350 degrees. Place oven rack in the center position.
  2. In a large bowl, combine the Bread Crumbs, Parmesan Cheese, Parsley, Salt, Pepper and Garlic Powder until well blended. Set aside.
  3. In a microwave-proof bowl, melt the butter.
  4. Next, set up a “work station” with the following in a row or circle:
    1. Chicken Breasts
    2. Melted Butter
    3. Bread Crumb Mixture
    4. 9″ x 13″ Baking Dish (you may need 2 Baking Dishes, depending on the size of your Chicken Breasts – do NOT crowd your Chicken).
  5. Dip each Chicken Breast into the Melted Butter, coating well. Then, transfer to the Bread Crumb mixture and roll around to coat completely. Place into the Baking Dish and repeat these steps with the remaining Chicken Breasts.
  6. Once all of the Chicken Breasts have been prepared, drizzle any leftover Melted Butter and the Lemon Juice evenly over the tops of the Chicken. Sprinkle with Paprika.
  7. Bake for approximately 40-45 minutes – check the center Chicken Breast by cutting it in half to check for any pinkness.
  8. Drizzle juices from pan over the Chicken Breasts before serving. Yum!!!

NOTE: The original recipe for this incredible dish came from a wonderful cookbook that was published by the supporters of the American Cancer Society in 1989, called “VIP Cookbook: A Potpourri of Virginia Cooking.” If you can get your hands on one of these cookbooks, it would be well-worth it!!! 🙂

Dinner, Main Dish


Paprika Cauliflower Bites ~ Gluten-Free

Paprika Cauliflower Bites ~ Gluten-Free

Did you know that there are three (3) different types of Paprika? There is “Sweet Paprika,” usually labeled as “Paprika” and offers a somewhat sweet pepper flavor without much heat. The second type is “Hot Paprika,” because it is exactly that…HOT! The last type is “Smoked Paprika” and comes from peppers that have been smoked and dried over a fire. “Smoked Paprika” comes in a variety of spiciness (mild, medium, medium-hot and hot), depending on the variety of peppers used.
Paprika is definitely one of my favorite spices, so I am always trying out new ways to use it in my recipes. I hope you enjoy these Paprika Cauliflower Bites 🙂

The Marinade:

  • 1/4 Cup Light Olive Oil (or Canola Oil)
  • 1/4 Cup lemon juice (Juice of 1 Large Lemon)
  • 1/4 Cup Parmesan Cheese, grated or shredded (I use grated when it’s available)
  • 1 tsp Dried Oregano
  • 1 tsp Salt (table)
  • 1 tsp Ground Black Pepper

The Cauliflower:

  • 1 Head Cauliflower (broken/cut into bite-size pieces)

The Coating:

  • 1 Cup All-Purpose Gluten Free Flour (I use King Arthur or Better Batter)
  • 4 tsp Paprika (I use “Sweet Paprika” (label usually states just “Paprika”)
  • 1/2 tsp Ground Black Pepper
  • 1 Tbsp Parmesan Cheese, shredded or grated (I use Shredded for this part for a cheesier finish)
  • 1/2 Cup Butter, salted
  1. In a medium-size bowl, combine all of the Marinade ingredients mixing well; set aside.
  2. Place the bite-size Cauliflower pieces into a large resealable plastic bag.
  3. Pour the Marinade into the bag with the Cauliflower and close bag securely. Smoosh the Cauliflower around in the marinade to evenly coat. Refrigerate for at least 2 hours.
  4. Meanwhile, combine the GF Flour, Paprika, Pepper and Parmesan Cheese in a large bowl, mixing well.
  5. Once the Cauliflower has finished marinating, melt the butter in a large non-stick skillet over medium heat.
  6. Using a slotted spoon, transfer the Cauliflower pieces from the marinade to the GF Flour mixture in the large bowl. Gently toss to evenly coat all of the Cauliflower pieces with the GF Flour mixture.
  7. Once the Cauliflower pieces are ready to cook, transfer the pieces to the large skillet containing the melted butter. Do not move the Cauliflower around for about 1-2 minutes, allowing the pieces to turn golden brown and lightly crispy. Gently flip the Cauliflower pieces over to cook all sides…you may have to reduce the temperature to prevent burning. Test a piece after about 5 minutes to see if it’s done (softened) – I usually cook mine for about 8-10 minutes.
  8. Serve with a fresh salad and your choice of protein….yummy! 🙂
Appetizers, Dinner, Hors d’Oeuvres, Side Dish


Sour Cream Chicken Tenders (Gluten Free)

Sour Cream Chicken Tenders (Gluten Free)

These baked Chicken Tenders turn out tender and juicy inside with a light and crispy outside every time. I bake these quite often for my family and always make a double batch to ensure there are plenty of leftovers for the next day 🙂 This dish is one of our son’s most-requested meals! Enjoy 🙂

The Sour Cream Marinade:

  • 2 Cups Daisy Lite Sour Cream (You may use Regular Sour Cream, if desired)
  • 1/4 Cup Fresh Lemon Juice
  • 4-5 tsp Worcestershire sauce
  • 2 tsp Paprika
  • 1/2 tsp Garlic, minced
  • 1 tsp Salt
  • 2 tsp Ground Black Pepper
  • 2 Packages (9-10 per pack) Chicken Tenders (rinsed and lightly dried with paper towels)

The Crispy Outer Crust:

  • 1 1/2-2 Cups Gluten Free Italian Bread Crumbs
  • 1/2 Cup Salted Butter, melted

Making the Sour Cream Marinade:

  1. In a large bowl, combine the first 7 ingredients and mix well. Set aside.
  2. Place the prepared Chicken Tenders into a large resealable plastic bag.
  3. Pour the Sour Cream marinade into the bag with the Chicken, close the bag securely, and then “smoosh” the chicken around to evenly coat with the marinade. Place flat in the refrigerator overnight (12-24 hours).

Breading the Chicken:

  1. When the chicken is ready to bake, preheat the oven to 350 degrees.
  2. Line a cookie sheet with parchment paper or foil (if using foil, spray with non-stick cooking spray); set aside.
  3. Pour the Bread Crumbs into a shallow bowl or dish and place beside the prepared cookie sheet.
  4. Remove the marinating Chicken from the refrigerator and place next to the dish containing the bread crumbs (I place mine in a large bowl to keep the bag from tipping over).
  5. Once your “station” is set up, remove a few (3-4) Chicken tenders from the bag and dredge them through the bread crumbs to evenly coat them. Then place onto the prepared cookie sheet. Repeat these steps with the remaining chicken.
  6. Once all of the chicken is prepared and lined up on the cookie sheet, drizzle them with the melted butter.
  7. Bake uncovered for approximately 15-18 minutes, depending on your oven, turning them over halfway through.
  8. Serve with your favorite sides and watch them disappear…I serve ours with my Homemade Ranch Dressing/Dip or my Honey Mustard Sauce/Dip 😉
Dinner, Lunch, Main Dish