Barbecue-Ranch Dip/Salad Dressing

Barbecue-Ranch Dip/Salad Dressing
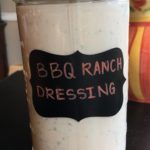
This Dressing/Dip is definitely one of my family’s favorites! I make sure to keep a fresh batch made at all times…my husband loves it as a dip for veggies and tortilla chips 🙂 And, my children love it as a salad dressing, baked potato topper and a dip for French Fries and Chicken Bites! It’s so easy to make and can be easily personalized to suit your family’s tastes by adding different herbs and spices 😉
Of course, a BIG “Thank You” to Ree Drummond (aka: “The Pioneer Woman”) for sharing the original version of this recipe!!! It’s a 5-Star recipe in our house!

  • 1 Cup Mayonnaise (I use Hellmann’s)
  • 1/2 Cup Sour Cream (I use Daisy Lite, but full-fat is fine, too)
  • 1/4 Cup Barbecue Sauce (I use Sweet Baby Ray’s, but you can use whatever bbq sauce you have on hand)
  • 3 Tbsp Dried Parsley Flakes
  • 1/2 tsp Garlic, minced (I use the already-minced garlic in a jar (usually found in the produce section))
  • 1/4-1/2 Cup Buttermilk (*usually only needed if you’re making a Salad Dressing; I make my own by adding 1 Cup Milk to 1 Tbsp Lemon Juice or White Vinegar; gently stir and let sit for 5 minutes)
  • 1/4-1/2 tsp Kosher Salt (optional)
  1. Gather the ingredients.
  2. Note: If using Buttermilk (usually only needed for the Salad Dressing version of this recipe; if you’re making this recipe as a dip, the Buttermilk is usually not needed) and you’re making your own, do so now by pouring 1 Tablespoon of White Vinegar or Lemon Juice into a 1-Cup measuring cup; then add milk (I use Whole Milk, but any fat % Milk is fine) to the Vinegar/Lemon Juice to almost fill the 1-cup measuring cup; gently stir and let sit for 5 minutes while preparing the remaining ingredients.
  3. While the Buttermilk is forming, place all of the remaining ingredients into a large bowl and whisk until thoroughly combined.
  4. To dilute/thin the dressing, add some Buttermilk, a little bit at a time, until you reach the desired consistency.
  5. Pour into a jar/vessel, cover with lid or plastic wrap and refrigerate until ready to use.
  6. Enjoy!
Appetizers, Hors d’Oeuvres, Salads, Side Dish, Snacks


Sour Cream Chicken Tenders (Gluten Free)

Sour Cream Chicken Tenders (Gluten Free)

These baked Chicken Tenders turn out tender and juicy inside with a light and crispy outside every time. I bake these quite often for my family and always make a double batch to ensure there are plenty of leftovers for the next day 🙂 This dish is one of our son’s most-requested meals! Enjoy 🙂

The Sour Cream Marinade:

  • 2 Cups Daisy Lite Sour Cream (You may use Regular Sour Cream, if desired)
  • 1/4 Cup Fresh Lemon Juice
  • 4-5 tsp Worcestershire sauce
  • 2 tsp Paprika
  • 1/2 tsp Garlic, minced
  • 1 tsp Salt
  • 2 tsp Ground Black Pepper
  • 2 Packages (9-10 per pack) Chicken Tenders (rinsed and lightly dried with paper towels)

The Crispy Outer Crust:

  • 1 1/2-2 Cups Gluten Free Italian Bread Crumbs
  • 1/2 Cup Salted Butter, melted

Making the Sour Cream Marinade:

  1. In a large bowl, combine the first 7 ingredients and mix well. Set aside.
  2. Place the prepared Chicken Tenders into a large resealable plastic bag.
  3. Pour the Sour Cream marinade into the bag with the Chicken, close the bag securely, and then “smoosh” the chicken around to evenly coat with the marinade. Place flat in the refrigerator overnight (12-24 hours).

Breading the Chicken:

  1. When the chicken is ready to bake, preheat the oven to 350 degrees.
  2. Line a cookie sheet with parchment paper or foil (if using foil, spray with non-stick cooking spray); set aside.
  3. Pour the Bread Crumbs into a shallow bowl or dish and place beside the prepared cookie sheet.
  4. Remove the marinating Chicken from the refrigerator and place next to the dish containing the bread crumbs (I place mine in a large bowl to keep the bag from tipping over).
  5. Once your “station” is set up, remove a few (3-4) Chicken tenders from the bag and dredge them through the bread crumbs to evenly coat them. Then place onto the prepared cookie sheet. Repeat these steps with the remaining chicken.
  6. Once all of the chicken is prepared and lined up on the cookie sheet, drizzle them with the melted butter.
  7. Bake uncovered for approximately 15-18 minutes, depending on your oven, turning them over halfway through.
  8. Serve with your favorite sides and watch them disappear…I serve ours with my Homemade Ranch Dressing/Dip or my Honey Mustard Sauce/Dip 😉
Dinner, Lunch, Main Dish


Cheesy Yellow Squash Casserole (Gluten Free)

Cheesy Yellow Squash Casserole (Gluten Free)

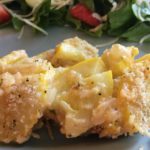
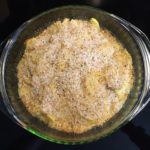
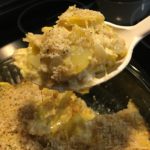
This Yellow Summer Squash Casserole is SO easy and cheesy that it will quickly become one of your family’s favorites! It pairs nicely with a fresh green salad and your favorite protein…a perfect accompaniment for my Maple Glazed Salmon! Enjoy 🙂

  • 2-3 Large Yellow Summer Squash, thinly sliced ((or 5-6 Medium Squash))
  • 1 Tbsp Canola Oil
  • 1 Tbsp Salted Butter (I use Land O Lakes)
  • 1 Large Vidalia Onion, thinly sliced
  • 1/2 Cup Parmesan cheese, shredded
  • 1 Cup Shredded Cheddar Cheese (I used Medium Cheddar, but Mild or Sharp works, too!)
  • 1/2 Cup Lite Sour Cream
  • 1/2 tsp Salt
  • 1/4 tsp Ground Black Pepper
  • 1/2 – 3/4 Cup Gluten Free Italian Bread Crumbs
  1. Preheat oven to 375 degrees.
  2. Grease a 2-quart casserole dish; set aside.
  3. In a large skillet, heat the Oil and Butter over medium heat until the butter is melted.
  4. Saute the thinly sliced Squash and Onion until both are soft. Sprinkle with the Salt and Pepper.
  5. Transfer the Squash and Onion to the prepared casserole dish and add the Parmesan, Cheddar and Sour Cream. Mix gently until well combined.
  6. Sprinkle the Bread Crumbs evenly over the top.
  7. Bake for about 30 minutes or until bubbly and the top is a light golden brown.
  8. Serve with a fresh green salad and your favorite protein….pairs lovely with the Maple Glazed Salmon!
Side Dish