Easy Creamy Broccoli & Cheddar Soup ~ Gluten Free

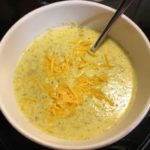
This quick & easy recipe reminds me of my favorite Broccoli-Cheddar Soup from Panera Bread, but without the Gluten 🙂 It’s so fresh and flavorful that I can’t stop at just one bowl! I owe a HUGE “Thank You” to Holly Nilsson @ spendwithpennies.com for sharing the original version of this yummy soup!! I made a few adjustments in order to make it Gluten-Free and allergy-friendly for my family.

Easy Creamy Broccoli & Cheddar Soup ~ Gluten Free
  • 1 Tbsp Butter (unsalted)
  • 1 Small Onion (Chopped)
  • 1/2 Cup Carrots (Diced)
  • 1/2 teaspoon Garlic (minced)
  • 1 Large Head Broccoli (Chopped (about 3 Cups))
  • 2 Cups Chicken Broth (Low Sodium or Regular)
  • 1/2 teaspoon Dried Thyme
  • Salt & Pepper (to taste)
  • 2 Tbsp All-Purpose Gluten Free Flour (I use Bob’s Red Mill 1-to-1 GF Flour)
  • 3/4 Cup Whole Milk
  • 3/4 Cup Skim Milk
  • 1 Cup Sharp Cheddar Cheese (Shredded)
  1. In a large saucepan, melt the Butter over medium-low heat. Once Butter is melted, add the Onions, Carrots and Garlic; cook until the Onions are translucent and soft (about 3-5 minutes).
  2. Add the Broccoli, Chicken Broth and Seasonings to the Onion mixture and cook over low heat until the Broccoli has softened ~ about 15 minutes.
  3. Next, using either an Immersion Blender, Regular Blender or Food Processor, thoroughly blend the cooked Vegetable/Broth mixture; set aside in the large saucepan over Low heat.
  4. Meanwhile, in a small/medium bowl, combine the GF Flour blend and Milks using a whisk to thoroughly blend; Add this mixture to the Vegetable/Broth mixture in the large saucepan.
  5. Increase the temperature to Medium/Medium-Low and bring to a boil, while whisking continuously; once the mixture has thickened (about 5 minutes), remove from heat and add the Shredded Cheddar.
  6. Serve with your favorite GF Bread and Enjoy!
Appetizers, Dinner, Hors d’Oeuvres, Lunch, Main Dish, Snacks, Soup
American


Pasta Primavera in a Lemon-Butter Sauce ~ Gluten Free

Pasta Primavera in a Lemon-Butter Sauce ~ Gluten Free

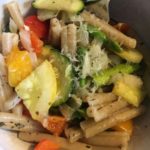
What better way to celebrate Spring than making “Pasta Primavera,” a healthy Spring Vegetable & Pasta dish…after all, “primavera” means ‘spring style’ in Italian 😉 I love this easy and very versatile recipe….I use as many veggies that I can find in my refrigerator before they go bad. Asparagus, squash, broccoli, bell peppers, carrots, zucchini, onions, snow peas…the possibilities are endless! And, the light lemony-butter sauce makes this recipe irresistible 🙂
*The original version of this recipe came from evolvingtable.com – thank you SO much for sharing! I have adjusted the original recipe in order to make it gluten-free and allergy-friendly for my family.

The Pasta:

  • 4 Cups Gluten-Free Pasta, dry (any style is fine)

The Vegetables:

  • 1 lb Asparagus (trim ends and cut into 2″ pieces)
  • 1 large Yellow Squash (quartered lengthwise & cut into bite-size pieces)
  • 1 large Zucchini (quartered lengthwise & cut into bite-size pieces)
  • 2 large Bell Peppers, any color (cut into bite-size pieces)
  • 1 large Vidalia Onion (cut into bite-size pieces)
  • 2-3 Tbsp Olive Oil
  • 1/2-1 tsp Kosher Salt
  • 1/4-1/2 tsp Ground Black Pepper
  • 1 tsp Dried Oregano
  • 1/2 tsp Dried Thyme
  • 1/2 tsp Dried Marjoram
  • 1/2 tsp Dried Basil

The Lemon-Butter Sauce:

  • 4 Tbsp Butter, salted ((1/2 stick))
  • 1 Large Lemon (Zest and juice)
  • 1 1/2 tsp Garlic, minced (I use the already-minced Garlic in a jar)
  • 1/2 Cup Water (reserved from the pasta water)
  • 1 Tbsp Dried Basil (or 1/4 Cup fresh, chopped)
  • 1/2-3/4 Cup Parmesan, grated (fresh is best)
  • 1/2-1 tsp Salt (to taste)

The Pasta:

  1. In a large pot, cook the pasta according to the package instructions for al dente; reserve 1/2 cup pasta water for the sauce before draining the rest of the water; set the pasta aside in a colander & keep the large pot available for cooking the sauce, etc.

The Vegetables:

  1. Preheat oven to 425 degrees.
  2. Line a large baking sheet with foil and lightly spray with non-stick cooking spray; set aside.
  3. While the Pasta is cooking, cut up all of the vegetables into bite-size pieces and place them into a large bowl. *This step can be done ahead of time, if desired (just keep veggies refrigerated until ready to use).
  4. Add the Olive Oil and spices to the vegetables in the bowl and toss to thoroughly coat; spread the veggies evenly onto the prepared baking sheet and bake for 15-18 minutes or until veggies are tender.

The Lemon-Butter Sauce:

  1. Using the same pot that you used to cook the pasta, add the butter, lemon zest, lemon juice and garlic; cook over medium-low heat until the butter is completely melted and the garlic becomes fragrant (about 2 minutes).
  2. Add the cooked Pasta, the reserved Pasta Water and the roasted vegetables to the Lemon-Butter mixture, tossing until thoroughly coated.
  3. Next, add the Basil, 1/2 cup Parmesan and Salt (to taste); toss to combine.
  4. Serve with freshly-grated Parmesan and fresh chopped Basil, if desired.
  5. Oh, so yummy! Enjoy 🙂
Dinner, Lunch, Main Dish
American, Italian


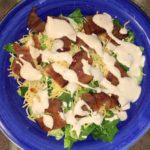
Chopped Salad with Barbecue Ranch Dressing

Chopped Salad with Barbecue Ranch Dressing

Oh my gosh! I could eat this salad every day! The combination of the fresh, crunchy lettuce, the salty bacon pieces and the slightly sweet BBQ Ranch Dressing is something that words just cannot accurately describe!! I am forever indebted to Ree Drummond (aka: “The Pioneer Woman”) for sharing the original recipe of this awesome salad (“Cowboy Chopped Salad”), which I have made a few minor adjustments to to make it allergy-friendly and GF for my family 🙂 Enjoy!!!

The Bacon:

  • 12-15 Slices Thick or Regular Bacon (Cooked and chopped into bite-size pieces)

The Barbecue Ranch Dressing:

  • 1 Cup Mayonnaise (I use Hellmann’s)
  • 1/2 Cup Lite or Regular Sour Cream (I use Daisy Lite Sour Cream)
  • 1/4 Cup Barbecue Sauce (I use Sweet Baby Ray’s )
  • 3 Tbsp Dried Parsley
  • 1/2 tsp Garlic, chopped
  • 1 pinch Kosher Salt (to taste)
  • 1 pinch Ground Black Pepper (to taste)
  • 1/2 – 3/4 Cup Buttermilk (I make my own by pouring 1 Tbsp White Vinegar into a 1 Cup measuring cup and adding enough Whole Milk to fill the rest; gently stir and let rest for 5 minutes.)

The Salad:

  • 1 Large Head of Lettuce (I use Romaine Lettuce, but Iceburg, Green or Red Leaf Lettuce, etc. is great, too)
  • 1 Cup Grape Tomatoes (halved)
  • 1-2 Chopped Green Onions/Scallions (I use both the green and white parts)
  • 3 Cups Shredded Cheddar Cheese
  • Pico de Gallo (Topping; I use store-bought once my garden has gone dormant)
  1. While the bacon is cooking, begin making the BBQ Ranch Dressing.

The BBQ Ranch Dressing:

  1. In a medium-size bowl, whisk together all of the dressing ingredients, except for the Buttermilk.
  2. Once all of the ingredients are thoroughly combined, add the Buttermilk 1/4 cup at a time until desired consistency is reached. Reserve any leftover Buttermilk in the refrigerator to add to the dressing later, as it will thicken over time.
  3. Cover and refrigerate the dressing until ready to use.

The Salad:

  1. In a very large bowl, place all of the salad ingredients, except for the Pico de Gallo, and gently toss to mix (reserve some of the Cheese and Onions for toppings).

Putting it All Together:

  1. To serve the salad, you can set up a station with the large salad bowl as center stage with the Bacon served in a side bowl (for non-bacon-eaters), as well as the Pico de Gallo and any other toppings that you want to serve separately. You can also serve the BBQ Ranch Dressing separately or sparingly toss on the salad, so individuals can add more if desired 😉
Dinner, Lunch, Main Dish, Salads, Side Dish, Snacks


Stovetop Chicken in an Indian Curry Sauce

Stovetop Chicken in an Indian Curry Sauce

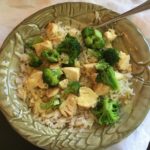
My mouth was watering just smelling this sweet and savory light Indian Curry Sauce simmering on the stove! The spices, cream and honey meld together perfectly into the most fragrant and delectable sauce that I have ever tasted 🙂 This yummy sauce pairs nicely with just about any vegetable, protein and/or starch. I hope you enjoy it!

The Curry Sauce:

  • 1/4 Cup Vegetable OIl (I used Canola Oil)
  • 1 Medium Onion, Finely Chopped (I used a Vidalia Onion)
  • 3 tsp Minced Garlic (I use the already minced Garlic in a jar)
  • 1/2 tsp Ground Ginger
  • 2 Tbsp Curry Powder (I used Madras Curry for a little bit more heat)
  • 3 1/2 Cups Chicken Broth
  • 1 Cup Heavy Cream (You can also use Half & Half or Whole MIlk)
  • 1 Tbsp Gluten Free Cornstarch
  • 2 heaping tsp Honey
  • 2-3 Pinches Salt
  • 2-3 Pinches Ground Black Pepper

The Chicken:

  • 4 Boneless, Skinless Chicken Breasts (Rinsed, trimmed and patted dry with a paper towel)
  • 1-2 Tbsp Salted Butter
  • 1-2 Tbsp Canola Oil
  • Salt & Pepper (Sprinkled over both sides of Chicken)

Making the Curry Sauce:

  1. Gather ingredients.
  2. In a medium-sized heavy saucepan, heat the Canola Oil over Medium heat.
  3. Add the finely chopped onion and cook for about 5 minutes, or until onion is translucent.
  4. Stir in the Garlic, Ginger and Curry and cook until fragrant (1-2 minutes).
  5. Add the Chicken Broth and stir well. Reduce heat to Low and simmer for about 20 minutes to reduce the mixture a little.
  6. While the broth is reducing, whisk the Cream, Cornstarch and Honey together in a small bowl until completely blended and smooth.
  7. Slowly whisk the Cream mixture into the Chicken Broth mixture, combining the ingredients completely. Simmer for about 5 minutes. Add a few pinches of Salt and Pepper to taste.
  8. Keep the sauce warm while cooking the chicken.

Cooking the Stovetop Chicken:

  1. In a large skillet, heat the Butter and Oil over medium-low heat until the butter is completely melted and bubbling.
  2. Add the Chicken Breasts, sprinkling with Salt & Pepper on both sides. Cook on each side for about 5-7 minutes per side, making sure that both sides are a light golden brown (internal temperature should be 165 degrees)
  3. Once the Chicken Breasts are nicely browned on both sides, use a ladle to spoon several scoops of sauce over the Chicken Breasts in the skillet. Turn the breasts over to thoroughly coat in the sauce.
  4. Serve the Chicken Breasts whole with your favorite side and vegetable and more sauce drizzled over the top…or cut up into bite-sized pieces and serve over Rice and with Steamed Broccoli and more yummy sauce!!!
    Enjoy!
Dinner, Main Dish
Indian