Easy Creamy Broccoli & Cheddar Soup ~ Gluten Free

This quick & easy recipe reminds me of my favorite Broccoli-Cheddar Soup from Panera Bread, but without the Gluten 🙂 It’s so fresh and flavorful that I can’t stop at just one bowl! I owe a HUGE “Thank You” to Holly Nilsson @ spendwithpennies.com for sharing the original version of this yummy soup!! I made a few adjustments in order to make it Gluten-Free and allergy-friendly for my family.

Easy Creamy Broccoli & Cheddar Soup ~ Gluten Free

  • 1 Tbsp Butter (unsalted)
  • 1 Small Onion (Chopped)
  • 1/2 Cup Carrots (Diced)
  • 1/2 teaspoon Garlic (minced)
  • 1 Large Head Broccoli (Chopped (about 3 Cups))
  • 2 Cups Chicken Broth (Low Sodium or Regular)
  • 1/2 teaspoon Dried Thyme
  • Salt & Pepper (to taste)
  • 2 Tbsp All-Purpose Gluten Free Flour (I use Bob’s Red Mill 1-to-1 GF Flour)
  • 3/4 Cup Whole Milk
  • 3/4 Cup Skim Milk
  • 1 Cup Sharp Cheddar Cheese (Shredded)
  1. In a large saucepan, melt the Butter over medium-low heat. Once Butter is melted, add the Onions, Carrots and Garlic; cook until the Onions are translucent and soft (about 3-5 minutes).
  2. Add the Broccoli, Chicken Broth and Seasonings to the Onion mixture and cook over low heat until the Broccoli has softened ~ about 15 minutes.
  3. Next, using either an Immersion Blender, Regular Blender or Food Processor, thoroughly blend the cooked Vegetable/Broth mixture; set aside in the large saucepan over Low heat.
  4. Meanwhile, in a small/medium bowl, combine the GF Flour blend and Milks using a whisk to thoroughly blend; Add this mixture to the Vegetable/Broth mixture in the large saucepan.
  5. Increase the temperature to Medium/Medium-Low and bring to a boil, while whisking continuously; once the mixture has thickened (about 5 minutes), remove from heat and add the Shredded Cheddar.
  6. Serve with your favorite GF Bread and Enjoy!
Appetizers, Dinner, Hors d’Oeuvres, Lunch, Main Dish, Snacks, Soup
American


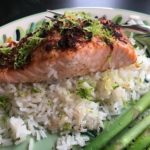
Quick & Easy Lemon-Garlic Salmon ~ Yum!

Quick & Easy Lemon-Garlic Salmon ~ Yum!

As many of you already know, Salmon is one of my family’s most-requested meals…so, I am always looking for new Salmon recipes to try. And, this one is a winner! It’s not only delicious and nutritious, but it’s SO quick and easy to prepare. I hope you enjoy it as much as we do 🙂
A huge “Thank You” to wellplated.com for posting the original version of this wonderful recipe. Please note: I have made substitutions and changes to the original recipe to suit my family.

  • 1 2-2.5 lbs Salmon Fillets w/ Skin (I purchase a whole fillet and bake it in tact)
  • 4 Tbsp Salted Butter, softened ((1/2 stick))
  • 1 Large Lemon (Zest & Juice)
  • 2-3 Heaping Teaspoons Garlic, minced (I use the already minced Garlic in a jar)
  • 2 tsp Dried Parsley
  • 1-2 large pinches Black Pepper
  • 1/2 tsp Salt
  1. Preheat oven to 400 degrees.
  2. Line a baking sheet with aluminum foil and spray with non-stick cooking spray.
  3. Rinse the Salmon in cold water, pat dry with paper towels and place in the center of the prepared baking sheet, skin side down; set aside.
  4. In a small bowl, mash together the Softened Butter, Lemon Zest, Garlic, Parsley, Pepper and Salt until well-combined.
  5. Using a butter knife, rubber spatula or your fingers, spread the Butter paste over the Salmon Fillets; Note: I usually end up using my fingers to spread the Butter mixture ~ the warmth of your skin helps spread the butter more easily.
  6. Next, squeeze the Lemon Juice evenly over the Salmon Fillets and sprinkle with extra salt and pepper, if desired.
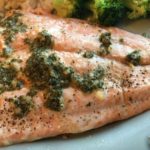
  7. Bake in pre-heated oven on the center rack for 15-20 minutes, depending on the thickness of your fillets. The fillets will flake apart easily with a fork when done and should measure 145 degrees.
  8. Serve with wedges of fresh lemon and sprinkle with extra Parsley. Enjoy!
Dinner, Main Dish


Instant Pot Turkey Chili

Instant Pot Turkey Chili

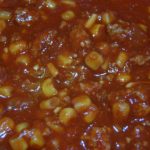
I don’t think that there is anything better than a hot bowl of Chili and fresh Corn Bread on a cold afternoon! Plus, making it in an Instant Pot brings this delicious Chili to fruition in about 30 minutes (prep and cook time!) I hope you enjoy this yummy Turkey Chili as much as we do 🙂
A HUGE “Thank You” to Olena @ ifoodreal.com for sharing the original version of this wonderful recipe – due to multiple food allergies I had to make some changes and omissions to her recipe.

  • 1-2 Tbsp Canola Oil
  • 2 lbs Ground Turkey
  • 2 Cups Beef Broth (you can use any other broth desired)
  • 3 tsp Garlic, minced (I use the garlic in a jar, found in the produce section)
  • 1/2 Large Vidalia Onion, chopped
  • 1 15 oz. Can Corn (If you like Corn, use 2 cans)
  • 4 Tbsp Chili Powder
  • 2 tsp Ground Cumin
  • 2 tsp Dried Oregano, Chopped
  • 1 tsp Paprika
  • 1 tsp Salt
  • 2 15 oz. Can Tomato Sauce
  • 1 12 oz. Can Tomato Paste (add more if you like a really thick chili)
  1. Gather all ingredients.
  2. In a 6-qt (or 8-qt) Instant Pot, add the 1-2 Tbsp Canola Oil and put in the “Saute” mode until the oil starts to shimmer.
  3. Swirl the Oil around to coat the bottom of the pot and add the Ground Turkey, breaking it up into smaller pieces; cook for 4-5 minutes (it does not have to cook completely at this stage).
  4. Add the Broth and press the “Cancel” button to turn the Instant Pot off.
  5. Next, add the Garlic, Onion, Corn, all of the Spices, Tomato Sauce and Tomato Paste: do NOT stir! (the bottom will Burn if you stir).
  6. Place the lid on the Instant Pot and seal; press the “Pressure Cook” button and make sure it’s on “High” – set for 15 minutes.
  7. After the 15 minutes cook time is up, release the pressure by turning or pressing down the Quick Release valve (this will take about 2-3 minutes)
  8. Once the Instant Pot has de-pressurized, remove the lid and stir thoroughly.
  9. Serve hot with your favorite toppings and some fresh Corn Bread or crusty French Bread 🙂

Store any leftovers in a airtight container in the refrigerator for 4-5 days.

You can also freeze fully cooked and cooled chili in an airtight container for up to 3 months; thaw on the stovetop on Low.

Dinner, Lunch, Main Dish, Soup, Stew


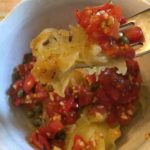
Spaghetti Squash with Tomatoes & Capers

Spaghetti Squash with Tomatoes & Capers

This dish is so Fresh and easy to make with vegetables right out of your garden or kitchen! If I do not have any Spaghetti Squash ready in my garden, I substitute Summer Squash, Zucchini, Acorn Squash, Baking Potato or a mild Fish, such as Flounder. I love this recipe, because it’s so versatile and delicious no matter what you pair with the sauteed Capers and Tomatoes! I hope you enjoy this dish as much as we do 🙂

  • 1 Large Spaghetti Squash
  • 2 tsp Garlic, minced
  • 2 Tbsp olive oil
  • 2 Tbsp Capers
  • 1 1/2 Cups Tomatoes, chopped (with juices)
  • 2 tsp Dried Oregano (or 2 Tbsp Fresh Oregano, chopped)
  • Table Salt (to taste)
  • Ground Black Pepper (to taste)

Baking the Spaghetti Squash:

  1. Preheat Oven to 400 degrees. Place rack in center position.
  2. Cut the Spaghetti Squash in half, lengthwise, scrape out the seeds and loose stringy innards and place facedown in a deep baking dish.
  3. Add enough water to cover the bottom of the dish by about 1/2 inch.
  4. Bake for about 35-40 minutes, or until the squash is soft (depends on the size of the squash).
  5. Remove the squash from the oven and set aside to cool enough to handle.
  6. Reduce oven temperature to 250 degrees.
  7. When the squash is cool enough to handle, hold it over a large, ovenproof bowl/dish and scrape out the flesh from the top to the bottom using the tines of a fork. Cover the dish with foil and place it in the oven to keep hot while you prepare the topping.

Making the Caper & Tomato Topping:

  1. In a large, nonstick skillet, heat the Olive Oil and Garlic over Medium Heat for about 2 minutes.
  2. Next, add the Capers, Tomatoes and Oregano and continue cooking for another 2 minutes.
  3. Remove from heat and add a few pinches of Salt and Pepper to taste.
  4. Spoon desired amount over the prepared Spaghetti Squash and watch it disappear!
Appetizers, Dinner, Hors d’Oeuvres, Main Dish, Salads, Side Dish


Corn & Tomato Salsa

Corn & Tomato Salsa

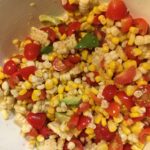
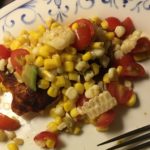
Are you wondering what to do with the 2,387 tomatoes in your garden?!? 😉 Well, here is a wonderful fresh Salsa that’s quick and easy and oh, so fresh and healthy!!! I serve it over Salmon, Chicken, Baked Potatoes and Fresh Green Leaf Lettuce…the possibilities are endless! Enjoy 🙂

  • 1 – 1 1/2 Cup Fresh Tomatoes (Cut into bite-size pieces; )
  • 1 – 1 1/2 Cup Fresh Corn (Cut off of the cob; can use canned corn, if desired)
  • 1 Large Avocado (Cut into bite-size pieces)
  • 1 Large Lime (Juice and Zest)
  • Table Salt (to taste)
  • Ground Black Pepper (to taste)
  • Chile Powder (to taste)
  • 1 Small Vidalia Onion ((optional) chopped)
  1. Add all of the chopped ingredients to a large mixing bowl and gently toss with the Lime Juice and seasonings to taste. If not serving immediately, wait to cut up the Avocado right before serving so it doesn’t brown. Cover tightly with plastic and refrigerate until ready to serve.
  2. So yummy over Salmon!
Appetizers, Hors d’Oeuvres, Lunch, Salads, Side Dish, Snacks


Copycat Chipotle Honey Vinaigrette Salad Dressing

Copycat Chipotle Honey Vinaigrette Salad Dressing

Chipotle’s Honey Vinaigrette Salad Dressing is my husband’s all-time FAVORITE dressing/dip! But, now that we no longer live near a Chipotle restaurant, I decided to make it myself 😉 My husband stated that he likes it even better than Chipotle’s, because he can really taste the Honey! He uses it as a salad dressing, dip, sauce, potato topping, etc. I hope you enjoy it as much as he does 🙂

  • 2-3 Small Chipotle Peppers in Adobo Sauce
  • 3/8 Cup Vinegar (I use White Wine Vinegar for its milder taste, but you can use Red, Apple Cider, Balsamic or Rice Wine Vinegar)
  • 3/4 Cup Canola Oil
  • 1 tsp minced garlic (I use the Minced Garlic in a jar)
  • 3 heaping Tbsp Honey (I use 100% Pure Honey)
  • 1 1/2 tsp Salt
  • 1/2 tsp Ground Black Pepper
  • 1/2 tsp Dried Oregano
  1. Gather all the ingredients.
  2. Using a blender or food processor, dump all of the ingredients into the blender/food processor and puree until smooth.
  3. Pour dressing into desired container and serve. Refrigerate any leftovers. Enjoy 🙂
Appetizers, Dinner, Hors d’Oeuvres, Lunch, Main Dish, Salads
American, Mexican


Salmon with Chile-Lime Rub

Salmon with Chile-Lime Rub

This recipe is SO quick, easy and delicious…you’ll find yourself making it often 😉 You can bake it or grill it, serve it hot with your favorite sides or cold on a fresh bed of lettuce for lunch or dinner…the possibilities are endless! This recipe was inspired by Ina Garten’s “Salmon Tacos,” which you can find that recipe on my website. Thank you very much for sharing this wonderful recipe, Ina Garten 🙂

  • 1-2 lbs Fresh Salmon
  • 2-3 tsp Chile Powder
  • 2 tsp Freshly Grated Lime Zest (about 2 Limes)
  • 1/4-1/2 tsp Salt
  • 3 Tbsp Fresh Lime Juice (about 2 Limes)
  1. Preheat oven to 425 degrees.
  2. Cover a cookie/baking sheet with foil and spray with non-stick cooking spray. Set aside.
  3. Rinse and pat dry the Salmon fillets. Place them on the baking sheet, skin side down, and brush with the fresh Lime Juice, thoroughly coating the top and sides.
  4. In a small bowl, combine the Lime Zest, Chile Powder and Salt. MIx well and sprinkle onto the Salmon Fillets, covering them well.
  5. Bake for 15-18 minutes, depending on thickness of fillets.
  6. Top with fresh Lime Juice and grated Lime Zest. Serve with your favorite sides. Enjoy!
Dinner, Lunch, Main Dish


Quick & Easy Gluten Free Cinnamon Sugar Cake Donuts

Quick & Easy Gluten Free Cinnamon Sugar Cake Donuts

Oh my gosh! These donuts (aka: doughnuts) are the BEST Gluten Free Donuts out there! They’re not only scrumptious, but quick and easy to make!!! All you need is a few ingredients (most of which you will already have in your Kitchen), about 30 minutes and you will have delicious, moist doughnuts that aren’t heavy, dry or gritty 🙂
A HUGE thank you to www.loveandzest.com for sharing this wonderful recipe!

Batter for the Donuts

  • 4 Tbsp Unsalted Butter (Melted)
  • 1/3 Cup Pure Maple Syrup
  • 1 tsp Vanilla Extract
  • 1 Large Egg (Beaten)
  • 1 tsp Baking Powder
  • 1/4 tsp Salt
  • 1/2 Cup Rice Milk (I use original, but Vanilla is fine; You may substitute with Unsweetened Almond or Oat Milk)
  • 1 Cup Gluten Free All-Purpose Flour, sifted (I use King Arthur All-Purpose Measure for Measure)

Cinnamon Sugar Coating

  • 1/2 Cup Granulated Sugar
  • 1-2 Tbsp Cinnamon (If you don’t care for a lot of cinnamon, start with 1 Tbsp)
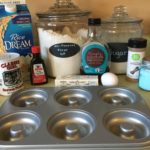
  1. Gather the ingredients.
  2. Preheat oven to 425 degrees.
  3. Spray a 6-count non-stick donut pan with non-stick cooking spray. Set aside.
  4. In a large microwave-proof mixing bowl (I use an 8-cup glass measuring bowl with a pour spout for easy transfer of batter to donut pan), melt the butter in the microwave.
  5. Using a whisk, stir the Maple Syrup and Vanilla Extract into the melted butter.
  6. Add the beaten egg and mix until well blended.
  7. Next, mix in the Rice Milk , Salt and Baking Powder until Baking Powder is completely mixed in.
  8. Whisk in the sifted GF Flour and mix until completely blended (I sift the flour directly into the batter).
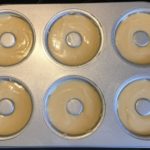
  9. Spoon or pour the batter into the greased Donut pan, spreading evenly in each well.
  10. Bake for 10 minutes.
  11. Remove and let sit in pan for about 5 minutes to cool slightly.

Making the Cinnamon Sugar Coating

  1. While the donuts are cooling, pour the sugar and cinnamon into a large resealable plastic baggie and mix well.
  2. When the donuts are slightly cooled, turn the donut pan upside down onto a wire rack and thump the bottom a couple of times to remove the donuts.
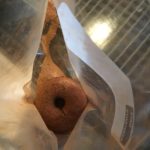
  3. Add a donut, one-at-a-time, into the resealable baggie and gently shake in the sugar mixture until completely coated.
  4. Place the finished donuts on a wire rack to let them set/dry. As they cool, the donuts absorb the cinnamon, so try to refrain from pouncing on the donuts as soon as you pull each one out of the baggie…they get better and better as they cool. Enjoy!
Breakfast, Desserts, Snacks


Easy Homemade Beef & Chicken Chili (No Beans; Gluten-Free & Keto Friendly)

Easy Homemade Beef & Chicken Chili (No Beans; Gluten-Free & Keto Friendly)

There is nothing better than a huge pot of Homemade Chili simmering on the stove! I make this Beef & Chicken Chili just about every other weekend throughout the Fall and Winter seasons. It’s so easy to make and the mix of chili spices is delectable! And, it’s Gluten-Free and Keto Friendly! Enjoy 🙂

  • 2 lbs Lean Ground Beef
  • 2 lbs Lean Ground Chicken
  • 1 Large Onion, diced (I use Vidalia)
  • 1 Tablespoon Olive Oil
  • 5 Tablespoons Chili Powder
  • 4 Tablespoons Ground Cumin
  • 2 Tablespoons Garlic Powder
  • 2 teaspoons Salt
  • 1 teaspoon Ground Pepper
  • 1/2 teaspoon Cayenne Pepper (Increase by 1/8 teaspoon at a time of you want a spicier chili)
  • 1 12 oz. Canned Tomato Paste
  • 1 Cup Beef or Chicken Broth (I usually use Beef Broth)
  • 1 Large Fresh Tomato, diced (Or canned (Otional))
  • Shredded Cheddar Cheese (Topping)
  • Sour Cream (Topping)
  • Green Onions (Topping)

The Meats

  1. Gather Ingredients
  2. In a large pot, heat the oil over medium to medium-high heat for about 2-3 minutes. Add the chopped onions and cook until translucent, about 5 minutes.
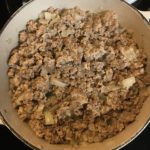
  3. Add the ground meats to the pot and cook until browned (about 8-10 minutes). Lower temperature to medium-low.

The Spices

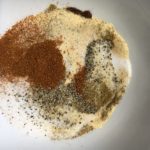
  1. In a medium sized bowl, add all of the spices and blend well.
  2. Next, add the blended spices to the meat mixture. Mix well.

The Broth and Tomato

  1. Add the tomato paste, diced tomato and broth to the pot. Mix well.
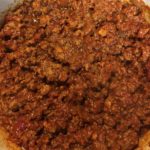
  2. Cook for 20-30 minutes, stirring occasionally.
  3. Serve with shredded cheddar cheese, sour cream, onions, etc.
Lunch, Main Dish
Mexican