Gluten Free Lemon Pound Cake

Gluten Free Lemon Pound Cake

This Lemon Pound Cake turns out moist, tasty and delicious every time! Made with Fresh Lemon Juice and Lemon Zest puts this GF Lemon Pound Cake over the top! I have learned to make TWO cakes, since my family tends to inhale the first one within a few hours 😉
A big “Thank You” to America’s Test Kitchen for creating this recipe 🙂

Cake Ingredients:

  • 1 1/4 Cups King Arthur Gluten Free Multi-Purpose Flour (Sifted)
  • 1 tsp Baking Powder
  • 1/2 tsp Salt
  • 1/4 tsp Xanthan Gum
  • 1 1/4 Cup Granulated Sugar
  • 2 Tbsp Lemon Zest (about 2 lemons)
  • 1 Tbsp Lemon Juice (from the Lemons used for Zest)
  • 4 Large Eggs
  • 1/2 Cup Cream Cheese (softened)
  • 1 1/2 tsp Vanilla Extract
  • 1/2 Cup Unsalted Butter (Melted)

Glaze Ingredients:

  • 1/2 Cup Powdered Sugar
  • 2 tsp Lemon Juice

The Cake Instructions:

  1. Preheat oven to 350 degrees.
  2. Grease and flour an 8 1/2″ x 4 1/2″ loaf pan. Set aside.
  3. In a large mixing bowl, whisk the Flour, Baking Powder, Salt and Xanthan Gum until blended. Set aside.
  4. In a food processor, combine the Granulated Sugar and Lemon Zest until thoroughly mixed (about 7 pulses).
  5. Next, add the Lemon Juice, Eggs, Softened Cream Cheese and Vanilla Extract to the Sugar mixture. Process until completely blended (about 20-30 seconds)
  6. With the Food Processor running on Low, slowly drizzle the melted Butter into the Cream Cheese mixture. Continue processing until mixed completely (about 30-40 seconds).
  7. Add this Cream Cheese mixture to the Flour mixture in the large bowl. Whisk until thoroughly blended and smooth.
  8. Pour the batter into the prepared loaf pan. Bake for 15 minutes at 350 degrees. Decrease the temperature to 325 degrees and bake for an additional 35-40 minutes, or until cake is a light golden brown and toothpick inserted into the center comes out clean.
  9. Let cool in the pan on a wire rack for about 10 minutes. Remove cake from pan and continue cooling on the wire rack until completely cooled (about 1 1/2 hours).

The Glaze Instructions:

  1. In a small bowl, whisk together the Powdered Sugar and Lemon Juice until smooth, adding more sugar if not thick enough.

Putting it all Together:

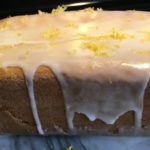
  1. Once the cake is completely cooled, drizzle the Glaze over the top of the cake, letting it run down the sides. Sprinkle fresh Lemon Zest on top and let Glaze set for about 15 minutes before serving. Enjoy 🙂
Store cake at room temperature in a large plastic baggie, sealed tightly.

Breakfast, Desserts, Snacks, Sweet Breads


Hot Chocolate Brownie Bites (Gluten Free)

Hot Chocolate Brownie Bites (Gluten Free)

These little Hot Chocolate Brownie Bites are the BEST Gluten Free cookies that I have ever tasted!!! I thought I would never say this, but I actually prefer these without icing! They are, of course, delicious and quite sinful with or without the icing 🙂

Ingredients for the Cookie

  • 1/2 Cup Butter, Unsalted (1 Stick)
  • 1 1/2 Cups Semi-Sweet Chocolate Chips (I used “Enjoy Life” Mini Semi-Sweet Chocolate Chips (allergy friendly), but Nestle is just fine!)
  • 1 1/2 Cups Gluten Free All-Purpose Flour (I used “King Arthur” Cup-for-Cup GF All-Purpose Flour)
  • 1/4 Cup Unsweetened Cocoa Powder (I used Hershey’s Cocoa (100% Cacao))
  • 1 1/2 tsp Baking Powder
  • 1/4 tsp Salt
  • 1 1/4 Cup Light Brown Sugar
  • 3 Large Eggs
  • 1 1/2 tsp Vanilla Extract

Ingredients for the Icing

  • 4 Tablespoons Unsalted Butter, Melted
  • 2 Cups Confectioner’s Sugar
  • 1/4 Cup Unsweetened Cocoa Powder (Hershey’s Cocoa)
  • 1/4 Cup Hot Water (Hot Water from the tap…not boiling)
  • 1/2 tsp Vanila Extract
  • Decorative Sprinkles

Making the Cookies

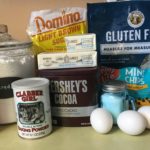
  1. Gather the ingredients.
  2. In a small heavy pot, melt the 1/2 Cup Unsalted Butter on Low. Once the butter is melted, add the 1 1/2 Cups Semi-Sweet Chocolate Morsels and continue heating over low until the chocolate is melted. Mixture should be smooth and creamy. Remove from heat.
  3. Meanwhile, in a medium-sized bowl, combine the dry ingredients (Flour, Cocoa Powder, Baking Powder and Salt). Mix well and set aside.
  4. Either using a Standing or Handheld Mixer, beat the Eggs, Brown Sugar and Vanilla Extract on low until blended.
  5. Add the cooled Chocolate mixture to the Egg mixture and mix on Low until blended.
  6. Next, add the Flour mixture 1/2 Cup at a time to the Wet Mixture and beat on Low until well blended. The dough will be thick, like Brownies. Cover the bowl with foil or plastic wrap and refrigerate for 3-4 hours.
  7. Once the dough has “hardened” to the consistency of modeling clay, remove the dough from the refrigerator.
  8. Preheat oven to 325 degrees.
  9. Line 1-2 cookie sheets with Parchment Paper or Silicone Baking Mats and set aside.
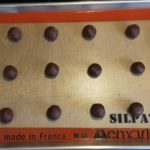
  10. Using a Small Cookie Scoop, scoop out dough and roll into balls. Place them 2″ apart on the prepared cookie sheets.
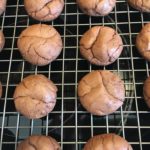
  11. Bake for 10-12 minutes or until they start to form cracks on their tops.
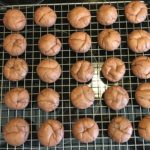
  12. Let cookies sit on cookie sheet for a few minutes before transferring them to a wire rack to cool completely.

Making the Icing

  1. While the cookies are cooling, combine the 4 Tablespoons melted Butter, 1/4 Cup Cocoa Powder, 1/4 Cup Hot Water, Vanilla Extract and 2 Cups Confectioner’s Sugar. Mix on Low until well blended. If mixture is too thick, add a little bit of water (1 Tablespoon at a time) until icing is a little runny.
  2. Next, keeping the cooled cookies on the cooling rack, place rack on a cookie sheet or paper towels to catch the run-off icing.
  3. Spoon desired amount of icing onto 2-3 cookies at a time and then add sprinkles….icing sets up quickly, so only apply icing to a few cookies at a time.
  4. Continue applying the icing and decorative sprinkles to the rest of the cookies until done.
    Enjoy!

Note: Instead of adding Icing to these cookies, try rolling them in Confectioner’s Sugar before baking or leave plain 🙂

Desserts, Snacks