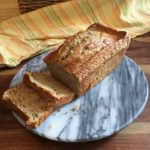
Easy Gluten Free Cinnamon-Sugar Coffee Cake

Easy Gluten Free Cinnamon-Sugar Coffee Cake

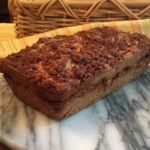
This Gluten Free Coffee Cake is SO moist, tasty and easy to make! It’s the perfect afternoon snack, dessert or breakfast for those weekend sleepovers. An instant hit with our family and friends! 🙂
*Thank You to America’s Test Kitchen for sharing this wonderful recipe!!

The Crumb Topping

  • 1/2 Cup Unsalted Butter, Melted (1 Stick or 8 Tbsp)
  • 1/3 Cup Granulated Sugar
  • 1/3 Cup Dark Brown Sugar (Packed)
  • 1 Large Egg Yolk
  • 1/8 tsp Salt
  • 3/4 tsp Cinnamon
  • 3/4 Cup + 1/3 Cup All-Purpose Gluten Free Flour, Sifted (I use Better Batter GF Multi-Purpose Flour)

The Cake

  • 3/4 Cup + 1/3 Cup All-Purpose GF Flour, Sifted (I use Better Batter GF Multi-Purpose Flour)
  • 1/2 Cup Granulated Sugar
  • 1/4 tsp Salt
  • 1/4 tsp Xanthan Gum (use ONLY if your GF Flour Blend doesn’t contain any; Better Batter contains Xanthan Gum, so I do not add it )
  • 1/2 tsp Baking Soda
  • 6 Tbsp Butter, Unsalted (Softened & Cut Into 6 Pieces)
  • 1/2 Cup Sour Cream
  • 2 Large Eggs
  • 1 Large Egg Yolk
  • 1 tsp Vanilla Extract
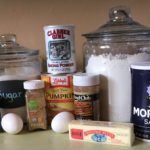
  1. Gather the ingredients.
  2. Spray an 8″ x 8″ baking pan with non-stick cooking spray. Next, fold a 16″ length of Parchment Paper to a width of 7″ and fit it into the baking pan, so that the excess hangs over the edges for easy removal of the cake. Set aside.

Making the topping:

  1. In a small sauce pan, melt the butter over low heat. Once completely melted, remove from heat and let cool slightly.
  2. Using a whisk, mix in the sugars, salt, cinnamon and egg yolk to the melted butter, thoroughly mixing.
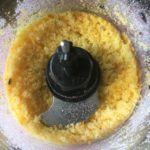
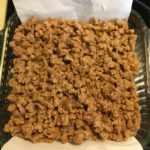
  3. Add the GF Flour to the butter mixture, blending well. The mixture will look like ground meat. Set aside.

Making the Cake:

  1. Place one of your oven racks in the upper-middle position of the oven and preheat oven to 325 degrees.
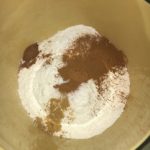
  2. In a stand mixer, using the paddle attachment, mix the GF Flour, Granulated Sugar, Salt, Xanthan Gum (if needed) and Baking Soda on low until completely blended.
  3. Next, add the Butter to the flour mixture, one piece at a time, mixing on low until butter pieces are no longer visible – mixture will resemble coarse sand.
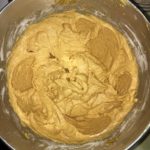
  4. Add the Sour Cream, Eggs, Yolk and Vanilla to the Flour mixture and mix on medium-high until batter is light and fluffy.

Putting it Together:

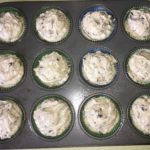
  1. Scrape the batter into the prepared baking pan and smooth the top.
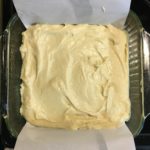
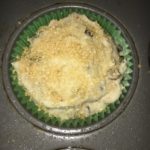
  2. Using your hands, break the Topping Mixture into large pea-sized pieces and sprinkle over the top of the batter to completely cover.
  3. Bake for 35-45 minutes, rotating the pan halfway through baking. It’s done when the middle is no longer jiggly and a wooden toothpick inserted into the middle comes out clean.
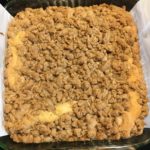
  4. Let cool in the pan for 30 minutes before removing, using the excess Parchment Paper to lift and pull the cake out.
  5. Place on a platter or cutting board to cut and serve. Enjoy!
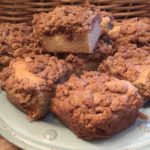
**This cake stores well in an air-tight container for about 3 days.

***A HUGE “Thank You” to America’s Test Kitchen for sharing this wonderful recipe!!! 🙂
Breakfast, Desserts, Snacks


Easy 3-Ingredient Candied Cashews

Easy 3-Ingredient Candied Cashews

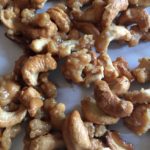
This is the easiest and yummiest recipe for Candied Cashews!!! Only 3 ingredients, about 15 minutes and these delicious morsels are ready to enjoy…..well, you have to wait a few minutes for them to cool before you pounce on them! These are perfect for snacking, giving as gifts or topping your favorite ice cream 🙂
A BIG “Thank You” to www.saltandlavender.com for sharing this wonderful treat!!!

  • 2 Tbsp Salted Butter
  • 1 Cup Granulated Sugar
  • 2 Cups Cashews (I used Lightly Salted)
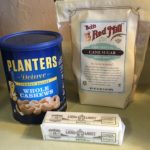
  1. Gather the ingredients.
  2. In a medium to large nonstick skillet, melt the butter over medium-low heat.
  3. Once the butter is melted, add the sugar and cashews.
  4. Cook over low to medium-low heat until sugar has completely melted, stirring often to completely coat the cashews and to prevent mixture from burning.
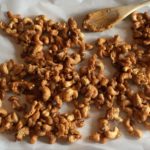
  5. Turn out onto a sheet of parchment paper to let cool.
  6. Enjoy as a snack, as a topping on ice cream or mixed in with your favorite yogurt…or give as a special gift!
Desserts, Snacks


Butter Cookie Chocolate Batons (Gluten Free)

Butter Cookie Chocolate Batons (Gluten Free)

I have been making these yummy cookies with my children for about 20 years and they are definitely one of our favorites. When our children were younger, they loved squeezing the dough into batons and dipping them in the chocolate and sprinkles! The cookie dough is like a shortbread butter cookie. Combined with the melted semi-sweet chocolate and non-pareils makes them irresistible. I hope you enjoy making these with your little (and grown) ones as much as I did and still do 🙂

Equipment Needed:

  • 1 Stand or handheld Mixer
  • 1-2 Large Mixing Bowls
  • 1-2 Cookie Sheets
  • 1 Large Star Tip
  • 1 Pastry Bag (I used a Sturdy Disposable one for easier cleanup)
  • 1 Small Heavy Saucepan
  • 1-2 Cooling Racks

Cookie Ingredients:

  • 1 Cup Butter, softened
  • 1 Cup Granulated Sugar
  • 1 Large Egg
  • 1 Egg Yolk
  • 2 teaspoons Vanilla Extract
  • 2 1/2 Cups Gluten Free All-Purpose Flour (I used King Arthur’s Gluten Free All-Purpose Flour)
  • 1 teaspoon Baking Powder
  • 1/4 teaspoon Salt

Chocolate Dip

  • 1 Cup Semi-Sweet Chocolate Chips
  • 4 Tablespoons Butter, salted
  • 2 Tablespoons Milk (I used Skim, but any % is fine)
  • Colored Sprinkles (Non Pareils)

Getting Ready!

  1. Preheat oven to 350 degrees
  2. Line 1-2 cookie sheets with a silpat cooking mat or parchment paper. Set aside.
  3. Gather your ingredients.

Making the Cookie Dough

  1. Cream together the softened butter and sugar in a stand or handheld mixer ~ about 2-3 minutes. Scrape sides.
  2. Add the whole egg and yolk to the butter mixture one at a time ~ mix for 1-2 minutes.
  3. Stir in vanilla extract until just blended.
  4. In a medium or large mixing bowl, combine the GF flour, salt and baking powder. Blend well.
  5. Add the flour mixture to the butter mixture 1/2 cup at a time, being sure to scrape the sides between each flour addition.
  6. Dough should feel soft and not sticky.

Making the Batons (Kids LOVE doing this part!)

  1. Fit a pastry bag with a large rosette or star tip.
  2. Spoon the cookie dough into the pastry bag.
  3. Squeeze the dough into 2″ batons (logs) onto the prepared cookie sheets.
  4. Bake for 10-12 minutes or until the edges begin to turn a golden brown color.
  5. Cool the cookies on the cookie sheets for about 3 minutes before transferring to the cooling racks.

Making the Chocolate Dip

  1. In a heavy saucepan, combine the chocolate chips and butter. Heat over low heat until completely melted and smooth ~ stirring with a wooden spoon or whisk to prevent clumping.
  2. When the chocolate and butter are ready, remove from heat and add the milk, one tablespoon at a time. Whisk or stir well after each addition of milk.

Putting it all Together (The FUN Part!)

  1. Once all of the cookies are completely cooled, dip each end into the melted chocolate mixture and then the sprinkles (put the sprinkles into a cereal bowl for ample dipping room).
  2. Lay each decorated cookie onto a cooling rack to let the chocolate cool and set.
  3. Use different colored sprinkles to mix things up!
  4. Or leave some with just the chocolate for those who don’t prefer sprinkles.
Desserts, Snacks


Baya’s Spicy Holiday Pecans

Baya’s Spicy Holiday Pecans

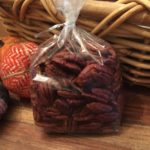
These spicy, crunchy Pecans bring back the fondest memories of the Holidays with my husband’s Grandmother, Baya. She used to make these delicious Pecan treats during Thanksgiving and Christmas for guests to snack on. I make sure to always have a batch or two baking in the oven during the Holidays to fill the house with warm, spicy fragrances. These Pecans also make the perfect Gifts! I hope you, your friends and family enjoy them as much as we do 🙂

  • 4 Cups Pecan Halves
  • 10 Dashes Tabasco/Hot Sauce (Add more if you REALLY like some heat)
  • 1/3 Cup Worcestershire sauce
  • 1 Tablespoon Salted Butter, Melted
  • Salt (Sprinkle as little or as much as you desire)
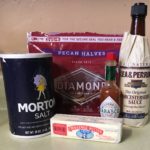
  1. Gather the ingredients.
  2. Preheat oven to 270 degrees.
  3. In a large bowl, combine the Tabasco, Worcestershire Sauce and melted Butter. Mix well.
  4. Next, add the pecans to the Tabasco mix and toss gently with a rubber spatula to thoroughly coat the pecans.
  5. Dump the pecans on a cookie sheet and spread them out evenly. Sprinkle with salt (as much or as little as you desire).
  6. Bake in the center of the oven for 15 minutes.
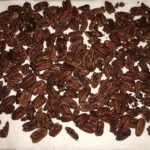
  7. Remove from oven, stir, salt and return to oven for another 15 minutes or until lightly crispy.
  8. Cool on a paper towel for 10-12 hours (I usually do this in the evening, so I can let them cool/crisp overnight).
  9. If you’re giving these as gifts, pack in a plastic gift bag or tightly sealed container.
  10. Or place them in pretty bowls throughout your house for friends and family to munch 🙂
Snacks


Simply Chocolate French Silk Pie

Simply Chocolate French Silk Pie

The cool, creamy (and yes, silky!) chocolate topped with fresh homemade whipped cream definitely takes me back to my childhood! Yes, I was one of THOSE kids who preferred pie over cake for my Birthday…but not just ANY pie! It HAD to be Chocolate French Silk Pie from Miller & Rhoads Tea Room. Even though the Tea Room sadly closed years ago, this wonderful recipe will forever live on in our home and hopefully your home, as well 🙂

Pie Filling

  • 1 1/2 Sticks (or 12 Tablespoons) Salted Butter, Softened
  • 1 Cup + 2 Tablespoons Powdered Sugar
  • 1 1/2 teaspoons Vanilla Extract
  • 4 1/2 Squares Unsweetened Chocolate (Melted)
  • 2 Large Eggs (Keep Cold)
  • 1 9″ Pie Shell (Baked & Cooled)

Whipped Topping

  • 1 Cup Heavy Whipping Cream (Kept Cold)
  • 2 Tablespoons Powdered Sugar (Heaping Tablespoons)
  • 1/2 teaspoon Vanilla Extract
  • 1 Hershey Milk Chocolate Kiss

Making the Chocolate Filling

  1. Gather the ingredients
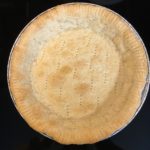
  2. Bake a 9″ pie crust and let cool while preparing the chocolate filling.
  3. Using a Stand or Handheld Mixer, cream the first 3 ingredients together on medium to medium high speed until light and creamy.
  4. Add the melted chocolate and continue beating until well blended.
  5. Add one cold egg and mix for 5 minutes on medium-high. Scrape the sides of the mixing bowl, then add the second cold egg and mix for another 5 minutes. Filling should be light and fluffy.
  6. Pour into the baked and cooled pie shell, spreading evenly. Chill in the refrigerator for at least 2 hours.

Making the Whipped Topping

  1. Using a Stand or Handheld Mixer, whip the cold Heavy Whipping Cream, 2 heaping Tablespoons of Powdered Sugar and 1/2 teaspoon Vanilla Extract on medium-high for about 3-4 minutes (until stiff peaks form).
  2. Spread the whipped cream onto the chocolate filling and add chocolate shavings, if desired (I grated 1 Hershey Kiss for the shavings).
Desserts, Snacks


Gluten Free Blueberry-Orange Muffins

Gluten Free Blueberry-Orange Muffins

The combination of Orange Zest and fresh Blueberries in these Gluten Free muffins is absolutely wonderful! And, I love the fact that they aren’t too sweet, making them perfect for Breakfast, mid-morning and afternoon snacks. Enjoy!
Note: I tweaked this recipe from America’s Test Kitchen’s “The How Can It Be Gluten Free Cookbook”

  • 8 Tablespoons Butter, Unsalted (1 Stick; Melted & cooled)
  • 2 Cups Blueberries (Fresh )
  • 3/4 Cup Granulated Sugar (Can use 1 Cup, if you want these to be a little bit sweeter)
  • 2-3 teaspoons Orange Zest (Zest of 1 large orange)
  • 1 3/4 + 2/3 Cups Gluten Free All-Purpose Flour (I made the ATK’s Gluten Free Flour Blend (recipe included below), but I also make these with Pamela’s Gluten Free All-Purpose Flour Blend, if I don’t have my own mix readily available)
  • 1 Tablespoon Gluten Free Baking Powder
  • 1/2 teaspoon Salt
  • 1/4 teaspoon Xanthan Gum
  • 1/2 Cup Plain Yogurt (I used 0% Fat Yogurt)
  • 3 Large Eggs
  • 2 Tablespoons Turbinado Sugar (i.e. Raw Sugar)
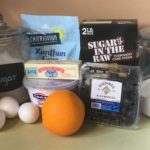
  1. Gather the ingredients.
  2. Melt the butter and let cool a bit while you begin preparing the muffin batter.
  3. In a food processor, pulse the Blueberries a few times (3-4) to coarsely chop them. Scrape them into a separate bowl and set aside.
    Note: I would normally leave them whole, but certain members of my family prefer them when chopped :).
  4. In the same food processor, combine the granulated sugar and orange zest. Pulse for about 10 seconds until the consistency is sand-like.
  5. In a large bowl, combine the GF Flour mix, baking powder, salt and xanthan gum. Mix well with a whisk. Then add to the sugar mixture in the food processor, pulsing until well blended.
  6. In the same large bowl that you used to whisk together the flour mixture, combine the eggs, yogurt and melted butter. Whisk until well blended, then add to the food processor and blend until there are no lumps.
  7. Transfer the batter to the large bowl and gently fold in the chopped (or whole) blueberries. Cover the bowl with plastic wrap and let rest for 30 minutes.
    (Note: this resting period is important in order to let the grains soften or mature, so that the resulting muffins will not be grainy or sandy in texture)
  8. Meanwhile, preheat oven to 400 degrees.
    Line a muffin tin with muffin cups and spray with a non-stick cooking spray.
  9. After the batter has rested for 30 minutes, scoop into the lined muffin tray using a medium or large scoop. This batter does not rise much, so don’t worry about filling the cups to the top.
  10. Sprinkle the tops with the Turbinado sugar.
  11. Bake for about 18-20 minutes, or until lightly golden and toothpick comes out clean. Cool muffins in the pan for about 10 minutes, before transferring them to a wire rack to cool for an additional 10 minutes.
  12. Enjoy these muffins that are chock full of blueberries while warm :).
  13. Any leftovers can be completely cooled and stored in an airtight container for about 2 days or frozen for 2-3 weeks. Before serving, let thaw and microwave for about 20 seconds.

The ATK Gluten Free Flour Blend

Ingredients:

  • 4 1/2 Cups + 1/3 Cup White Rice Flour
  • 1 2/3 Cups Brown Rice Flour
  • 1 1/3 Cups Potato Starch (NOT Potato Flour)
  • 3/4 Tapioca Starch
  • 3 Tablespoons Nonfat Milk Powder (if milk allergies are an issue, substitute with Gluten Free, Lactose Free, Non-Dairy Coffee Creamer Powder, like Nestle Original Coffee-Mate).

In a large bowl, combine all of the ingredients with a whisk and transfer to an airtight container. Refrigerate for up to 3 months. Before using, bring to room temperature.


Gluten Free Cinnamon Bread

Gluten Free Cinnamon Bread

Oh my gosh! This recipe for Gluten Free Cinnamon Bread is so delicious and easy to make! You will have a hard time telling that it’s Gluten Free :). I make several of these at a time, since my family can polish off an entire loaf in an afternoon!

Dry Ingredients for Bread

  • 2 Cups Gluten Free All-Purpose Flour (I use Pamela’s All-Pupose Flour – Gluten Free + Vegan Artisan Blend or my own blend if I have some on-hand)
  • 1 Cup Granulated Sugar
  • 2 Teaspoons Gluten Free Baking Powder (I use Clabber Girl)
  • 1/2 Teaspoon Baking Soda
  • 1 Teaspoon Salt
  • 2 Teaspoons Ground Cinnamon

Wet Ingredients for Bread

  • 2 Large Eggs
  • 1 Cup Buttermilk
  • 1/4 Cup Canola Oil
  • 2 Teaspoons Vanilla Extract

Cinnamon Topping

  • 4 Tablespoons Granulated Sugar
  • 2 Teaspoons Ground Cinnamon
  • 4 Teaspoons Butter, Salted (Keep cold)

Preparation

  1. Preheat oven to 350 degrees
  2. Using a solid shortening, grease a 9″ x 5″ bread pan. Set aside.

Mixing the Dry Ingredients

  1. In a large bowl, combine the Dry Ingredients (the first 6 ingredients for bread mix). Mix well and set aside.

Mixing the Wet Ingredients

  1. Using a standard Stand Mixer, whisk the eggs. Then slowly add the Buttermilk and oil. Blend well.
  2. Add vanilla and blend until well combined.

Combining the Dry and Wet Ingredients

  1. Mixing on medium-low speed, slowly add the Flour mixture, one cup at a time, to the Egg mixture, making sure to scrape down the sides between additions. Note: mixture will be sticky/gummy.

Making the Cinnamon-Sugar Layer & Topping

  1. Note: You may make this at the beginning and set aside, while making the loaf part…or make it at this step.
  2. In a small bowl, mix the 4 Tablespoons of sugar with the 2 teaspoons cinnamon. Next, cut in the cold butter with a sharp knife and blend until crumbly.

Putting it All Together

  1. Pour half of the Bread dough mixture into the prepared loaf pan. Spread evenly.
  2. Sprinkle half of the Cinnamon-Sugar mixture on top of this layer.
  3. Pour remaining Bread Dough mixture on top of the Cinnamon layer. Spread evenly.
  4. Sprinkle top with remaining Cinnamon-Sugar mixture.
  5. Bake for 45-50 minutes, or until toothpick comes out clean.
  6. Let rest for about 10 minutes before removing from pan. Cool on a rack before slicing. Enjoy!
Desserts, Snacks


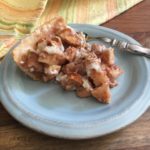
Simple Apple Pie

Simple Apple Pie

This is the simplest-to-make Apple Pie recipe on the planet. It only requires 6 ingredients and is oh so yummy! Served with or without vanilla ice cream, it’s delicious either way. Enjoy 🙂

Pie Crust

  • 1 Package Refrigerated Pie Crusts (I used “Pillsbury” Pie Crust, found in the Danish/Biscuit area)

Apple Filling

  • 6 Medium Apples (I used Golden Delicious)
  • 1/2 Cup Granulated Sugar
  • 1 teaspoon Cinnamon

Topping

  • 3/4 Cup Flour (I used All-Purpose, Unbleached)
  • 1/2 Cup Granulated Sugar
  • 1/3 Cup Butter, salted (Cold)
  1. Preheat oven to 400 degrees. Gather your ingredients.

The Topping

  1. In a small bowl, mix the flour and 1/2 cup sugar together. Set aside.

The Filling

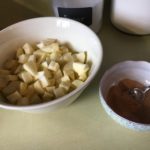
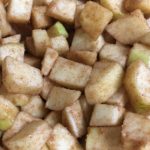
  1. Peel and cut apples into bite-size pieces and place in a large bowl (you may leave peels on the apples, if desired). If the apples start to brown, add cold water and a few ice cubes. In a separate small bowl, mix the 1/2 cup sugar and cinnamon together.
  2. Dump the sugar mixture over the apples and gently toss with a large spoon making sure all of the apples are well-coated.

The Pie Crust

  1. Let pie crust sit out for about 15 minutes before unrolling into the pie dish – this makes it much easier to unroll and press into the dish. Do NOT prick the dough with a fork.

Assembling the Pie

  1. Simply dump the filling into the freshly rolled out pie crust and spread out evenly.
  2. Sprinkle the sugar/flour topping evenly over the apples. Then cut the cold butter into tiny squares and place them evenly on top of the apples.
  3. Bake for 40-50 minutes or until golden brown. Remove from oven and let cool for about 30 minutes before slicing.
  4. Serve with or without vanilla bean ice cream!
Desserts, Snacks
Apples, dessert, Pie, simple, sweets


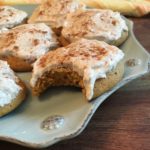
Frosted Pumpkin Spice Cookies

Frosted Pumpkin Spice Cookies ~ Gluten-Free

These cookies are amazing! Soft, sweet and spicy…just my kind of cookie :). Plus, they’re so easy to make and they freeze really well! Perfect Autumn treat! A HUGE “thank you” to “Two Sisters Crafting” for sharing this wonderful recipe!!! I did make a few changes to the recipe to make them Gluten-Free and allergy-friendly for my family 🙂

Pumpkin Spice Cookies

  • 1/2 Cup Butter, salted (Softened )
  • 1 Cup Granulated Sugar
  • 1 Cup Canned Pumpkin
  • 2 Large Eggs
  • 2 Cups All-Purpose Gluten-Free Flour ~ I used Krusteaz GF
  • 4 teaspoons Baking Powder
  • 1 teaspoon Salt
  • 2 1/2 teaspoons Cinnamon
  • 1/2 teaspoon Nutmeg
  • 1/4 teaspoon Ginger

Cream Cheese Frosting

  • 8 oz. Cream Cheese ((1 cup) softened)
  • 1/2 Cup Butter, salted (softened)
  • 3 teaspoons Vanilla Extract
  • 4 Cups Powdered Sugar
  • 1 teaspoon Cinnamon

Making the Pumpkin Spice Cookies

  1. Preheat oven to 350 degrees.
    Gather the ingredients.
  2. Line a cookie sheet with parchment paper or use a silicone mat. Set aside.
  3. Using a Handheld or Stand Mixer, combine the softened butter and sugar. Mix until light and fluffy.
  4. Add eggs and pumpkin. Mix thoroughly.
  5. In a separate bowl, combine the flour, baking powder and spices. Mix thoroughly.
  6. Gradually add the flour mixture to the pumpkin mixture and blend well.
  7. Using a spoon or a Medium-sized scoop (makes 2″ size balls), drop cookie batter onto the prepared cookie sheet.
  8. Bake for 12-15 minutes (cooking time varies by oven). Cool on pan for 1-2 minutes before transferring to a cooling rack to cool completely before adding the frosting.

Making the Cream Cheese Frosting

  1. Using a Handheld or Stand mixer, beat the butter, cream cheese and vanilla until well-blended.
  2. Gradually add the powdered sugar 1 cup at a time, mixing until well-blended and creamy.
  3. Add the Cinnamon and mix thoroughly.
  4. Frost the cooled cookies and enjoy!

These cookies freeze really well – I placed about a dozen in a plastic container and froze them. They thaw out perfectly for midmorning snacks and school lunches!

Desserts, Snacks


Zucchini Bread

Zucchini Bread ~ Gluten-Free

Moist, delicious AND Healthy Zucchini Bread! Thankfully, this recipe is for 2 loaves, since my family gobbles up the first loaf within hours (okay, minutes!) of it coming out of the oven ;). The combination of spices and Lemon zest adds a wonderful flavor to this already tasty Sweet Bread. I bet your first loaf will also disappear within the first day! Enjoy :).

  • 3 Cups Zucchini (shredded)
  • 4 Cups All-Purpose Gluten Free Flour (I used Better Batter brand for this recipe)
  • 1 Cup Granulated Sugar
  • 2 Tablespoons Granulated Sugar (Divided, for the pans)
  • 1/4 Cup Light Brown Sugar (Firmly packed)
  • 5 teaspoons Baking Powder
  • 1 1/2 teaspoons Ground Cinnamon
  • 1/2 teaspoon Salt
  • 1/4 teaspoon Ground Nutmeg
  • 1 Tablespoon Lemon Zest
  • 1 1/2 Cups Skim Milk
  • 6 Tablespoons Vegetable Oil (I use Canola)
  • 2 teaspoons Vanilla Extract
  • 2 Large Eggs (Lightly beaten)
  • Non-Stick Cooking Spray (I use Pam’s Coconut Spray)
  • 1/2 Cup Walnuts or Pecans (Chopped (Optional))
  1. Preheat oven to 350 degrees.
  2. Gather all ingredients.
  3. Spray two 8″ x 4″ loaf pans with the non-stick cooking spray. Sprinkle each pan with 1 Tablespoon Granulated sugar. Set aside.

Flour Mixture

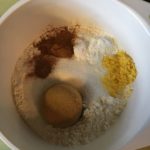
  1. In a large bowl, combine the flour, 1 cup granulated sugar, brown sugar and the next 5 ingredients (Note: if you’re adding Pecans or Walnuts, do so now).
  2. Form a well in the center of the flour mixture. Set aside.

Zucchini Mixture

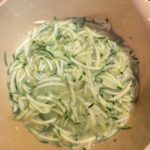
  1. Using a food processor or handheld grater, shred the zucchini and place it in a strainer to drain the liquid – I use a wooden spoon to press zucchini against the strainer, as well as squeezing the shredded zucchini with my hands to get as much liquid out.

  2. In a large bowl, whisk the milk, vegetable oil, vanilla extract and eggs until well blended. Add the shredded zucchini and mix well.

Making the Batter

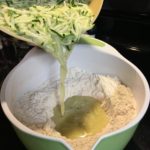
  1. Add the Zucchini Mixture to the center of the Flour Mixture.
  2. Mix well using a fork to start with to help break up the shredded zucchini. Then switch to a spoon to ensure that you get all of the ingredients off of the bottom of the bowl.

Baking the Bread

  1. Divide the batter between the two prepared loaf pans. If desired, you can also sprinkle the tops with more granulated sugar (I do not do this, as I find that the sprinkled sugar inside the pans is usually enough to satisfy our family’s sweet tooth).
  2. Bake for 50-60 minutes (time will vary with each oven). Start checking the loaves around 45 minutes with a wooden pick. Loaves are done when pick comes out clean.
  3. Cool in their pans on a wire rack for about 10 minutes.
  4. Remove loaves from pans and cool completely on wire rack before slicing…if you can keep the rest of your family from pouncing on them!
  5. Once completely cooled, slice and enjoy!
Desserts, Snacks, Sweet Breads
Gluten Free
dessert, gluten-free, snacks, sweet breads, sweets, zucchini