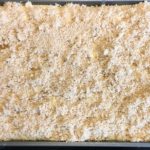
Maple Shortbread Sandwich Cookies ~ Gluten Free

Maple Shortbread Sandwich Cookies ~ Gluten Free

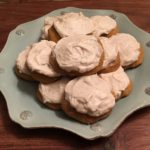
If you like the flavor of Maple, you’re going to love these delicious Maple Shortbread Sandwich Cookies! I make them as single shortbread cookies and as sandwich cookies with a yummy Maple Buttercream Filling for those who prefer a little extra touch of Maple. Either way, these little cookies melt in your mouth and are sure to please your friends and family during the holidays 🙂 Enjoy!

The Maple Shortbread Cookie:

  • 10 Tbsp Unsalted Butter, softened ((1 stick + 2 Tbsp))
  • 1/4 tsp Salt
  • 1/4 Cup Powdered Sugar
  • 1/4 Cup Maple Sugar (I do a heaping 1/4 cup ;))
  • 1/2 tsp Maple Extract (increase to 3/4 – 1 tsp if you want a stronger Maple Flavor)
  • 1 1/2 Cups All-Purpose Gluten Free Flour (I use Better Batter)
  • 1/2 tsp Xanthan Gum (add if your all-purpose GF flour does not contain Xanthan Gum)

The Maple Buttercream Filling:

  • 2 Tbsp Unsalted Butter, softened
  • 1/4 tsp Salt
  • 1/2 tsp Vanilla Extract
  • 1/4 tsp Maple Extract
  • 1 Tbsp Pure Maple Syrup (I use Grade A, but Grade B is also fine)
  • 1 1/2 Cups Powdered Sugar
  • 1 Tbsp Whole Milk (1%, 2% and Skim is also fine)

Making the Cookie Dough:

  1. Gather all the ingredients needed for the cookies.
  2. Using a Stand or Handheld Mixer, combine the Butter, Salt, Maple Sugar and Maple Extract; beat until creamy and smooth.
  3. Add the Powdered Sugar to the Butter mixture and mix on the lowest setting, scraping the sides of the bowl as needed, until well-blended and smooth.
  4. In a small bowl, measure out the 1 1/2 Cups Flour using the “spoon and scrape” method (using a spoon, scoop out the GF Flour into a Dry Measuring Cup, overfilling the cup; then scrape off the excess flour back into the flour bag/container using the back edge of a knife); gently pour the measured GF Flour into the small bowl.
  5. Add the Xanthan Gum (if your GF Flour mix doesn’t contain it) to the GF Flour in the small bowl and mix well.
  6. With the mixer set on the lowest setting, gradually add the GF Flour mixture, 1/2 cup at a time, to the Butter mixture; mix well and scrape sides of bowl as need between each addition of the Flour.
    Note: the cookie dough will be crumbly, but should hold together when squeezed into a ball; if the dough does not hold together, add 1/2-1 more Tablespoon of softened unsalted butter.
  7. Form the cookie dough into a ball and wrap in plastic wrap; Refrigerate for 30 minutes.
  8. While the dough is in the refrigerator, line 1-2 cookie sheets with parchment paper or baking mats; set aside.
  9. Preheat oven to 325 degrees.
  10. After 30 minutes, remove cookie dough from refrigerator and cut in half for a more manageable portion of dough to roll out.
    Note: if the dough is refrigerated for more than 30 minutes, set it out on your kitchen counter for about 15-20 minutes to soften up a little before trying to roll it out.
  11. Once the dough is ready, roll it out onto a lightly floured surface to about 1/4″ thickness.
  12. Using the desired cookie cutter/cutters, cut dough into shapes and place onto the prepared cookie sheet/sheets.
  13. Bake for 18-20 minutes, or until cookies are a light golden brown; cool on baking sheets. Enjoy as single Maple Shortbread Cookies or fill with the Maple Buttercream filling (recipe below).

The Maple Buttercream Filling:

  1. If making sandwich cookies, gather the ingredients for the Maple Buttercream Filling.
  2. Using a Stand or Handheld Mixer, combine all of the Filling ingredients, being sure to gradually add the Powdered Sugar, 1/2 cup at a time; adjust the Milk or Powdered Sugar as needed for the desired consistency (you want the filling to be thick and creamy).
  3. Once the cookies are completely cooled, you are ready to fill :).
  4. Using a small knife or the back of a spoon, spread the desired amount of filling onto the backside of one of the cookies; then gently press another cookie on top of the filling and scrape any excess filling from the sides of the cookies with the knife or spoon.
  5. Serve with your a hot cup of tea or coffee and sit back and enjoy 🙂
Desserts, Snacks


Frosted Pumpkin Spice Cookies ~ Gluten Free

Frosted Pumpkin Spice Cookies ~ Gluten Free

This is an updated version of my post from last year (2019), which was not a GF recipe. Fear not….this IS a Gluten Free recipe for soft, sweet and delicious Frosted Pumpkin Cookies. These wonderful little treats are mildly flavored with a blend of spices that you can adjust to satisfy your personal taste. Please let me know what you think 🙂

The Cookie:

  • 3 1/2 Cups Gluten Free All-Purpose Flour Blend (I used Better Batter brand)
  • 1 tsp Baking Powder, GF
  • 1 tsp Baking Soda
  • 1/2 tsp Table Salt
  • 2 1/2 tsp Cinnamon (increase to 3 tsp if you want a spicier taste)
  • 1/2 tsp Nutmeg (increase to 3/4 – 1 tsp for a spicier taste)
  • 1/4 tsp Ground Ginger (increase to 1/2 tsp for a spicier taste)
  • 1 Cup Dixie Crystals Extra Fine Granulated Sugar
  • 1 Cup Light Brown Sugar (packed)
  • 1 Cup Vegetable Oil (I use Canola Oil)
  • 2 Cups Canned Pumpkin Puree
  • 2 Large Eggs (lightly beaten)
  • 1 tsp Vanilla Extract (GF)

The Frosting:

  • 1 Cup Cream Cheese, softened (I use Philadelphia Cream Cheese (full fat))
  • 1/2 Cup Salted Butter, Softened
  • 3 tsp Vanilla Extract (GF)
  • 4 Cups Powdered Sugar
  • 1 tsp Ground Cinnamon

Making the Cookies:

  1. Line cookie sheet/sheets with parchment paper or silicone baking mats; set aside.
  2. Gather the ingredients.
  3. In a Large mixing bowl, sift together the GF Flour, Baking Powder, Baking Soda, Salt and Spices; Mix well; Set aside.
  4. In another Large mixing bowl, combine the Sugars, Oil, Pumpkin, Eggs and Vanilla Extract until completely blended.
  5. Gradually add the dry ingredients, one cup at a time, to the wet ingredients and mix until smooth.
  6. Cover bowl with plastic wrap or dish cloth and let rest for 30 minutes. This allows the GF Flour to absorb the moisture from the wet ingredients which reduces (hopefully, eliminates!) the grainy texture.
  7. When ready to bake the cookies, place oven rack in the middle position and preheat oven to 350 degrees.
  8. Using a Small cookie scoop (or medium, if you want larger cookies) scoop out the cookie dough onto the prepared baking sheets.
  9. Spray the back of a spoon with non-stick cooking spray and use the spoon to flatten the cookie mounds (re-apply spray as often as needed).
  10. Bake for 10-12 minutes.
  11. Let cookies cool on cookie sheet for 1-2 minutes before transferring to a wire rack to cool completely before frosting.

Making the Frosting:

  1. While the cookies are baking and cooling start making the frosting…
  2. Using a Handheld or Stand Mixer, beat the softened Butter, Cream Cheese and Vanilla Extract until well-blended.
  3. Gradually add the Powdered Sugar, one cup at a time, mixing until completely blended and creamy.
  4. Add the Ground Cinnamon and Mix thoroughly.
  5. You’re ready to frost the cookies and enjoy!

Note: The original recipe that I posted in 2019 was from “Two Sisters Crafting,” which I have updated so it is now GF, thanks in large part to “amyin the kitchen.com 🙂 I just love converting and joining recipes to see what the end results will be! Thanks so much for sharing your wonderful recipes!!!

Desserts, Snacks
American


Chocolate Pudding with Cookie Crumbles & Fresh Whipped Cream (Gluten Free)

Chocolate Pudding with Cookie Crumbles & Fresh Whipped Cream (Gluten Free)

Pudding is one of my favorite comfort foods. However, I must confess…I always made it from a box 😉 So, I decided to make it from scratch to see if there was a big difference and YES there is! Homemade chocolate pudding is definitely worth making 🙂 I added the chocolate cookie crumbles in the bottom after finding a wonderful recipe by Ree Drummond (thank you, Ree!) Let me know what you think…box or homemade?

Ingredients for the Cookie Crumble (optional):

  • 22-24 Gluten Free Chocolate Sandwich Cookies (if not GF, use Oreos)
  • 4 Tbsp Salted Butter, Melted (I use Land O Lakes)

Ingredients for the Pudding:

  • 1 1/2 Cups Granulated Sugar
  • 1/4 Cup All-Purpose Gluten Free Corn Starch
  • 1/4 tsp Salt
  • 3 Cups Skim Milk (You can substitute with 1%, 2%, Whole or any non-dairy milk)
  • 4 Large Egg Yolks
  • 6 1/2 ounces Bittersweet Chocolate
  • 2 Tbsp Butter, salted
  • 2 tsp Vanilla Extract

Ingredients for the Whipped Topping:

  • 1 Cup Heavy Whipping Cream (very cold)
  • 2-3 Tbsp Powdered Sugar
  • 1/2 tsp Vanilla Extract

Making the Cookie Crumble:

  1. In a food processor, pulse the melted Butter and Sandwich Cookies until finely crushed. Then spoon desired amount into the bottom of your serving dishes/cups (reserving some for garnish). Note: I spoon about 2 Tbsp into the bottom of each glass.

Making the Pudding:

  1. In a medium saucepan, whisk together the Sugar, Cornstarch and Salt until well-blended.
  2. Add the Milk and Egg Yolks to the Sugar mixture and whisk well.
  3. Heat this mixture over medium heat for about 8-10 minutes, stirring constantly so mixture doesn’t burn or clump. Immediately remove from the heat once it starts to thicken (like pudding ;))
  4. Add the Butter and Vanilla to the pudding mixture, stirring until butter is completely melted and blended.
  5. Pour the mixture into desired serving bowls/cups. Refrigerate for at least 2 hours.

Making the Whipped Cream:

  1. Just before serving the pudding, make the Whipped Cream by combining the Heavy Whipping Cream, Powdered Sugar (1 Tablespoon at a time) and Vanilla Extract using a Stand or Handheld Mixer. Beat on medium-high until stiff peaks form (about 4-5 minutes)
  2. Spoon desired amount on top of each pudding and add a few Cookie Crumbles for garnish. Yum!
Desserts, Snacks
American


Lime Freeze (Milk Shake)

Lime Freeze (Milk Shake)

One of my fondest memories is of these WONDERFUL frozen treats! I used to walk down to our neighborhood pharmacy, now sadly closed, on hot Summer days and order one of these cool, delicious Lime Freezes 🙂 They are truly one of my all-time favorites and I was bound and determined to reproduce the recipe…I think this is as close as I’m going to get! It’s quick and easy to make and only requires 3 ingredients! Enjoy 🙂
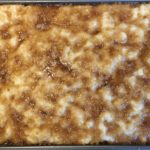
  • 3-4 Large Ice Cream Scoops Lime Sherbet (I think Orange Sherbet would be delicious, too!)
  • 1 Large Ice Cream Scoop Vanilla Ice Cream
  • 3/4 Cup Diet Lemon Lime Soda (Sprite or any other type of Lemon-Lime Soda available; You can also use regular (instead of diet); add a splash at a time if you want a thinner version)
  1. Gather the ingredients.
  2. In a blender or food processor, combine all the ingredients and blend until smooth and creamy.
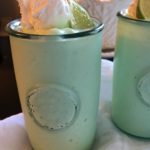
  3. Serve with a dollop of Cool Whip and a wedge of Lime for garnish 🙂
Desserts, Snacks


Lite Pineapple-Cool Whip Soft Serve “Ice Cream” (Gluten Free)

Lite Pineapple-Cool Whip Soft Serve “Ice Cream” (Gluten Free)

This refreshing treat is SO quick and easy to make…and there are only 3 ingredients needed! I am posting the Pineapple and Strawberry versions, but feel free to try different frozen fruit to create your favorite Summer treats! Yummy 🙂

  • 2 Cups Frozen Pineapple Chunks (or any frozen fruit of your choice)
  • 3 Cups Frozen Lite Cool Whip
  • 3/4 Cup Pineapple Juice (Add 1/4 if too thick)
  1. Gather the ingredients.
  2. Using a blender (I have a Ninja brand that has an “Ice Cream” setting that works really well) or food processor, combine all of the ingredients and process until fully blended and smooth.
  3. Spoon (or pipe with a pastry bag) into desired glasses/cups and top with Cool Whip and Fruit! Enjoy 🙂
Desserts, Snacks
American


Gluten Free Lemon Cookies with Lemon-Cream Cheese Frosting

Gluten Free Lemon Cookies with Lemon-Cream Cheese Frosting

Crispy Lemon-Butter Cookies accented with Fresh Lemon Zest and topped with a Creamy Lemon Frosting infused with more Fresh Lemon Zest make these cookies sinfully delicious! I have to make a double batch every time I make these, because my family gobbles them up so quickly 🙂 If you like Lemony desserts, you’ll LOVE these cookies!

The Lemon Cookies

  • 1 Cup Unsalted Butter, softened ((2 Sticks))
  • 1 Cup Powdered Sugar
  • 1/2 tsp Salt
  • 1/2 tsp Pure Vanilla Extract
  • 1 Tbsp Lemon Zest
  • 1 Tbsp Fresh Lemon Juice
  • 2 Cups Gluten Free All-Purpose Flour (Sifted)

The Creamy Lemon Frosting

  • 1/2 Cup Cream Cheese, softened
  • 1 1/2 Cups Powdered Sugar
  • 1 Tbsp Lemon Zest
  • 1 Tbsp Fresh Lemon Juice
  • 1/8 tsp Butter, Unsalted
  1. Gather the ingredients needed for the Lemon Cookie dough.
  2. Using a Stand Mixer fitted with the Paddle attachment, cream together the Butter, Powdered Sugar and Salt until light and fluffy.
  3. Add the Vanilla Extract, Lemon Zest and Lemon Juice to the Butter mixture, mixing until combined.
  4. Next, gradually add the GF Flour, 1/2 cup at a time, to the mixing bowl, blending thoroughly between each addition and scraping down the sides of the bowl as needed.
  5. Once the cookie dough has been thoroughly blended, turn the dough out onto a large cutting board and roll into a log about 9″-10″ in length. Wrap this log tightly in plastic wrap and place in freezer for at least 2 hours.
  6. When dough is chilled enough for slicing, preheat oven to 350 degrees and remove chilled dough from the freezer.
  7. Line a cookie sheet with a nonstick baking mat or Parchment paper. Set aside.
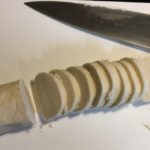
  8. Using a sharp knife, slice the dough log into 1/4″ thick sections and place each disc about 2″ apart onto the prepared cookie sheet.
  9. Bake for 12-15 minutes, or until edges turn a light golden-brown.
  10. Let cookies cool on pan for 1-2 minutes until removing to a wire cooling rack. Cool completely before applying the frosting.

Making the Creamy Lemon Frosting

  1. Using a Stand Mixer fitted with the Paddle attachment, cream together the softened Cream Cheese and Powdered Sugar until well-blended.
  2. Add the Lemon Zest, Lemon Juice and Salt to the Cream Cheese mixture. Continue beating until completely mixed.
  3. Transfer the Frosting to a piping bag, fitted with a large star tip. Please Note: this is optional, as you can apply the frosting either using a butter knife or a piping bag (or plastic storage bag) with the end snipped off.
  4. When the cookies are completely cooled, spread or pipe the desired amount of frosting onto each cookie. Enjoy 🙂

Note: I usually make the frosting while the cookies are baking, so I can place it into the refrigerator to set. If you find that the frosting gets too soft while piping, place it into the refrigerator for 10-15 minutes to harden a little.

Desserts, Snacks


Gluten Free Monster Cookies

Gluten Free Monster Cookies

Inspired by Ree Drummond’s “Monster Cookies” recipe! To make these incredibly delicious cookies Gluten Free and Allergy-Friendly for my family, I just swapped out a few of the ingredients, decreased the oven temperature and baking time and voila! These are the BEST Gluten Free cookies that I have converted from a “regular” recipe 🙂 They are just the right blend of sweet, savory, chewy AND crunchy!
A HUMONGOUS “Thank You” to Ree Drummond (aka: The Pioneer Woman) for sharing her “Monster Cookies” recipe!!!

  • 2 Sticks Salted Butter, Softened ((16 Tbsps) I used “Land O Lakes”)
  • 1/2 Cup Granulated Sugar
  • 1 1/2 Cups Light Brown Sugar (Firmly packed)
  • 2 Large Eggs
  • 1 Tbsp Vanilla Extract
  • 1 1/2 Cups All-Purpose Gluten Free Flour, Sifted (I used “King Arthur” Brand)
  • 1 1/2 tsp Salt
  • 1 tsp Gluten Free Baking Powder (I use “Clabber Girl” brand)
  • 1/2 tsp Baking Soda
  • 1 1/2 Cups Oats (I used “Quaker” Old Fashioned Oats)
  • 1 Cup Chocolate Coated Candies (I used “M&M’s”)
  • 3/4 Cup Mini Chocolate Morsels (I used “Enjoy Life” semi-sweet mini chips)
  • 2 1/4 Cups Rice Cereal (I used “Rice Krispies” cereal)
  • 1/2 Cup Chopped Pecans ((Optional) I did not include these due to allergies)
  1. Preheat oven to 350 degrees.
  2. Line cookie sheet with a Silpat Baking Pad or parchment paper. Set aside.
  3. Using a Stand Mixer fitted with the Paddle attachment, cream together the Butter and Sugars until light and fluffy (about 2 minutes).
  4. Add the eggs, one at a time, mixing well. Add the vanilla and continue mixing until all is blended, scraping down sides of bowl as needed.
  5. In a separate bowl, combine the Sifted GF Flour, Salt, Baking Powder and Baking Soda.
    Note: please be sure to sift the flour since it helps prevent grittiness.
  6. Add the Flour mixture to the Butter mixture. Mix until well-combined.
  7. Next, add the Oats and Chocolate Chips and mix until incorporated. Note: add the chopped nuts now if you’re including them.
  8. Lastly, add the M&M Candies and Rice Cereal and mix well using a large, sturdy spoon.
  9. Using a 2 Tbsp cookie scoop, drop dough balls at least 2″ apart onto the prepared cookie sheet. I only placed 8 cookie dough balls on each baking sheet.
  10. Bake in preheated oven for 10-14 minutes, rotating pan halfway through. Cookies are done when they turn a light golden brown.
  11. Let cookies cool for a couple of minutes on baking sheet, before transferring to a wire cooling rack.
  12. These cookies store well in an airtight container for 3-5 days, if they last that long! They also ship well…I send these cookies to one of my daughters, who states that they arrive looking like they were just baked 🙂

Desserts, Snacks


Easy Gluten Free Cinnamon-Sugar Coffee Cake

Easy Gluten Free Cinnamon-Sugar Coffee Cake

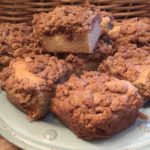
This Gluten Free Coffee Cake is SO moist, tasty and easy to make! It’s the perfect afternoon snack, dessert or breakfast for those weekend sleepovers. An instant hit with our family and friends! 🙂
*Thank You to America’s Test Kitchen for sharing this wonderful recipe!!

The Crumb Topping

  • 1/2 Cup Unsalted Butter, Melted (1 Stick or 8 Tbsp)
  • 1/3 Cup Granulated Sugar
  • 1/3 Cup Dark Brown Sugar (Packed)
  • 1 Large Egg Yolk
  • 1/8 tsp Salt
  • 3/4 tsp Cinnamon
  • 3/4 Cup + 1/3 Cup All-Purpose Gluten Free Flour, Sifted (I use Better Batter GF Multi-Purpose Flour)

The Cake

  • 3/4 Cup + 1/3 Cup All-Purpose GF Flour, Sifted (I use Better Batter GF Multi-Purpose Flour)
  • 1/2 Cup Granulated Sugar
  • 1/4 tsp Salt
  • 1/4 tsp Xanthan Gum (use ONLY if your GF Flour Blend doesn’t contain any; Better Batter contains Xanthan Gum, so I do not add it )
  • 1/2 tsp Baking Soda
  • 6 Tbsp Butter, Unsalted (Softened & Cut Into 6 Pieces)
  • 1/2 Cup Sour Cream
  • 2 Large Eggs
  • 1 Large Egg Yolk
  • 1 tsp Vanilla Extract
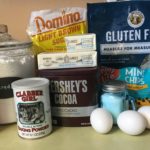
  1. Gather the ingredients.
  2. Spray an 8″ x 8″ baking pan with non-stick cooking spray. Next, fold a 16″ length of Parchment Paper to a width of 7″ and fit it into the baking pan, so that the excess hangs over the edges for easy removal of the cake. Set aside.

Making the topping:

  1. In a small sauce pan, melt the butter over low heat. Once completely melted, remove from heat and let cool slightly.
  2. Using a whisk, mix in the sugars, salt, cinnamon and egg yolk to the melted butter, thoroughly mixing.
  3. Add the GF Flour to the butter mixture, blending well. The mixture will look like ground meat. Set aside.

Making the Cake:

  1. Place one of your oven racks in the upper-middle position of the oven and preheat oven to 325 degrees.
  2. In a stand mixer, using the paddle attachment, mix the GF Flour, Granulated Sugar, Salt, Xanthan Gum (if needed) and Baking Soda on low until completely blended.
  3. Next, add the Butter to the flour mixture, one piece at a time, mixing on low until butter pieces are no longer visible – mixture will resemble coarse sand.
  4. Add the Sour Cream, Eggs, Yolk and Vanilla to the Flour mixture and mix on medium-high until batter is light and fluffy.

Putting it Together:

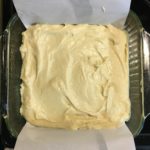
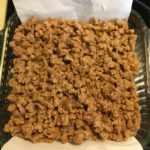
  1. Scrape the batter into the prepared baking pan and smooth the top.
  2. Using your hands, break the Topping Mixture into large pea-sized pieces and sprinkle over the top of the batter to completely cover.
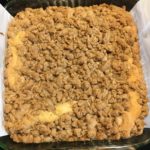
  3. Bake for 35-45 minutes, rotating the pan halfway through baking. It’s done when the middle is no longer jiggly and a wooden toothpick inserted into the middle comes out clean.
  4. Let cool in the pan for 30 minutes before removing, using the excess Parchment Paper to lift and pull the cake out.
  5. Place on a platter or cutting board to cut and serve. Enjoy!

**This cake stores well in an air-tight container for about 3 days.

***A HUGE “Thank You” to America’s Test Kitchen for sharing this wonderful recipe!!! 🙂

Breakfast, Desserts, Snacks


Hot Chocolate Brownie Bites (Gluten Free)

Hot Chocolate Brownie Bites (Gluten Free)

These little Hot Chocolate Brownie Bites are the BEST Gluten Free cookies that I have ever tasted!!! I thought I would never say this, but I actually prefer these without icing! They are, of course, delicious and quite sinful with or without the icing 🙂

Ingredients for the Cookie

  • 1/2 Cup Butter, Unsalted (1 Stick)
  • 1 1/2 Cups Semi-Sweet Chocolate Chips (I used “Enjoy Life” Mini Semi-Sweet Chocolate Chips (allergy friendly), but Nestle is just fine!)
  • 1 1/2 Cups Gluten Free All-Purpose Flour (I used “King Arthur” Cup-for-Cup GF All-Purpose Flour)
  • 1/4 Cup Unsweetened Cocoa Powder (I used Hershey’s Cocoa (100% Cacao))
  • 1 1/2 tsp Baking Powder
  • 1/4 tsp Salt
  • 1 1/4 Cup Light Brown Sugar
  • 3 Large Eggs
  • 1 1/2 tsp Vanilla Extract

Ingredients for the Icing

  • 4 Tablespoons Unsalted Butter, Melted
  • 2 Cups Confectioner’s Sugar
  • 1/4 Cup Unsweetened Cocoa Powder (Hershey’s Cocoa)
  • 1/4 Cup Hot Water (Hot Water from the tap…not boiling)
  • 1/2 tsp Vanila Extract
  • Decorative Sprinkles

Making the Cookies

  1. Gather the ingredients.
  2. In a small heavy pot, melt the 1/2 Cup Unsalted Butter on Low. Once the butter is melted, add the 1 1/2 Cups Semi-Sweet Chocolate Morsels and continue heating over low until the chocolate is melted. Mixture should be smooth and creamy. Remove from heat.
  3. Meanwhile, in a medium-sized bowl, combine the dry ingredients (Flour, Cocoa Powder, Baking Powder and Salt). Mix well and set aside.
  4. Either using a Standing or Handheld Mixer, beat the Eggs, Brown Sugar and Vanilla Extract on low until blended.
  5. Add the cooled Chocolate mixture to the Egg mixture and mix on Low until blended.
  6. Next, add the Flour mixture 1/2 Cup at a time to the Wet Mixture and beat on Low until well blended. The dough will be thick, like Brownies. Cover the bowl with foil or plastic wrap and refrigerate for 3-4 hours.
  7. Once the dough has “hardened” to the consistency of modeling clay, remove the dough from the refrigerator.
  8. Preheat oven to 325 degrees.
  9. Line 1-2 cookie sheets with Parchment Paper or Silicone Baking Mats and set aside.
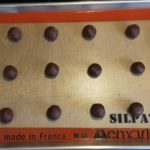
  10. Using a Small Cookie Scoop, scoop out dough and roll into balls. Place them 2″ apart on the prepared cookie sheets.
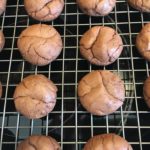
  11. Bake for 10-12 minutes or until they start to form cracks on their tops.
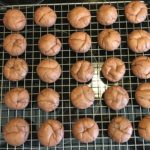
  12. Let cookies sit on cookie sheet for a few minutes before transferring them to a wire rack to cool completely.

Making the Icing

  1. While the cookies are cooling, combine the 4 Tablespoons melted Butter, 1/4 Cup Cocoa Powder, 1/4 Cup Hot Water, Vanilla Extract and 2 Cups Confectioner’s Sugar. Mix on Low until well blended. If mixture is too thick, add a little bit of water (1 Tablespoon at a time) until icing is a little runny.
  2. Next, keeping the cooled cookies on the cooling rack, place rack on a cookie sheet or paper towels to catch the run-off icing.
  3. Spoon desired amount of icing onto 2-3 cookies at a time and then add sprinkles….icing sets up quickly, so only apply icing to a few cookies at a time.
  4. Continue applying the icing and decorative sprinkles to the rest of the cookies until done.
    Enjoy!

Note: Instead of adding Icing to these cookies, try rolling them in Confectioner’s Sugar before baking or leave plain 🙂

Desserts, Snacks


Moravian Sugar Cake ~ Gluten Free!!!

Moravian Sugar Cake

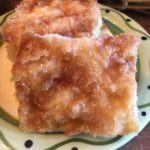
I just updated this recipe and it’s now Gluten-Free 🙂 This is my all-time favorite Christmas treat and I couldn’t go without it just because of my Gluten allergy, so I rolled up my sleeves and headed into my kitchen to come up with a GF version! I hope you all approve 🙂 The crispy Brown Sugar-Cinnamon topping combined with the buttery, tender yeast cake is seriously addictive! Perfect for Christmas morning, New Years Eve, and Holiday Gifts for your special friends and family 🙂
A huge “Thank You” to pastrychefonline.com for sharing the original version of this Wonderful Recipe!!!

For the Dough

  • 1/2 Cup Warm Water
  • 2 Tablespoons Dried Yeast
  • 1 Cup Mashed Potatoes (Unseasoned – no skin, butter, milk or seasonings)
  • 1 1/2 teaspoons Salt
  • 1/2 Cup Granulated Sugar
  • 11 Tablespoons Salted Butter, Melted ((1 Stick + 3 Tablespoons))
  • 1 Cup Whole Milk
  • 2 Large Eggs
  • 4 Cups All-Purpose Gluten Free Flour (Divided; check to see if your GF flour blend contains Xanthan Gum, if so great, but if not add 2 tsp. Xanthan Gum )
  • *2 tsp Xanthan Gum (*Add ONLY if your GF flour blend does NOT contain Xanthan Gum ~ 1/2 tsp xanthan gum per 1 cup GF flour for cakes, muffins, quick breads)

For the Topping

  • 8 Tablespoons Salted Butter, Melted
  • 1 Cup Granulated Sugar
  • 1 Cup Light Brown Sugar (packed)
  • 1/2 teaspoon Ground Cinnamon
  • 1/4 teaspoon Ground Nutmeg
  • 1/8 teaspoon Salt

Making the Dough

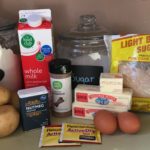
  1. Gather the ingredients.
  2. In the bowl of your standing mixer, combine the warm water and yeast. Using the paddle attachment, stir for about 1 minute or until yeast is completely dissolved.
  3. Next, add the mashed potatoes, salt, sugar, melted butter, milk, eggs and 2 cups of the flour. Mix well on low.
  4. Change the paddle attachment to the dough hook. Add the remaining 2 cups of flour and mix on medium speed for about 5 minutes, scraping the sides as needed. Dough should be very sticky and stretchy when pulling dough between your fingers. Add a little bit of extra flour if dough doesn’t feel like it has enough body…wetter is better than dry!
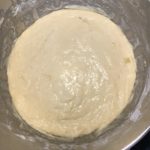
  5. Smooth the top of the dough with an oiled rubber spatula and cover bowl with a towel. Set in a warm area of your kitchen and let rise for about 1 1/2 – 2 hours. (Dough should double in size).
  6. Spray 2 jelly roll pans with non-stick spray.
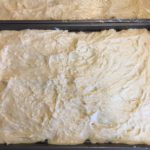
  7. Divide the dough in half between the 2 jelly roll pans. Spray the dough and your hands with the non-stick spray and begin patting and stretching the dough until it fills each pan – alternate between the pans to allow the dough to relax and stretch on its own.
  8. Spray the dough with non-stick spray and cover with plastic wrap. Set in a warm area to let rise once again, about 1 hour.

Making the topping

  1. Place the oven racks in top third and bottom third of your oven. Preheat to 400 degrees.
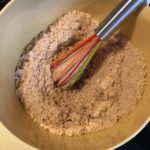
  2. Meanwhile, in a medium bowl, combine the sugars, cinnamon, nutmeg and salt. Mix very well.

Putting it all Together

  1. Once the dough in the pans has risen and become puffy, dimple the dough thoroughly using your greased fingers – do not worry if you puncture all the way through to the pan.
  2. Next, brush the tops of the dough with 4 Tablespoons of the melted butter per pan. Butter should pool in the dimples that you created.
  3. Sprinkle half of the sugar mixture onto each of the cakes until you can no longer see the dough.
  4. Place the cakes on the oven racks (one on the top rack and one on the bottom rack). Bake for 7 minutes.
  5. Switch the cakes on the racks. Bake for another 7 minutes.
  6. Let cakes cool in the pans for about 5 minutes.
  7. Using a large spatula and your hands, transfer to cooling racks – this keeps the bottoms from getting soggy.
  8. Serve warm or wrap very well in freeze-proof bags to freeze for up to 2 months.
  9. Enjoy these yummy cakes throughout the holidays!
  10. They make the PERFECT Holiday Gifts for friends and family 🙂
Breakfast, Desserts, Snacks, Sweet Breads