Pumpkin Spice Bundt Cake (Gluten Free)


Pumpkin Spice Bundt Cake (Gluten Free)
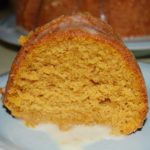
Wow! This cake takes it all!!! It is so moist and full of flavor…and, it's Gluten-Free 🙂 If you haven't tried "Gluten Free Heaven" Flour Mixes, then you don't know what you're missing! They have mastered the secret to GF baking – you will never know it's GF. A big shout out to Dixie Crystals for the original version of this recipe…I made a few changes in order to make it GF and allergy-friendly for my family. Thank you to Dixie Crystals and GF Heaven 🙂

Cake:

  • 1 3/4 Cups *Gluten Free Heaven" Cake & Pastry Flour (*I have not made this cake with any other GF flours; please note that all GF Flours are not created the same and results will vary if you use a different GF Flour)
  • 3/4 + 1/8 teaspoon *Xanthan Gum (*This must be added for “GF Heaven Flours” since they do not contain it; leave out if your GF Flour already contains it)
  • 1 teaspoon GF Baking Powder
  • 1/2 teaspoon GF Baking Soda
  • 2 teaspoons Ground Cinnamon
  • 1/2 teaspoon Ground Ginger
  • 1/8 teaspoon Ground Cloves
  • 1 teaspoon Salt
  • 1 Cup + 2 Tbsp Unsalted Butter (Very soft, but not melted)
  • 1 Cup Extra Fine Granulated Sugar (I always use Dixie Crystals)
  • 3 Large Eggs (room temperature)
  • 2/3 Cup Canned Pumpkin (I used Libby’s)
  • 1/3 Cup Orange Juice (I used “no pulp” kind)

Glaze:

  • 2/3 Cups Confectioner’s Sugar ((Powdered); plus more if you want a thicker consistency)
  • 2 Tbsp Orange Juice
  1. Set oven rack in the middle position; Preheat oven to 350 degrees.
  2. Butter and flour Bundt pan (you can also use a 9 x 5 – inch loaf pan); set aside.
  3. In a medium-sized bowl, whisk together the GF Flour, Xanthan Gum, Baking Soda & Powder and Spices; set aside.
  4. Using a Stand or Handheld Mixer, fitted with the paddle attachment, beat the Butter until light & fluffy; add the Granulated Sugar and blend until thoroughly mixed and fluffy.
  5. Add the Eggs, one at a time, blending well after adding each Egg; scrape sides of bowl often; whip until the mixture is very light & fluffy.
  6. Next, add the Canned Pumpkin and mix until blended.
  7. Add the Dry Ingredient mixture and Orange Juice in 3-4 segments, mixing and scraping bowl and paddle well between each addition.
  8. Scrape the batter into the prepared Bundt Pan; place in the preheated oven on the middle rack and bake for 45 minutes (check the cake around the 30-35 minute mark to make sure it isn't browning too much – if it is, cover loosely with a piece of aluminum foil); test doneness after 45 minutes with a toothpick and pressing lightly on the top to see if it springs back; bake an additional 15-30 minutes, depending on your oven (my cake was ready after 45 minutes).

  9. Once cake is done, remove from oven and let cool in the pan for approximately 10-15 minutes before turning out onto a cooling rack.
  10. While the cake is cooling, thoroughly whisk the Powdered Sugar and Orange Juice together in a small bowl until desired consistency is reached; spoon the Glaze over slightly warm or completely cooled cake.
  11. Serve with or without Vanilla Ice Cream and Enjoy! 🙂

*Use the “Spoon & Sweep” method for measuring the GF Flour: use a spoon to fill the measuring cup with the desired amount of flour, then scrape across the top with the back side of a knife to level off.

Desserts, Snacks
Gluten Free
bundt cake, Cake, dixie crystals, gluten-free, Holidays, Pumpkin, pumpkin spice, sweet treats, sweets, Treats


Gluten Free Potatoes au Gratin

Gluten Free Potatoes au Gratin

Wow! This is the ultimate rich and creamy comfort food that is a true crowd-pleaser. Plus, it’s not only tasty and satisfying, but SO easy to make!! My family loves it SO much that we have it as our main dish along with a fresh salad for dinner on many nights! Yummy!!! Enjoy 🙂
A HUGE “Thank You” to Ree Drummond for sharing this yummy recipe! I have made a couple of changes to make it allergy-friendly and Gluten Free for my family 🙂

  • 8 Medium-Large Russet Potatoes (Scrubbed clean and cut into bite-sized pieces)
  • 3 Cups Heavy Cream (or Half & Half)
  • 1 Cup Whole Milk
  • 1/4 Cup All-Purpose Gluten Free Flour (I use King Arthur brand)
  • 2 tsps Salt
  • 1/2 tsp Freshly Ground Black Pepper
  • 2 Cups Shredded Cheddar
  • 2 Green Onions (Sliced Thin)
  1. Preheat oven to 400 degrees.
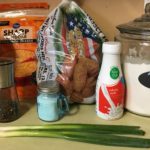
  2. Gather the ingredients.
  3. Spray a 9″ x 13″ baking pan with non-stick cooking spray (or coat with butter). Dump the bite-sized pieces of potatoes into the baking pan and spread evenly.
  4. In a large bowl, combine the cream, milk, flour, salt and pepper and whisk until thoroughly mixed. Pour this over the potatoes in the baking dish.
  5. Cover the baking dish with foil and bake for approximately 20 minutes. Remove foil and bake for an additional 15-20 minutes.
  6. Top with the cheese and bake for approximately 5 minutes, or until cheese melts and mixture is bubbly. Top with green onions and serve while hot. Enjoy!
Side Dish


Simply Chocolate French Silk Pie

Simply Chocolate French Silk Pie

The cool, creamy (and yes, silky!) chocolate topped with fresh homemade whipped cream definitely takes me back to my childhood! Yes, I was one of THOSE kids who preferred pie over cake for my Birthday…but not just ANY pie! It HAD to be Chocolate French Silk Pie from Miller & Rhoads Tea Room. Even though the Tea Room sadly closed years ago, this wonderful recipe will forever live on in our home and hopefully your home, as well 🙂

Pie Filling

  • 1 1/2 Sticks (or 12 Tablespoons) Salted Butter, Softened
  • 1 Cup + 2 Tablespoons Powdered Sugar
  • 1 1/2 teaspoons Vanilla Extract
  • 4 1/2 Squares Unsweetened Chocolate (Melted)
  • 2 Large Eggs (Keep Cold)
  • 1 9″ Pie Shell (Baked & Cooled)

Whipped Topping

  • 1 Cup Heavy Whipping Cream (Kept Cold)
  • 2 Tablespoons Powdered Sugar (Heaping Tablespoons)
  • 1/2 teaspoon Vanilla Extract
  • 1 Hershey Milk Chocolate Kiss

Making the Chocolate Filling

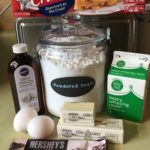
  1. Gather the ingredients
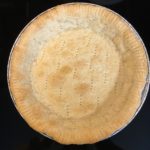
  2. Bake a 9″ pie crust and let cool while preparing the chocolate filling.
  3. Using a Stand or Handheld Mixer, cream the first 3 ingredients together on medium to medium high speed until light and creamy.
  4. Add the melted chocolate and continue beating until well blended.
  5. Add one cold egg and mix for 5 minutes on medium-high. Scrape the sides of the mixing bowl, then add the second cold egg and mix for another 5 minutes. Filling should be light and fluffy.
  6. Pour into the baked and cooled pie shell, spreading evenly. Chill in the refrigerator for at least 2 hours.

Making the Whipped Topping

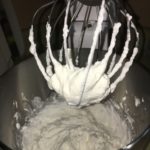
  1. Using a Stand or Handheld Mixer, whip the cold Heavy Whipping Cream, 2 heaping Tablespoons of Powdered Sugar and 1/2 teaspoon Vanilla Extract on medium-high for about 3-4 minutes (until stiff peaks form).
  2. Spread the whipped cream onto the chocolate filling and add chocolate shavings, if desired (I grated 1 Hershey Kiss for the shavings).
Desserts, Snacks