Frosted Pumpkin Spice Cookies ~ Gluten Free

Frosted Pumpkin Spice Cookies ~ Gluten Free
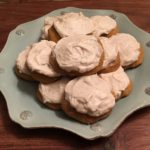
This is an updated version of my post from last year (2019), which was not a GF recipe. Fear not….this IS a Gluten Free recipe for soft, sweet and delicious Frosted Pumpkin Cookies. These wonderful little treats are mildly flavored with a blend of spices that you can adjust to satisfy your personal taste. Please let me know what you think 🙂

The Cookie:

  • 3 1/2 Cups Gluten Free All-Purpose Flour Blend (I used Better Batter brand)
  • 1 tsp Baking Powder, GF
  • 1 tsp Baking Soda
  • 1/2 tsp Table Salt
  • 2 1/2 tsp Cinnamon (increase to 3 tsp if you want a spicier taste)
  • 1/2 tsp Nutmeg (increase to 3/4 – 1 tsp for a spicier taste)
  • 1/4 tsp Ground Ginger (increase to 1/2 tsp for a spicier taste)
  • 1 Cup Dixie Crystals Extra Fine Granulated Sugar
  • 1 Cup Light Brown Sugar (packed)
  • 1 Cup Vegetable Oil (I use Canola Oil)
  • 2 Cups Canned Pumpkin Puree
  • 2 Large Eggs (lightly beaten)
  • 1 tsp Vanilla Extract (GF)

The Frosting:

  • 1 Cup Cream Cheese, softened (I use Philadelphia Cream Cheese (full fat))
  • 1/2 Cup Salted Butter, Softened
  • 3 tsp Vanilla Extract (GF)
  • 4 Cups Powdered Sugar
  • 1 tsp Ground Cinnamon

Making the Cookies:

  1. Line cookie sheet/sheets with parchment paper or silicone baking mats; set aside.
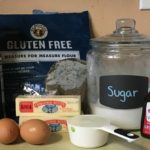
  2. Gather the ingredients.
  3. In a Large mixing bowl, sift together the GF Flour, Baking Powder, Baking Soda, Salt and Spices; Mix well; Set aside.
  4. In another Large mixing bowl, combine the Sugars, Oil, Pumpkin, Eggs and Vanilla Extract until completely blended.
  5. Gradually add the dry ingredients, one cup at a time, to the wet ingredients and mix until smooth.
  6. Cover bowl with plastic wrap or dish cloth and let rest for 30 minutes. This allows the GF Flour to absorb the moisture from the wet ingredients which reduces (hopefully, eliminates!) the grainy texture.
  7. When ready to bake the cookies, place oven rack in the middle position and preheat oven to 350 degrees.
  8. Using a Small cookie scoop (or medium, if you want larger cookies) scoop out the cookie dough onto the prepared baking sheets.
  9. Spray the back of a spoon with non-stick cooking spray and use the spoon to flatten the cookie mounds (re-apply spray as often as needed).
  10. Bake for 10-12 minutes.
  11. Let cookies cool on cookie sheet for 1-2 minutes before transferring to a wire rack to cool completely before frosting.

Making the Frosting:

  1. While the cookies are baking and cooling start making the frosting…
  2. Using a Handheld or Stand Mixer, beat the softened Butter, Cream Cheese and Vanilla Extract until well-blended.
  3. Gradually add the Powdered Sugar, one cup at a time, mixing until completely blended and creamy.
  4. Add the Ground Cinnamon and Mix thoroughly.
  5. You’re ready to frost the cookies and enjoy!

Note: The original recipe that I posted in 2019 was from “Two Sisters Crafting,” which I have updated so it is now GF, thanks in large part to “amyin the kitchen.com 🙂 I just love converting and joining recipes to see what the end results will be! Thanks so much for sharing your wonderful recipes!!!

Desserts, Snacks
American


Rustic Strawberry Tart (Gluten Free)

Rustic Strawberry Tart (Gluten Free)

We look forward to Spring every year because we get to make jam, jelly, frozen yogurt pies and yummy tarts with our buckets of fresh, plump Strawberries! This recipe was adapted from two of my favorite cooks/bakers/chefs….Ree Drummond (aka: The Pioneer Woman) and Kim (“letthemeatgfcake”). I simply swapped out the “regular” pie crust with Kim’s recipe for Gluten Free Pie Crust and filled it with a GF version of Ree’s Strawberry Filling. Topped with freshly whipped cream, this tart is out of this world!!! Enjoy 🙂

The Gluten Free Pie Crust:

  • 1 1/2 Cups Unsalted Butter (Chilled and Cut into 1/2″ pieces)
  • 3 Cups Gluten Free All-Purpose Flour Blend (this blend must include Xanthan Gum )
  • 1 Large Egg (beaten)
  • 1 Tbsp White Vinegar
  • 7-9 Tbsp Ice-cold Water
  • 1 tsp Salt
  • 1 Large Egg (for outside of crust)
  • 1 Tbsp Water (for outside of crust)

The GF Strawberry Filling:

  • 4 Cups Strawberries (cut into bite-size pieces)
  • 1/2 Cup Granulated Sugar
  • 2 Tbsp All-Purpose Gluten Free Flour (plus more for dusting work surface)
  • 1 tsp Vanilla Extract
  • 1 tsp Lemon Zest
  • 1 tsp lemon juice
  • 1/3 Cup Orange Marmalade (This is for using as a glaze for the strawberry filling; you can use just about any preserves, jams or marmalades that you have in your frig ;))
  • Splash Water

The Fresh Whipped Cream:

  • 1 Cup Heavy Whipping Cream (cold)
  • 3-4 Tbsp Powdered Sugar
  • 1 tsp Vanilla Extract

Making the GF Pie Crusts:

  1. NOTE: This recipe makes 2 pie crusts. You can refrigerate any unused & uncooked dough for up to 3 days, or freeze it for up to 3 months, well wrapped. To thaw the dough, move it to the refrigerator overnight, then let dough warm a little for about 20-30 minutes at room temperature.
  2. Gather the ingredients for the pie crusts.
  3. In a food processor, pulse together the GF Flour Blend and Salt until well combined.
  4. Next, add the Cold Butter pieces to the food processor and pulse until the butter is in large chunks.
  5. Add the Beaten Egg and Vinegar to the Butter/Flour mixture and pulse until just combined.
  6. Slowly add the Ice-cold Water, 1 Tablespoon at a time, to the dough mixture while pulsing. Note: depending on the humidity, you may not need all of the water. Pulse until the dough comes together.
  7. Divide the dough in half (I weigh mine) and wrap each half in plastic wrap, flattening the dough into discs. Refrigerate for at least 30 minutes.

Making the Strawberry Filling (while the Pie Dough is chilling):

  1. Gather the ingredients for the filling.
  2. Place one of your oven racks in the center position and preheat oven to 400 degrees.
  3. In a large bowl, combine the cut-up Strawberries, Sugar, GF Flour, Vanilla Extract, Lemon Zest and Juice until the Strawberries are well coated. Set aside while you roll out the pie dough.
  4. Lightly flour a piece of parchment paper and place one of the pie dough discs on top. Using a rolling pin, roll the dough out into an oval shape about 19″ x 11″ (thickness of dough should be about 1/4″).
  5. Transfer the rolled-out dough and the Parchment Paper to a baking sheet and spoon the Strawberry filling onto the center of the dough. Spread the filling evenly out, leaving a 1-2″ border of dough.
  6. Very gently fold the edges of the dough over the Strawberries, pinching together any folds in the dough.
  7. In a small bowl, whisk together 1 Large Egg and 1 Tbsp of water. Brush this egg wash onto the folded edges of the dough.
  8. Bake on the center rack for about 30 minutes, rotating the pan halfway through to evenly bake.
  9. While the tart is baking, warm the Preserves (or Jam/Jelly/Marmalade) with a splash of water (to help the Preserves spread).
  10. Once the crust is a golden brown, remove the Tart from the oven and gently brush the Strawberry filling with the warmed Preserves. Cool completely.

Making the Whipped Cream:

  1. Using a Stand Mixer, fitted with the Whisk attachment, whisk the Heavy Whipping Cream, Powdered Sugar and Vanilla Extract on Medium-High until soft peaks have formed.
  2. Serve the cooled Tart with a large dollop of freshly made Whipped Cream and watch it disappear!
Desserts, Lunch, Snacks
American


Gluten Free White Pearl Cupcakes

Gluten Free White Pearl Cupcakes

I think these cupcakes would be perfect for a Bridal Shower, Wedding, Anniversary, Birthday or any special occasion 🙂 Plus, they’re SO easy to make and absolutely delicious! Enjoy!

The Cupcake Batter

  • 1 Stick Salted Butter, softened ((8 Tbsp))
  • 1 Cup Granulated Sugar
  • 1 1/2 tsp Vanilla Extract
  • 3 Large Egg Whites
  • 1/2 Cup Whole Milk
  • 1 1/2 Cups Gluten Free All-Purpose Flour (I use King Arthur brand)
  • 2 tsp Baking Powder
  • 1/2 tsp Salt

The Buttercream Frosting

  • 2 Sticks Salted Butter, softened ((16 Tbsp))
  • 4 Cups Powdered Sugar
  • 2 tsp Vanilla Extract
  • 1/8 tsp Salt
  • 1/3 Cup Heavy Cream

Making the Cupcake Batter

  1. Gather the ingredients.
  2. Preheat Oven to 350 degrees.
    Line cupcake tin with cupcake liners and set aside.
  3. In a medium-sized bowl, sift together the GF Flour, Baking Powder and Salt. Set aside.
  4. Using a stand mixer fitted with the paddle attachment, cream the Softened Butter with the Granulated Sugar and Vanilla Extract until light and fluffy.
  5. Add the Egg Whites to the Butter mixture, mixing until well-blended.
  6. Slowly begin adding the Flour Mixture to the Butter mixture, alternating with the Milk, until all of the ingredients are mixed together and batter is smooth.
  7. Pour batter into the prepared cupcake tin, filling each cupcake liner 2/3 full (you may have enough batter for a couple of extra cupcakes).
  8. Bake for 15-18 minutes (my oven runs a little bit hot, so my cupcakes are ready in 15 minutes), or until toothpick comes out clean.
  9. Cool in pan for about 10 minutes before transferring the cupcakes to a wire rack to cool completely.

Making the Frosting

  1. Using a stand mixer fitted with the whisk attachment, whisk the butter until smooth and creamy.
  2. Slowly add the powdered sugar to the creamed butter until completely mixed. Increase speed to medium-high and whisk until fluffy.
  3. Next, add the Vanilla Extract and Heavy Cream, whisking on medium-high until light and fluffy (you may add extra Heavy Cream, if needed).
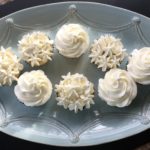
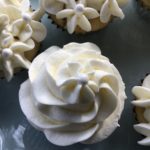
  4. Pipe the frosting onto the cupcakes, using whichever tip you desire (I used a Star tip)…or simply spread onto the cupcakes with a butter knife for a smooth effect. Top with Pearl candies or any other sprinkle, etc.
  5. Enjoy!

I want to thank “The Toasty Kitchen” for sharing her recipe for Easy White Cupcakes, which I adapted to a Gluten-Free Version 🙂

Desserts, Snacks


Homemade Vanilla Marshmallows

Homemade Vanilla Marshmallows

There’s nothing better than a Hot Cup of Cocoa with Homemade Marshmallows, a good Book and a Crackling Fire on a cold Winter’s night! This recipe can be easily tweaked by adding different flavored Gelatins or Extracts, adding hot cocoa powder to the powdered sugar to make chocolate marshmallows and cutting the marshmallows into fun designs using cookie cutters! Let your imagination soar 🙂 Thank you to dinnerthendessert.com for this awesome recipe!

  • 3 1/4 oz. packets Unflavored Gelatin (3/4 oz. Total)
  • 1/2 + 1/2 Cup Water (1 Cup Total)
  • 1 1/2 Cups Granulated Sugar
  • 1 Cup Light Corn Syrup
  • 1/8 tsp Salt
  • 1 Tablespoon Vanilla Extract (Can substitute different extract flavors)
  • 1/2 Cup Confectioner’s Sugar (Divided)
  • 1 Candy Thermometer (I know this isn’t an ingredient, but please make sure you have one of these before beginning)
  1. Gather the ingredients.
  2. Sprinkle 1/4 Cup of the Confectioner’s Sugar into a 9″ x 13″ baking dish. Set aside.
  3. Add the 3 Packets of Gelatin and 1/2 cup Water to the bowl of your Standing Mixer.
  4. Meanwhile, in a medium heavy saucepan, fitted with the Candy Thermometer, combine the Sugar, Corn Syrup, Salt and 1/2 Cup Water. Heat over Medium Heat, whisking until all of the Sugar is dissolved. Continue cooking until temperature reaches 240 degrees F. (Note: you do not need to whisk the entire time…let the mixture boil on its own after the sugar has dissolved, but do not leave unattended).
  5. Once the Sugar mixture has reached 240 degrees, turn off heat and leave the pot on the stove while you turn your Standing Mixer on to the Low setting.
  6. Slowly and carefully add the Sugar mixture to the Gelatin mixture in the Standing Mixer and blend for about 2 minutes, until thoroughly mixed.
  7. Next, increase the speed to High and mix for approximately 10 minutes, or until mixture has reached the consistency of Marshmallow Fluff.
  8. Add the Vanilla (or whatever flavor you desire) Extract and mix for another minute to thoroughly blend.
  9. Pour the Marshmallow mixture into the prepared 9″ x 13″ Baking Dish, spreading with a spatula to smooth out the surface.
  10. With the remaining 1/4 Cup Confectioner’s Sugar, sprinkle evenly over the top of the Marshmallow mixture. Place somewhere to let rest and firm up for 24 hours.
  11. Once the Marshmallow has firmed up, remove from the baking dish and place on a cutting surface.
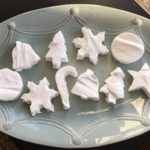
  12. Using a sharp knife, cut into squares or use cookie cutters to make different-themed shapes (dip knife and/or cookie cutters into Confectioner’s Sugar to help prevent sticking).
  13. Enjoy with a Hot Cup of Cocoa, a good book and a roaring fire!
Desserts, Snacks


Baya’s Spicy Holiday Pecans

Baya’s Spicy Holiday Pecans

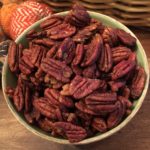
These spicy, crunchy Pecans bring back the fondest memories of the Holidays with my husband’s Grandmother, Baya. She used to make these delicious Pecan treats during Thanksgiving and Christmas for guests to snack on. I make sure to always have a batch or two baking in the oven during the Holidays to fill the house with warm, spicy fragrances. These Pecans also make the perfect Gifts! I hope you, your friends and family enjoy them as much as we do 🙂

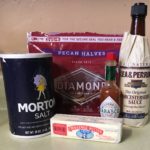
  • 4 Cups Pecan Halves
  • 10 Dashes Tabasco/Hot Sauce (Add more if you REALLY like some heat)
  • 1/3 Cup Worcestershire sauce
  • 1 Tablespoon Salted Butter, Melted
  • Salt (Sprinkle as little or as much as you desire)
  1. Gather the ingredients.
  2. Preheat oven to 270 degrees.
  3. In a large bowl, combine the Tabasco, Worcestershire Sauce and melted Butter. Mix well.
  4. Next, add the pecans to the Tabasco mix and toss gently with a rubber spatula to thoroughly coat the pecans.
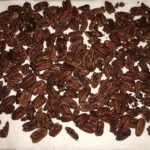
  5. Dump the pecans on a cookie sheet and spread them out evenly. Sprinkle with salt (as much or as little as you desire).
  6. Bake in the center of the oven for 15 minutes.
  7. Remove from oven, stir, salt and return to oven for another 15 minutes or until lightly crispy.
  8. Cool on a paper towel for 10-12 hours (I usually do this in the evening, so I can let them cool/crisp overnight).
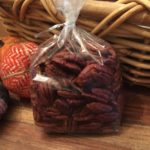
  9. If you’re giving these as gifts, pack in a plastic gift bag or tightly sealed container.
  10. Or place them in pretty bowls throughout your house for friends and family to munch 🙂
Snacks


Halloween Witch’s Hat Cookies

Halloween Witch’s Hat Cookies

These are the easiest Halloween Treats to make! You just need three ingredients, a decorating tip and a somewhat steady hand. I made these every year for each of my children’s classrooms and they were always a hit with the kids :).

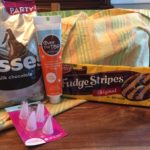
  • 1 24-Pack Keebler Fudge Stripe Original Fudge Stripe Cookies
  • 24 Hershey Kisses (I used the Regular Milk Chocolate ones, but you may use any flavor you desire)
  • 1-2 4 oz Tubes Decorating Icing (I used Orange and Yellow, but again choose any colors you want)
  • 1-2 #2 Tiny Round Decorating Tip
  1. Gather the ingredients
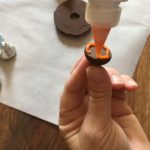
  2. Pipe around the bottom of a Hershey Kiss with the decorating icing.
  3. Place the Hershey Kiss rightside up on top of solid chocolate side of the Fudge Stripe cookie and press gently to secure.
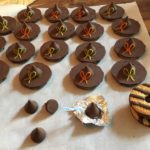
  4. Next, “draw” a bow with the decorating frosting on the Hershey Kiss and cookie (see photo).
  5. Repeat with the rest of the cookies and Kisses until done. I usually make enough for each child/adult to have 2 cookies.
  6. I hope you and your family enjoy these as much as we do!

Unfortunately, I injured my right hand…so my bows aren’t as neat as they used to be ;).

Desserts, Snacks