Gluten Free Lemon Pound Cake

Gluten Free Lemon Pound Cake

This Lemon Pound Cake turns out moist, tasty and delicious every time! Made with Fresh Lemon Juice and Lemon Zest puts this GF Lemon Pound Cake over the top! I have learned to make TWO cakes, since my family tends to inhale the first one within a few hours 😉
A big “Thank You” to America’s Test Kitchen for creating this recipe 🙂

Cake Ingredients:

  • 1 1/4 Cups King Arthur Gluten Free Multi-Purpose Flour (Sifted)
  • 1 tsp Baking Powder
  • 1/2 tsp Salt
  • 1/4 tsp Xanthan Gum
  • 1 1/4 Cup Granulated Sugar
  • 2 Tbsp Lemon Zest (about 2 lemons)
  • 1 Tbsp Lemon Juice (from the Lemons used for Zest)
  • 4 Large Eggs
  • 1/2 Cup Cream Cheese (softened)
  • 1 1/2 tsp Vanilla Extract
  • 1/2 Cup Unsalted Butter (Melted)

Glaze Ingredients:

  • 1/2 Cup Powdered Sugar
  • 2 tsp Lemon Juice

The Cake Instructions:

  1. Preheat oven to 350 degrees.
  2. Grease and flour an 8 1/2″ x 4 1/2″ loaf pan. Set aside.
  3. In a large mixing bowl, whisk the Flour, Baking Powder, Salt and Xanthan Gum until blended. Set aside.
  4. In a food processor, combine the Granulated Sugar and Lemon Zest until thoroughly mixed (about 7 pulses).
  5. Next, add the Lemon Juice, Eggs, Softened Cream Cheese and Vanilla Extract to the Sugar mixture. Process until completely blended (about 20-30 seconds)
  6. With the Food Processor running on Low, slowly drizzle the melted Butter into the Cream Cheese mixture. Continue processing until mixed completely (about 30-40 seconds).
  7. Add this Cream Cheese mixture to the Flour mixture in the large bowl. Whisk until thoroughly blended and smooth.
  8. Pour the batter into the prepared loaf pan. Bake for 15 minutes at 350 degrees. Decrease the temperature to 325 degrees and bake for an additional 35-40 minutes, or until cake is a light golden brown and toothpick inserted into the center comes out clean.
  9. Let cool in the pan on a wire rack for about 10 minutes. Remove cake from pan and continue cooling on the wire rack until completely cooled (about 1 1/2 hours).

The Glaze Instructions:

  1. In a small bowl, whisk together the Powdered Sugar and Lemon Juice until smooth, adding more sugar if not thick enough.

Putting it all Together:

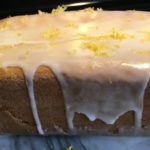
  1. Once the cake is completely cooled, drizzle the Glaze over the top of the cake, letting it run down the sides. Sprinkle fresh Lemon Zest on top and let Glaze set for about 15 minutes before serving. Enjoy 🙂

Store cake at room temperature in a large plastic baggie, sealed tightly.

Breakfast, Desserts, Snacks, Sweet Breads


Salmon with Chile-Lime Rub

Salmon with Chile-Lime Rub

This recipe is SO quick, easy and delicious…you’ll find yourself making it often 😉 You can bake it or grill it, serve it hot with your favorite sides or cold on a fresh bed of lettuce for lunch or dinner…the possibilities are endless! This recipe was inspired by Ina Garten’s “Salmon Tacos,” which you can find that recipe on my website. Thank you very much for sharing this wonderful recipe, Ina Garten 🙂

  • 1-2 lbs Fresh Salmon
  • 2-3 tsp Chile Powder
  • 2 tsp Freshly Grated Lime Zest (about 2 Limes)
  • 1/4-1/2 tsp Salt
  • 3 Tbsp Fresh Lime Juice (about 2 Limes)
  1. Preheat oven to 425 degrees.
  2. Cover a cookie/baking sheet with foil and spray with non-stick cooking spray. Set aside.
  3. Rinse and pat dry the Salmon fillets. Place them on the baking sheet, skin side down, and brush with the fresh Lime Juice, thoroughly coating the top and sides.
  4. In a small bowl, combine the Lime Zest, Chile Powder and Salt. MIx well and sprinkle onto the Salmon Fillets, covering them well.
  5. Bake for 15-18 minutes, depending on thickness of fillets.
  6. Top with fresh Lime Juice and grated Lime Zest. Serve with your favorite sides. Enjoy!
Dinner, Lunch, Main Dish


Gluten Free Chocolate Brownie-Cream Sandwiches

Gluten Free Chocolate Brownie & Cream Sandwiches

These little treats are sinfully rich, moist and delicious 🙂 They are certain to please any Gluten-Free Chocoholic! I converted this recipe from The Pioneer Woman’s (aka: Ree Drummond) “Chocolate Devils,” which were intended to be a cake-like consistency, but to our delight the Gluten-Free version turned out to be a moist, brownie-like consistency. A 5-Star hit in our household 🙂

Brownie Ingredients:

  • 2 Cups Gluten Free All-Purpose Flour, sifted (must be sifted to reduce grittiness)
  • 2 Cups Granulated Sugar
  • 1/4 tsp Salt
  • 1 Cup Butter, salted (2 sticks)
  • 4 Tbsp Cocoa (heaping Tbsps)
  • 1 Cup Boiling Water
  • 1/2 Cup Buttermilk
  • 1 tsp Baking Soda
  • 1 tsp Vanilla Extract
  • 2 Large Eggs

The Cream-Filling Ingredients:

  • 5 Tbsps All-Purpose Gluten Free Flour, Sifted (again, must be sifted to reduce grittiness)
  • 1 Cup Whole Milk
  • 1 tsp Vanilla Extract
  • 1 Cup Salted Butter, Softened ((2 sticks))
  • 1 Cup Granulated Sugar

The Ganache Ingredients:

  • 3 Cups Heavy Cream
  • 2 tsp Vanilla Extract
  • 4 Cups Semi-Sweet Chocolate Chips

Making the Gluten-Free Brownies

  1. Preheat Oven to 350 degrees.
  2. Gather the ingredients.
  3. Spray a cookie sheet with non-stick cooking spray. Line the cookie sheet with parchment paper and spray the paper as well. Set aside.
  4. In a stand mixer, combine the Flour, Sugar and Salt on low. Set aside while moving to the next step.
  5. In a small or medium saucepan, melt the butter. Add the Cocoa Powder and mix until completely combined. Add 1 Cup boiling water to the saucepan, mixing well and bring to a boil. Let boil for about 30 seconds. Add this mixture to the Flour mixture and blend on low until combined. Let cool slightly.
  6. In a medium-sized bowl, whisk the Buttermilk, Baking Soda, Vanilla and Eggs until thoroughly combined. Pour this into the Flour-Butter mixture and blend on low until completely combined.
  7. Scrape the Brownie mixture into the prepared cookie sheet, spreading evenly over the parchment paper.
  8. Bake for 20-25 minutes, or until toothpick inserted into the center comes out clean. Cool completely! This is very important – if brownies are not cooled all the way, the cream filling will just melt and turn to goop 🙁 If I have the time, I let mine cool overnight.
  9. Once completely cooled, cut the brownies into 2″ squares and place on a wire rack on another cookie sheet (you can use a square cookie cutter if you have one). Set in a cool spot while you prepare the cream filling.

Making the Cream Filling:

  1. In a small saucepan, whisk the GF Flour and Milk together and heat over medium-low heat, stirring constantly, until very thick (like pancake batter). Remove and cool completely. Add the Vanilla and blend thoroughly.
  2. Meanwhile, in a stand mixer fitted with the paddle attachment, cream the softened Butter and Sugar until VERY light, smooth and fluffy.
  3. Next, add the completely cooled Flour-Milk-Vanilla mixture to the Butter-Sugar mixture and beat on medium to medium-high for about 5-7 minutes – you want it to look like whipped cream.
  4. Using a pastry bag or plastic freezer (these are thicker and sturdier than regular ones) baggie fitted with a large star tip, fill the bag with the Cream Filling and pipe onto one of the cooled brownies. Place another brownie on top and press down gently. Repeat with the remaining brownies, reserving a small amount of the cream for the tops of the brownies. Set aside while you prepare the Ganache.

Making the Ganache:

  1. In a large saucepan, heat the Heavy Cream over medium-low until VERY hot. Add the Vanilla and Chocolate Morsels and stir until all of the chocolate is melted and blended completely.
  2. Remove Ganache from the heat and ladle over each Brownie Sandwich. Chill in the refrigerator for at least 1 hour.
  3. When ready to serve, top each Brownie Sandwich with some of the Cream and perhaps a cherry or raspberry 🙂
  4. Enjoy!

I know that there are a lot of steps involved, but believe me it’s well worth it!!!

Desserts, Snacks


Gluten Free Stovetop Mac & Cheese

Gluten Free Stovetop Mac & Cheese

Gluten-Free Mac & Cheese, that’s not only delicious and creamy, but SO easy to make! This is one of those dishes that I was really missing when I found out that I could no longer eat anything containing Gluten…but, after a few adjustments and substitutions, I can once again enjoy one of my all-time favorite comfort foods 🙂
A HUGE “Thank You” to one of my favorite cooks, Ree Drummond (The Pioneer Woman) for sharing her Macaroni and Cheese recipe – I am slowly converting our favorite Pioneer Woman’s recipes to Gluten Free versions 🙂

  • 12 Oz. Gluten Free Dried Pasta ((4 Cups) Any small pasta will do (Elbow Macaroni, Fusilli, Penne, etc.))
  • 1 Large Egg (whisked)
  • 4 Tbsp Salted Butter ((1/2 stick))
  • 1/4 Cup All-Purpose Gluten Free Flour, Sifted ((sifting the flour helps cut down on the grittiness))
  • 2 1/2 Cups Whole Milk
  • 1 1/2 – 2 tsp Dry Mustard (You can substitute with Creamy Dijon (start with 1 Tbsp of the prepared mustard and increase if desired))
  • 1 lb Medium or Sharp Cheddar Cheese (Freshly grated)
  • 1/2 tsp Salt (Increase or decrease pertaining to your diet)
  • 1/4 – 1/2 tsp Freshly Ground Pepper
  • Chopped Fresh Green Onions (Topping; optional)
  1. Gather the ingredients.
  2. In a small bowl, whisk the egg and set aside.
  3. Begin cooking pasta according to the instructions on the packaging.
  4. While the pasta is cooking, melt the butter in a large pot over medium-low heat;
    whisk in the sifted GF Flour, whisking constantly for about 2 minutes.
  5. Add the Milk and Mustard to the Butter-Flour combination. Whisk until completely blended and smooth. Continue heating and whisking over medium-low heat until sauce is thick. This will take about 5 minutes.
  6. Reduce heat to low and take about 1/4 cup of the sauce and whisk it into the beaten egg, whisking constantly to prevent egg from scrambling 😉
    Once thoroughly blended, add this to the rest of the sauce, again constantly whisking to prevent egg from cooking. Add the Shredded Cheese, Salt and Pepper, mixing until completely blended and smooth.
  7. Add the cooked and drained Pasta to the sauce, stirring to evenly coat the Pasta.
  8. Top with chopped green onions, chives, parsley, etc. Serve immediately 🙂
Dinner, Lunch, Main Dish, Side Dish
American


Gluten Free Chocolate Hydrangea Cupcakes

Gluten Free Chocolate Hydrangea Cupcakes

Even though I love Blue Hydrangeas, I just couldn’t bring myself to decorate these yummy cupcakes with Blue Icing….so, Pink Hydrangeas it is! The wonderful Chocolate of the cupcakes compliments the creamy Butter-Cream Icing perfectly….an instant hit in our household!!! Enjoy 🙂
A HUGE ‘Thank You” to America’s Test Kitchen for sharing this incredible Gluten Free Chocolate Cupcake recipe!

Cupcake Ingredients:

  • 1/2 Cup Canola Oil
  • 3 oz. Bittersweet Chocolate (chopped)
  • 1/3 Cup Unsweetened Cocoa Powder
  • 1/2 Cup + 2 Tbsp King Arthur Gluten Free Multi-Purpose Flour (sifted)
  • 3/4 tsp Gluten Free Baking Powder
  • 1/2 tsp Baking Soda
  • 1/2 tsp Xanthan Gum
  • 1/2 tsp Salt
  • 3 Large Eggs
  • 1 tsp Vanilla Extract
  • 3/4 Cup Granulated Sugar
  • 1/3 Cup Whole Milk

Buttercream Icing Ingredients:

  • 12 Tbsp Unsalted Butter (Softened)
  • 1 1/2 Tbsp Heavy Cream
  • 1 1/4 tsp Vanilla Extract
  • 1/8 tsp Salt
  • 1 1/2 Cups Powdered Sugar
  • Red Food Coloring Gel (as much or as little as you desire)

Making the Cupcakes:

  1. Preheat oven to 350 degrees.
  2. Line a 12-cup muffin tin with paper cupcake liners. Set aside.
  3. Gather the ingredients.
  4. In a microwave-safe bowl, microwave the Oil, Chocolate and Cocoa until chocolate is fully melted (about 2 minutes). Be sure to stir the mixture often to thoroughly mix ingredients and to prevent clumping. Remove from microwave and set aside to cool slightly.
  5. In a small bowl, whisk together the sifted GF Flour, Baking Powder, Baking Soda, Xanthan Gum and Salt. Set aside.
  6. In a large bowl, whisk together the Eggs, Vanilla Extract and Sugar until thoroughly blended.
  7. Next, whisk the Chocolate mixture and Milk into the Egg Mixture until thoroughly combined.
  8. Add the Flour Mixture to the Chocolate/Egg mixture, whisking until smooth and creamy.
  9. Using a 2″ cookie scoop or large spoon, scoop the batter into the prepared cupcake tin.
  10. Bake for 15-18 minutes, rotating the tin halfway through the baking time (my oven tends to run a little on the hot side, so 15 minutes is perfect for me), or until toothpick inserted into the middle of the cupcake comes out clean.
  11. Let cool in the cupcake tin for 10-15 minutes before transferring the cupcakes to a wire rack to cool completely.

Making the Buttercream Icing:

  1. In a Stand Mixer fitted with the whisk attachment, whisk the Butter, Heavy Cream, Vanilla Extract and Salt together on medium-high until smooth and creamy.
  2. Reduce speed to Low and slowly add the Powdered Sugar, 1/2 cup at a time, until well-blended.
  3. Increase speed to medium-high and whip until fluffy (about 5 minutes).
    If adding food coloring, do so halfway through this step and while mixer is turned OFF (I learned this the hard way ;))
  4. Once the cupcakes are completely cooled, you can begin icing them with the prepared icing/frosting using either a knife or pastry bag fitted with desired tip. Add sprinkles, too!
  5. Enjoy 🙂
Desserts, Snacks


Chicken Taco Salad

Chicken Taco Salad

Another delicious meal inspired by The Pioneer Woman (aka: Ree Drummond)!! This yummy salad immediately went to the top of my “Favorites” list 🙂 Made with Homemade Ranch Dressing (see link to recipe in notes below) and fresh Avocados turn an ordinary Taco Salad into a culinary dream!!! This one rates 5 stars in our household 🙂

The Chicken Ingredients:

  • 3-4 Breasts Boneless, Skinless Chicken Breasts (Cut into bite-size pieces)
  • 2-3 Tbsp Taco Seasoning (Regular or Reduced Sodium)
  • 1/4 Cup Canola Oil
  • 2 Tbsp Salted Butter

The Dressing Ingredients:

  • 3/4 – 1 Cup Homemade Ranch (or Store-Bought (see link in Recipe Notes for recipe))
  • 1/4 Cup Salsa (Mild, Medium or Spicy)

Salad Ingredients:

  • 2 – 15.25 oz. Cans Yellow or White Corn (drained)
  • 1-2 Bunches Lettuce (Chopped into bite-size pieces)
  • 2-3 Roma Tomatoes (Diced)
  • 1 Cup Monterey Jack Cheese (Shredded; or any other cheese that you prefer)
  • 1-2 Medium Avocados (cut into bite-size pieces)
  • 1-2 Sliced Green Onions
  • Crushed Tortilla Chips (optional)

For the Chicken & Dressing

  1. In a small/medium bowl, mix the Ranch Dressing and Salsa together until well-blended. Place in refrigerator while preparing the rest of the salad.
  2. Next, in a large skillet, heat the Oil and Butter on medium-low to medium until good and hot (the surface will begin to ripple when ready).
  3. Add the bite-size Chicken pieces and the Taco Seasoning to the skillet and stir to evenly coat the chicken.
  4. Continue cooking chicken for about 5 minutes, stirring often, until all of the pieces are cooked thoroughly.
  5. Using a slotted spoon, remove the chicken pieces to a large bowl, leaving drippings in the skillet. Set chicken aside.

For the Salad:

  1. Pour the drained Corn into the leftover chicken drippings in the skillet and heat over Low. Be certain to scrape the bottom of the skillet to incorporate all of the Chicken, Oil/Butter and Taco seasonings with the Corn.
  2. Once thoroughly heated and seasoned, scrape all of the Corn and drippings into a bowl for serving.
  3. I set up a serving station with all of the prepared Veggies, Chicken, Dressing, Cheese and Crushed Tortilla Chips placed in separate bowls.
  4. Now, let the crowd gather and prepare their Chicken Taco Salads as they wish! Enjoy 🙂
Lunch, Main Dish, Salads
Mexican


Gluten Free Lemon Cookies with Lemon-Cream Cheese Frosting

Gluten Free Lemon Cookies with Lemon-Cream Cheese Frosting

Crispy Lemon-Butter Cookies accented with Fresh Lemon Zest and topped with a Creamy Lemon Frosting infused with more Fresh Lemon Zest make these cookies sinfully delicious! I have to make a double batch every time I make these, because my family gobbles them up so quickly 🙂 If you like Lemony desserts, you’ll LOVE these cookies!

The Lemon Cookies

  • 1 Cup Unsalted Butter, softened ((2 Sticks))
  • 1 Cup Powdered Sugar
  • 1/2 tsp Salt
  • 1/2 tsp Pure Vanilla Extract
  • 1 Tbsp Lemon Zest
  • 1 Tbsp Fresh Lemon Juice
  • 2 Cups Gluten Free All-Purpose Flour (Sifted)

The Creamy Lemon Frosting

  • 1/2 Cup Cream Cheese, softened
  • 1 1/2 Cups Powdered Sugar
  • 1 Tbsp Lemon Zest
  • 1 Tbsp Fresh Lemon Juice
  • 1/8 tsp Butter, Unsalted
  1. Gather the ingredients needed for the Lemon Cookie dough.
  2. Using a Stand Mixer fitted with the Paddle attachment, cream together the Butter, Powdered Sugar and Salt until light and fluffy.
  3. Add the Vanilla Extract, Lemon Zest and Lemon Juice to the Butter mixture, mixing until combined.
  4. Next, gradually add the GF Flour, 1/2 cup at a time, to the mixing bowl, blending thoroughly between each addition and scraping down the sides of the bowl as needed.
  5. Once the cookie dough has been thoroughly blended, turn the dough out onto a large cutting board and roll into a log about 9″-10″ in length. Wrap this log tightly in plastic wrap and place in freezer for at least 2 hours.
  6. When dough is chilled enough for slicing, preheat oven to 350 degrees and remove chilled dough from the freezer.
  7. Line a cookie sheet with a nonstick baking mat or Parchment paper. Set aside.
  8. Using a sharp knife, slice the dough log into 1/4″ thick sections and place each disc about 2″ apart onto the prepared cookie sheet.
  9. Bake for 12-15 minutes, or until edges turn a light golden-brown.
  10. Let cookies cool on pan for 1-2 minutes until removing to a wire cooling rack. Cool completely before applying the frosting.

Making the Creamy Lemon Frosting

  1. Using a Stand Mixer fitted with the Paddle attachment, cream together the softened Cream Cheese and Powdered Sugar until well-blended.
  2. Add the Lemon Zest, Lemon Juice and Salt to the Cream Cheese mixture. Continue beating until completely mixed.
  3. Transfer the Frosting to a piping bag, fitted with a large star tip. Please Note: this is optional, as you can apply the frosting either using a butter knife or a piping bag (or plastic storage bag) with the end snipped off.
  4. When the cookies are completely cooled, spread or pipe the desired amount of frosting onto each cookie. Enjoy 🙂

Note: I usually make the frosting while the cookies are baking, so I can place it into the refrigerator to set. If you find that the frosting gets too soft while piping, place it into the refrigerator for 10-15 minutes to harden a little.

Desserts, Snacks