Baked Herb-Mayonnaise Chicken

Baked Herb-Mayonnaise Chicken

This recipe is SO quick and easy to make and I bet most of you already have these ingredients in your kitchen! Plus, you can easily swap the herbs with ones that you have on hand, as well as the mayo…you can use regular mayo, lite mayo or substitute sour cream for the mayo (I recently made it with half mayo and half sour cream, because we were running low on mayonnaise, and it was delicious!) The chicken comes out very moist and tender every time 🙂
A BIG “Thank You” to allrecipes for sharing the original recipe for Mayo Chicken…it is divine!!! 🙂

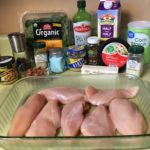
  • 4-6 Boneless, Skinless Chicken Breasts
  • 1 Cup Mayonnaise (I used Hellmann’s Regular Mayonnaise, but you can use Lite or substitute with Sour Cream*)
  • 1 tsp Crushed Garlic
  • 1/2 heaping tsp Dried Basil (or whatever you have on hand)
  • 1/2 heaping tsp Dried Oregano (or whatever you have on hand)
  • 3/4 tsp Salt
  • pinch Pepper
  • 1/2 – 3/4 Cup Parmesan Cheese (grated or shredded)
  1. Preheat oven to 350 degrees.
  2. Spray a 9″ x 13″ baking dish with non-stick cooking spray. Set aside.
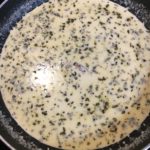
  3. In a medium bowl, mix together the Mayonnaise (or Sour Cream), Garlic, Herbs, Salt & Pepper until well-blended.
  4. Place Chicken Breasts in the baking dish, leaving a little space between each breast.
  5. Using a pastry brush or back-side of spoon, spread the Mayonnaise mixture onto both sides of the Chicken Breasts, coating evenly.
  6. Sprinkle desired amount of Parmesan Cheese onto the top of each Chicken Breast.
  7. Bake uncovered for 30-45 minutes, or until inside temperature of chicken registers 160 degrees.
  8. Serve with your favorite side. Enjoy!

*The original recipe called for 1 Cup regular mayonnaise and 1 Tbsp of fresh Rosemary. However, as I noted in the Ingredients section, you can use regular or lite mayonnaise or 1/2 mayo + 1/2 Sour Cream or all sour cream. As far as the herbs are concerned, have fun and try different herbs (dried and/or fresh)…the sky is the limits 😉

Dinner, Main Dish
American


Gluten Free Chicken Quesadillas

Gluten Free Chicken Quesadillas

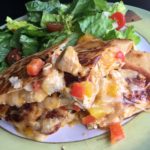
I absolutely LOVE these Chicken Quesadillas! The crispy tortilla wraps paired with the spicy chicken, veggies and cheese really give these Quesadillas an authentic Mexican taste! And, they are surprisingly easy to prepare and oh so delicious 🙂

The Quesadilla:

  • 3-4 Large Boneless, Skinless Chicken Breasts (Cut into bite-size pieces)
  • 2-3 Tbsp Olive Oil
  • 2-3 Tbsp Gluten Free Taco Seasoning (I use McCormick Gluten Free Taco Seasoning Mix or make my own)
  • 1 Large Onion, diced
  • 3 Large Bell Peppers, seeded & diced (I use whatever peppers I have on hand)
  • 1-2 Tbsp Fresh Lime Juice (Freshly squeezed over the top of Chicken and Veggies)
  • 1-2 pinches Freshly Ground Pepper
  • 3-4 Cups Shredded Cheese (Monterey Jack & Cheddar combination is wonderful)
  • 12 Gluten Free Tortilla Wraps (I use “Mission” brand)
  • 10-12 Tbsp Salted Butter (I usually use softened butter and spread desired amount on one side of each Tortilla Shell for frying)

Toppings:

  • Sour Cream (I use Lite)
  • Pico de Gallo (This is wonderful either by itself or mixed with Ranch Dressing for dipping)
  • Ranch Dressing (either store-bought or homemade (see recipe below in the Notes)
  • Shredded Cheese (any variety)
  • Fresh Cilantro, chopped (or Parsley)
  1. Gather the ingredients.
  2. In a large skillet, heat about 1-1 1/2 Tbsp Olive Oil over medium heat.
  3. Add the Chicken pieces, Taco Seasoning and Ground Pepper to the skillet, gently stirring/tossing until chicken is well-coated with the seasonings. Cook until chicken is done (about 5-8 minutes). Remove chicken from the skillet with a slotted spoon/spatula, placing it into a bowl to rest. Set aside.
  4. In the same skillet, lower the temperature to medium-low and add another 1 -1 1/2 Tbsp Olive OIl and the diced Onion and Peppers. Cook for about 3 minutes, stirring often.
  5. Once the veggies are done, reduce temperature to low and add the cooked chicken. Stir to mix well. Add the Fresh Lime Juice at this step.
  6. In a separate skillet, melt about 1/2 Tbsp Butter over medium-low heat and place one Tortilla Wrap/Shell in the skillet.
  7. Next, start building the Quesadillas by sprinkling some shredded cheese to cover the shell; then add some of the chicken & veggie mixture; then place more shredded cheese on top of the chicken/veggies; top with a second tortilla shell.
  8. Once the bottom tortilla is starting to get crispy and golden brown, lift the Quesadilla using a large spatula, and drop another 1/2 tbsp of butter into the pan. Now, carefully flip the Quesadilla onto the other side and cook until crispy and golden. Repeat these steps with the remaining tortillas and chicken mixture.
  9. Cut each Quesadilla into quarters and serve with a fresh salad and an assortment of the toppings.
  10. Enjoy!

This recipe can easily be cut in half or doubled, depending on the desired amount.

Fresh Homemade Ranch Recipe: https://smallthymecook.com/recipe/homemade-ranch-dressing-dip/

Dinner, Lunch, Main Dish
Mexican


Salmon with Chile-Lime Rub

Salmon with Chile-Lime Rub

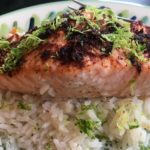
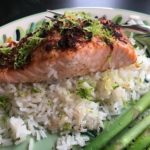
This recipe is SO quick, easy and delicious…you’ll find yourself making it often 😉 You can bake it or grill it, serve it hot with your favorite sides or cold on a fresh bed of lettuce for lunch or dinner…the possibilities are endless! This recipe was inspired by Ina Garten’s “Salmon Tacos,” which you can find that recipe on my website. Thank you very much for sharing this wonderful recipe, Ina Garten 🙂

  • 1-2 lbs Fresh Salmon
  • 2-3 tsp Chile Powder
  • 2 tsp Freshly Grated Lime Zest (about 2 Limes)
  • 1/4-1/2 tsp Salt
  • 3 Tbsp Fresh Lime Juice (about 2 Limes)
  1. Preheat oven to 425 degrees.
  2. Cover a cookie/baking sheet with foil and spray with non-stick cooking spray. Set aside.
  3. Rinse and pat dry the Salmon fillets. Place them on the baking sheet, skin side down, and brush with the fresh Lime Juice, thoroughly coating the top and sides.
  4. In a small bowl, combine the Lime Zest, Chile Powder and Salt. MIx well and sprinkle onto the Salmon Fillets, covering them well.
  5. Bake for 15-18 minutes, depending on thickness of fillets.
  6. Top with fresh Lime Juice and grated Lime Zest. Serve with your favorite sides. Enjoy!
Dinner, Lunch, Main Dish


Gluten Free Stovetop Mac & Cheese

Gluten Free Stovetop Mac & Cheese

Gluten-Free Mac & Cheese, that’s not only delicious and creamy, but SO easy to make! This is one of those dishes that I was really missing when I found out that I could no longer eat anything containing Gluten…but, after a few adjustments and substitutions, I can once again enjoy one of my all-time favorite comfort foods 🙂
A HUGE “Thank You” to one of my favorite cooks, Ree Drummond (The Pioneer Woman) for sharing her Macaroni and Cheese recipe – I am slowly converting our favorite Pioneer Woman’s recipes to Gluten Free versions 🙂

  • 12 Oz. Gluten Free Dried Pasta ((4 Cups) Any small pasta will do (Elbow Macaroni, Fusilli, Penne, etc.))
  • 1 Large Egg (whisked)
  • 4 Tbsp Salted Butter ((1/2 stick))
  • 1/4 Cup All-Purpose Gluten Free Flour, Sifted ((sifting the flour helps cut down on the grittiness))
  • 2 1/2 Cups Whole Milk
  • 1 1/2 – 2 tsp Dry Mustard (You can substitute with Creamy Dijon (start with 1 Tbsp of the prepared mustard and increase if desired))
  • 1 lb Medium or Sharp Cheddar Cheese (Freshly grated)
  • 1/2 tsp Salt (Increase or decrease pertaining to your diet)
  • 1/4 – 1/2 tsp Freshly Ground Pepper
  • Chopped Fresh Green Onions (Topping; optional)
  1. Gather the ingredients.
  2. In a small bowl, whisk the egg and set aside.
  3. Begin cooking pasta according to the instructions on the packaging.
  4. While the pasta is cooking, melt the butter in a large pot over medium-low heat;
    whisk in the sifted GF Flour, whisking constantly for about 2 minutes.
  5. Add the Milk and Mustard to the Butter-Flour combination. Whisk until completely blended and smooth. Continue heating and whisking over medium-low heat until sauce is thick. This will take about 5 minutes.
  6. Reduce heat to low and take about 1/4 cup of the sauce and whisk it into the beaten egg, whisking constantly to prevent egg from scrambling 😉
    Once thoroughly blended, add this to the rest of the sauce, again constantly whisking to prevent egg from cooking. Add the Shredded Cheese, Salt and Pepper, mixing until completely blended and smooth.
  7. Add the cooked and drained Pasta to the sauce, stirring to evenly coat the Pasta.
  8. Top with chopped green onions, chives, parsley, etc. Serve immediately 🙂
Dinner, Lunch, Main Dish, Side Dish
American


Chicken Taco Salad

Chicken Taco Salad

Another delicious meal inspired by The Pioneer Woman (aka: Ree Drummond)!! This yummy salad immediately went to the top of my “Favorites” list 🙂 Made with Homemade Ranch Dressing (see link to recipe in notes below) and fresh Avocados turn an ordinary Taco Salad into a culinary dream!!! This one rates 5 stars in our household 🙂

The Chicken Ingredients:

  • 3-4 Breasts Boneless, Skinless Chicken Breasts (Cut into bite-size pieces)
  • 2-3 Tbsp Taco Seasoning (Regular or Reduced Sodium)
  • 1/4 Cup Canola Oil
  • 2 Tbsp Salted Butter

The Dressing Ingredients:

  • 3/4 – 1 Cup Homemade Ranch (or Store-Bought (see link in Recipe Notes for recipe))
  • 1/4 Cup Salsa (Mild, Medium or Spicy)

Salad Ingredients:

  • 2 – 15.25 oz. Cans Yellow or White Corn (drained)
  • 1-2 Bunches Lettuce (Chopped into bite-size pieces)
  • 2-3 Roma Tomatoes (Diced)
  • 1 Cup Monterey Jack Cheese (Shredded; or any other cheese that you prefer)
  • 1-2 Medium Avocados (cut into bite-size pieces)
  • 1-2 Sliced Green Onions
  • Crushed Tortilla Chips (optional)

For the Chicken & Dressing

  1. In a small/medium bowl, mix the Ranch Dressing and Salsa together until well-blended. Place in refrigerator while preparing the rest of the salad.
  2. Next, in a large skillet, heat the Oil and Butter on medium-low to medium until good and hot (the surface will begin to ripple when ready).
  3. Add the bite-size Chicken pieces and the Taco Seasoning to the skillet and stir to evenly coat the chicken.
  4. Continue cooking chicken for about 5 minutes, stirring often, until all of the pieces are cooked thoroughly.
  5. Using a slotted spoon, remove the chicken pieces to a large bowl, leaving drippings in the skillet. Set chicken aside.

For the Salad:

  1. Pour the drained Corn into the leftover chicken drippings in the skillet and heat over Low. Be certain to scrape the bottom of the skillet to incorporate all of the Chicken, Oil/Butter and Taco seasonings with the Corn.
  2. Once thoroughly heated and seasoned, scrape all of the Corn and drippings into a bowl for serving.
  3. I set up a serving station with all of the prepared Veggies, Chicken, Dressing, Cheese and Crushed Tortilla Chips placed in separate bowls.
  4. Now, let the crowd gather and prepare their Chicken Taco Salads as they wish! Enjoy 🙂
Lunch, Main Dish, Salads
Mexican


Red Curry & Pineapple Lentil Stew with Rice

Red Curry & Pineapple Lentil Stew with Rice

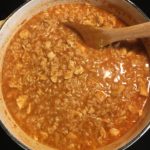
This delightful dish is one of my “go to” recipes for when I’m in the mood for a sweet, savory and filling vegetarian meal…although, I have added shredded chicken to this dish and it’s delicious! I hope you enjoy this easy and yummy stew 🙂

  • 1 Small Onion
  • 4-5 Cloves Garlic (Or 2 1/2 tsp already minced garlic from jar)
  • 2-3 tsp Ginger Paste (This is found in the produce section; or can use 2 sugar-cube size chunks of fresh ginger )
  • 1-2 Tablespoons Olive Oil (I used 2 Tablespoons)
  • 2 tsp Gluten Free Soy Sauce (I used low sodium type)
  • 1 28 oz. Can Crushed Tomatoes
  • 1 20 oz. Can Crushed Pineapple (Do not drain the juice…use the entire contents of can)
  • 1 20 oz. Can Pineapple Tidbits ((optional) I usually use 3/4 of the can)
  • 1-2 Tablespoons Red Curry Paste (I add 1/2 Tablespoon at a time and taste-test as stew simmers…I usually add 1 1/2 T total)
  • 1 1/2 Cups Lentils (I use the Green variety)
  • 2 Cups Water
  • 1 1/2 – 2 Cups Plain Coconut Milk (Added 1/2 cup at a time until desired consistency is reached)
  • 1/8-1/4 tsp Ground Cinnamon
  • 2-4 Cups Rice, cooked (Any variety is fine; amount is up to you)
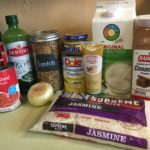
  1. Gather the ingredients.
  2. Using a food processor, finely mince the Onion, Garlic and Ginger.
  3. In a large skillet, heat the Olive Oil over medium-low and add the minced Onion mixture. Saute for about 5 minutes.
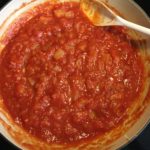
  4. Add the Soy Sauce, Crushed Tomatoes, Crushed Pineapple and 1/2 Tablespoon at a time of the Red Curry Paste to the skillet. Mix until well-blended. Let cook down for about 5-7 minutes.
  5. Next, add the Lentils and Water. Reduce temperature to low and Simmer for about 20 minutes.
  6. Lastly, add the Coconut Milk (1/2 Cup at a time) and Cinnamon (add some Pineapple Tidbits at this point, if you’re adding them). Mix well and continue simmering for at least 15 minutes.
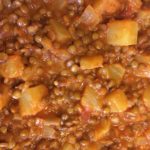
  7. Once the Lentils are tender, serve over cooked Rice or all by itself. Enjoy!

This recipe is so versatile and easy…add, replace, increase or decrease ingredients as you desire (i.e. we like our Lentil Stew on the sweet side, so I add the entire can of Crushed Pineapples and 3/4 of the can of Pineapple Tidbits).

Appetizers, Lunch, Main Dish, Soup, Stew


Gluten Free Sandwich Bread

Gluten Free Sandwich Bread

After trying several Gluten Free Breads available in the stores, I decided to try making my own. I finally found a recipe that is simple, delicious and easy on the purse…the total cost per 2 pound loaf is just $5.43 (give or take a few cents, depending on price fluctuations of ingredients).
An enormous “Thank You” to America’s Test Kitchen for creating this recipe!!! 🙂

  • 2 Tbsp Unsalted Butter (Melted and cooled)
  • 2 Large Eggs
  • 2 Cups Warm Water (110 degrees – do NOT use water over this temperature, because it will kill the yeast)
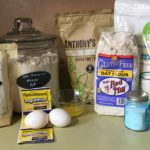
  • 2 1/3 + 1/4 Cups King Arthur Gluten Free Multi-Purpose Flour (Sifted)
  • 1 1/3 Cups Gluten Free Oat Flour (Sifted)
  • 1/2 Cup Nonfat Dry Milk Powder
  • 3 Tbsp Powdered Psyllium Husk
  • 2 Tbsp Granulated Sugar
  • 2 1/4 tsp Rapid Rise or Instant Yeast
  • 2 tsp Baking Powder
  • 1 1/2 tsp Salt
  1. Gather the ingredients.
  2. Spray loaf pan with non-stick cooking spray and set aside.
  3. Melt the Butter and set aside to cool a little.
  4. In a Stand Mixer, using the paddle attachment (not the dough hook), mix the dry ingredients – GF Flour, Oat Flour, Dry Milk Powder, Psyllium, Sugar, Yeast, Baking Powder and Salt on Low until blended (about 1 minute).
  5. In a separate bowl, whisk the Eggs with the 110 degree Water and melted Butter until well-blended.
  6. Slowly add the Water mixture to the Dry Ingredients in the Stand Mixer, mixing on Low until all ingredients are blended, scraping sides as needed. Increase speed to Medium and mix for 6 minutes. Dough will look like cookie dough.
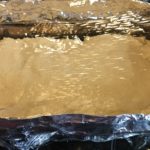
  7. Using a rubber spatula that is sprayed with non-stick cooking spray, scrape dough into the prepared loaf pan and smooth out surface with wet hands. Note: if using an 8 1/2″ pan you will need to wrap a foil collar around the pan (staple ends together), in case dough rises above the top (see photo).
  8. Spray or flick water with hands onto the top of the bread dough and cover loosely with plastic wrap.
  9. Place in a warm spot to rise about 50% – usually about 1 hour.
  10. Preheat oven to 350 degrees and put oven rack in the middle position.
  11. When ready to bake, remove plastic and spray or flick water onto the top of bread and bake for 1 – 1 1/2 hours (our oven runs a bit hot, so I usually only bake my bread for 1 hour). Bread is ready when it turns golden brown and sounds hollow when tapped.
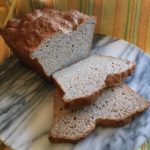
  12. Let cool for about 10 minutes in pan. Then remove to a wire rack to cool completely. Enjoy with butter and honey (or your favorite jam).
  1. Bread keeps on shelf tightly sealed in a plastic bag for 3-5 days.
  2. Freezes well, too, if you can resist eating the entire loaf!
  3. I keep a back-up Ziploc Baggie with all of the dry ingredients already sifted and mixed in the refrigerator for a quick start 🙂
Lunch, Main Dish, Snacks


Gluten Free Chicken Spaghetti

Gluten Free Chicken Spaghetti

This recipe was actually kind of an accident…I ran out of time to go to the grocery store, so I had to scrounge around in my pantry and refrigerator to come up with something for dinner. To my surprise, this dish was an instant hit with my family!!! I hope you and your family like it as well 🙂

  • 2 Large Boneless, Skinless Chicken Breasts (You can use leftovers, if you have them)
  • 12 Oz. Box Gluten Free Spaghetti Noodles (Broken in half)
  • 2-2 1/2 Cups Shredded Cheddar Cheese (Mild, Regular or Sharp)
  • 1 Large Bell Pepper, finely diced (Any color you have on hand will do…I used a Yellow one, because that’s what I had ;))
  • 1 10 3/4 oz. can Cream of Chicken Soup (You may use Cream of Mushroom, if you don’t have Cr. of Chicken)
  • 1 tsp Season All
  • 1/8 tsp Cayenne
  • 1/4 tsp Freshly Ground Black Pepper
  • 1-2 Sliced Green Onions (optional)
  1. Preheat oven to 350 degrees.
  2. Gather the ingredients.
  3. Spray a 9″ x 13″ baking dish with non-stick cooking spray. Set aside.
  4. If your chicken breasts are raw, boil them for about 15 minutes in a large pot, reserving the water to be used later for cooking the pasta.
  5. Once the chicken breasts are almost done, remove them from the hot water to a cutting board to cool slightly. In addition, remove 1 cup of the water and set aside.
  6. Bring the water that was used to cook the chicken to a boil and add the pasta, cooking until al dente.
  7. While the pasta is cooking, shred the chicken and place in a large bowl.
  8. In the same large bowl, add the Cream of Chicken Soup, 1 1/2 cups of the Shredded Cheddar Cheese, the bell pepper and spices. Mix well with the shredded chicken.
  9. Add the cooked spaghetti and the 1 cup of reserved water to the chicken mixture, mixing well.
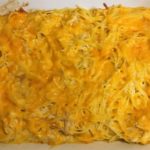
  10. Dump this mixture into the prepared baking dish and spread out evenly. Top with the remaining cheese.
  11. Bake uncovered for 40-45 minutes, covering with foil if the cheese starts to brown.
  12. Top with sliced green onions and serve. Yummy!
Lunch, Main Dish


Mexican Chicken & Rice Soup

Mexican Chicken & Rice Soup

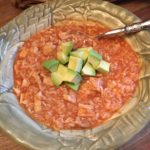
This soup is warm, hearty and filling…making it perfect for these cold Winter days! I particularly like this soup because it’s not only wonderful on Day 1, but also gets tastier and thicker as time goes by. Top with your favorite toppings, such as avocados, sour cream, shredded cheese, chopped onions, lime, etc. Enjoy 🙂

Soup

  • 2 Tbsp Olive Oil
  • 1-2 Garlic Cloves (Finely Chopped)
  • 1 tsp Ground Coriander
  • 1 tsp Ground Cumin
  • 1 tsp Chile Powder
  • 1 Can (14.5 oz) Crushed Tomatoes
  • 6 Cups Chicken Broth
  • 2-3 Boneless Skinless Chicken Breasts
  • 1 Cup Rice, uncooked (I use Basmati or Jasmine)
  • Salt (to taste (optional))
  • Pepper (to taste)

Toppings (The Sky is the Limit!)

  • Avocados (Cut into bite-size pieces)
  • Chopped Onions (Green or White…any variety)
  • Shredded Cheese
  • Sour Cream
  • Croutons
  • Lime Juice
  1. Gather the ingredients.
  2. In a large Stock Pot (or Dutch Oven), heat the Olive Oil over medium-low. Add the Garlic and cook for 2-3 minutes or until Garlic starts to turn a light golden brown.
  3. Add the spices (Coriander, Cumin and Chile Powder) and cook for 1-2 minutes.
  4. Next, add the Chicken Broth and Tomatoes. Increase the temperature to medium-high or high and bring to a simmer, stirring constantly.
  5. Once the mixture starts to bubble, decrease the temperature back to medium-low and add the Chicken Breasts. Cook for about 10-12 minutes, stirring often and turning the Chicken Breasts over halfway through to evenly cook.
  6. Remove the Chicken Breasts from the pot, placing on a cutting board to be shredded once it’s cool enough to handle.
  7. While Chicken is cooling a little, add the Rice, Ground Pepper and Salt (if adding). Continue cooking over medium-low heat while you shred the chicken.
  8. Add the shredded Chicken back into the stock pot and continue cooking until the Rice is thoroughly cooked (about 15-20 minutes, depending on the type of Rice you use).
  9. Serve the soup with the assortment of toppings.
    Yummy!
Lunch, Main Dish
Mexican


Creamy Garlic Chicken with Spinach & Bacon

Creamy Garlic Chicken with Spinach & Bacon

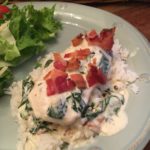
If you’re searching for a tasty Chicken dish for these cold Winter nights that will satisfy just about any palate, look no further! This creamy recipe is not only savory and rich, but hearty and filling! And, if you’re not in the mood for Bacon (who in the world would NOT be?!), just substitute Sundried Tomatoes. This dish is quick and easy to make 🙂
Many thanks to eatwell101 for sharing this delicious recipe!!!

  • 6 Boneless, Skinless Chicken Breasts (Rinsed and patted dry with paper towels)
  • 2 tsp Olive Oil
  • 2 Tbsp Butter (salted or unsalted)
  • 3 tsp Garlic (chopped (I use the already chopped garlic in a jar from the produce section))
  • 1/3 Cup Chicken Broth
  • 5-6 Crispy Bacon Strips (If you’re substituting Sundried Tomatoes, use as much or as little as you want (I usually add about 5 Tablespoons))
  • 1 3/4 Cup Half & Half (You may also use Heavy Cream or Skim Milk)
  • 3 Cups Spinach Leaves (Fresh)
  • 1/2 tsp Dried Oregano
  • 1/2 tsp Dried Basil
  • Salt & Pepper (to taste)
  • 1/2 Cup Parmesan Cheese (Shredded)
  • Crushed Chili Pepper Flakes (Optional)
  • 1 tsp Cornstarch (mixed with 1 Tablespoon water if you need/want a thicker sauce)
  1. Gather your ingredients.
  2. In a large skillet, heat the Olive Oil over low to medium heat (our cooktop runs quite hot, so I cook this between Low and Medium heat).
  3. Sprinkle both sides of the chicken breasts with salt and pepper and add to the skillet, adjusting the temperature to brown both sides. Cook about 6-8 minutes per side, depending on the thickness of the breasts. Remove the chicken breasts from the skillet, once they’re cooked and set aside (you may place them in a warm oven).
  4. Next, add the butter to the skillet, mixing with the leftover chicken juices. Once melted, add the garlic and cook for approximately 1 minute.
  5. Add the Chicken Broth to the butter and garlic mixture in the skillet. Cook for 2 minutes to reduce down slightly. Add the Bacon (or the Sundried Tomatoes) and cook for another 1-2 minutes.
  6. Add the Half & Half (or Heavy Cream or Skim Milk) to the skillet and continue cooking over Low Heat until mixture starts to bubble, stirring frequently. Add the Basil and Oregano (and salt & pepper to taste, optional).
  7. Add the Spinach and Parmesan Cheese and simmer until Spinach has wilted and cheese has melted. At this stage, if you want a thicker sauce, add the Cornstarch & Water mixture, mixing well. Continue simmering and stirring often.
  8. Once the sauce has reached the desired consistency, add the chicken breasts back into the skillet, coating well with the sauce. Add the chili pepper flakes, if using.
  9. Heat for a few minutes to warm the chicken. Top each breast with the savory garlic sauce and extra Bacon, if desired. Serve over steamed rice and your favorite veggie. Enjoy!
Main Dish