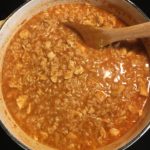
Buffalo Chicken Dip

Buffalo Chicken Dip
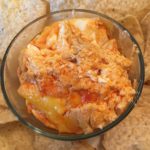
This is our middle daughter’s favorite food…I seriously think she would eat it for Breakfast, Lunch and Dinner EVERY day of her life if others didn’t step in and insist on some variety in her diet 😉
It really IS delicious, though! Our family doesn’t just eat it as an appetizer or hors d’oeuvres, but as a meal with fresh bread/rolls and a big salad 🙂 A definite 5-Stars in this household!

  • 4-6 Large Boneless, Skinless Chicken Breasts (about 3 lbs.; boiled and shredded)
  • 1 1/4 Cup Hot Sauce (I use Sweet Baby Ray’s Buffalo Wing Sauce because it’s Gluten Free and SO yummy!)
  • 2 Cups Ranch Dressing (I make my own using Hidden Valley Ranch Powder, but store-bought in the bottle is just fine ;))
  • 2 Blocks Cream Cheese ((16 oz) I use full fat Philadelphia Cream Cheese)
  • 3 Cups Shredded Cheddar Cheese (You can also use half Cheddar and half Monterey Jack)
  1. Preheat oven to 350 degrees.
  2. In a 9″ x 13″ (or 4 quart) baking dish dish, mix together the Chicken, the Hot Sauce and 1 1/2 Cups Shredded Cheese until thoroughly blended; Spread out evenly in the pan and set aside.
  3. In a medium saucepan, heat the Ranch Dressing and the Cream Cheese over Low heat until the Cream Cheese has completely melted and the mixture is smooth. Pour this mixture evenly over the Chicken mixture in the baking dish.
  4. Top with the remaining Shredded Cheese.
  5. Bake uncovered for approximately 30-35 minutes, or until edges are bubbly and the top is lightly brown.
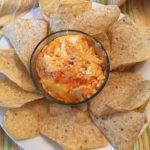
  6. Serve with your favorite chips, pita chips, bread, etc. Enjoy 🙂
Appetizers, Dinner, Hors d’Oeuvres, Lunch, Main Dish, Side Dish, Snacks
American


Stove-Top Paprika Chicken Bites (Gluten Free)

Stove-Top Paprika Chicken Bites (Gluten Free)

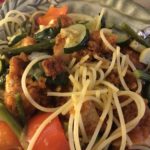
These crispy, yet tender, Paprika Chicken Bites will have your friends and family asking for more! They are delicious served all by themselves or over GF Pasta and my oven roasted veggies! And, the Lemon really comes out when served cold, making this recipe perfect for a picnic lunch. Enjoy 🙂

The Marinade:

  • 1/4 Cup olive oil (or Canola Oil)
  • 1 Large Juice of Lemon (about 1/4 cup)
  • 1/4 Cup Parmesan Cheese, grated or shredded (I use shredded, because that is all we have in our area)
  • 1 tsp Dried Oregano
  • 1 tsp Salt
  • 1 tsp Ground Black Pepper

The Chicken:

  • 3-4 Medium Chicken Breasts (rinsed, patted dry and cut into bite-size pieces)

The Coating:

  • 1 Cup All-Purpose Gluten Free Flour (I use King Arthur brand)
  • 4 tsp Paprika
  • 1/2 tsp Ground Black Pepper
  • 1 Tbsp Parmesan Cheese, grated or shredded
  • 1/2 Cup Salted Butter (I use Land O Lakes)
  1. In a medium bowl, combine all of the Marinade Ingredients until completely blended.
  2. Place the prepared, bite-size pieces of chicken into a large resealable plastic bag.
  3. Pour the Marinade into the bag with the chicken and close bag securely. Smoosh the chicken around in the marinade to evenly coat. Refrigerate for at least 2 hours.
  4. While the chicken is marinating in the refrigerator, combine the GF Flour Blend, Paprika, Pepper and Parmesan Cheese in a Large bowl, mixing well.
  5. Once the chicken has finished marinating, melt the butter in a Large non-stick skillet over medium heat.
  6. Using a slotted spoon, transfer the chicken pieces from the marinade to the GF Flour mixture in the large bowl. Gently toss to evenly coat all of the chicken pieces.
  7. Once the chicken is ready to cook, transfer the pieces to the large skillet containing the melted butter. Do not move the chicken around for 1-2 minutes, allowing the pieces to turn golden and crispy. Gently flip the pieces over to cook all sides…you may have to reduce the temperature once things get going ;). Test a piece after about 5 minutes to see if it’s done (no longer pink inside). I usually cook mine for a total of 8-10 minutes.
  8. Serve with your favorite sides, over rice or pasta or just by themselves! They are FULL of flavor :). We serve ours over GF Pasta and my oven-roasted veggies…kind of a Chicken Alfredo Bowl!
Dinner, Main Dish


Sour Cream Chicken Tenders (Gluten Free)

Sour Cream Chicken Tenders (Gluten Free)

These baked Chicken Tenders turn out tender and juicy inside with a light and crispy outside every time. I bake these quite often for my family and always make a double batch to ensure there are plenty of leftovers for the next day 🙂 This dish is one of our son’s most-requested meals! Enjoy 🙂

The Sour Cream Marinade:

  • 2 Cups Daisy Lite Sour Cream (You may use Regular Sour Cream, if desired)
  • 1/4 Cup Fresh Lemon Juice
  • 4-5 tsp Worcestershire sauce
  • 2 tsp Paprika
  • 1/2 tsp Garlic, minced
  • 1 tsp Salt
  • 2 tsp Ground Black Pepper
  • 2 Packages (9-10 per pack) Chicken Tenders (rinsed and lightly dried with paper towels)

The Crispy Outer Crust:

  • 1 1/2-2 Cups Gluten Free Italian Bread Crumbs
  • 1/2 Cup Salted Butter, melted

Making the Sour Cream Marinade:

  1. In a large bowl, combine the first 7 ingredients and mix well. Set aside.
  2. Place the prepared Chicken Tenders into a large resealable plastic bag.
  3. Pour the Sour Cream marinade into the bag with the Chicken, close the bag securely, and then “smoosh” the chicken around to evenly coat with the marinade. Place flat in the refrigerator overnight (12-24 hours).

Breading the Chicken:

  1. When the chicken is ready to bake, preheat the oven to 350 degrees.
  2. Line a cookie sheet with parchment paper or foil (if using foil, spray with non-stick cooking spray); set aside.
  3. Pour the Bread Crumbs into a shallow bowl or dish and place beside the prepared cookie sheet.
  4. Remove the marinating Chicken from the refrigerator and place next to the dish containing the bread crumbs (I place mine in a large bowl to keep the bag from tipping over).
  5. Once your “station” is set up, remove a few (3-4) Chicken tenders from the bag and dredge them through the bread crumbs to evenly coat them. Then place onto the prepared cookie sheet. Repeat these steps with the remaining chicken.
  6. Once all of the chicken is prepared and lined up on the cookie sheet, drizzle them with the melted butter.
  7. Bake uncovered for approximately 15-18 minutes, depending on your oven, turning them over halfway through.
  8. Serve with your favorite sides and watch them disappear…I serve ours with my Homemade Ranch Dressing/Dip or my Honey Mustard Sauce/Dip 😉
Dinner, Lunch, Main Dish


Stovetop Chicken in an Indian Curry Sauce

Stovetop Chicken in an Indian Curry Sauce

My mouth was watering just smelling this sweet and savory light Indian Curry Sauce simmering on the stove! The spices, cream and honey meld together perfectly into the most fragrant and delectable sauce that I have ever tasted 🙂 This yummy sauce pairs nicely with just about any vegetable, protein and/or starch. I hope you enjoy it!

The Curry Sauce:

  • 1/4 Cup Vegetable OIl (I used Canola Oil)
  • 1 Medium Onion, Finely Chopped (I used a Vidalia Onion)
  • 3 tsp Minced Garlic (I use the already minced Garlic in a jar)
  • 1/2 tsp Ground Ginger
  • 2 Tbsp Curry Powder (I used Madras Curry for a little bit more heat)
  • 3 1/2 Cups Chicken Broth
  • 1 Cup Heavy Cream (You can also use Half & Half or Whole MIlk)
  • 1 Tbsp Gluten Free Cornstarch
  • 2 heaping tsp Honey
  • 2-3 Pinches Salt
  • 2-3 Pinches Ground Black Pepper

The Chicken:

  • 4 Boneless, Skinless Chicken Breasts (Rinsed, trimmed and patted dry with a paper towel)
  • 1-2 Tbsp Salted Butter
  • 1-2 Tbsp Canola Oil
  • Salt & Pepper (Sprinkled over both sides of Chicken)

Making the Curry Sauce:

  1. Gather ingredients.
  2. In a medium-sized heavy saucepan, heat the Canola Oil over Medium heat.
  3. Add the finely chopped onion and cook for about 5 minutes, or until onion is translucent.
  4. Stir in the Garlic, Ginger and Curry and cook until fragrant (1-2 minutes).
  5. Add the Chicken Broth and stir well. Reduce heat to Low and simmer for about 20 minutes to reduce the mixture a little.
  6. While the broth is reducing, whisk the Cream, Cornstarch and Honey together in a small bowl until completely blended and smooth.
  7. Slowly whisk the Cream mixture into the Chicken Broth mixture, combining the ingredients completely. Simmer for about 5 minutes. Add a few pinches of Salt and Pepper to taste.
  8. Keep the sauce warm while cooking the chicken.

Cooking the Stovetop Chicken:

  1. In a large skillet, heat the Butter and Oil over medium-low heat until the butter is completely melted and bubbling.
  2. Add the Chicken Breasts, sprinkling with Salt & Pepper on both sides. Cook on each side for about 5-7 minutes per side, making sure that both sides are a light golden brown (internal temperature should be 165 degrees)
  3. Once the Chicken Breasts are nicely browned on both sides, use a ladle to spoon several scoops of sauce over the Chicken Breasts in the skillet. Turn the breasts over to thoroughly coat in the sauce.
  4. Serve the Chicken Breasts whole with your favorite side and vegetable and more sauce drizzled over the top…or cut up into bite-sized pieces and serve over Rice and with Steamed Broccoli and more yummy sauce!!!
    Enjoy!
Dinner, Main Dish
Indian


Copycat Chipotle Chicken (Baked)

Copycat Chipotle Chicken (Baked)

I think my husband and children would eat this meal every day of their lives if I didn’t put my foot down and insist on some variety 😉 This recipe truly is delicious!!! And, it’s so easy to prepare…I always make 2 batches at a time, so we are sure to have enough for a couple of meals 🙂 Enjoy!

  • 4 Boneless, Skinless Chicken Breasts (Rinsed and dried)
  • 1/4 Cup Water
  • 1/4 Cup Distilled White Vinegar
  • 4 Tbsps Canola Oil
  • 2 teaspoons Minced Garlic
  • 1 teaspoon Ground Cumin
  • 1 teaspoon Dried Oregano
  • 1 teaspoon Kosher Salt
  • 2 teaspoons Chili Powder
  • 1/2 teaspoon Ground Black Pepper

Ingredients for Chipotle Chicken Bowl

  • 2 Cups Cooked Rice
  • 2-4 Cups Shredded or Chopped Lettuce
  • 4 Breasts Chopped Chipotle Chicken ((from the above recipe))
  • 1-2 Cups Shredded Cheese (any flavor you desire)
  • 1 Cup Pico de Gallo (I buy this pre-made in the produce section)
  • 1-2 Medium Chopped Tomatoes
  • 1-2 Avocados (Smushed)
  • Sour Cream (I use the Lite version)
  • 1-2 Green Onions (chopped)
  • Copycat Chipotle Honey Vinaigrette Dressing (*recipe in the “Sides & Salads” of the “All Recipes” section on my website)
  1. Gather the ingredients.
  2. Place the rinsed and dried Chicken into a Large Ziploc Baggie. Set aside.
  3. In a medium-sized bowl, combine the rest of the ingredients and whisk well.
  4. Pour the marinade over the Chicken in the baggie and seal securely, being sure to press air out of the bag. Squish the chicken around in the baggie to coat evenly.
  5. Place the sealed baggie with the marinating chicken in the baking dish that you will be using later. Refrigerate for at least 4 hours.
  6. When ready to bake, preheat oven to 400 degrees and place one of the racks in the center position.
  7. Meanwhile, remove the chicken from the marinade and place into the baking dish. Cover with foil.
  8. Bake for 20 minutes on the center rack. Remove foil and bake for another 5-7 minutes, or until inside temperature of chicken registers 165 degrees or no longer pink inside.
  9. Remove cooked chicken from oven and cut into bite-sized pieces.
  10. To make a Chipotle Chicken Bowl, layer Rice, Lettuce, Chicken, Cheese, Pico de Gallo, Guacamole (or just smushed Avocados), Chopped Tomatoes, Sour Cream and, of course, the Chipotle Honey Vinaigrette Dressing!
Dinner, Lunch, Main Dish, Salads
American, Mexican


Baked Herb-Mayonnaise Chicken

Baked Herb-Mayonnaise Chicken

This recipe is SO quick and easy to make and I bet most of you already have these ingredients in your kitchen! Plus, you can easily swap the herbs with ones that you have on hand, as well as the mayo…you can use regular mayo, lite mayo or substitute sour cream for the mayo (I recently made it with half mayo and half sour cream, because we were running low on mayonnaise, and it was delicious!) The chicken comes out very moist and tender every time 🙂
A BIG “Thank You” to allrecipes for sharing the original recipe for Mayo Chicken…it is divine!!! 🙂

  • 4-6 Boneless, Skinless Chicken Breasts
  • 1 Cup Mayonnaise (I used Hellmann’s Regular Mayonnaise, but you can use Lite or substitute with Sour Cream*)
  • 1 tsp Crushed Garlic
  • 1/2 heaping tsp Dried Basil (or whatever you have on hand)
  • 1/2 heaping tsp Dried Oregano (or whatever you have on hand)
  • 3/4 tsp Salt
  • pinch Pepper
  • 1/2 – 3/4 Cup Parmesan Cheese (grated or shredded)
  1. Preheat oven to 350 degrees.
  2. Spray a 9″ x 13″ baking dish with non-stick cooking spray. Set aside.
  3. In a medium bowl, mix together the Mayonnaise (or Sour Cream), Garlic, Herbs, Salt & Pepper until well-blended.
  4. Place Chicken Breasts in the baking dish, leaving a little space between each breast.
  5. Using a pastry brush or back-side of spoon, spread the Mayonnaise mixture onto both sides of the Chicken Breasts, coating evenly.
  6. Sprinkle desired amount of Parmesan Cheese onto the top of each Chicken Breast.
  7. Bake uncovered for 30-45 minutes, or until inside temperature of chicken registers 160 degrees.
  8. Serve with your favorite side. Enjoy!

*The original recipe called for 1 Cup regular mayonnaise and 1 Tbsp of fresh Rosemary. However, as I noted in the Ingredients section, you can use regular or lite mayonnaise or 1/2 mayo + 1/2 Sour Cream or all sour cream. As far as the herbs are concerned, have fun and try different herbs (dried and/or fresh)…the sky is the limits 😉

Dinner, Main Dish
American


Gluten Free Chicken Quesadillas

Gluten Free Chicken Quesadillas

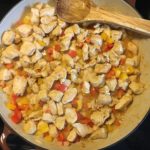
I absolutely LOVE these Chicken Quesadillas! The crispy tortilla wraps paired with the spicy chicken, veggies and cheese really give these Quesadillas an authentic Mexican taste! And, they are surprisingly easy to prepare and oh so delicious 🙂

The Quesadilla:

  • 3-4 Large Boneless, Skinless Chicken Breasts (Cut into bite-size pieces)
  • 2-3 Tbsp Olive Oil
  • 2-3 Tbsp Gluten Free Taco Seasoning (I use McCormick Gluten Free Taco Seasoning Mix or make my own)
  • 1 Large Onion, diced
  • 3 Large Bell Peppers, seeded & diced (I use whatever peppers I have on hand)
  • 1-2 Tbsp Fresh Lime Juice (Freshly squeezed over the top of Chicken and Veggies)
  • 1-2 pinches Freshly Ground Pepper
  • 3-4 Cups Shredded Cheese (Monterey Jack & Cheddar combination is wonderful)
  • 12 Gluten Free Tortilla Wraps (I use “Mission” brand)
  • 10-12 Tbsp Salted Butter (I usually use softened butter and spread desired amount on one side of each Tortilla Shell for frying)

Toppings:

  • Sour Cream (I use Lite)
  • Pico de Gallo (This is wonderful either by itself or mixed with Ranch Dressing for dipping)
  • Ranch Dressing (either store-bought or homemade (see recipe below in the Notes)
  • Shredded Cheese (any variety)
  • Fresh Cilantro, chopped (or Parsley)
  1. Gather the ingredients.
  2. In a large skillet, heat about 1-1 1/2 Tbsp Olive Oil over medium heat.
  3. Add the Chicken pieces, Taco Seasoning and Ground Pepper to the skillet, gently stirring/tossing until chicken is well-coated with the seasonings. Cook until chicken is done (about 5-8 minutes). Remove chicken from the skillet with a slotted spoon/spatula, placing it into a bowl to rest. Set aside.
  4. In the same skillet, lower the temperature to medium-low and add another 1 -1 1/2 Tbsp Olive OIl and the diced Onion and Peppers. Cook for about 3 minutes, stirring often.
  5. Once the veggies are done, reduce temperature to low and add the cooked chicken. Stir to mix well. Add the Fresh Lime Juice at this step.
  6. In a separate skillet, melt about 1/2 Tbsp Butter over medium-low heat and place one Tortilla Wrap/Shell in the skillet.
  7. Next, start building the Quesadillas by sprinkling some shredded cheese to cover the shell; then add some of the chicken & veggie mixture; then place more shredded cheese on top of the chicken/veggies; top with a second tortilla shell.
  8. Once the bottom tortilla is starting to get crispy and golden brown, lift the Quesadilla using a large spatula, and drop another 1/2 tbsp of butter into the pan. Now, carefully flip the Quesadilla onto the other side and cook until crispy and golden. Repeat these steps with the remaining tortillas and chicken mixture.
  9. Cut each Quesadilla into quarters and serve with a fresh salad and an assortment of the toppings.
  10. Enjoy!

This recipe can easily be cut in half or doubled, depending on the desired amount.

Fresh Homemade Ranch Recipe: https://smallthymecook.com/recipe/homemade-ranch-dressing-dip/

Dinner, Lunch, Main Dish
Mexican


Chicken Taco Salad

Chicken Taco Salad

Another delicious meal inspired by The Pioneer Woman (aka: Ree Drummond)!! This yummy salad immediately went to the top of my “Favorites” list 🙂 Made with Homemade Ranch Dressing (see link to recipe in notes below) and fresh Avocados turn an ordinary Taco Salad into a culinary dream!!! This one rates 5 stars in our household 🙂

The Chicken Ingredients:

  • 3-4 Breasts Boneless, Skinless Chicken Breasts (Cut into bite-size pieces)
  • 2-3 Tbsp Taco Seasoning (Regular or Reduced Sodium)
  • 1/4 Cup Canola Oil
  • 2 Tbsp Salted Butter

The Dressing Ingredients:

  • 3/4 – 1 Cup Homemade Ranch (or Store-Bought (see link in Recipe Notes for recipe))
  • 1/4 Cup Salsa (Mild, Medium or Spicy)

Salad Ingredients:

  • 2 – 15.25 oz. Cans Yellow or White Corn (drained)
  • 1-2 Bunches Lettuce (Chopped into bite-size pieces)
  • 2-3 Roma Tomatoes (Diced)
  • 1 Cup Monterey Jack Cheese (Shredded; or any other cheese that you prefer)
  • 1-2 Medium Avocados (cut into bite-size pieces)
  • 1-2 Sliced Green Onions
  • Crushed Tortilla Chips (optional)

For the Chicken & Dressing

  1. In a small/medium bowl, mix the Ranch Dressing and Salsa together until well-blended. Place in refrigerator while preparing the rest of the salad.
  2. Next, in a large skillet, heat the Oil and Butter on medium-low to medium until good and hot (the surface will begin to ripple when ready).
  3. Add the bite-size Chicken pieces and the Taco Seasoning to the skillet and stir to evenly coat the chicken.
  4. Continue cooking chicken for about 5 minutes, stirring often, until all of the pieces are cooked thoroughly.
  5. Using a slotted spoon, remove the chicken pieces to a large bowl, leaving drippings in the skillet. Set chicken aside.

For the Salad:

  1. Pour the drained Corn into the leftover chicken drippings in the skillet and heat over Low. Be certain to scrape the bottom of the skillet to incorporate all of the Chicken, Oil/Butter and Taco seasonings with the Corn.
  2. Once thoroughly heated and seasoned, scrape all of the Corn and drippings into a bowl for serving.
  3. I set up a serving station with all of the prepared Veggies, Chicken, Dressing, Cheese and Crushed Tortilla Chips placed in separate bowls.
  4. Now, let the crowd gather and prepare their Chicken Taco Salads as they wish! Enjoy 🙂
Lunch, Main Dish, Salads
Mexican


Gluten Free Chicken Spaghetti

Gluten Free Chicken Spaghetti

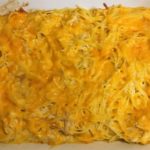
This recipe was actually kind of an accident…I ran out of time to go to the grocery store, so I had to scrounge around in my pantry and refrigerator to come up with something for dinner. To my surprise, this dish was an instant hit with my family!!! I hope you and your family like it as well 🙂

  • 2 Large Boneless, Skinless Chicken Breasts (You can use leftovers, if you have them)
  • 12 Oz. Box Gluten Free Spaghetti Noodles (Broken in half)
  • 2-2 1/2 Cups Shredded Cheddar Cheese (Mild, Regular or Sharp)
  • 1 Large Bell Pepper, finely diced (Any color you have on hand will do…I used a Yellow one, because that’s what I had ;))
  • 1 10 3/4 oz. can Cream of Chicken Soup (You may use Cream of Mushroom, if you don’t have Cr. of Chicken)
  • 1 tsp Season All
  • 1/8 tsp Cayenne
  • 1/4 tsp Freshly Ground Black Pepper
  • 1-2 Sliced Green Onions (optional)
  1. Preheat oven to 350 degrees.
  2. Gather the ingredients.
  3. Spray a 9″ x 13″ baking dish with non-stick cooking spray. Set aside.
  4. If your chicken breasts are raw, boil them for about 15 minutes in a large pot, reserving the water to be used later for cooking the pasta.
  5. Once the chicken breasts are almost done, remove them from the hot water to a cutting board to cool slightly. In addition, remove 1 cup of the water and set aside.
  6. Bring the water that was used to cook the chicken to a boil and add the pasta, cooking until al dente.
  7. While the pasta is cooking, shred the chicken and place in a large bowl.
  8. In the same large bowl, add the Cream of Chicken Soup, 1 1/2 cups of the Shredded Cheddar Cheese, the bell pepper and spices. Mix well with the shredded chicken.
  9. Add the cooked spaghetti and the 1 cup of reserved water to the chicken mixture, mixing well.
  10. Dump this mixture into the prepared baking dish and spread out evenly. Top with the remaining cheese.
  11. Bake uncovered for 40-45 minutes, covering with foil if the cheese starts to brown.
  12. Top with sliced green onions and serve. Yummy!
Lunch, Main Dish


Mexican Chicken & Rice Soup

Mexican Chicken & Rice Soup

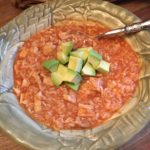
This soup is warm, hearty and filling…making it perfect for these cold Winter days! I particularly like this soup because it’s not only wonderful on Day 1, but also gets tastier and thicker as time goes by. Top with your favorite toppings, such as avocados, sour cream, shredded cheese, chopped onions, lime, etc. Enjoy 🙂

Soup

  • 2 Tbsp Olive Oil
  • 1-2 Garlic Cloves (Finely Chopped)
  • 1 tsp Ground Coriander
  • 1 tsp Ground Cumin
  • 1 tsp Chile Powder
  • 1 Can (14.5 oz) Crushed Tomatoes
  • 6 Cups Chicken Broth
  • 2-3 Boneless Skinless Chicken Breasts
  • 1 Cup Rice, uncooked (I use Basmati or Jasmine)
  • Salt (to taste (optional))
  • Pepper (to taste)

Toppings (The Sky is the Limit!)

  • Avocados (Cut into bite-size pieces)
  • Chopped Onions (Green or White…any variety)
  • Shredded Cheese
  • Sour Cream
  • Croutons
  • Lime Juice
  1. Gather the ingredients.
  2. In a large Stock Pot (or Dutch Oven), heat the Olive Oil over medium-low. Add the Garlic and cook for 2-3 minutes or until Garlic starts to turn a light golden brown.
  3. Add the spices (Coriander, Cumin and Chile Powder) and cook for 1-2 minutes.
  4. Next, add the Chicken Broth and Tomatoes. Increase the temperature to medium-high or high and bring to a simmer, stirring constantly.
  5. Once the mixture starts to bubble, decrease the temperature back to medium-low and add the Chicken Breasts. Cook for about 10-12 minutes, stirring often and turning the Chicken Breasts over halfway through to evenly cook.
  6. Remove the Chicken Breasts from the pot, placing on a cutting board to be shredded once it’s cool enough to handle.
  7. While Chicken is cooling a little, add the Rice, Ground Pepper and Salt (if adding). Continue cooking over medium-low heat while you shred the chicken.
  8. Add the shredded Chicken back into the stock pot and continue cooking until the Rice is thoroughly cooked (about 15-20 minutes, depending on the type of Rice you use).
  9. Serve the soup with the assortment of toppings.
    Yummy!
Lunch, Main Dish
Mexican