Pumpkin Spice Bundt Cake (Gluten Free)


Pumpkin Spice Bundt Cake (Gluten Free)

Wow! This cake takes it all!!! It is so moist and full of flavor…and, it's Gluten-Free 🙂 If you haven't tried "Gluten Free Heaven" Flour Mixes, then you don't know what you're missing! They have mastered the secret to GF baking – you will never know it's GF. A big shout out to Dixie Crystals for the original version of this recipe…I made a few changes in order to make it GF and allergy-friendly for my family. Thank you to Dixie Crystals and GF Heaven 🙂

Cake:

  • 1 3/4 Cups *Gluten Free Heaven" Cake & Pastry Flour (*I have not made this cake with any other GF flours; please note that all GF Flours are not created the same and results will vary if you use a different GF Flour)
  • 3/4 + 1/8 teaspoon *Xanthan Gum (*This must be added for “GF Heaven Flours” since they do not contain it; leave out if your GF Flour already contains it)
  • 1 teaspoon GF Baking Powder
  • 1/2 teaspoon GF Baking Soda
  • 2 teaspoons Ground Cinnamon
  • 1/2 teaspoon Ground Ginger
  • 1/8 teaspoon Ground Cloves
  • 1 teaspoon Salt
  • 1 Cup + 2 Tbsp Unsalted Butter (Very soft, but not melted)
  • 1 Cup Extra Fine Granulated Sugar (I always use Dixie Crystals)
  • 3 Large Eggs (room temperature)
  • 2/3 Cup Canned Pumpkin (I used Libby’s)
  • 1/3 Cup Orange Juice (I used “no pulp” kind)

Glaze:

  • 2/3 Cups Confectioner’s Sugar ((Powdered); plus more if you want a thicker consistency)
  • 2 Tbsp Orange Juice
  1. Set oven rack in the middle position; Preheat oven to 350 degrees.
  2. Butter and flour Bundt pan (you can also use a 9 x 5 – inch loaf pan); set aside.
  3. In a medium-sized bowl, whisk together the GF Flour, Xanthan Gum, Baking Soda & Powder and Spices; set aside.
  4. Using a Stand or Handheld Mixer, fitted with the paddle attachment, beat the Butter until light & fluffy; add the Granulated Sugar and blend until thoroughly mixed and fluffy.
  5. Add the Eggs, one at a time, blending well after adding each Egg; scrape sides of bowl often; whip until the mixture is very light & fluffy.
  6. Next, add the Canned Pumpkin and mix until blended.
  7. Add the Dry Ingredient mixture and Orange Juice in 3-4 segments, mixing and scraping bowl and paddle well between each addition.
  8. Scrape the batter into the prepared Bundt Pan; place in the preheated oven on the middle rack and bake for 45 minutes (check the cake around the 30-35 minute mark to make sure it isn't browning too much – if it is, cover loosely with a piece of aluminum foil); test doneness after 45 minutes with a toothpick and pressing lightly on the top to see if it springs back; bake an additional 15-30 minutes, depending on your oven (my cake was ready after 45 minutes).

  9. Once cake is done, remove from oven and let cool in the pan for approximately 10-15 minutes before turning out onto a cooling rack.
  10. While the cake is cooling, thoroughly whisk the Powdered Sugar and Orange Juice together in a small bowl until desired consistency is reached; spoon the Glaze over slightly warm or completely cooled cake.
  11. Serve with or without Vanilla Ice Cream and Enjoy! 🙂

*Use the “Spoon & Sweep” method for measuring the GF Flour: use a spoon to fill the measuring cup with the desired amount of flour, then scrape across the top with the back side of a knife to level off.
Desserts, Snacks
Gluten Free
bundt cake, Cake, dixie crystals, gluten-free, Holidays, Pumpkin, pumpkin spice, sweet treats, sweets, Treats


Creamy Lemon Chicken over Gluten-Free Pasta

Creamy Lemon Chicken over Gluten-Free Pasta

This recipe has quickly become one of our favorites! It’s so quick and easy to make, but tastes like you’ve been in the kitchen for hours 😉 Serve with a fresh garden salad and you’re good to go!
As usual, I found this recipe in The Pioneer Woman’s collection and made a few simple changes to make it Gluten-Free and allergy-friendly for my family.

  • 1/2 Cup All-Purpose Gluten Free Flour (I use Bob’s Red Mill GF 1-to-1 Baking Flour)
  • 2-3 Tbsp Olive Oil (I use the lighter Olive Oil, so it doesn’t interfere with the flavors)
  • 1-1 1/2 lbs Chicken Tender (you can really use any cut of chicken, but I usually prefer Chicken Tenders for ease and convenience)
  • 1 1/2 tsp Garlic, minced (I use the already minced garlic in a jar)
  • 1/4 Cup Low Sodium Chicken Broth (You can also use Vegetable Broth)
  • 3/4 Cup Heavy Cream (or Half & Half)
  • 1/2 Cup Parmesan Cheese, grated (Fresh is much better here)
  • 1 Large Lemon (Zest & Juice)
  • Salt & Pepper (to taste)
  • 3 Large Handfuls (Baby Spinach (optional))
  • Basil or Parsley (for garnish)
  • 12 oz. box Gluten Free Pasta (You can use any type of GF Pasta of your choice, but I have found that GF Spaghetti, Fettuccine or Capellini work best)
  1. Place the flour in a shallow dish and season with salt & pepper, if desired. Set aside.
  2. Heat the oil in a large skillet over medium heat until the oil begins to shimmer on the surface.
  3. Meanwhile, dredge the Chicken Tenders through the flour to fully coat and shake off excess flour.
  4. Carefully place the floured Chicken Tenders into the hot oil and cook for about 3-4 minutes on each side or until thoroughly cooked; remove the chicken and place on a plate.
  5. While the Chicken is cooking, bring a large pot of water to boil and cook the GF Pasta according to directions; drain and set aside.
  6. Once all of the Chicken has cooked and been removed from the pan, lower the temperature to Simmer/Low and add the Minced Garlic; cook for about 1 minute.
  7. Carefully add the Chicken Broth and stir well.
  8. Next, add the Cream, Parmesan Cheese, Lemon Zest and Juice stirring well to combine all of the ingredients; add salt & pepper to taste; simmer until the sauce begins to thicken (about 2-3 minutes).
  9. Return the Chicken Tenders to the pan and cover completely with the sauce; add the Spinach, if desired, and cook for about 1 minute (or until the Spinach is wilted).
  10. Serve over your choice of GF Pasta and garnish with Basil or Parsley, if desired.
Dinner, Main Dish
American


Maple-Brown Sugar Salmon

Maple-Brown Sugar Salmon

Are you looking for a quick & easy recipe for dinner? Well, here it is! Since my family eats a lot of Salmon, I am always experimenting with new seasonings & marinades and different ways of cooking our cherished Salmon. This recipe only calls for 7 ingredients (if you include the spices) and it’s ready in under 30 minutes 🙂 I added Cayenne for a little kick, but you can omit this if desired. Enjoy!

  • 1 1/2 lbs Fresh Salmon (rinsed in cold water and patted dry with paper towels)
  • 1/4 Cup 100% Pure Maple Syrup (not Pancake syrup)
  • 1/4 Cup Light Brown Sugar (not packed)
  • 2 Tbsp Canola Oil
  • 1 tsp Garlic, minced (fresh or jar)
  • 1/8-1/4 tsp Salt (regular, not Kosher)
  • 1-2 Pinches Cayenne Pepper, ground (add 1 pinch at a time to taste (optional))
  1. Preheat oven to 425 degrees.
  2. Gather the ingredients.
  3. Place rinsed and dried Salmon in a small, deep baking dish (8″ x 8″ or 9″ x 9″) – you want the Salmon to take up most of the room in the dish, so it stays submerged in the sauce while cooking.
  4. Combine all of the remaining ingredients in a small bowl or glass measuring cup that has a pour spout; Whisk together until thoroughly blended; pour or spoon this over the Salmon.
  5. Note: you can leave the Salmon with meat side facing up for a milder flavor or gently flip the Salmon over, so the meat side faces down and is submerged in the sauce during the baking process for a stronger flavor.
  6. Bake on the middle rack for 16-18 minutes (depending on the thickness of your Salmon), spooning some of the sauce over the Salmon halfway through the cooking time (if you’re baking with the meat side facing up). Salmon is ready when it flakes apart easily with a fork.
  7. Spoon sauce over the top before serving and enjoy with your favorite sides 🙂

Note:

  1. You can prepare the sauce and marinate the Salmon for 1-12 hours in a large resealable plastic bag for a stronger flavor before cooking.
  2. You can also cook the Salmon by grilling or pan-searing it for approximately 3-5 minutes per side (depending on the thickness of the fillet).
Dinner, Lunch, Main Dish


Stove-Top Paprika Chicken Bites (Gluten Free)

Stove-Top Paprika Chicken Bites (Gluten Free)

These crispy, yet tender, Paprika Chicken Bites will have your friends and family asking for more! They are delicious served all by themselves or over GF Pasta and my oven roasted veggies! And, the Lemon really comes out when served cold, making this recipe perfect for a picnic lunch. Enjoy 🙂

The Marinade:

  • 1/4 Cup olive oil (or Canola Oil)
  • 1 Large Juice of Lemon (about 1/4 cup)
  • 1/4 Cup Parmesan Cheese, grated or shredded (I use shredded, because that is all we have in our area)
  • 1 tsp Dried Oregano
  • 1 tsp Salt
  • 1 tsp Ground Black Pepper

The Chicken:

  • 3-4 Medium Chicken Breasts (rinsed, patted dry and cut into bite-size pieces)

The Coating:

  • 1 Cup All-Purpose Gluten Free Flour (I use King Arthur brand)
  • 4 tsp Paprika
  • 1/2 tsp Ground Black Pepper
  • 1 Tbsp Parmesan Cheese, grated or shredded
  • 1/2 Cup Salted Butter (I use Land O Lakes)
  1. In a medium bowl, combine all of the Marinade Ingredients until completely blended.
  2. Place the prepared, bite-size pieces of chicken into a large resealable plastic bag.
  3. Pour the Marinade into the bag with the chicken and close bag securely. Smoosh the chicken around in the marinade to evenly coat. Refrigerate for at least 2 hours.
  4. While the chicken is marinating in the refrigerator, combine the GF Flour Blend, Paprika, Pepper and Parmesan Cheese in a Large bowl, mixing well.
  5. Once the chicken has finished marinating, melt the butter in a Large non-stick skillet over medium heat.
  6. Using a slotted spoon, transfer the chicken pieces from the marinade to the GF Flour mixture in the large bowl. Gently toss to evenly coat all of the chicken pieces.
  7. Once the chicken is ready to cook, transfer the pieces to the large skillet containing the melted butter. Do not move the chicken around for 1-2 minutes, allowing the pieces to turn golden and crispy. Gently flip the pieces over to cook all sides…you may have to reduce the temperature once things get going ;). Test a piece after about 5 minutes to see if it’s done (no longer pink inside). I usually cook mine for a total of 8-10 minutes.
  8. Serve with your favorite sides, over rice or pasta or just by themselves! They are FULL of flavor :). We serve ours over GF Pasta and my oven-roasted veggies…kind of a Chicken Alfredo Bowl!
Dinner, Main Dish


Salmon with Avocado Salsa

Salmon with Avocado Salsa

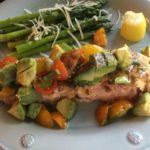
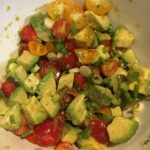
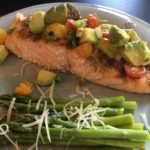
This Salmon dish is SO fresh and easy to make! Our family eats Salmon 1-2 times per week, so I am always looking for new ways to prepare it…this one is a definite winner! The Avocado Salsa is very versatile and is great paired with fish, chicken, pork, turkey, beef, pasta, baked potatoes, etc. It is wonderful on top of a Turkey Burger! I hope you and your family/friends enjoy it as much as we do 🙂

Avocado Salsa Ingredients:

  • 1 Large Ripe Avocado (Peeled, pitted and cubed)
  • 1 Green Onion (thinly chopped)
  • 1/2 Cup Tomatoes (Diced; I use red, orange and yellow cherry tomatoes)
  • 1 Large Lemon (Zest and Juice)

Salmon Ingredients:

  • 1 Pound Fresh Salmon (Rinsed and patted dry with paper towels)
  • 1 Tbsp Olive Oil
  • 1 tsp Ground Cumin
  • 1/2 tsp Ground Coriander
  • 1/2 tsp Onion Powder
  • 1/4 tsp Sea Salt
  • 1/8 tsp Ground Black Pepper
  • 1/8 tsp Ground Cayenne Pepper

Making the Salsa:

  1. In a small/medium bowl, gently mix the chopped Avocado, Green Onions, Tomatoes, Lemon Zest and Lemon Juice. Refrigerate while preparing the Salmon.

Making the Salmon:

  1. Preheat oven to 425 degrees.
  2. Line a baking sheet with foil, place salmon on the sheet and brush with the Olive Oil, being sure to completely coat the Salmon.
  3. In a small bowl, combine the spices and sprinkle evenly over the Salmon.
  4. Bake for 15-18 minutes.
  5. Serve topped with the fresh Avocado Salsa and your favorite veggies!

Note: This recipe was inspired by a Keto-Friendly recipe that one of my daughters found…Thank you to Amy Ramos for sharing the original recipe for this yummy Salmon and Avocado dish!!! We are forever indebted to you 🙂

Dinner, Lunch, Main Dish


Honey-Ginger Pork Tenderloin

Honey-Ginger Pork Tenderloin

This wonderful dish has quickly become one of our regular Favorite meals! It turns out tender and very flavorful every time 🙂 It’s SO easy to prepare and goes well with just about any side dish. I usually marinate two tenderloins at a time – one for that day’s meal and one to freeze for later (perfect for those days when you just don’t feel like cooking). A HUGE “Thank You” to www.thechunkychef.com for sharing this incredible recipe 🙂

  • 1 Pork Tenderloin (trimmed, rinsed and patted dry with paper towels)
  • 1/2 Cup Honey
  • 1 1/2 Tbsp Fresh Ginger, grated
  • 2 Tbsp Fresh Lemon Juice (or bottled)
  • 2 1/2 Tbsp Soy Sauce (I use the Low-sodium variety)
  • 2 tsp Garlic, minced (I use the all-ready minced Garlic in the jar)
  • Pinch Cayenne Pepper
  • Kosher Salt (to taste)
  • Ground Black Pepper (to taste)
  • 1-2 Tbsp Olive Oil (for searing)
  • Fresh, Chopped Parsley (garnish)
  1. Gather the ingredients.
  2. Place the trimmed, rinsed and patted dry Pork Tenderloin into a large Ziploc baggie. Set aside.
  3. In a small/medium bowl, combine the Honey, Ginger, Lemon Juice, Soy Sauce, Garlic and spices. Whisk/mix until well combined.
  4. Pour half of the marinade into the baggie with the Pork and seal. Let marinate in refrigerator for 4-24 hours. Reserve the other half in an airtight container in the refrigerator for later.
  5. When ready to bake the pork, preheat oven to 400 degrees.
  6. Line a baking sheet with foil and set aside.
  7. Remove the reserved marinade from refrigerator and set aside.
  8. In a large skillet, heat the Olive Oil over Medium to Medium-High heat.
  9. Once the oil is heated, remove the Pork Tenderloin from the marinade and place into the heated oil/pan. Sear all sides of the tenderloin until a light golden brown.
  10. Place the seared Pork onto the prepared baking sheet and bake for about 15 minutes, or until inside temperature of Pork reaches 132-134 degrees.
  11. Evenly brush the Pork with the reserved marinade and continue baking for 5-7 more minutes, or until inside temperature reaches 140 degrees. Note: you may broil the Pork on High for a couple of minutes instead of continuing to bake, if desired.
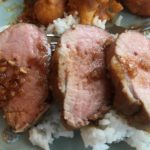
  12. Remove the Pork from the oven and cover loosely with foil. Let rest for about 5 minutes – pork will continue to cook and should register 145 degrees with light pink insides (see photo).
  13. Brush the Pork with run-off marinade from baking sheet and sprinkle the top with the Fresh, Chopped Parsley. Slice into desired thickness and serve with your favorite sides and veggies. Enjoy!

Note: If you’re preparing 2 Tenderloins, simply double all ingredients.

Dinner, Lunch, Main Dish
American, Asian


Copycat Chipotle Chicken (Baked)

Copycat Chipotle Chicken (Baked)

I think my husband and children would eat this meal every day of their lives if I didn’t put my foot down and insist on some variety 😉 This recipe truly is delicious!!! And, it’s so easy to prepare…I always make 2 batches at a time, so we are sure to have enough for a couple of meals 🙂 Enjoy!

  • 4 Boneless, Skinless Chicken Breasts (Rinsed and dried)
  • 1/4 Cup Water
  • 1/4 Cup Distilled White Vinegar
  • 4 Tbsps Canola Oil
  • 2 teaspoons Minced Garlic
  • 1 teaspoon Ground Cumin
  • 1 teaspoon Dried Oregano
  • 1 teaspoon Kosher Salt
  • 2 teaspoons Chili Powder
  • 1/2 teaspoon Ground Black Pepper

Ingredients for Chipotle Chicken Bowl

  • 2 Cups Cooked Rice
  • 2-4 Cups Shredded or Chopped Lettuce
  • 4 Breasts Chopped Chipotle Chicken ((from the above recipe))
  • 1-2 Cups Shredded Cheese (any flavor you desire)
  • 1 Cup Pico de Gallo (I buy this pre-made in the produce section)
  • 1-2 Medium Chopped Tomatoes
  • 1-2 Avocados (Smushed)
  • Sour Cream (I use the Lite version)
  • 1-2 Green Onions (chopped)
  • Copycat Chipotle Honey Vinaigrette Dressing (*recipe in the “Sides & Salads” of the “All Recipes” section on my website)
  1. Gather the ingredients.
  2. Place the rinsed and dried Chicken into a Large Ziploc Baggie. Set aside.
  3. In a medium-sized bowl, combine the rest of the ingredients and whisk well.
  4. Pour the marinade over the Chicken in the baggie and seal securely, being sure to press air out of the bag. Squish the chicken around in the baggie to coat evenly.
  5. Place the sealed baggie with the marinating chicken in the baking dish that you will be using later. Refrigerate for at least 4 hours.
  6. When ready to bake, preheat oven to 400 degrees and place one of the racks in the center position.
  7. Meanwhile, remove the chicken from the marinade and place into the baking dish. Cover with foil.
  8. Bake for 20 minutes on the center rack. Remove foil and bake for another 5-7 minutes, or until inside temperature of chicken registers 165 degrees or no longer pink inside.
  9. Remove cooked chicken from oven and cut into bite-sized pieces.
  10. To make a Chipotle Chicken Bowl, layer Rice, Lettuce, Chicken, Cheese, Pico de Gallo, Guacamole (or just smushed Avocados), Chopped Tomatoes, Sour Cream and, of course, the Chipotle Honey Vinaigrette Dressing!
Dinner, Lunch, Main Dish, Salads
American, Mexican


Baked Herb-Mayonnaise Chicken

Baked Herb-Mayonnaise Chicken

This recipe is SO quick and easy to make and I bet most of you already have these ingredients in your kitchen! Plus, you can easily swap the herbs with ones that you have on hand, as well as the mayo…you can use regular mayo, lite mayo or substitute sour cream for the mayo (I recently made it with half mayo and half sour cream, because we were running low on mayonnaise, and it was delicious!) The chicken comes out very moist and tender every time 🙂
A BIG “Thank You” to allrecipes for sharing the original recipe for Mayo Chicken…it is divine!!! 🙂

  • 4-6 Boneless, Skinless Chicken Breasts
  • 1 Cup Mayonnaise (I used Hellmann’s Regular Mayonnaise, but you can use Lite or substitute with Sour Cream*)
  • 1 tsp Crushed Garlic
  • 1/2 heaping tsp Dried Basil (or whatever you have on hand)
  • 1/2 heaping tsp Dried Oregano (or whatever you have on hand)
  • 3/4 tsp Salt
  • pinch Pepper
  • 1/2 – 3/4 Cup Parmesan Cheese (grated or shredded)
  1. Preheat oven to 350 degrees.
  2. Spray a 9″ x 13″ baking dish with non-stick cooking spray. Set aside.
  3. In a medium bowl, mix together the Mayonnaise (or Sour Cream), Garlic, Herbs, Salt & Pepper until well-blended.
  4. Place Chicken Breasts in the baking dish, leaving a little space between each breast.
  5. Using a pastry brush or back-side of spoon, spread the Mayonnaise mixture onto both sides of the Chicken Breasts, coating evenly.
  6. Sprinkle desired amount of Parmesan Cheese onto the top of each Chicken Breast.
  7. Bake uncovered for 30-45 minutes, or until inside temperature of chicken registers 160 degrees.
  8. Serve with your favorite side. Enjoy!

*The original recipe called for 1 Cup regular mayonnaise and 1 Tbsp of fresh Rosemary. However, as I noted in the Ingredients section, you can use regular or lite mayonnaise or 1/2 mayo + 1/2 Sour Cream or all sour cream. As far as the herbs are concerned, have fun and try different herbs (dried and/or fresh)…the sky is the limits 😉

Dinner, Main Dish
American


Chicken Taco Salad

Chicken Taco Salad

Another delicious meal inspired by The Pioneer Woman (aka: Ree Drummond)!! This yummy salad immediately went to the top of my “Favorites” list 🙂 Made with Homemade Ranch Dressing (see link to recipe in notes below) and fresh Avocados turn an ordinary Taco Salad into a culinary dream!!! This one rates 5 stars in our household 🙂

The Chicken Ingredients:

  • 3-4 Breasts Boneless, Skinless Chicken Breasts (Cut into bite-size pieces)
  • 2-3 Tbsp Taco Seasoning (Regular or Reduced Sodium)
  • 1/4 Cup Canola Oil
  • 2 Tbsp Salted Butter

The Dressing Ingredients:

  • 3/4 – 1 Cup Homemade Ranch (or Store-Bought (see link in Recipe Notes for recipe))
  • 1/4 Cup Salsa (Mild, Medium or Spicy)

Salad Ingredients:

  • 2 – 15.25 oz. Cans Yellow or White Corn (drained)
  • 1-2 Bunches Lettuce (Chopped into bite-size pieces)
  • 2-3 Roma Tomatoes (Diced)
  • 1 Cup Monterey Jack Cheese (Shredded; or any other cheese that you prefer)
  • 1-2 Medium Avocados (cut into bite-size pieces)
  • 1-2 Sliced Green Onions
  • Crushed Tortilla Chips (optional)

For the Chicken & Dressing

  1. In a small/medium bowl, mix the Ranch Dressing and Salsa together until well-blended. Place in refrigerator while preparing the rest of the salad.
  2. Next, in a large skillet, heat the Oil and Butter on medium-low to medium until good and hot (the surface will begin to ripple when ready).
  3. Add the bite-size Chicken pieces and the Taco Seasoning to the skillet and stir to evenly coat the chicken.
  4. Continue cooking chicken for about 5 minutes, stirring often, until all of the pieces are cooked thoroughly.
  5. Using a slotted spoon, remove the chicken pieces to a large bowl, leaving drippings in the skillet. Set chicken aside.

For the Salad:

  1. Pour the drained Corn into the leftover chicken drippings in the skillet and heat over Low. Be certain to scrape the bottom of the skillet to incorporate all of the Chicken, Oil/Butter and Taco seasonings with the Corn.
  2. Once thoroughly heated and seasoned, scrape all of the Corn and drippings into a bowl for serving.
  3. I set up a serving station with all of the prepared Veggies, Chicken, Dressing, Cheese and Crushed Tortilla Chips placed in separate bowls.
  4. Now, let the crowd gather and prepare their Chicken Taco Salads as they wish! Enjoy 🙂
Lunch, Main Dish, Salads
Mexican


Gluten Free Lemon Cookies with Lemon-Cream Cheese Frosting

Gluten Free Lemon Cookies with Lemon-Cream Cheese Frosting

Crispy Lemon-Butter Cookies accented with Fresh Lemon Zest and topped with a Creamy Lemon Frosting infused with more Fresh Lemon Zest make these cookies sinfully delicious! I have to make a double batch every time I make these, because my family gobbles them up so quickly 🙂 If you like Lemony desserts, you’ll LOVE these cookies!

The Lemon Cookies

  • 1 Cup Unsalted Butter, softened ((2 Sticks))
  • 1 Cup Powdered Sugar
  • 1/2 tsp Salt
  • 1/2 tsp Pure Vanilla Extract
  • 1 Tbsp Lemon Zest
  • 1 Tbsp Fresh Lemon Juice
  • 2 Cups Gluten Free All-Purpose Flour (Sifted)

The Creamy Lemon Frosting

  • 1/2 Cup Cream Cheese, softened
  • 1 1/2 Cups Powdered Sugar
  • 1 Tbsp Lemon Zest
  • 1 Tbsp Fresh Lemon Juice
  • 1/8 tsp Butter, Unsalted
  1. Gather the ingredients needed for the Lemon Cookie dough.
  2. Using a Stand Mixer fitted with the Paddle attachment, cream together the Butter, Powdered Sugar and Salt until light and fluffy.
  3. Add the Vanilla Extract, Lemon Zest and Lemon Juice to the Butter mixture, mixing until combined.
  4. Next, gradually add the GF Flour, 1/2 cup at a time, to the mixing bowl, blending thoroughly between each addition and scraping down the sides of the bowl as needed.
  5. Once the cookie dough has been thoroughly blended, turn the dough out onto a large cutting board and roll into a log about 9″-10″ in length. Wrap this log tightly in plastic wrap and place in freezer for at least 2 hours.
  6. When dough is chilled enough for slicing, preheat oven to 350 degrees and remove chilled dough from the freezer.
  7. Line a cookie sheet with a nonstick baking mat or Parchment paper. Set aside.
  8. Using a sharp knife, slice the dough log into 1/4″ thick sections and place each disc about 2″ apart onto the prepared cookie sheet.
  9. Bake for 12-15 minutes, or until edges turn a light golden-brown.
  10. Let cookies cool on pan for 1-2 minutes until removing to a wire cooling rack. Cool completely before applying the frosting.

Making the Creamy Lemon Frosting

  1. Using a Stand Mixer fitted with the Paddle attachment, cream together the softened Cream Cheese and Powdered Sugar until well-blended.
  2. Add the Lemon Zest, Lemon Juice and Salt to the Cream Cheese mixture. Continue beating until completely mixed.
  3. Transfer the Frosting to a piping bag, fitted with a large star tip. Please Note: this is optional, as you can apply the frosting either using a butter knife or a piping bag (or plastic storage bag) with the end snipped off.
  4. When the cookies are completely cooled, spread or pipe the desired amount of frosting onto each cookie. Enjoy 🙂

Note: I usually make the frosting while the cookies are baking, so I can place it into the refrigerator to set. If you find that the frosting gets too soft while piping, place it into the refrigerator for 10-15 minutes to harden a little.

Desserts, Snacks